IOS开发实战-----Tom猫
项目名称:Tom猫
项目知识:UIImageView控件动画播放
效果图:


开始项目
一、
(1)添加一个项目,在storyboard添加一个UIImageView
如图 布局将真个ViewControl布满。
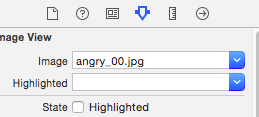
(2)添加UIImagView 默认 image,这张图片为Tom平时状态。
如图
(3)开始写后台代码,选择分页模式

(4)Tom触摸点分解
Tom猫点击头部,胸部,脚以及6个图标都会做出相应的动作。其实这9个的核心代码是一样。这里我仅仅写头部的代码,其他部分留给读者自己思考。
(6)在Tom头部添加一个Button,当触摸到这个按钮的时候,就触发头部动作。
设置Button的属性,使得Button的文本消失 。
。
(7)进行连线,编写处理代码
如图
在TouchHead_Click函数添加一下函数
for(int i=0;i<80;i++)
{
//循环添加图片
NSString *imgName=[NSString stringWithFormat:@"knockout_%02d.jpg",i];
NSString *path=[[NSBundle mainBundle] pathForResource:imgName ofType:nil];
UIImage *img=[UIImage imageWithContentsOfFile:path];
[imgArray addObject:img];
[self LoadImageWithClearImage];
}
另外需要自写两个函数,
1,-(void)ClearImage;清除图片
2,-(void)LoadImageWithClearImage//加载图片跟清楚图片
具体如下
-(void)ClearImg
{
self.ImageCat.image=nil;
[imgArray removeAllObjects];
}
-(void)LoadImageWithClearImage
{
//设置动画源
[self.ImageCat setAnimationImages:imgArray];
//设置动画重复次数
[self.ImageCat setAnimationRepeatCount:1];
//设置动画播放的速度
[self.ImageCat setAnimationDuration:imgArray.count*0.1];
//设置动画播放完的执行的函数
[self.ImageCat performSelector:@selector(ClearImg) withObject:nil afterDelay:self.ImageCat.animationDuration];
//开始动画
[self.ImageCat startAnimating];
}
到这里核心代码已经完全写完,后面8个动作代码基本一样。
二、思路总结
定义了一个全局的NSMutableArray,作为图片储存数组。当我点击按头部的时候,会触发加载动画+清除动画。
具体如下
//i为图片的张数
for(int i=0;i<80;i++)
{
//循环添加图片
NSString *imgName=[NSString stringWithFormat:@"knockout_%02d.jpg",i];
NSString *path=[[NSBundle mainBundle] pathForResource:imgName ofType:nil];
UIImage *img=[UIImage imageWithContentsOfFile:path];
[imgArray addObject:img];
}
[self LoadImageWithClearImage];
当我加载完图片的时候就应该开始动画。但是在开始动画前需要动画进行设置。
设置动画的源-----设置动画的重复次数---设置动画的速度--设置动画结束是执行的函数--设置开始动画
具体代码如下:
//设置动画源
[self.ImageCat setAnimationImages:imgArray];
//设置动画重复次数
[self.ImageCat setAnimationRepeatCount:1];
//设置动画播放的速度
[self.ImageCat setAnimationDuration:imgArray.count*0.1];
//设置动画播放完的执行的函数
[self.ImageCat performSelector:@selector(ClearImg) withObject:nil afterDelay:self.ImageCat.animationDuration];
//开始动画
[self.ImageCat startAnimating];


