2008.9.22
配置Ajax for ASP.net
以前做练习的时候整理的,发上来供需要的朋友参考。
需要具备的软件或其他资料
1) ASPAJAXExtSetup.msi软件ajax组建库
2) ReturnOfSmartPartv1_3 Install
Ajax for Asp.net的扩展组件库,由Jan Tielens开发
3) Ajax的发布工具以及控件库AjaxControlToolkit
步骤:
1) ASPAJAXExtSetup.msi
2) 安装ReturnOfSmartPartv1_3
3) 安装Ajax控件
AjaxControlToolkit\TemplateVSI\bin目录下,执行AjaxControlExtender.vsi
4) 拷贝AjaxControlToolkit\AjaxControlToolkit\bin\Debug\ AjaxControlToolkit.dll到
C:\WINDOWS\assembly目录
注意查看其公匙标记和版本
5) 配置8000网站Web.config文件
参考shyang_web.config参考文件:
<?xml version="1.0" encoding="UTF-8" standalone="yes"?>
<configuration>
<configSections>
...
<!-- Add by shyang 01-->
<sectionGroup name="system.web.extensions" type="System.Web.Configuration.SystemWebExtensionsSectionGroup, System.Web.Extensions, Version=1.0.61025.0, Culture=neutral, PublicKeyToken=31bf3856ad364e35">
<sectionGroup name="scripting" type="System.Web.Configuration.ScriptingSectionGroup, System.Web.Extensions, Version=1.0.61025.0, Culture=neutral, PublicKeyToken=31bf3856ad364e35">
<section name="scriptResourceHandler" type="System.Web.Configuration.ScriptingScriptResourceHandlerSection, System.Web.Extensions, Version=1.0.61025.0, Culture=neutral, PublicKeyToken=31bf3856ad364e35" requirePermission="false" allowDefinition="MachineToApplication" />
<sectionGroup name="webServices" type="System.Web.Configuration.ScriptingWebServicesSectionGroup, System.Web.Extensions, Version=1.0.61025.0, Culture=neutral, PublicKeyToken=31bf3856ad364e35">
<section name="jsonSerialization" type="System.Web.Configuration.ScriptingJsonSerializationSection, System.Web.Extensions, Version=1.0.61025.0, Culture=neutral, PublicKeyToken=31bf3856ad364e35" requirePermission="false" allowDefinition="Everywhere" />
<section name="profileService" type="System.Web.Configuration.ScriptingProfileServiceSection, System.Web.Extensions, Version=1.0.61025.0, Culture=neutral, PublicKeyToken=31bf3856ad364e35" requirePermission="false" allowDefinition="MachineToApplication" />
<section name="authenticationService" type="System.Web.Configuration.ScriptingAuthenticationServiceSection, System.Web.Extensions, Version=1.0.61025.0, Culture=neutral, PublicKeyToken=31bf3856ad364e35" requirePermission="false" allowDefinition="MachineToApplication" />
</sectionGroup>
</sectionGroup>
</sectionGroup>
<!--End Add by shyang 01-->
</configSections>
<SharePoint>
<SafeMode MaxControls="200" CallStack="false" DirectFileDependencies="10" TotalFileDependencies="50" AllowPageLevelTrace="false">
<PageParserPaths>
</PageParserPaths>
</SafeMode>
<WebPartLimits MaxZoneParts="50" PropertySize="1048576" />
<WebPartCache Storage="CacheObject" />
<WebPartControls DatasheetControlGuid="65BCBEE4-7728-41a0-97BE-14E1CAE36AAE" />
<SafeControls>
...
<!--Add by shyang 06-->
<SafeControl Assembly="System.Web.Extensions, Version=1.0.61025.0, Culture=neutral, PublicKeyToken=31bf3856ad364e35" Namespace="System.Web.UI" TypeName="*" Safe="True" />
<SafeControl Assembly="AjaxControlToolkit, Version=1.0.20229.29726, Culture=neutral, PublicKeyToken=28f01b0e84b6d53e" Namespace="AjaxControlToolkit" TypeName="*" Safe="True" />
<!--End Add by shyang 06-->
</SafeControls>
...
</SharePoint>
...
<system.web>
...
<httpHandlers>
...
<!--Add by shyang 04-->
<add verb="*" path="*.asmx" validate="false" type="System.Web.Script.Services.ScriptHandlerFactory, System.Web.Extensions, Version=1.0.61025.0, Culture=neutral, PublicKeyToken=31bf3856ad364e35"/>
<add verb="*" path="*_AppService.axd" validate="false" type="System.Web.Script.Services.ScriptHandlerFactory, System.Web.Extensions, Version=1.0.61025.0, Culture=neutral, PublicKeyToken=31bf3856ad364e35"/>
<add verb="GET,HEAD" path="ScriptResource.axd" type="System.Web.Handlers.ScriptResourceHandler, System.Web.Extensions, Version=1.0.61025.0, Culture=neutral, PublicKeyToken=31bf3856ad364e35" validate="false"/>
<!--End Add by shyang 04-->
</httpHandlers>
...
<httpModules>
...
<!--Add by shyang 05-->
<add name="ScriptModule" type="System.Web.Handlers.ScriptModule, System.Web.Extensions, Version=1.0.61025.0, Culture=neutral, PublicKeyToken=31bf3856ad364e35" />
<!--End by shyang 05-->
</httpModules>
...
<compilation batch="false" debug="false">
<assemblies>
...
<!--Add by shyang 03-->
<add assembly="System.Web.Extensions, Version=1.0.61025.0, Culture=neutral, PublicKeyToken=31bf3856ad364e35" />
<add assembly="ReturnOfSmartPart, Version=1.3.0.0, Culture=neutral, PublicKeyToken=9f4da00116c38ec5"/>
<add assembly="AjaxControlToolkit, Version=1.0.20229.29726, Culture=neutral, PublicKeyToken=28f01b0e84b6d53e"/>
<!--End Add by shyang 03 -->
</assemblies>
...
</compilation>
<pages enableSessionState="false" enableViewState="true" enableViewStateMac="true" validateRequest="false" pageParserFilterType="Microsoft.SharePoint.ApplicationRuntime.SPPageParserFilter, Microsoft.SharePoint, Version=12.0.0.0, Culture=neutral, PublicKeyToken=71e9bce111e9429c" asyncTimeout="7">
...
<!-- Add by shyang 02-->
<controls>
<add tagPrefix="asp" namespace="System.Web.UI" assembly="System.Web.Extensions, Version=1.0.61025.0, Culture=neutral, PublicKeyToken=31bf3856ad364e35" />
<add namespace="AjaxControlToolkit" assembly="AjaxControlToolkit" tagPrefix="ajaxToolkit"/>
</controls>
<!-- End add by shyang 02-->
</pages>
...
</system.web>
...
<!--Add by shyang 07-->
<system.web.extensions>
<scripting>
<webServices>
<!-- Uncomment this line to enable the authentication service. Include requireSSL="true" if appropriate. -->
<!--
<authenticationService enabled="true" requireSSL = "true|false"/>
-->
<!-- Uncomment these lines to enable the profile service. To allow profile properties to be retrieved and modified in ASP.NET AJAX applications, you need to add each property name to the readAccessProperties and writeAccessProperties attributes. -->
<!--
<profileService enabled="true"
readAccessProperties="propertyname1,propertyname2"
writeAccessProperties="propertyname1,propertyname2" />
-->
</webServices>
<!--
<scriptResourceHandler enableCompression="true" enableCaching="true" />
-->
</scripting>
</system.web.extensions>
<system.webServer>
<validation validateIntegratedModeConfiguration="false" />
<modules>
<add name="ScriptModule" preCondition="integratedMode" type="System.Web.Handlers.ScriptModule, System.Web.Extensions, Version=1.0.61025.0, Culture=neutral, PublicKeyToken=31bf3856ad364e35" />
</modules>
<handlers>
<remove name="WebServiceHandlerFactory-Integrated" />
<add name="ScriptHandlerFactory" verb="*" path="*.asmx" preCondition="integratedMode" type="System.Web.Script.Services.ScriptHandlerFactory, System.Web.Extensions, Version=1.0.61025.0, Culture=neutral, PublicKeyToken=31bf3856ad364e35" />
<add name="ScriptHandlerFactoryAppServices" verb="*" path="*_AppService.axd" preCondition="integratedMode" type="System.Web.Script.Services.ScriptHandlerFactory, System.Web.Extensions, Version=1.0.61025.0, Culture=neutral, PublicKeyToken=31bf3856ad364e35" />
<add name="ScriptResource" preCondition="integratedMode" verb="GET,HEAD" path="ScriptResource.axd" type="System.Web.Handlers.ScriptResourceHandler, System.Web.Extensions, Version=1.0.61025.0, Culture=neutral, PublicKeyToken=31bf3856ad364e35" />
</handlers>
</system.webServer>
<!--End Add by shyang 07-->
</configuration>
注意修改AjaxcontrolToolkit和ReturnOfSmartPart的版本号和公匙标记
然后进入vs cmd下,执行IIS重启命令iisreset
6) 登陆http://win2k3server:8000/,如果能够正常登陆,则说明web.config配置成功
7) 导入工具箱
建立一个ASP.NET AJAX-Enabled Web Site,在工具箱上,右键点击,“添加选项卡”,输入AjaxControlToolkit,然后右键点击该项,选择“添加项”,需要等待较长时间,然后“浏览”,浏览到刚才的Dll文件,添加即可,工具箱上会出现Ajax控件。
示例1:简单的Ajax webpart,简单的时钟
打开VS 2005,新建项目:
添加一个Ajax timer,并修改Interval
保存
双击button
加入如下内容:
protected void Button1_Click(object sender, EventArgs e)
{
Button1.Text = "Hello World!";
}
protected void Timer1_Tick1(object sender, EventArgs e)
{
TextBox1.Text = DateTime.Now.ToString();
}
(注意:上述代码不要直接拷贝到里面去,双击对应的控件,然后将内容添加进去)
全部保存
拷贝刚才建好的Web控件
到目录:C:\Inetpub\wwwroot\wss\VirtualDirectories\8000\usercontrols(注意usercontrols目录是特定的,需要手工建立)
到自己定义的库下:“编辑网页”
点“添加Web部件”:
确定:
推出编辑模式:
示例2:无刷新换页的Ajax webpart
新建一个“网站”
文件|新建|网站
语言要选择visual C#
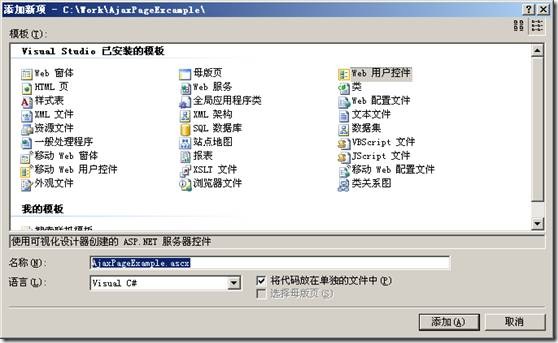
解决方案浏览器中,右键点击最顶层节点,添加新项
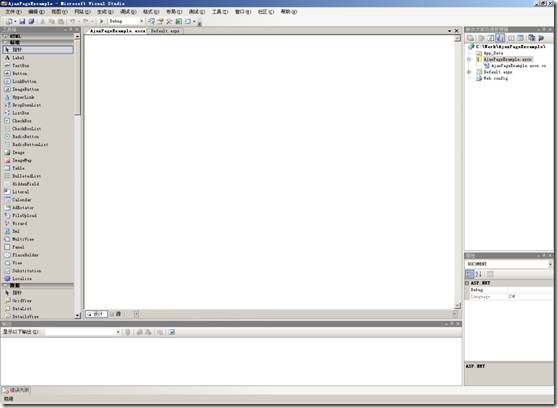
“添加”,然后进入设计页面,此时页面是空白的
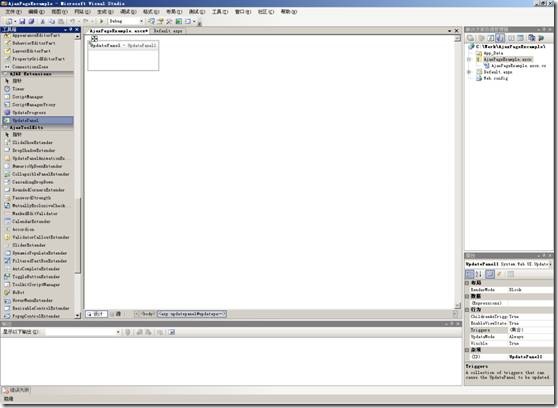
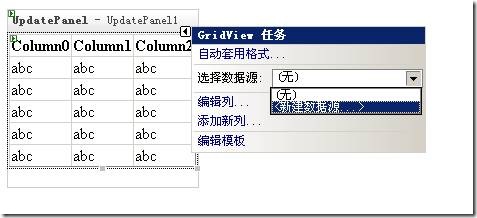
在“工具箱”|AJAX Extentions选项卡中,拖进一个UpdatePanel
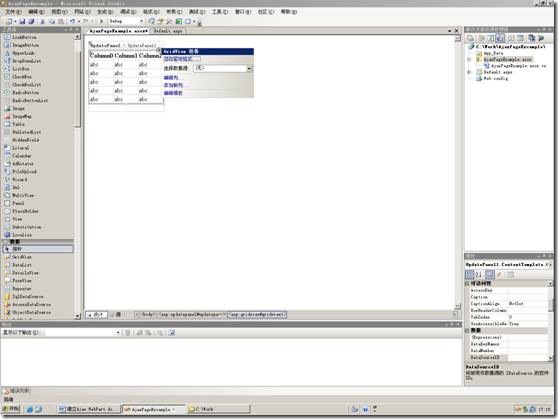
然后在“数据”选项卡中,拖进一个GridView
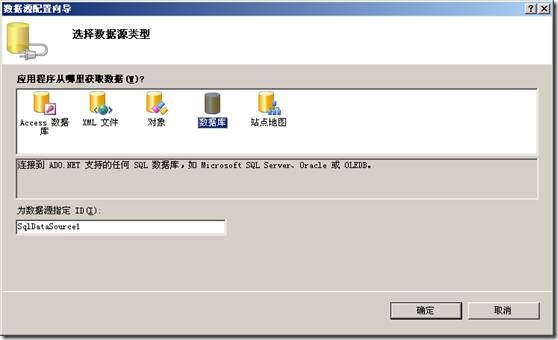
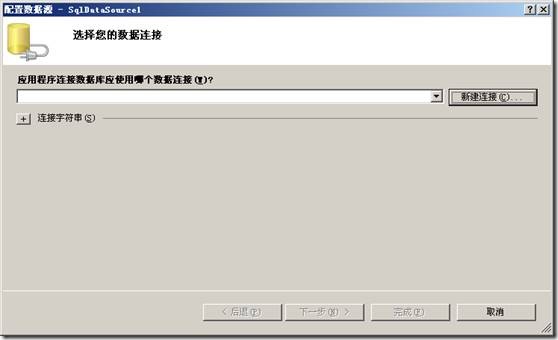
确定,在配置数据源里面点击“新建连接。。。”
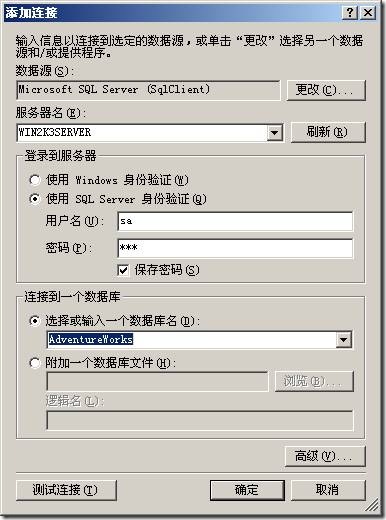
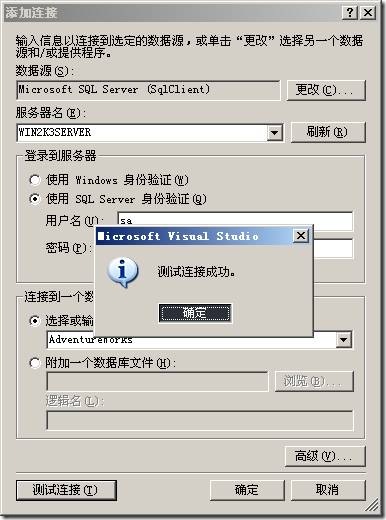
1)服务器名:
2)使用SQL Server身份验证
用户名:(输入连接SQL的用户)
密码:(输入连接SQL用户的密码)
选中保存密码
3)选择或输入一个数据库名
在下拉列表中选择“AdventureWorks”
测试连接,应该能够连接成功,如下:
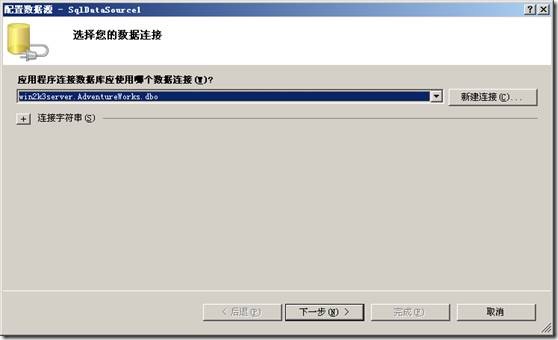
选择刚才建立的连接
下一步:
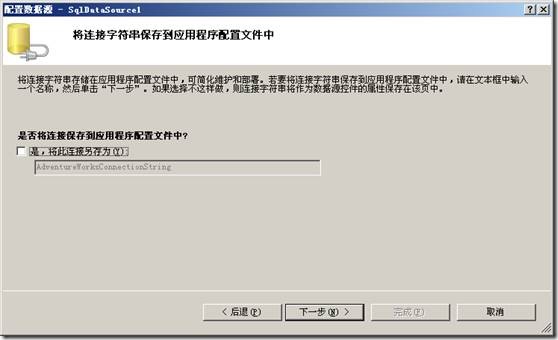
去掉选中“是否将连接保存到应用程序配置文件中”,表示放在服务器上的web。Config文件中,而不是应用程序的web。Config文件中。
下一步
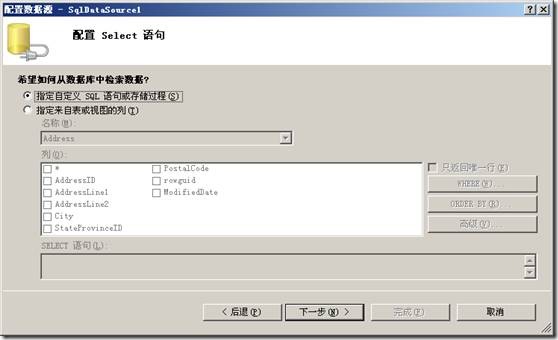
会弹出一个用户验证框,输入数据库正确的用户和密码,然后确定,然后出现如下界面:
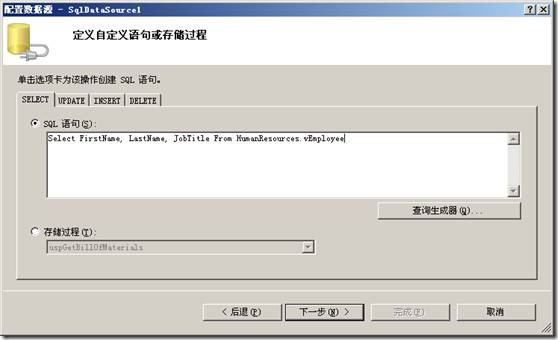
选择“指定自定义SQL语句或存储过程”
下一步:
在sql语句中输入:
Select FirstName, LastName, JobTitle From HumanResources.vEmployee
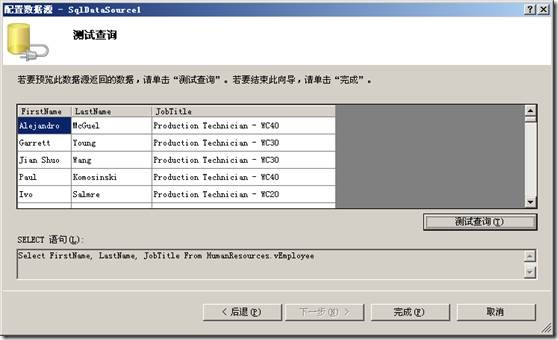
下一步:
点击“测试查询”,出现验证框,输入正确的数据库用户和密码,然后窗格中显示刚才Select出来的数据。
点击“完成”。
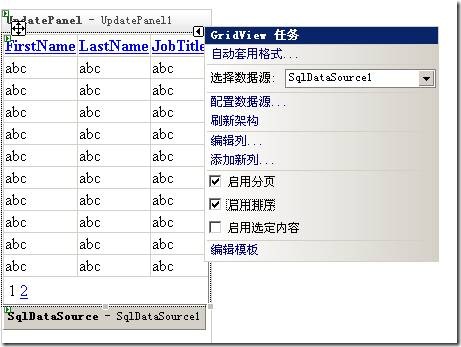
回到Vs界面:
选中“起用分页”和“启用排序”
保存页面
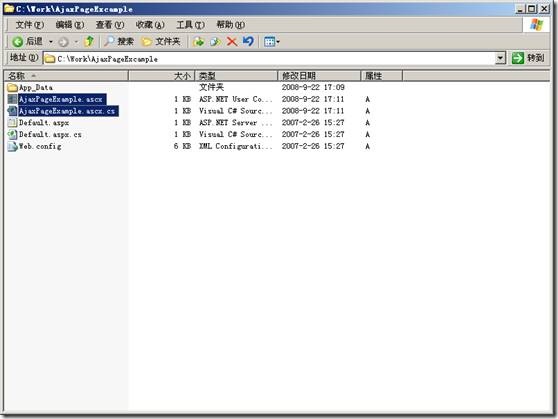
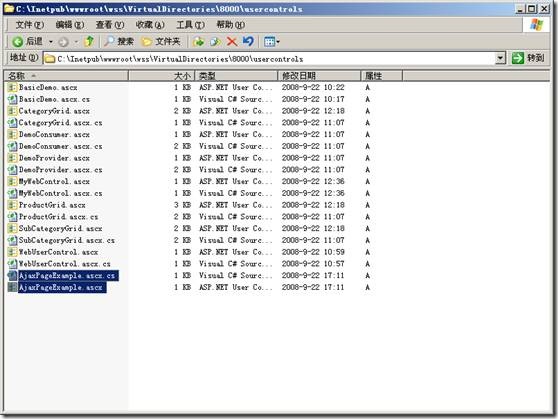
拷贝AjaxPageExample.ascx和AjaxPageExample.ascx.cs到目录
C:\Inetpub\wwwroot\wss\VirtualDirectories\8000\usercontrols下面
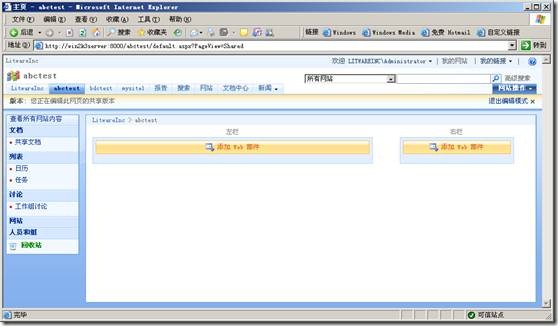
登陆http://win2k3server:8000/,并进入自己定义的网站,进入“编辑模式”
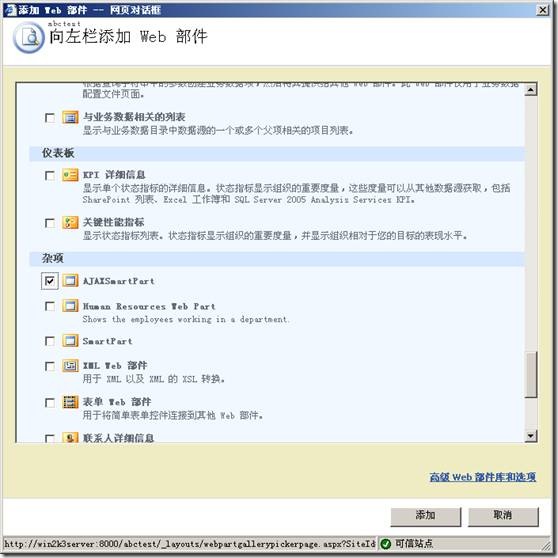
点击左侧的“添加web部件”
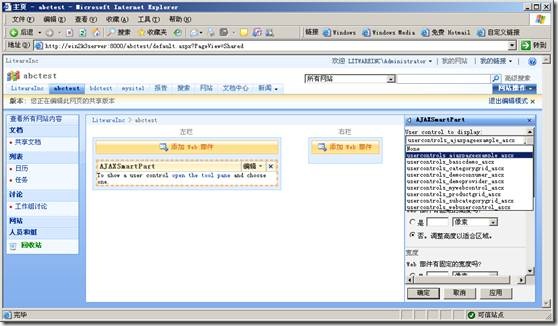
选择杂项里面的AjaxSmartPart,然后“添加”:
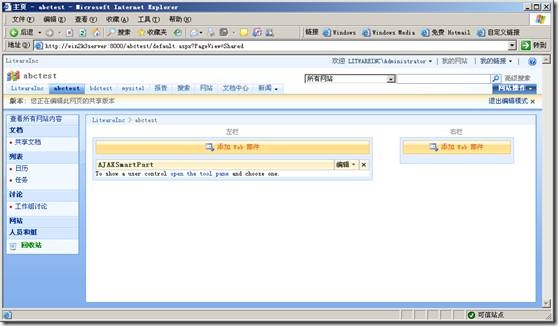
点“open the tool pane”
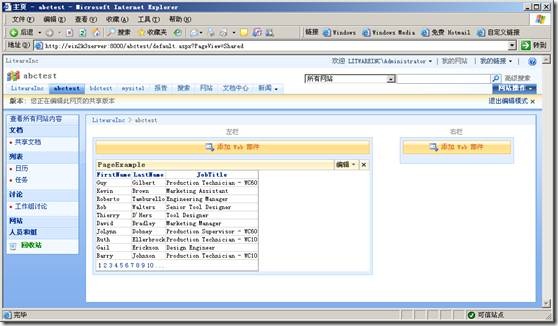
标题填写“PageExample”
完成WEB Part的添加,如下:
示例3:Ajax 日历
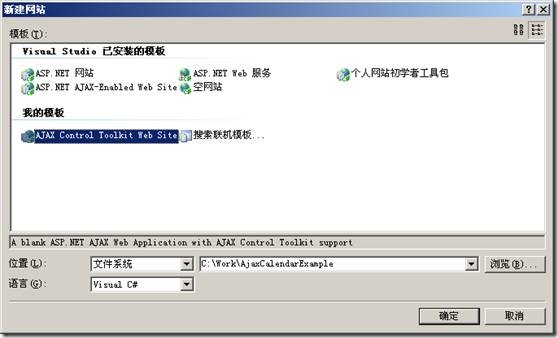
新建一个“网站”
文件|新建|网站
选择Ajax Control toolkit Web Site
存放在C:\Work\AjaxCalendarExample目录下
语言要选择visual C#
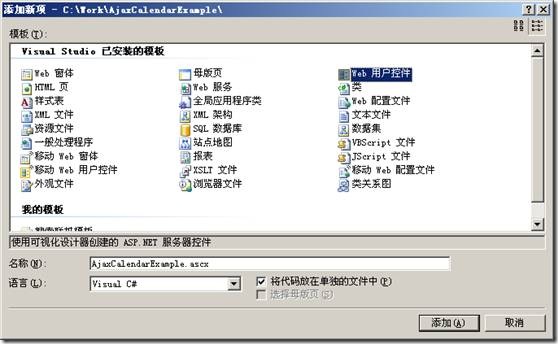
解决方案浏览器中,右键点击最顶层节点,添加新项
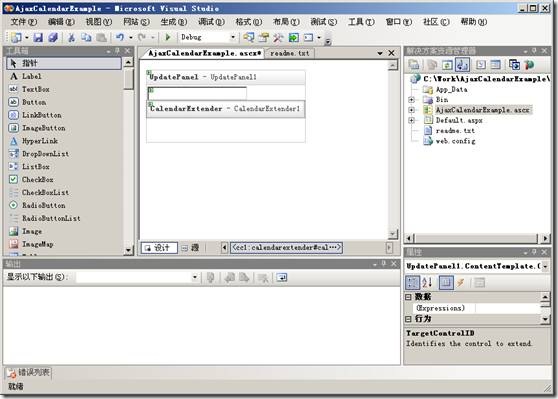
添加一个UpdatePanel,一个TextBox和一个CalendarExtender
其中CalendarExtender的TargetControlID属性为:TextBox1
保存
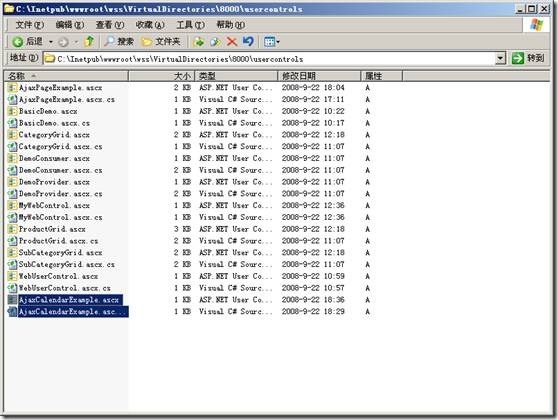
拷贝目录C:\Work\AjaxCalendarExample下面的
AjaxCalendarExample.ascx和AjaxCalendarExample.ascx.cs文件到目录
C:\Inetpub\wwwroot\wss\VirtualDirectories\8000\usercontrols下面
登陆http://win2k3server:8000/,并进入自己定义的网站,进入“编辑模式”
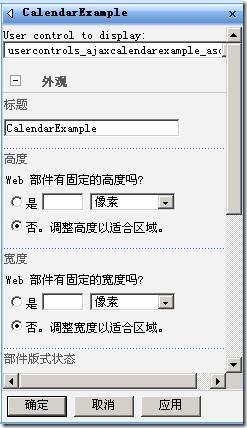
可以保留我们刚才添加的WebPart,在右栏添加WebPart,属性如下:
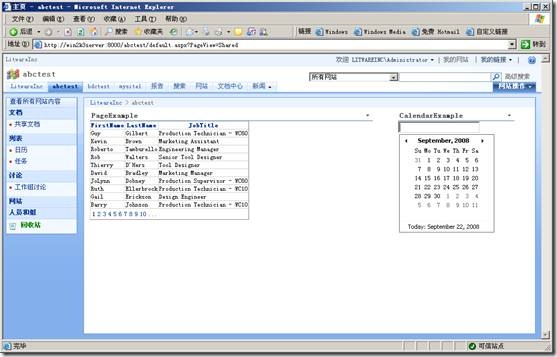
退出编辑模式,验证添加是否成功:
如右侧,点击文本框时,已经能够成功显示Calendar
完成
示例4:文本内容在页面中发送
打来练习文件C:\Work\ConnectionsDemo1,拷贝
DemoConsumer.ascx
DemoConsumer.ascx.cs
DemoProvider.ascx
DemoProvider.ascx.cs
到目录:C:\Inetpub\wwwroot\wss\VirtualDirectories\8000\usercontrols
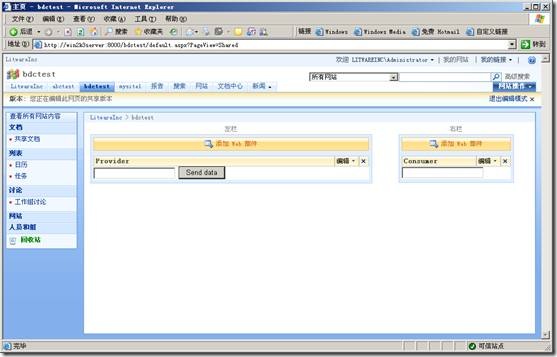
如前面练习一样分别添加Provider和Consumer WebPart,添加好后的界面如下:
在左侧Provider页面上,编辑|连接|Send test data to|Consumer,如下
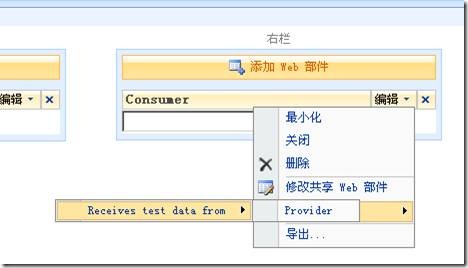
或者在右侧Consumer页面上,编辑|连接|Receives test data from|Provider,如下
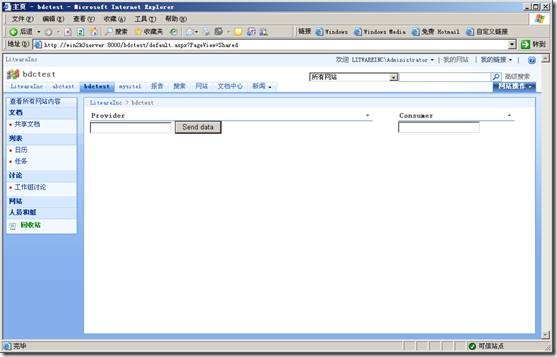
退出编辑模式:
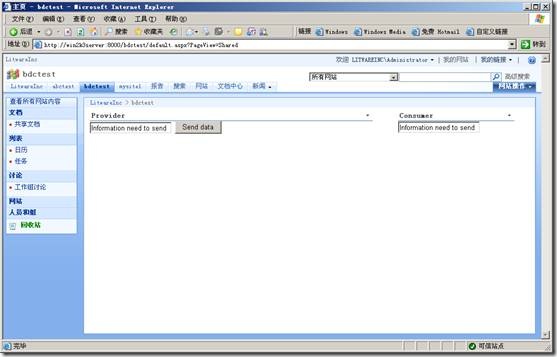
在左侧文本框中输入信息,然后点“Send data”,右边Counsumer栏里即可接收到信息
该练习的目的在于掌握代码中使用的连接发送的代码,如Provider中
public string ProviderMenuLabel
{
// Text to display in the connections menu in SharePoint.
get { return "Send test data to"; }
}
public object GetProviderData()
{
// Build a new AJAXConnectionData object and return it.
// Parameters:
// - value to send
// - control which triggers the connection
// - event of the control which will trigger the connection
return new SmartPart.AJAXConnectionData(
TextBox1.Text, Button1, "Click");
}
示例5:无刷新联动
打来练习文件C:\Work\ConnectionsDemo1,拷贝
CategoryGrid.ascx
CategoryGrid.ascx.cs
SubCategoryGrid.ascx
SubCategoryGrid.ascx.cs
ProductGrid.ascx
ProductGrid.ascx.cs
到目录:C:\Inetpub\wwwroot\wss\VirtualDirectories\8000\usercontrols
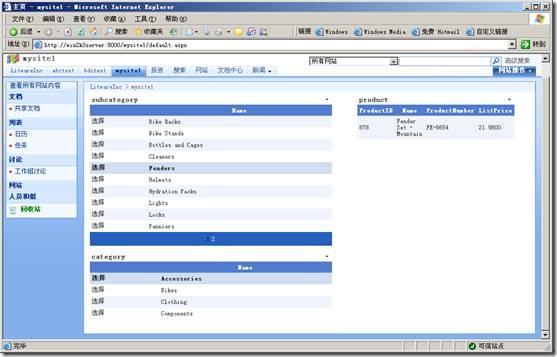
如前面练习一样分别添加三个WebPart,并建立连接关系,添加好后的界面如下:
如果添加过程出现问题,则有可能是数据库连接出现问题,那么需要用Vs2005
打开该网站(项目),修改数据库连接后再重新拷贝
需要理解代码
练习完成




 浙公网安备 33010602011771号