tomcat集群与Nginx 反向代理负载均衡 session
1、新建3个相同的web项目,只有index中有点区别,这也是为了方便观察
1、项目如下
2、编辑index.jsp,只有后面的tomcat3 是不一样的,分别为tomcat1、tomcat2、tomcat3
<body> <h1><font color="red">Session serviced by tomcat</font></h1> <table aligh="center" border="1"> <tr> <td>Session ID</td> <td><%=session.getId() %>-----tomcat3</td> <% session.setAttribute("abc","abc");%> </tr> <tr> <td>Created on</td> <td><%= session.getCreationTime() %></td> </tr> </table> </body> |
3、web.xml实现session复制,添加 <distributable/> 标签
<?xml version="1.0" encoding="UTF-8"?> <web-app xmlns:xsi="http://www.w3.org/2001/XMLSchema-instance" xmlns="http://java.sun.com/xml/ns/javaee" xsi:schemaLocation="http://java.sun.com/xml/ns/javaee http://java.sun.com/xml/ns/javaee/web-app_3_0.xsd" id="WebApp_ID" version="3.0"> <display-name>NginxTomcatSession</display-name> <distributable/> <!-- 前加<distributable /> 标签 (这个是tomcat进行session复制所必须的,否则session不能进行复制!) --> <welcome-file-list> <welcome-file>index.html</welcome-file> <welcome-file>index.htm</welcome-file> <welcome-file>index.jsp</welcome-file> <welcome-file>default.html</welcome-file> <welcome-file>default.htm</welcome-file> <welcome-file>default.jsp</welcome-file> </welcome-file-list> </web-app> |
3、建立3个tomcat服务器
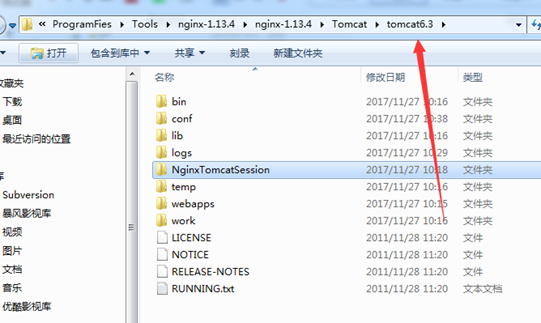
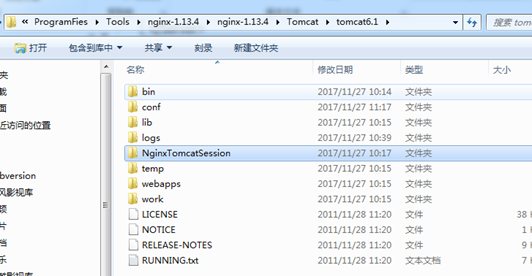
1、tomcat服务器位置
2、修改各自服务器的端口
1、 更改server和Connector端口.
1、tomcat1 中server的端口为18005,Connector端口为18080,;
2、tomcat2的分别是28005,28080
3、tomcat3分别是38085 ,38080
2、修改server.xml中为了实现session复制功能
1、取消Cluster节点的注释. (也就是添加集群)
2、保持每个Engine 节点jvmRoute的值是相同的. (sessionid的后缀)
3、tomcat1 中的的sever.xml
<?xml version='1.0' encoding='utf-8'?> <Server port="18005" shutdown="SHUTDOWN"> <Listener className="org.apache.catalina.core.AprLifecycleListener" SSLEngine="on" /> <Listener className="org.apache.catalina.core.JasperListener" /> <Listener className="org.apache.catalina.core.JreMemoryLeakPreventionListener" /> <Listener className="org.apache.catalina.mbeans.ServerLifecycleListener" /> <Listener className="org.apache.catalina.mbeans.GlobalResourcesLifecycleListener" />
<GlobalNamingResources> <Resource name="UserDatabase" auth="Container" type="org.apache.catalina.UserDatabase" description="User database that can be updated and saved" factory="org.apache.catalina.users.MemoryUserDatabaseFactory" pathname="conf/tomcat-users.xml" /> </GlobalNamingResources>
<Service name="Catalina"> <Connector port="18080" protocol="HTTP/1.1" connectionTimeout="20000" redirectPort="8443" /> <Connector port="18009" protocol="AJP/1.3" redirectPort="8443" /> <Engine name="Catalina" defaultHost="localhost" jvmRoute="jvm1"> <Cluster className="org.apache.catalina.ha.tcp.SimpleTcpCluster"/> <Realm className="org.apache.catalina.realm.LockOutRealm"> <Realm className="org.apache.catalina.realm.UserDatabaseRealm" resourceName="UserDatabase"/> </Realm> <Host name="localhost" appBase="webapps" unpackWARs="true" autoDeploy="true" xmlValidation="false" xmlNamespaceAware="false"> </Host> </Engine> </Service> </Server> |
3、布置这3个项目分部到 这3个服务器上去
1、项目位置
2、xml方式启动,这里不讲解
4、nginx配置
1、负载均衡
upstream mysite { server localhost:18080 weight=5; server localhost:28080 weight=5; server localhost:38080 weight=5; } |
2、反向代理,一定要记得添加下面的timeout ,否则浏览器会太慢
server { listen 80; server_name localhost; #监听tomcat8080 root E:/workspace/NginxTest/NginxRoot; index index.html index.htm;
location / { #添加如下3个配置后,浏览器访问的时候切换速度会很快,此时配置是1秒 proxy_connect_timeout 1; proxy_send_timeout 1; proxy_read_timeout 1; proxy_pass http://mysite; } |
5、开始测试
1、启动3个tomcat
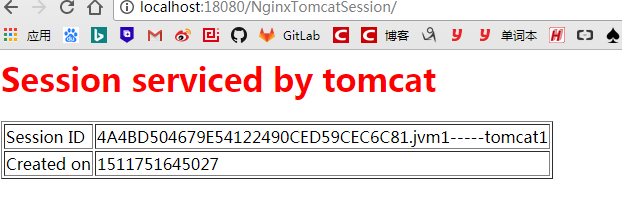
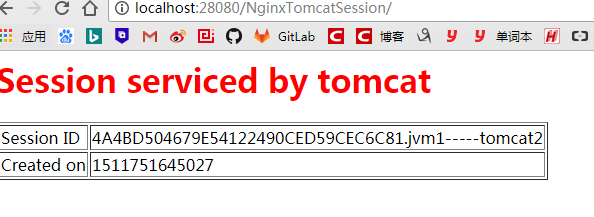
解释:会观察到其实这3个tomcat的session是一致的,因为我们已经完成session复制了
1、tomcat1
2、tomcat2
3、tomcat3
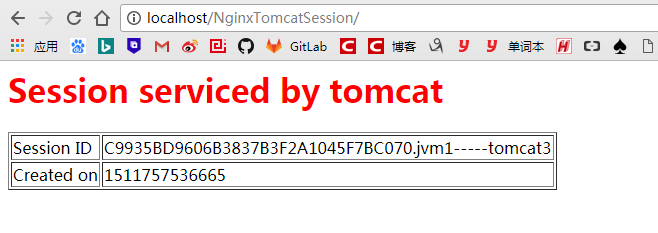
2、nginx、启动,实现负载均衡
1、随便刷新,会发现tomcat服务器再变化,但是session没有变化
5、如果是ip_hash
解释:每个请求按访问ip的hash结果分配,这样每个访客固定访问一个后端服务器,可以解决session不能跨服务器的问题。
如果后端服务器down掉,要手工down掉。(www.jbxue.com 整理)
upstream mysite { ip_hash; server localhost:18080 weight=5; server localhost:28080 weight=5; server localhost:38080 weight=5; } |
1、无论怎么刷新都是访问的tomcat3服务器,当然是随机访问的tomcat3


