1、swagger详解
前言
swagger为项目的api规范文档,帮助我们进行开发的。在找不同游戏中有详细用到。
1、项目构建
1.1、pom依赖
        <!--swagger 版本-->
        <swagger.version>2.7.0</swagger.version>

        <!--swagger-->
        <dependency>
            <groupId>io.springfox</groupId>
            <artifactId>springfox-swagger2</artifactId>
            <version>${swagger.version}</version>
        </dependency>
        <dependency>
            <groupId>io.springfox</groupId>
            <artifactId>springfox-swagger-ui</artifactId>
            <version>${swagger.version}</version>
        </dependency>
全部pom文件如下
<?xml version="1.0" encoding="UTF-8"?>
<project xmlns="http://maven.apache.org/POM/4.0.0" xmlns:xsi="http://www.w3.org/2001/XMLSchema-instance"
    xsi:schemaLocation="http://maven.apache.org/POM/4.0.0 http://maven.apache.org/xsd/maven-4.0.0.xsd">
    <modelVersion>4.0.0</modelVersion>

    <groupId>com.hlj.swagger</groupId>
    <artifactId>com-hlj-swagger</artifactId>
    <version>0.0.1-SNAPSHOT</version>
    <packaging>jar</packaging>

    <name>com-hlj-swagger</name>
    <description>Demo project for Spring Boot</description>

    <parent>
        <groupId>org.springframework.boot</groupId>
        <artifactId>spring-boot-starter-parent</artifactId>
        <version>2.0.0.RELEASE</version>
        <relativePath/> <!-- lookup parent from repository -->
    </parent>

    <properties>
        <!--swagger 版本-->
        <swagger.version>2.7.0</swagger.version>
        <project.build.sourceEncoding>UTF-8</project.build.sourceEncoding>
        <project.reporting.outputEncoding>UTF-8</project.reporting.outputEncoding>
        <java.version>1.8</java.version>
    </properties>

    <dependencies>
        <dependency>
            <groupId>org.springframework.boot</groupId>
            <artifactId>spring-boot-starter-web</artifactId>
        </dependency>

        <dependency>
            <groupId>org.springframework.boot</groupId>
            <artifactId>spring-boot-starter-test</artifactId>
            <scope>test</scope>
        </dependency>

        <!--swagger-->
        <dependency>
            <groupId>io.springfox</groupId>
            <artifactId>springfox-swagger2</artifactId>
            <version>${swagger.version}</version>
        </dependency>
        <dependency>
            <groupId>io.springfox</groupId>
            <artifactId>springfox-swagger-ui</artifactId>
            <version>${swagger.version}</version>
        </dependency>
    </dependencies>

    <build>
        <plugins>
            <plugin>
                <groupId>org.springframework.boot</groupId>
                <artifactId>spring-boot-maven-plugin</artifactId>
            </plugin>
        </plugins>
    </build>


</project>
1.2、SpringBoot添加配置config支持swagger
1、添加扫描路径com下的所有的api文件
2、api文件的说明,也就是标题。自己随意设置喽
package com.hlj.swagger.config;
import org.springframework.context.annotation.Bean;
import org.springframework.context.annotation.Configuration;
import springfox.documentation.builders.ApiInfoBuilder;
import springfox.documentation.builders.PathSelectors;
import springfox.documentation.builders.RequestHandlerSelectors;
import springfox.documentation.service.ApiInfo;
import springfox.documentation.spi.DocumentationType;
import springfox.documentation.spring.web.plugins.Docket;
import springfox.documentation.swagger2.annotations.EnableSwagger2;
//import springfox.documentation.service.Contact;
@EnableSwagger2
@Configuration
public class SwaggerConfig {
@Bean
public Docket createRestApi() {
return new Docket(DocumentationType.SWAGGER_2)
.apiInfo(apiInfo())
.select()
.apis(RequestHandlerSelectors.basePackage("com"))//扫描com路径下的api文档
.paths(PathSelectors.any())//路径判断
.build();
}
private ApiInfo apiInfo() {
return new ApiInfoBuilder()
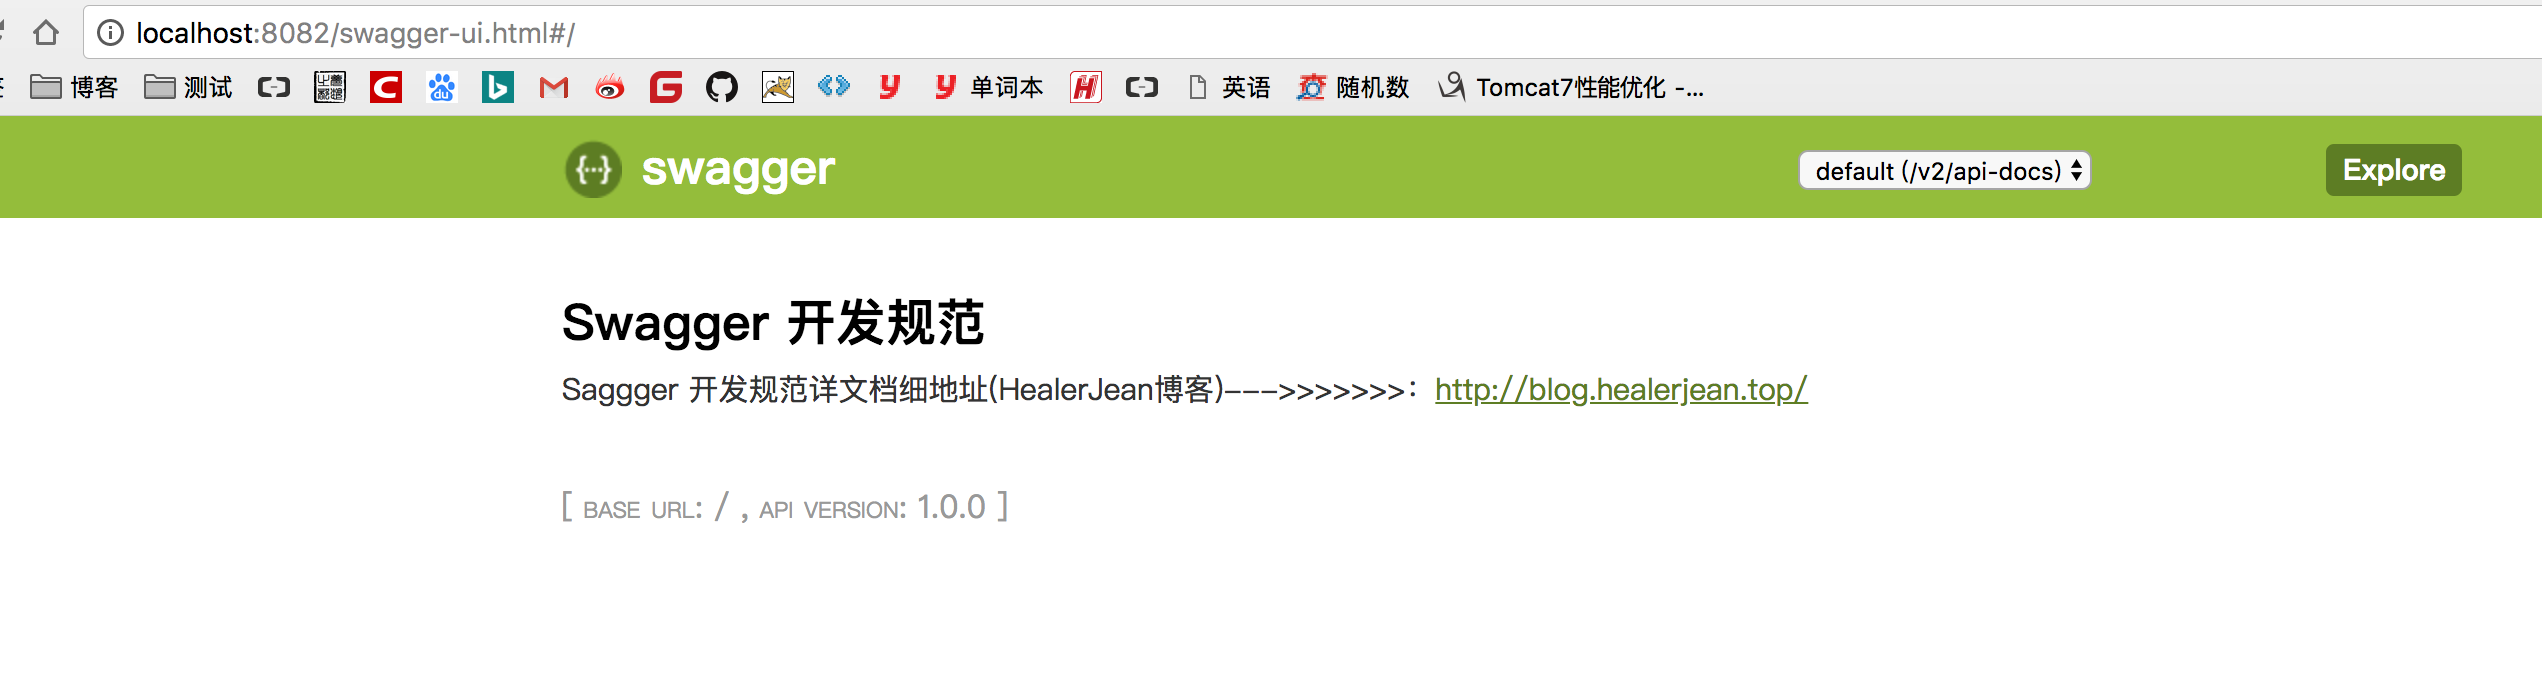
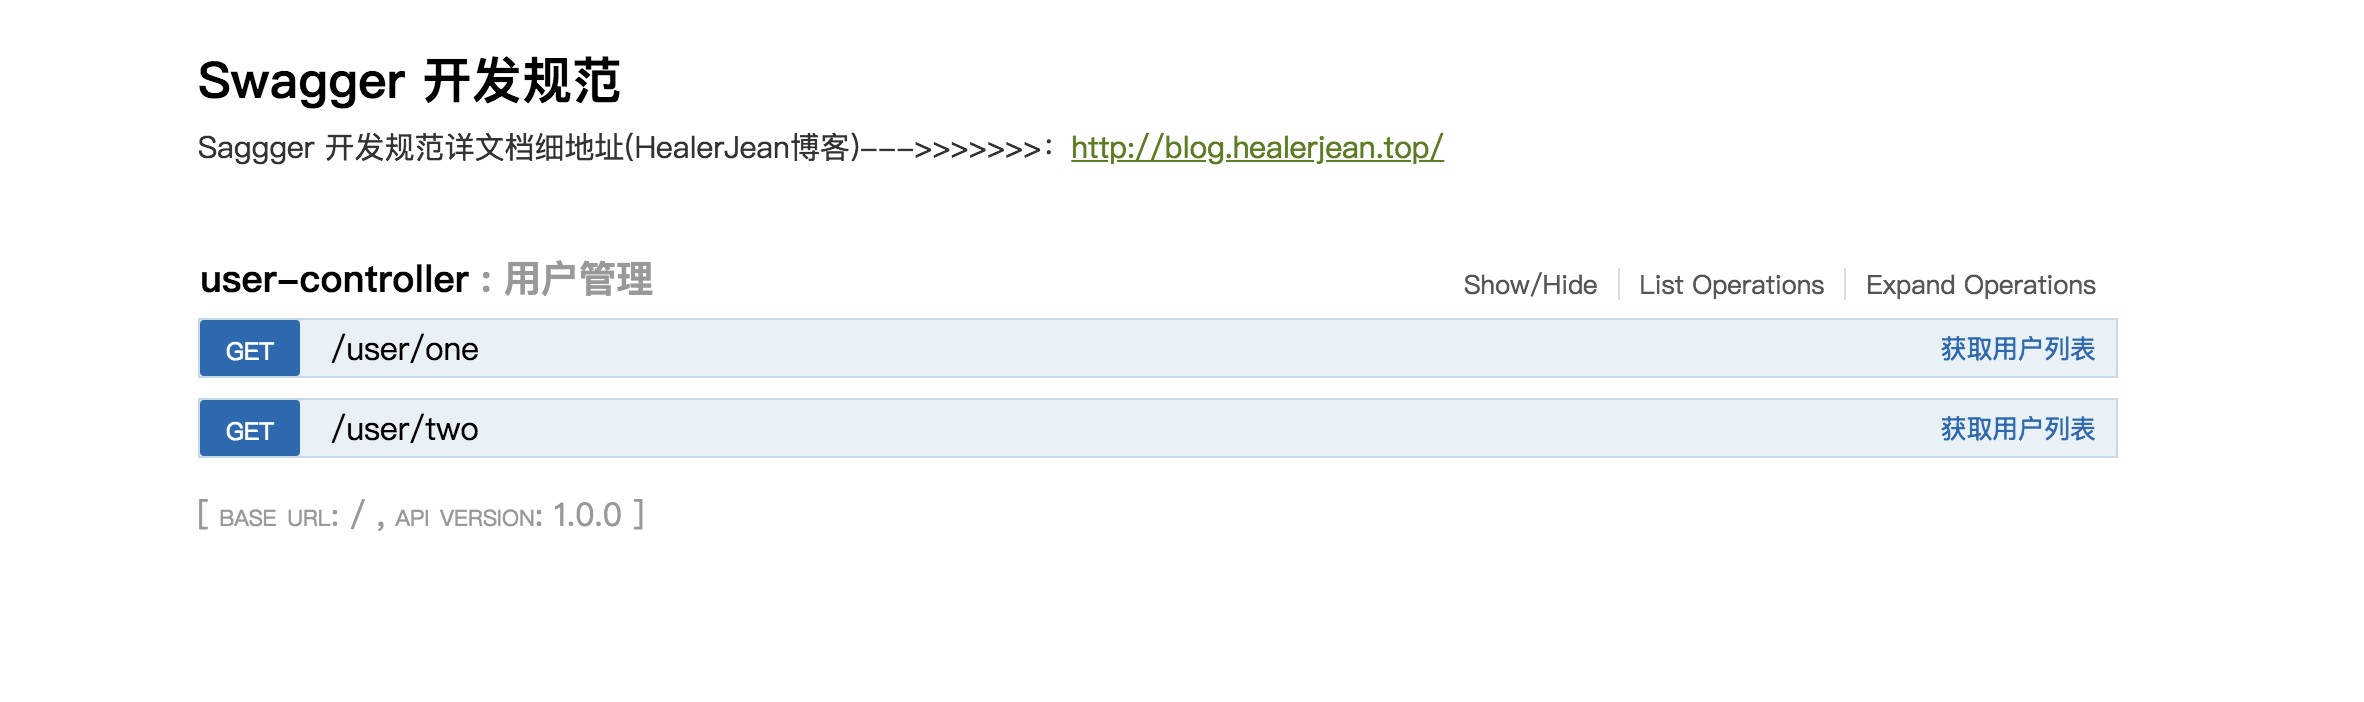
.title("Swagger 开发规范")//标题
.description("Saggger 开发规范详文档细地址(HealerJean博客)--->>>>>>>:http://blog.healerjean.top/")//描述
.termsOfServiceUrl("http://blog.healerjean.top/")//(不可见)条款地址
.version("1.0.0")//版本号
.build();
}
}
1.3、启动tomcat进行观察
这里我的端口设置了8082
http://localhost:8082/swagger-ui.html#/
2、开始添加一个demo
2.1、返回的实体对象
#### 2.1.1、@ApiModel(description = “我是User描述”)
对实体的描述,其实也没什么用,可以直接不填。比如,找不同就没有填
2.1.2、@ApiModelProperty(value = “用户的姓名,比如’李四’”)
对字段的描述
1、可以作为返回结果的描述和
2、关于User对象参数时候的内部参数的描述
package com.hlj.swagger.bean;

import io.swagger.annotations.ApiModel;
import io.swagger.annotations.ApiModelProperty;

@ApiModel
public class User {

    @ApiModelProperty(value = "用户的姓名,比如'李四'")
    private String name;
    @ApiModelProperty(value = "id",required = true)
    private String id;
    @ApiModelProperty(value = "用户的年龄,比如:20")
    private Integer age;

    @ApiModelProperty(value = "用户的子类,测试用",required = true)
    private Base base;


    get set 省略
下面这个是嵌入类,一定要添加无参构造函数,否则不能初始化它
package com.hlj.swagger.bean;

import io.swagger.annotations.ApiModel;
import io.swagger.annotations.ApiModelProperty;
@ApiModel(description = "User内部对象")
public class Base {
    @ApiModelProperty(value = "baseId,比如:20")
    private int baseId;

    public int getBaseId() {
        return baseId;
    }

    public void setBaseId(int baseId) {
        this.baseId = baseId;
    }
   //必须添加
    public Base() {
    }

    public Base(int baseId) {
        this.baseId = baseId;
    }
}
2.2、controler
2.2.1、@Api 标记一个Controller类做为swagger文档资源,以及该Controller的描述
@Api(value = “用户管理”,description = “用户管理”)
2.2.2、 @ApiOperation每一个url资源的说明,可以随意定制返回的类型
@ApiOperation(value = “获取用户列表”,notes = “根据url的id来获取用户详细信息,返回List类型用户信息的JSON;”)
2.2.3、@ApiImplicitParams 入参的描述
1、name 参数名称
2、value,参数说明
3、required 参数是否必填,当出现参数为对象时候,对象中的必填项可以在实体中
ApiModelProperty进行编辑
4、paramType http请求的类型 query为请求参数,表示在controller方法中定义的参数(基本类型),但如果是是参数是,对象则不需要配置。无关Get和Post方法
5、dataType 参数类型
@ApiImplicitParams({
     @ApiImplicitParam(name = "id",
                                value = "用户Id",
                                required = true,
                                paramType = "query"
                                dataType = "string")
package com.hlj.swagger.controller;
import com.hlj.swagger.bean.Base;
import com.hlj.swagger.bean.User;
import io.swagger.annotations.*;
import org.springframework.web.bind.annotation.*;
import java.util.*;
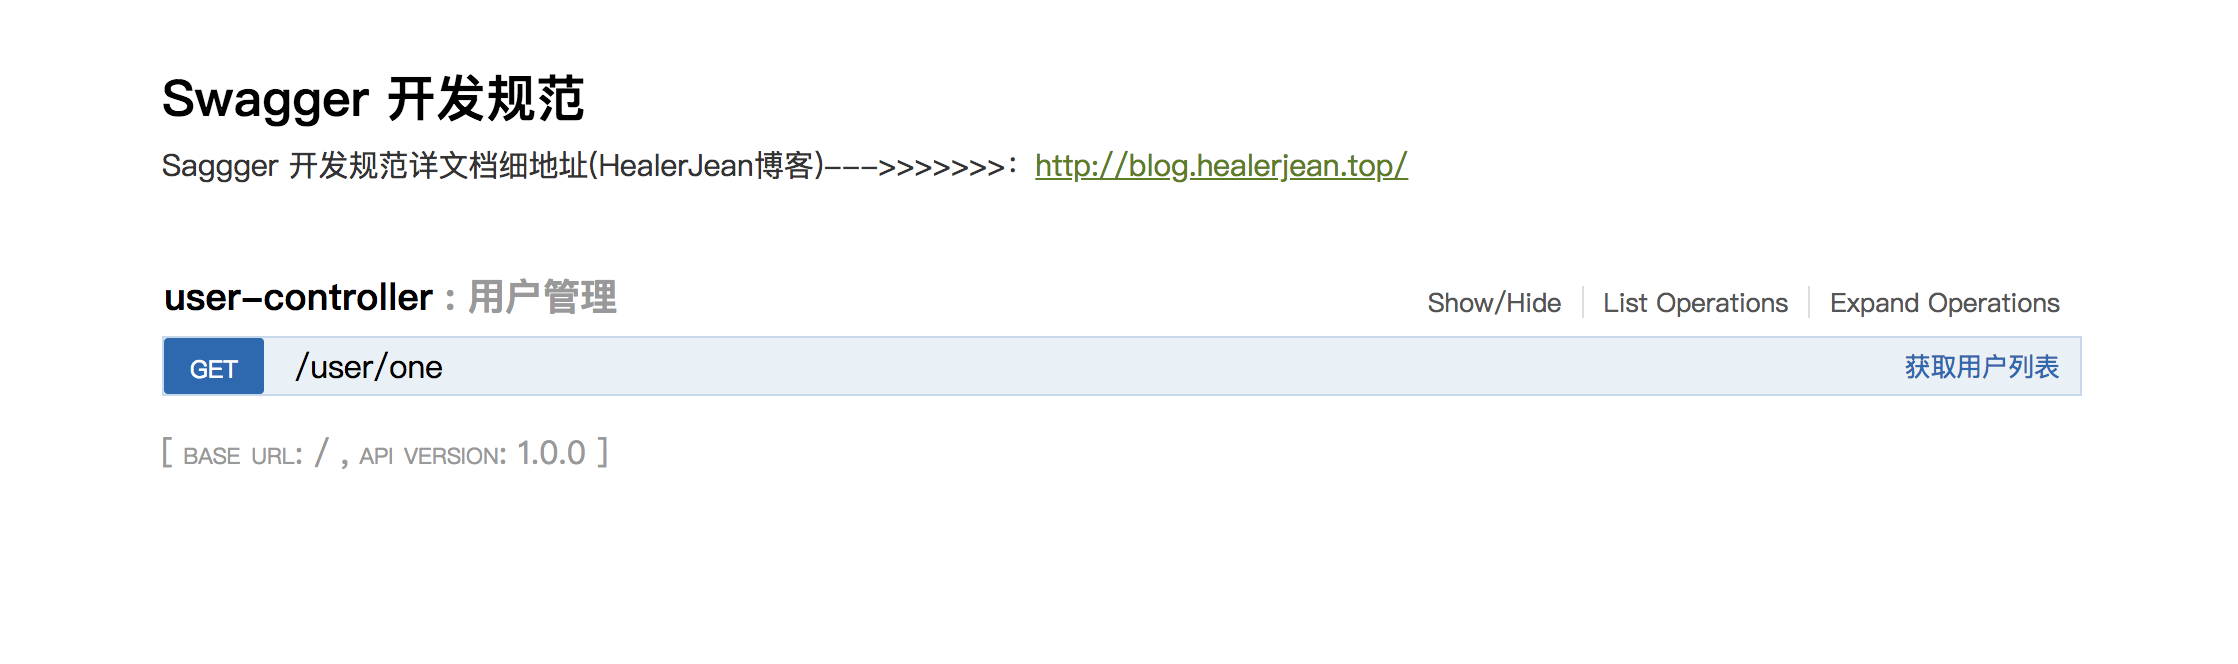
@Api(value = "用户管理",description = "用户管理")
@RestController
@RequestMapping("/user")
public class UserController {
Logger log = LoggerFactory.getLogger(UserController.class);
@ApiOperation(value = "获取用户列表", notes = "根据url的id来获取用户详细信息,返回List<User>类型用户信息的JSON;")
@ApiImplicitParams({
@ApiImplicitParam(name = "id", value = "用户ID", required = true, paramType = "query",dataType = "string")
})
@GetMapping("one")
public List<User> getUserBagOne(String id) {
List<User> users = new ArrayList<>();
try {
if (id.equals("1")) {
users.add(new User("HealerJean", "1", 24, new Base(1)));
} else {
users.add(new User("huangliang", "2", 25, new Base(2)));
}
return users;
} catch (Exception e) {
return users;
}
}
}2.3、浏览器启动,开始测试
http://localhost:8081/swagger-ui.html#/
解释上面为返回值,下面为输入参数
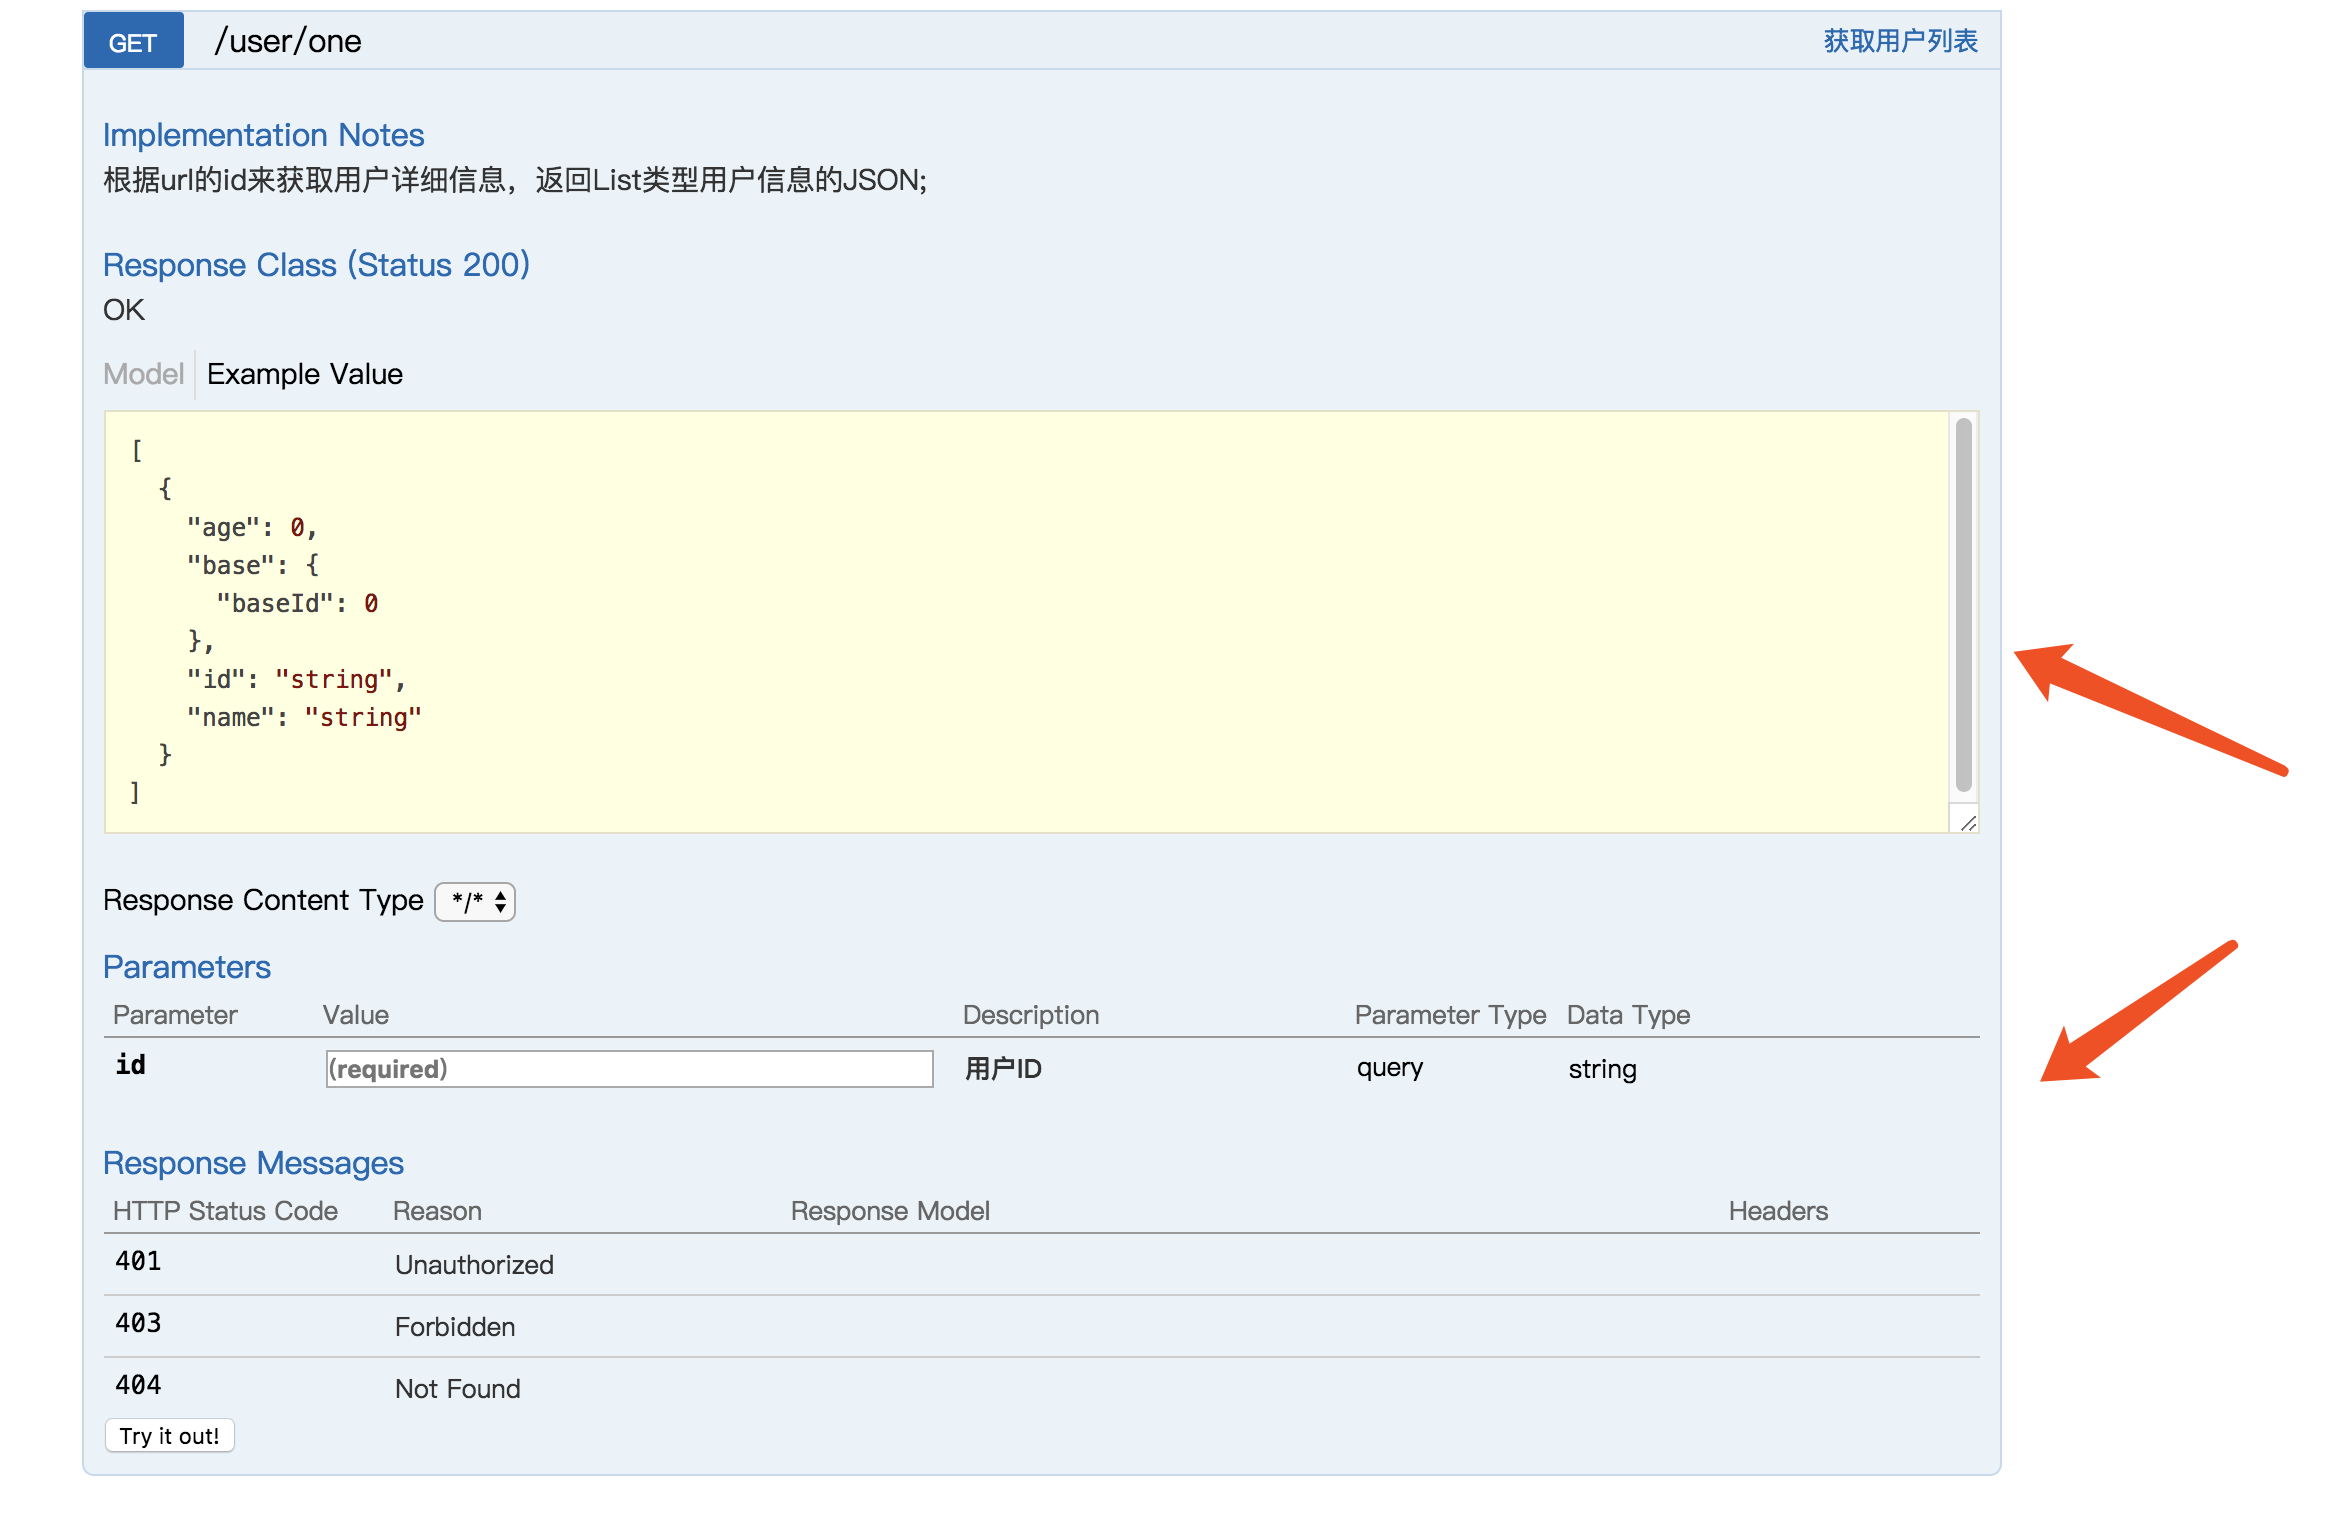
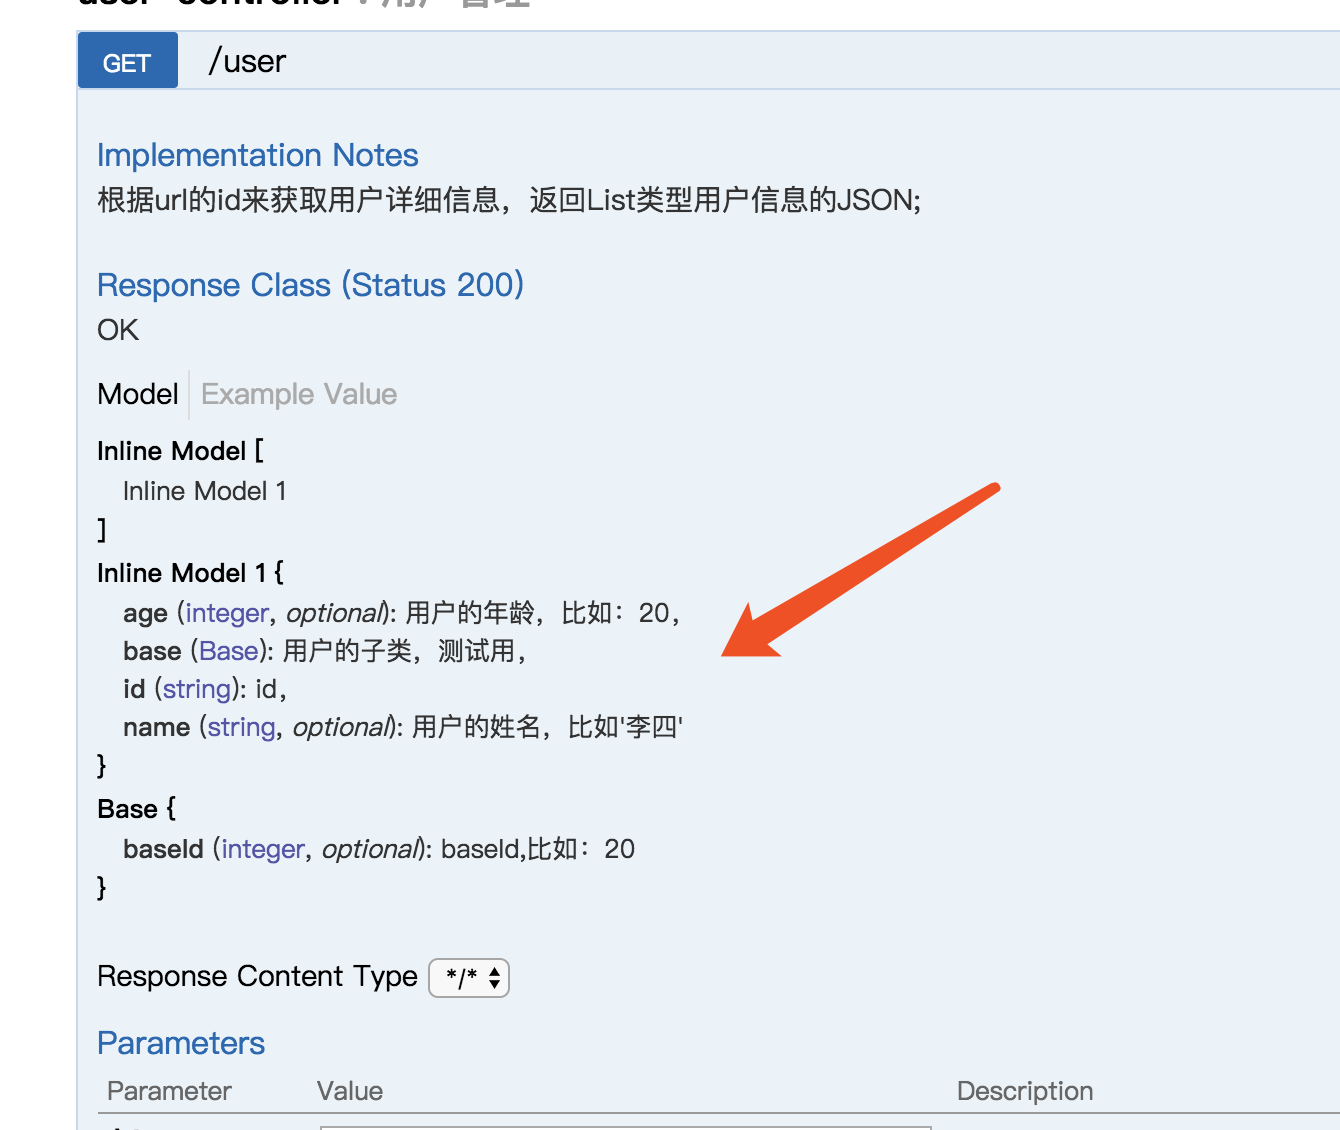
可以看到下面中会出现这个url的描述,以及请求参数和返回的结果举例,点击Model会看到结果参数的说明
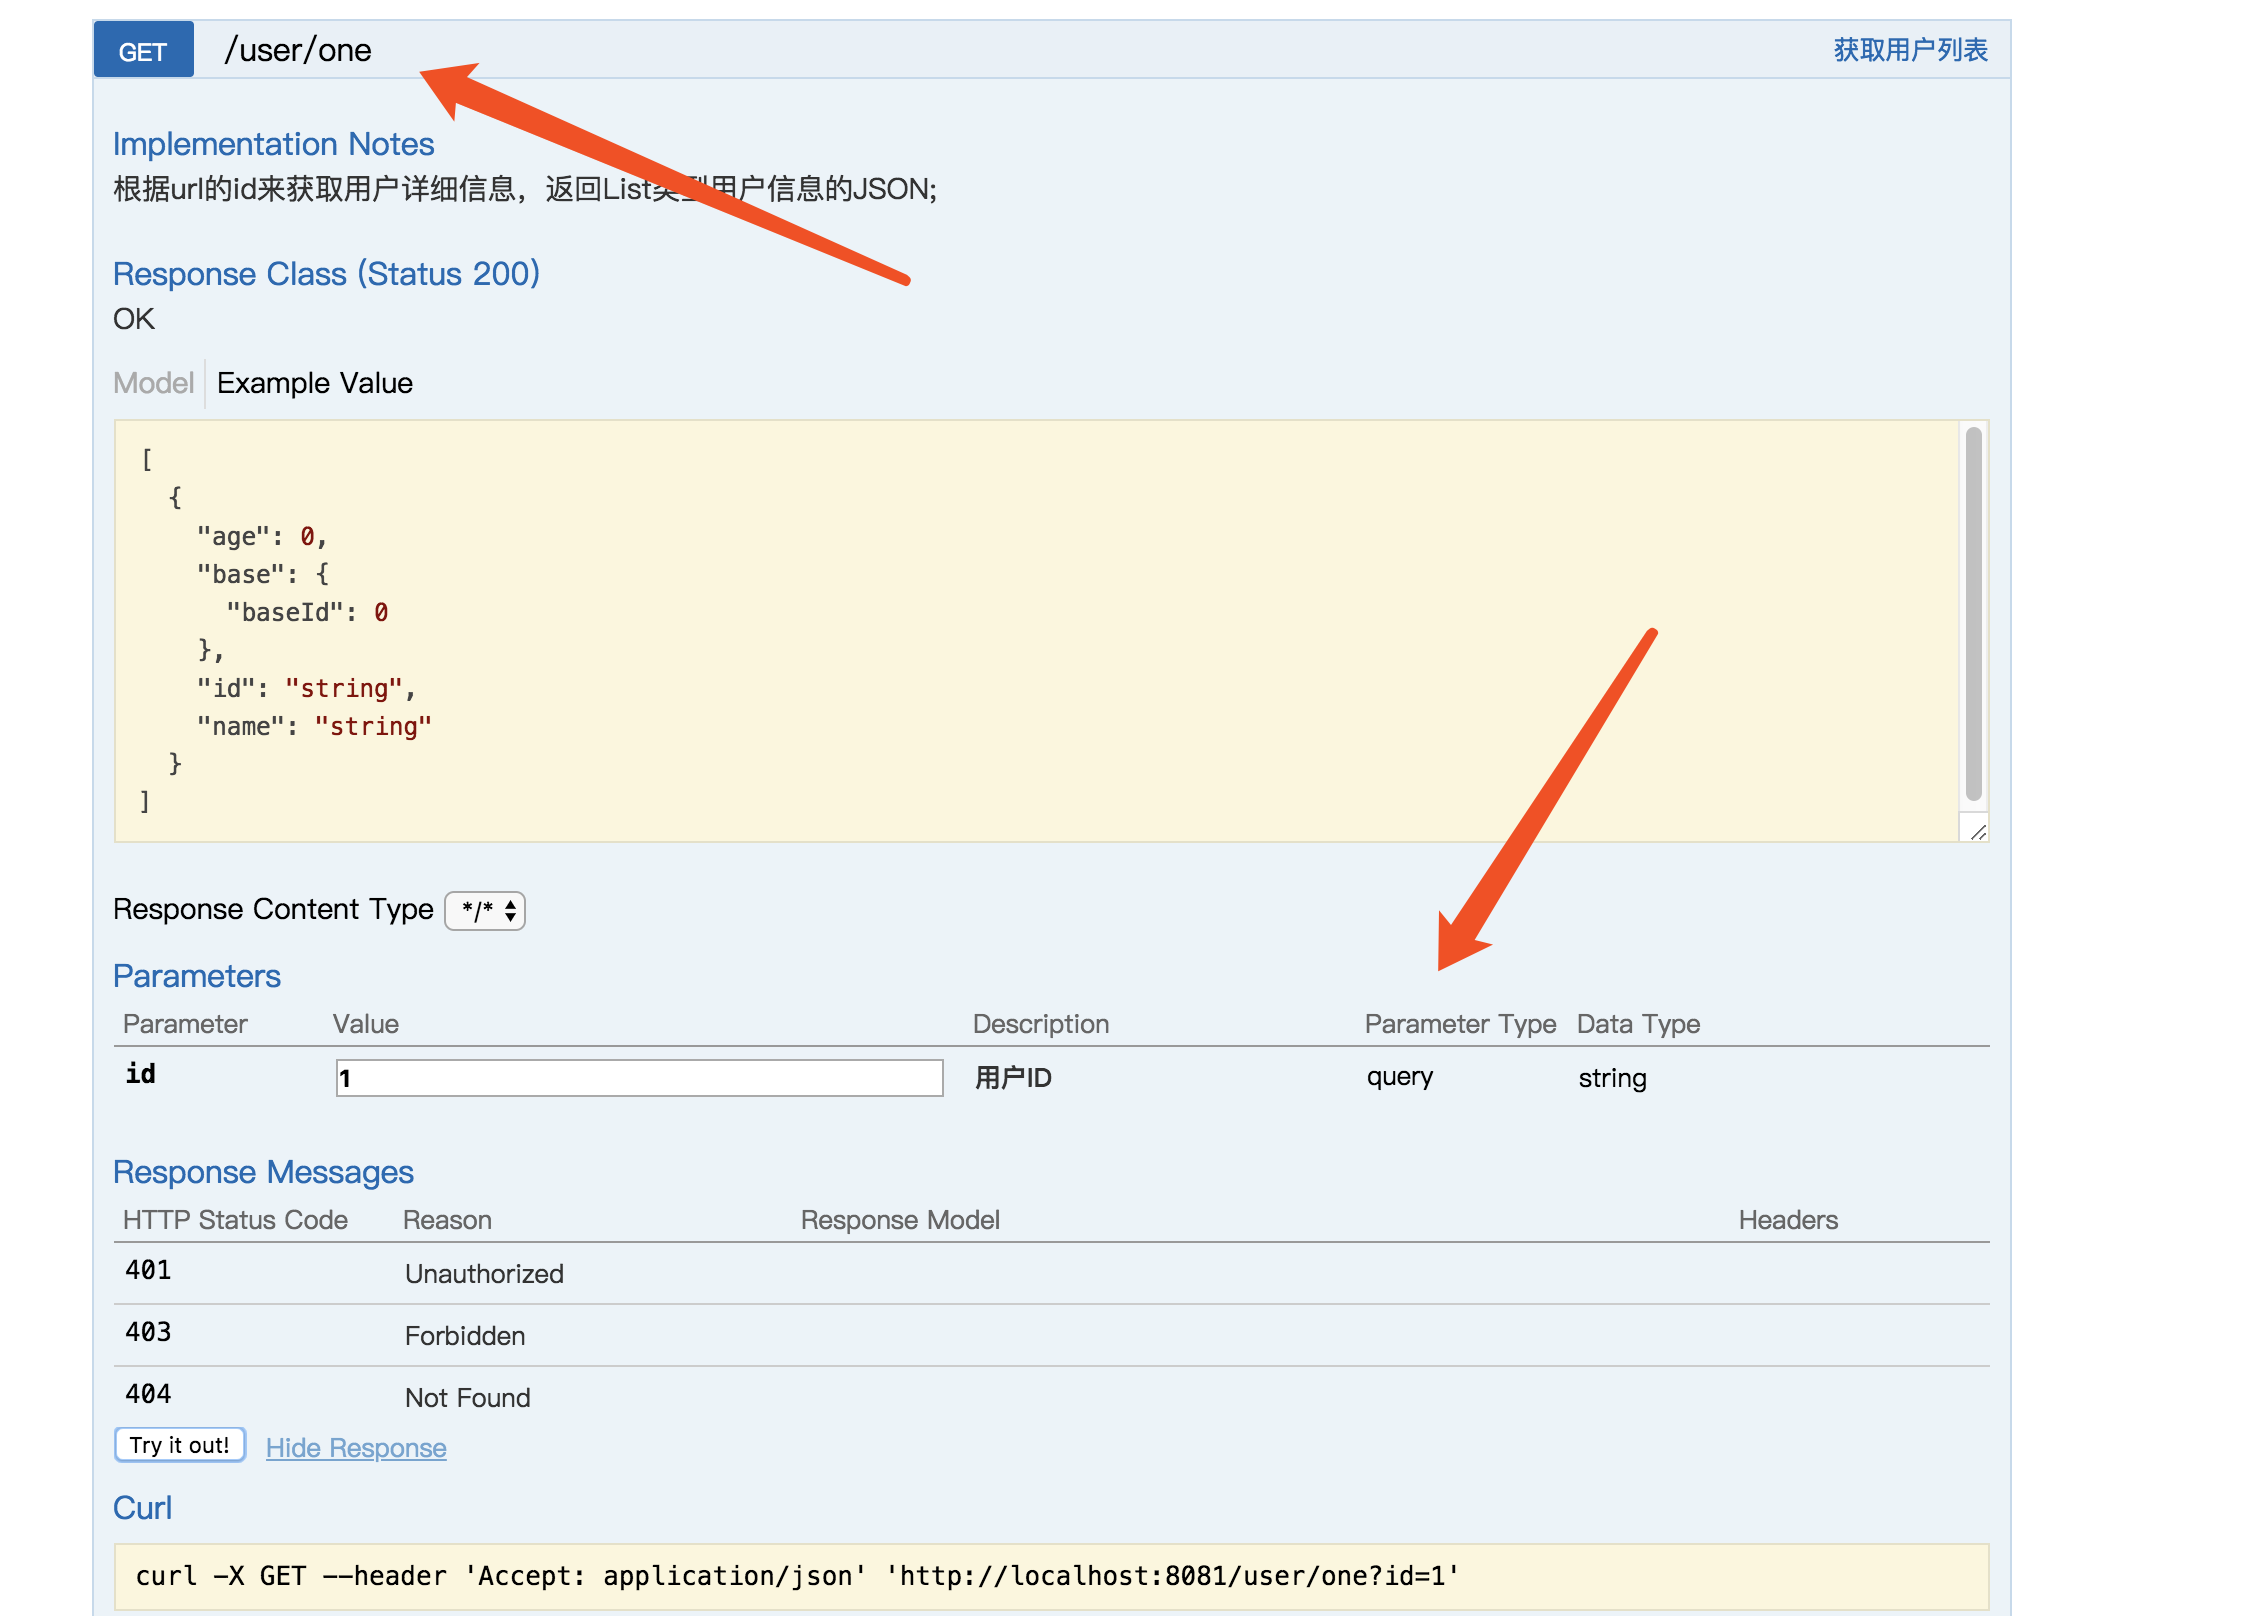
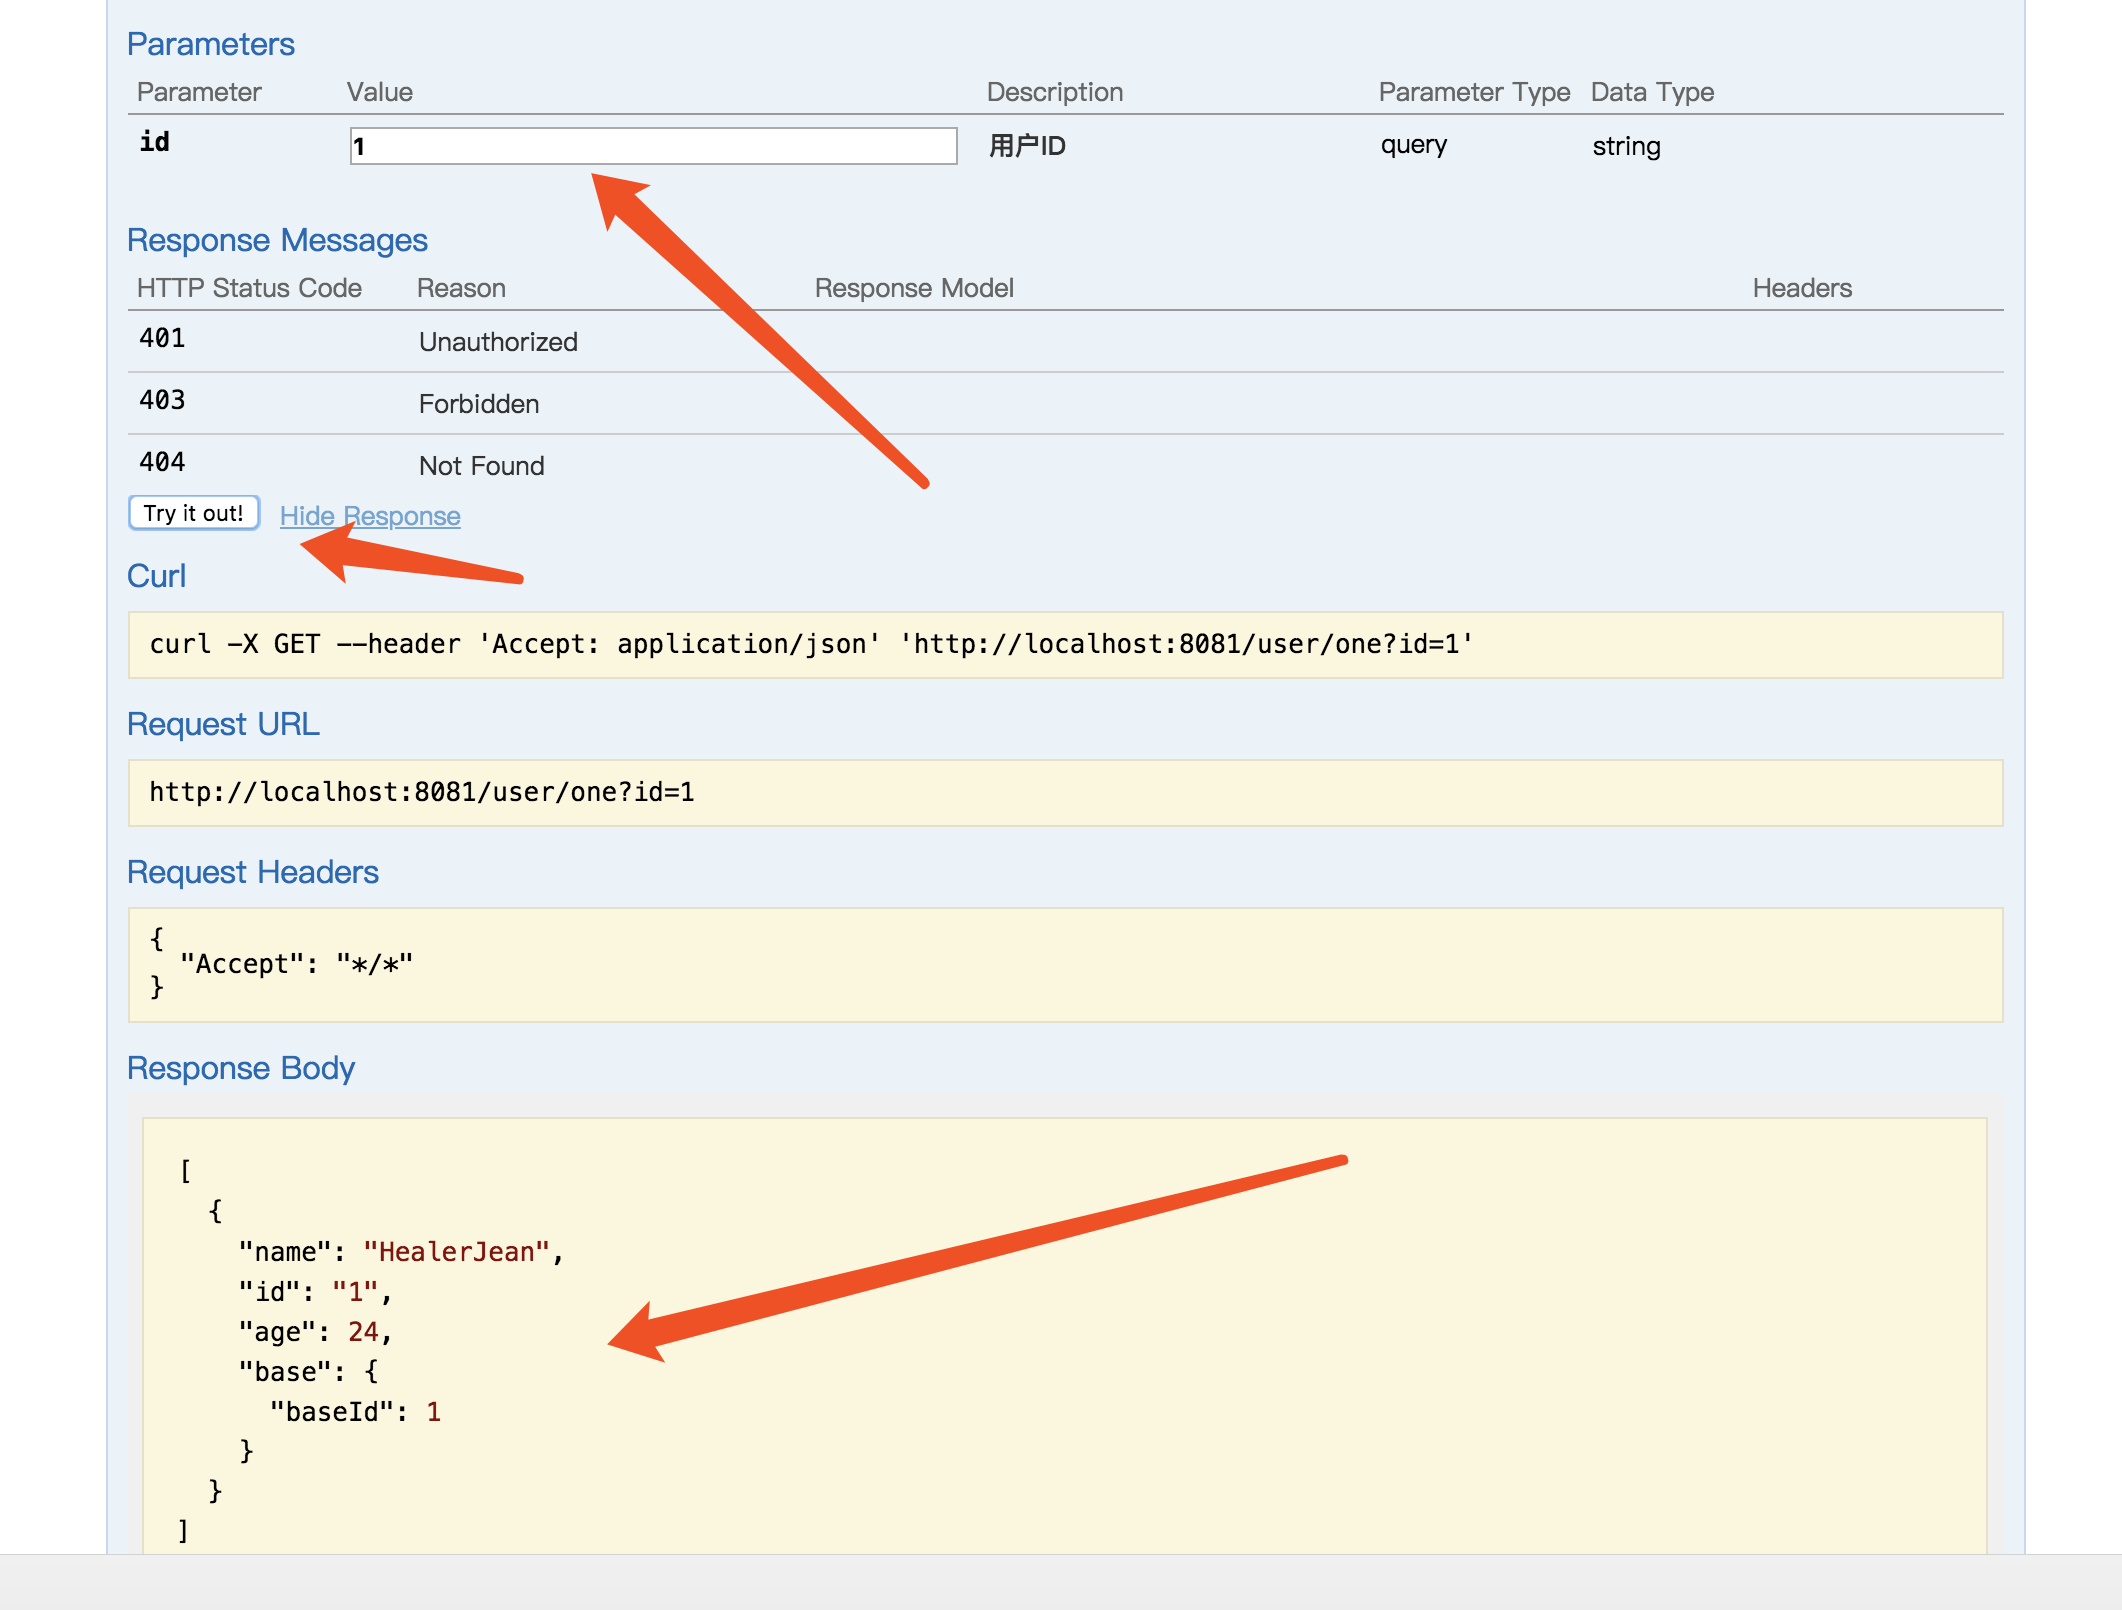
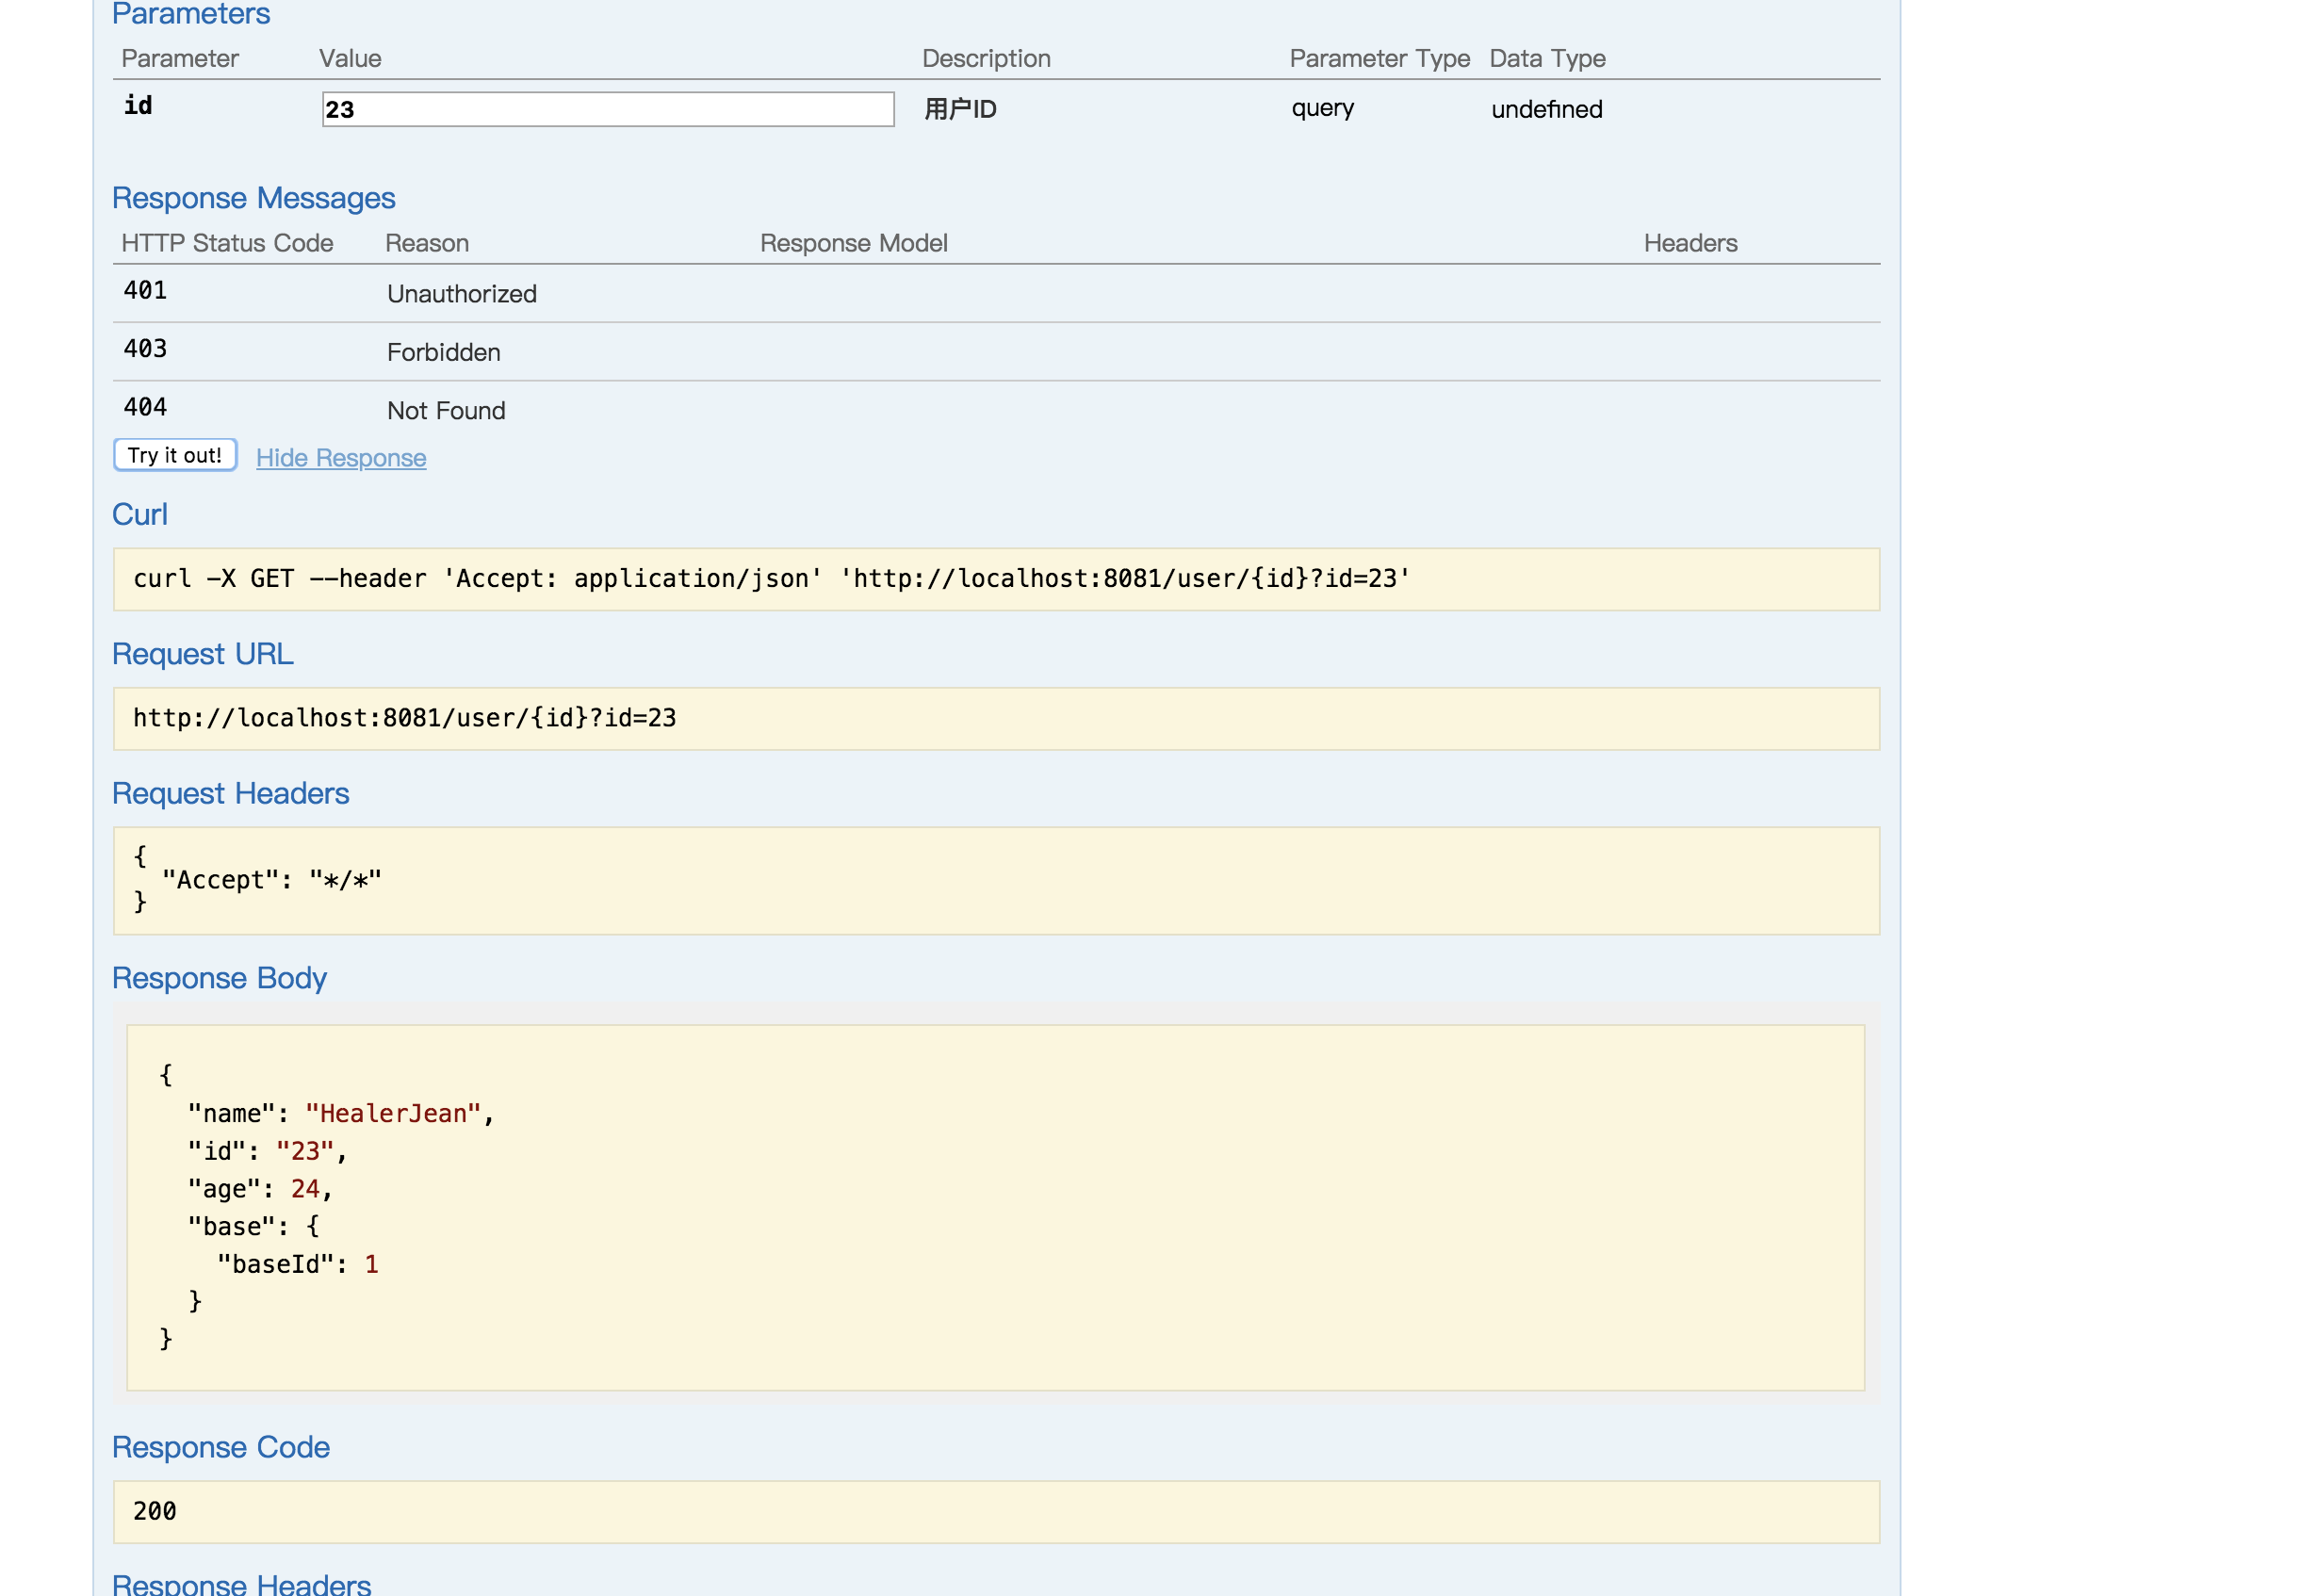
2.3.1 输入参数id为1 和2分别查看结果 try it out
3、修改2中获取结果的对象,设置为包装对象Response
3.1、包装对象
这里其实可以清晰的看到下面data其实就是我们正儿八经返回的结果
package com.hlj.swagger.common;


/**
 * @author fengchuanbo
 */
public class Response<T> {

    /**
     * 返回code
     */
    private String code;
    /**
     * 返回描述
     */
    private String desc;
    /**
     * 返回数据
     */
    private T data;

    public Response(String code, String desc) {
        this.code = code;
        this.desc = desc;
    }

    public Response(Code code) {
        this.code = code.getCode();
        this.desc = code.getDesc();
    }

    public Response(Code code, T data) {
        this.code = code.getCode();
        this.desc = code.getDesc();
        this.data = data;
    }

    /**
     * 成功响应
     * @param t
     * @param <T>
     * @return
     */
    public static <T> Response<T> success(T t){
        return new Response<>(Code.OK, t);
    }

    /**
     * 成功响应,date为空
     * @return
     */
    public static Response success(){
        return new Response(Code.OK);
    }

    /**
     * 参数错误
     * @return
     */
    public static Response illegalArgument(){
        return new Response(Code.illegalArgument);
    }


    /**
     * 自定义返回
     * @param code
     * @param desc
     * @return
     */
    public static <T> Response of(String code,String desc, T t){
        return new Response(code,desc,t);
    }


    /**
     * 自定义返回
     * @param code
     * @param desc
     * @return
     */
    public static Response of(String code,String desc){
        return new Response(code,desc);
    }


    /**
     * 自定义返回
     * @param code
     * @param t
     * @return
     */
    public static <T> Response of(Code code, T t){
        return new Response(code,t);
    }

    /**
     * 自定义返回
     * @param code
     * @return
     */
    public static Response of(Code code){
        return new Response(code);
    }


    /**
     * 系统错误
     * @return
     */
    public static Response error() {
        return new Response(Code.ERROR);
    }

    get set 省略

}
3.2、修改controller中的方法
1、修改 ApiOperation(实施说明) 中添加返回数据格式就可以,如下
@ApiOperation(value = "获取用户列表",
                        notes = "根据url的id来获取用户详细信息,返回List<User>类型用户信息的JSON;",
                        response = User.class,responseContainer = "List",
                        //application/json 返回结果的类型
                        produces = MediaType.APPLICATION_JSON_VALUE,
                        //multipart/form-data 返回的数据格式
                        consumes = MediaType.MULTIPART_FORM_DATA_VALUE)
@ApiOperation(value = "获取用户列表",notes = "根据url的id来获取用户详细信息,返回List<User>类型用户信息的JSON;",response = User.class,responseContainer = "List",produces = MediaType.APPLICATION_JSON_VALUE,consumes = MediaType.MULTIPART_FORM_DATA_VALUE)
@ApiImplicitParams({
        @ApiImplicitParam(name = "id", value = "用户ID", required = true, paramType = "query",dataType = "string")

})
@ApiResponses(value = {
        @ApiResponse(code = 200, message = "Successful — 请求已完成"),
        @ApiResponse(code = 400, message = "请求中有语法问题,或不能满足请求"),
        @ApiResponse(code = 401, message = "未授权客户机访问数据"),
        @ApiResponse(code = 404, message = "服务器找不到给定的资源;文档不存在"),
        @ApiResponse(code = 500, message = "服务器不能完成请求")}
)
@GetMapping("two")
public Response<?> getUserBagTwo(String id){
    List<User> users = new ArrayList<>();
    try {
        if(id.equals("1")) {
            users.add(new User("HealerJean", "1", 24, new Base(1)));
        }else {
            users.add(new User("huangliang", "2", 25, new Base(2)));
        }
        return Response.success(users);
    }catch (Exception e){
        return Response.error();
    }

}
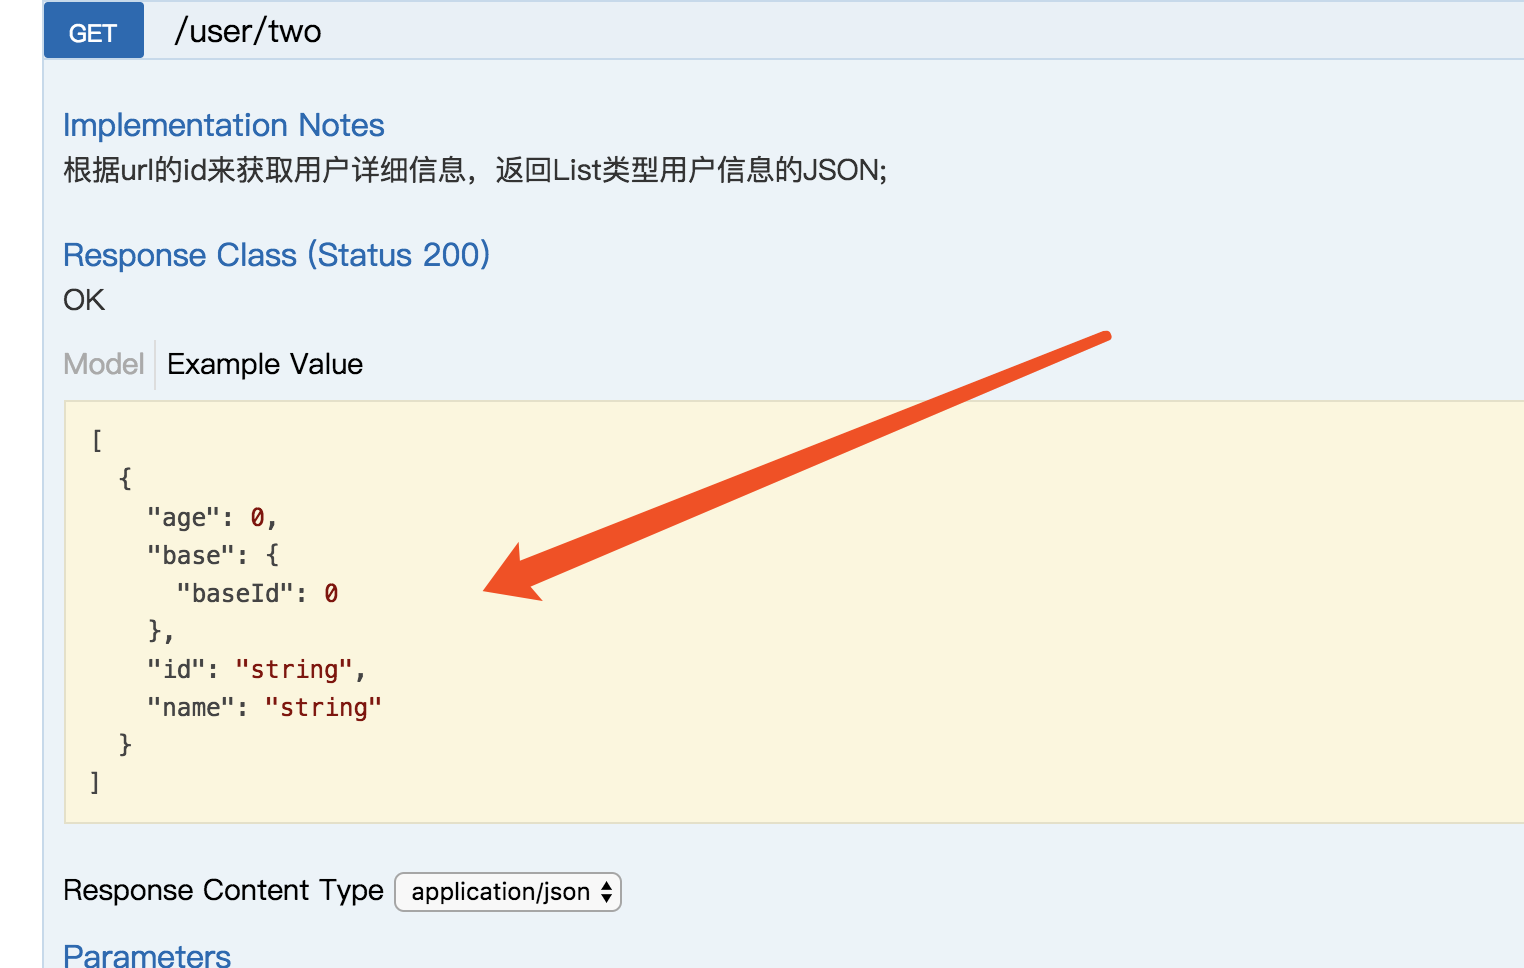
2、运行项目(这个时候我将第一个demo路径修改成了one,本次为two)
这个时候,就看到其实是List(User)中的内容了。而不是Response对象中的内容
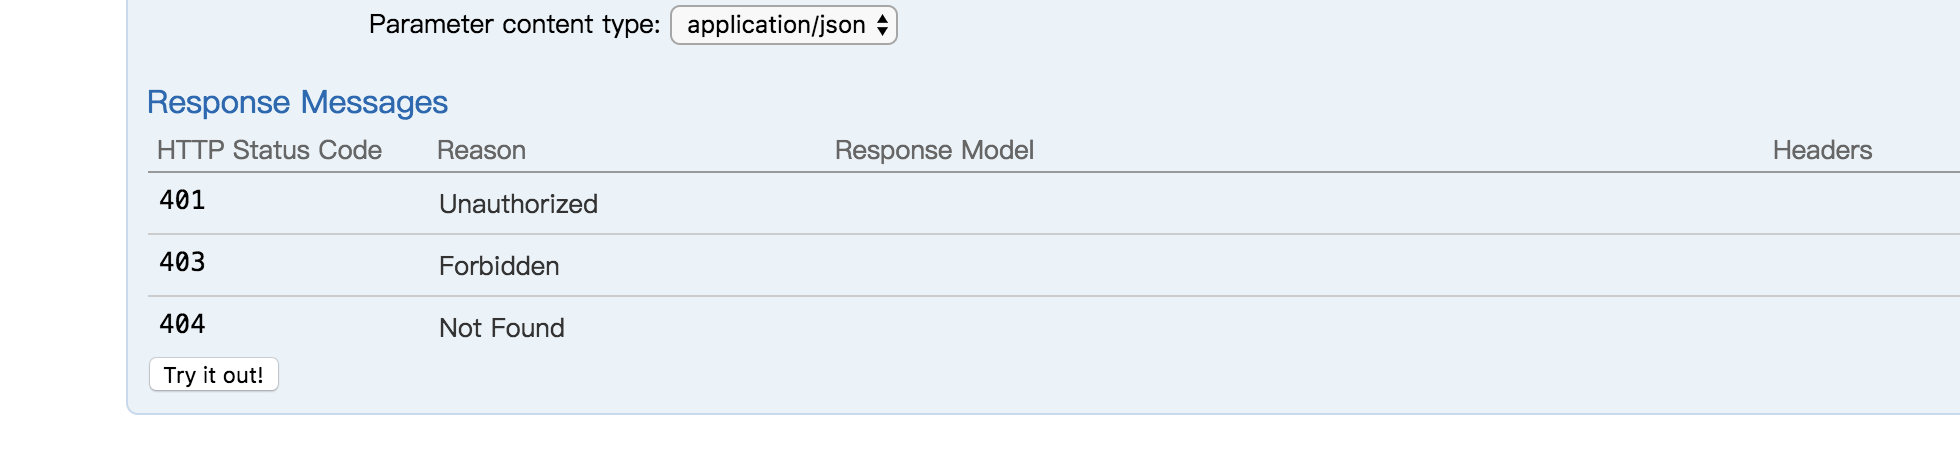
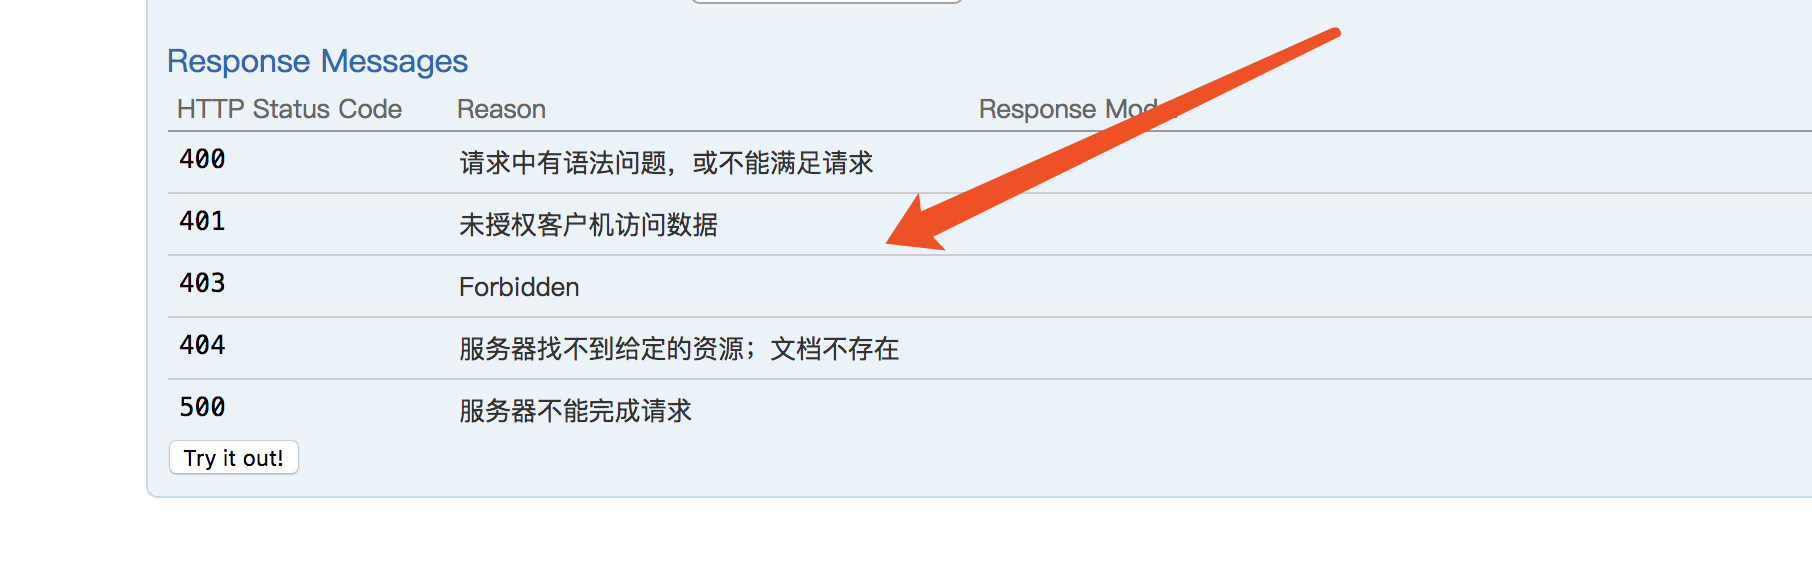
4、添加系统提供的http返回状态码描述
1、ApiResponses
@ApiResponses(value = {
        @ApiResponse(code = 200, message = "Successful — 请求已完成"),
        @ApiResponse(code = 400, message = "请求中有语法问题,或不能满足请求"),
        @ApiResponse(code = 401, message = "未授权客户机访问数据"),
        @ApiResponse(code = 404, message = "服务器找不到给定的资源;文档不存在"),
        @ApiResponse(code = 500, message = "服务器不能完成请求")}
)
@ApiOperation(value = "获取用户列表",notes = "根据url的id来获取用户详细信息,返回List<User>类型用户信息的JSON;",response = User.class,responseContainer = "List",produces = MediaType.APPLICATION_JSON_VALUE,consumes = MediaType.MULTIPART_FORM_DATA_VALUE)
@ApiImplicitParams({
        @ApiImplicitParam(name = "id", value = "id", required = true, dataType = "string")

})
@ApiResponses(value = {
        @ApiResponse(code = 200, message = "Successful — 请求已完成"),
        @ApiResponse(code = 400, message = "请求中有语法问题,或不能满足请求"),
        @ApiResponse(code = 401, message = "未授权客户机访问数据"),
        @ApiResponse(code = 404, message = "服务器找不到给定的资源;文档不存在"),
        @ApiResponse(code = 500, message = "服务器不能完成请求")}
)
@GetMapping("two")
public Response<?> getUserBagTwo(String id){
    List<User> users = new ArrayList<>();
    try {
        if(id.equals("1")) {
            users.add(new User("HealerJean", "1", 24, new Base(1)));
        }else {
            users.add(new User("huangliang", "2", 25, new Base(2)));
        }
        return Response.success(users);
    }catch (Exception e){
        return Response.error();
    }

}
之前
之后
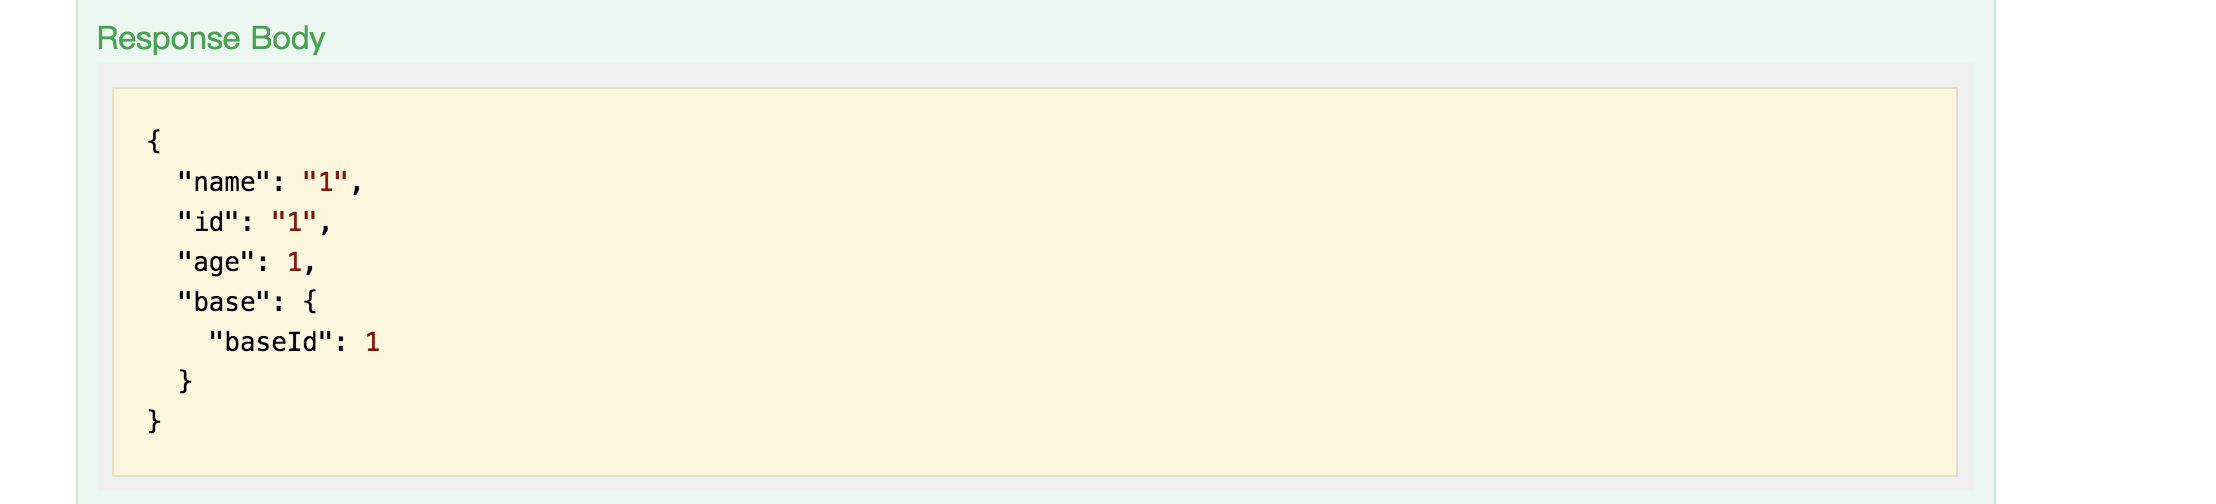
5、根据id-/{id}获取User
1、dataType = “path” 表示在请求头上直接写入参数
1、controller
@ApiOperation(value = "根据id获取用户详细信息", notes = "根据url的id来获取用户详细信息")
//描述容器
@ApiImplicitParam(name = "id", value = "用户ID", required = true,  paramType = "query",dataType = "path")
@RequestMapping(value = "/{id}", method = RequestMethod.GET)
public User getUser(String id) {
    return new User("HealerJean", id, 24, new Base(1));
}
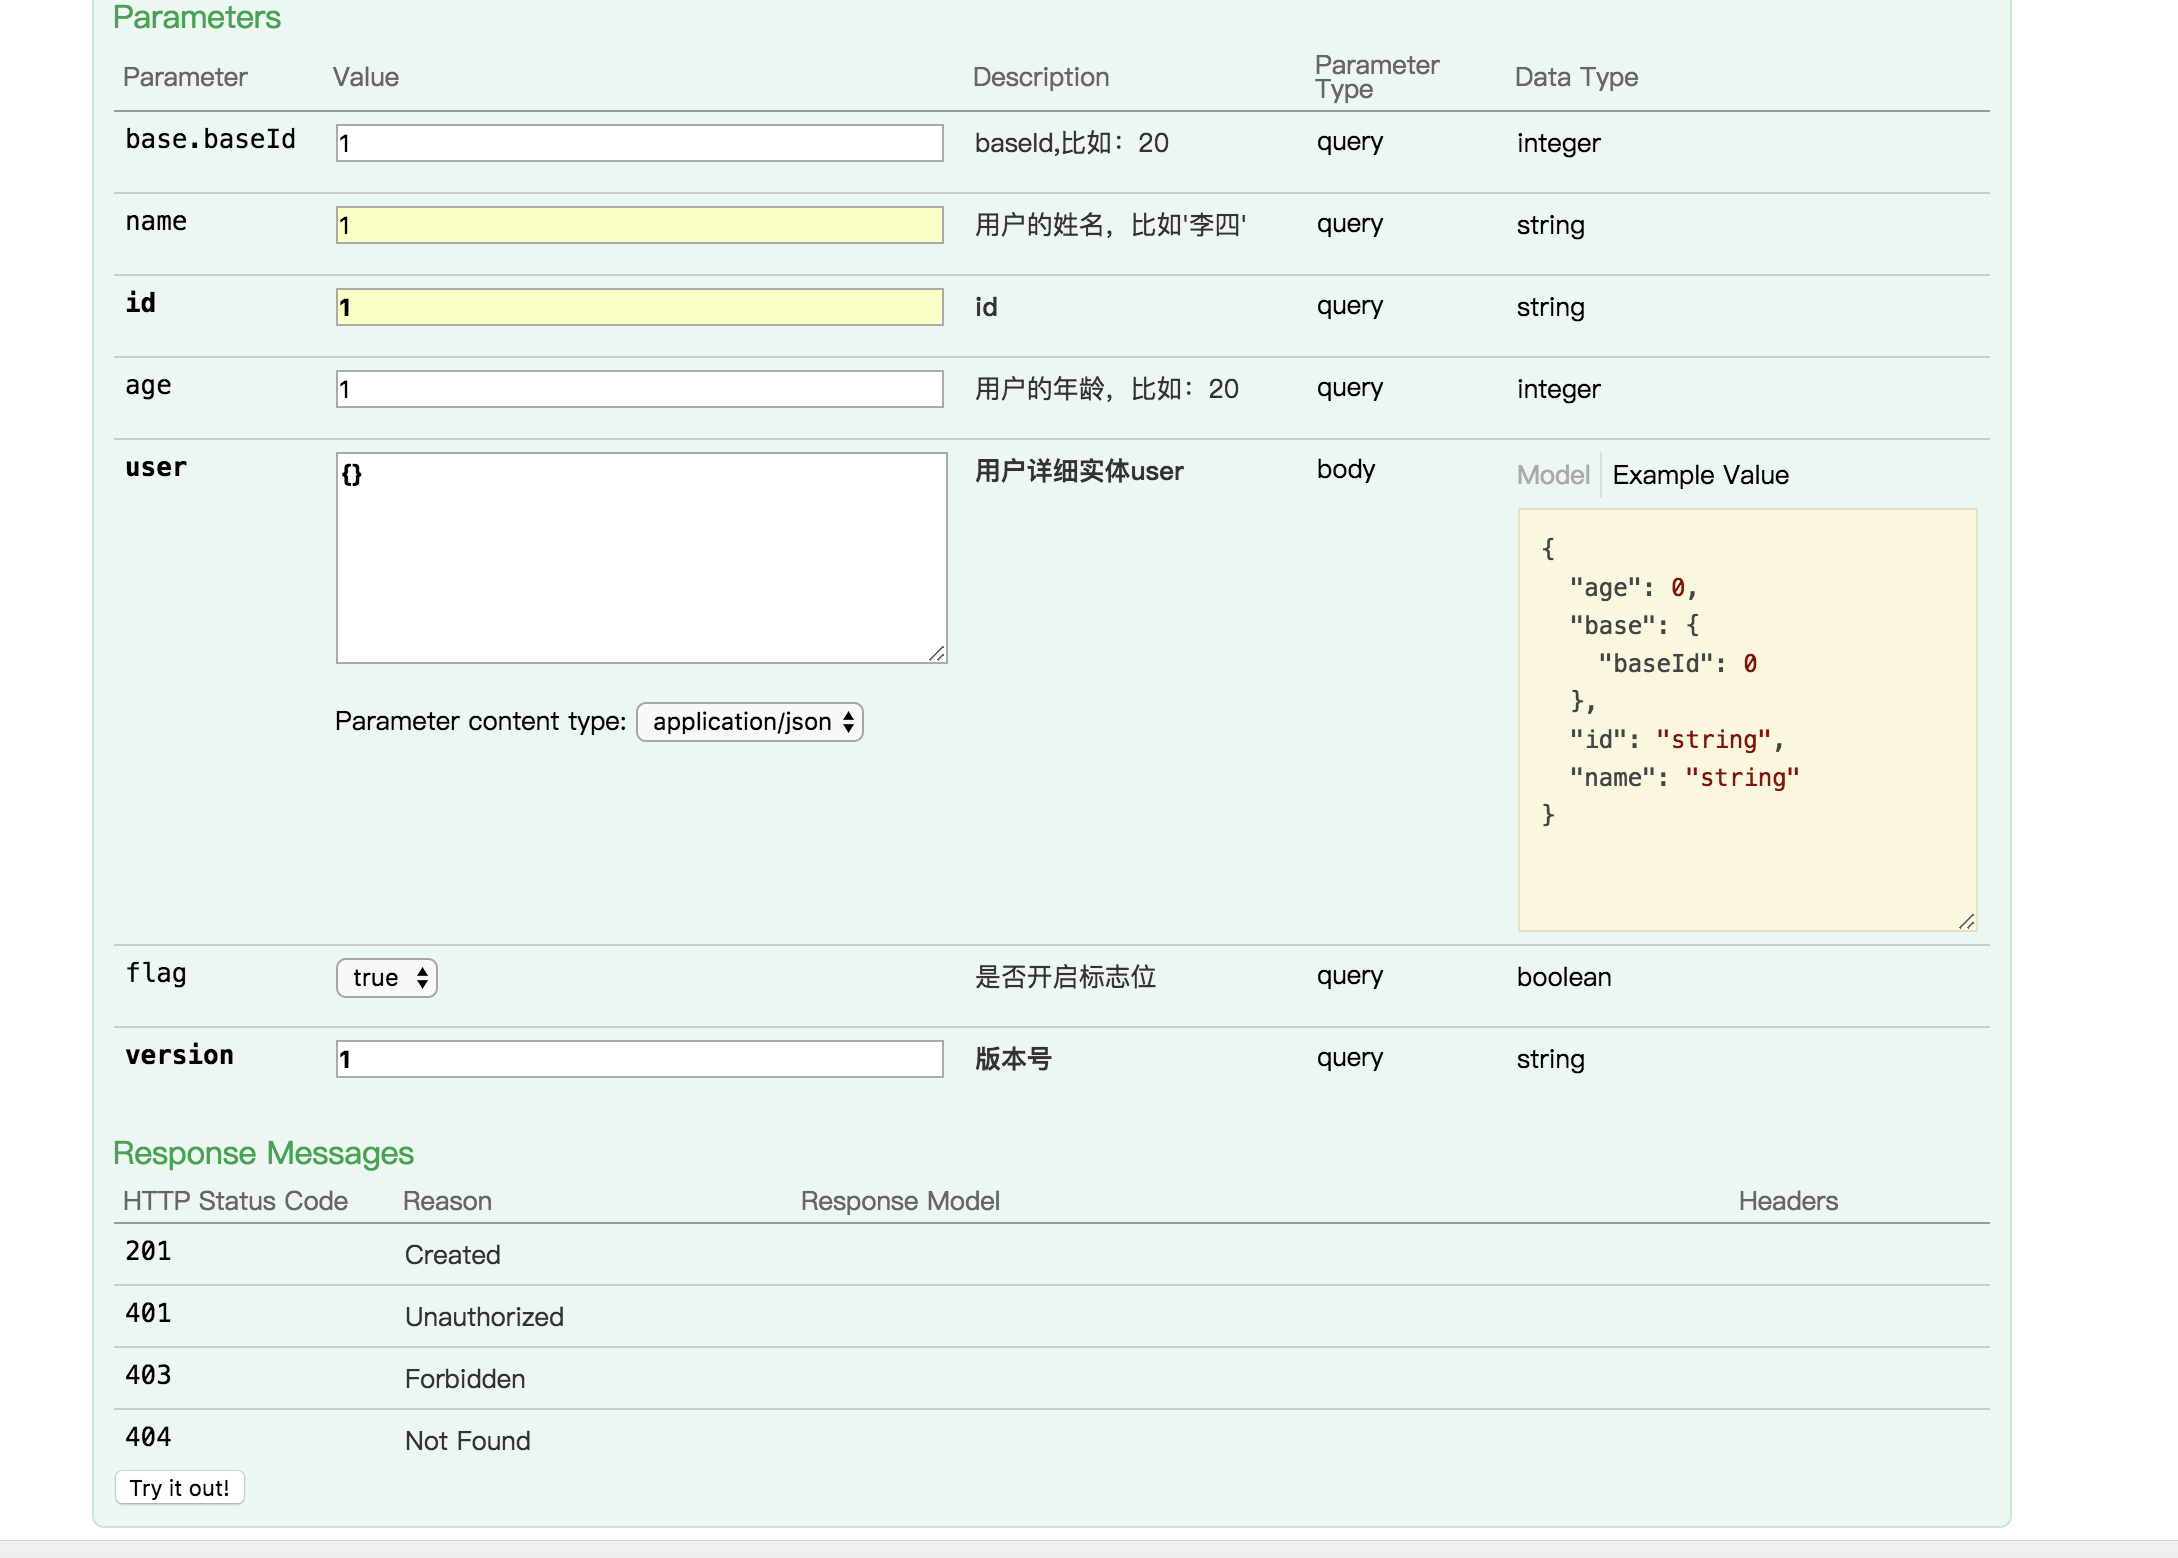
6、Post方法传入User对象参数
1、user 不需要配置 paramType ,默认都是body
@ApiImplicitParam(name = "user", value = "用户详细实体user", required = true, dataType = "User"),
@ApiOperation(value = "创建用户", notes = "根据User对象创建用户")
@ApiImplicitParams({
        @ApiImplicitParam(name = "user", value = "用户详细实体user", required = true, dataType = "User"),
        @ApiImplicitParam(name = "flag", value = "是否开启标志位", paramType = "query", dataType = "boolean"),
        @ApiImplicitParam(name = "version", value = "版本号", required = true, paramType = "query", dataType = "string")

})
@RequestMapping(value = "", method = RequestMethod.POST)
public User postUser(User user, @RequestParam(defaultValue = "false") boolean flag, String version) {
    log.info(flag+"");
    log.info(version);
    return user;
}
6.2、开始测试
1、user 对象也不需要输入值,只输入{}即可
2、测试成功
错误分析:如果当调用得到base.baseId输入后台报错的时候,说明base中没有空构造函数导致不能初始化。
代码下载
如果满意,请打赏博主任意金额,感兴趣的请下方留言吧。可与博主自由讨论哦
| 支付包 | 微信 | 微信公众号 |
|---|---|---|
 |
 |
 |

 浙公网安备 33010602011771号