

1.1图形验证码的生成
1、首先我们所有的登陆注册功能都不能在主页视图中完成,所以我们单独创建了一个文件夹来完成
如下图,index主页视图函数,news是新闻试图函数,passport就是登录注册函数实现地方

2、在开始前第一步我们先注册蓝图对象,在__init__.py写入一下代码
1 from flask import Blueprint
2
3 passport_blue = Blueprint('passport',__name__,url_prefix='/passport')
4
5 from . import views
3、然后在info文件下的__init__.py中的create_app函数中注册蓝图对象,后面会注册很多次都在这里注册
(注:哪里注册在哪里导包,放置蓝图问题的产生
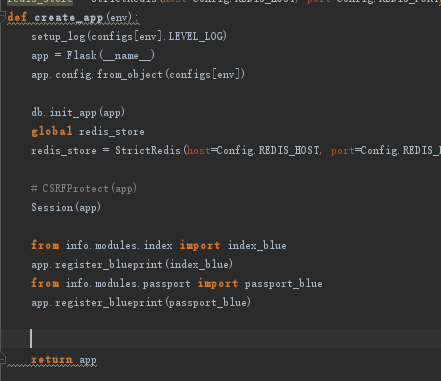
4、好的,蓝图注册完成就是我们的图形验证码的相关代码了,如下
 1 @passport_blue.route('/image_code')
 2 def image_code():
 3     # 1.接受前端传来的参数(UUID)
 4     imageCodeUUID = request.args.get("imageCodeId")
 5     # 2.校验参数(是否为空)
 6     if not imageCodeUUID:
 7     #如果为空返回一个403错误
 8         abort(403)
 9     # 3.生成图片验证码,用三个参数接收
10     name,text,image = captcha.generate_captcha()
11     # 4.将图片验证码的文字版存放到redis中
12     print(text)
13     try:
14         #检测异常,同时向redis数据库中写入键为imag_code的验证码
15         redis_store.set("image_code:"+imageCodeUUID,text,constants.IMAGE_CODE_REDIS_EXPIRES)
16     except Exception as e:
17         #异常日志记录上,同时返回一个500错误
18         current_app.logger.error(e)
19         abort(500)
20     # 5.返回内容
21     response = make_response(image)
22
23     response.headers["Content-Type"] = "image/jpg"
24     return response
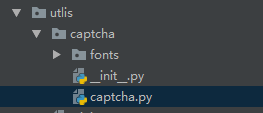
注意,第10行代码中调用的captcha.generate_captcha()函数我们是在第三方包中运用的,作用是生成图形验证码
以下是前端的js代码
 1 var imageCodeId = ""
 2
 3 // TODO 生成一个图片验证码的编号,并设置页面中图片验证码img标签的src属性
 4 function generateImageCode() {
 5     //生成UUID
 6     imageCodeId = generateUUID()
 7     //构造请求
 8     var url = 'passport/image_code?imageCodeId='+imageCodeId
 9     //动态修改src属性
10     $('.get_pic_code').attr('src',url)
11 }
