Hi3861_WiFi IoT工程:WiFi自动连接

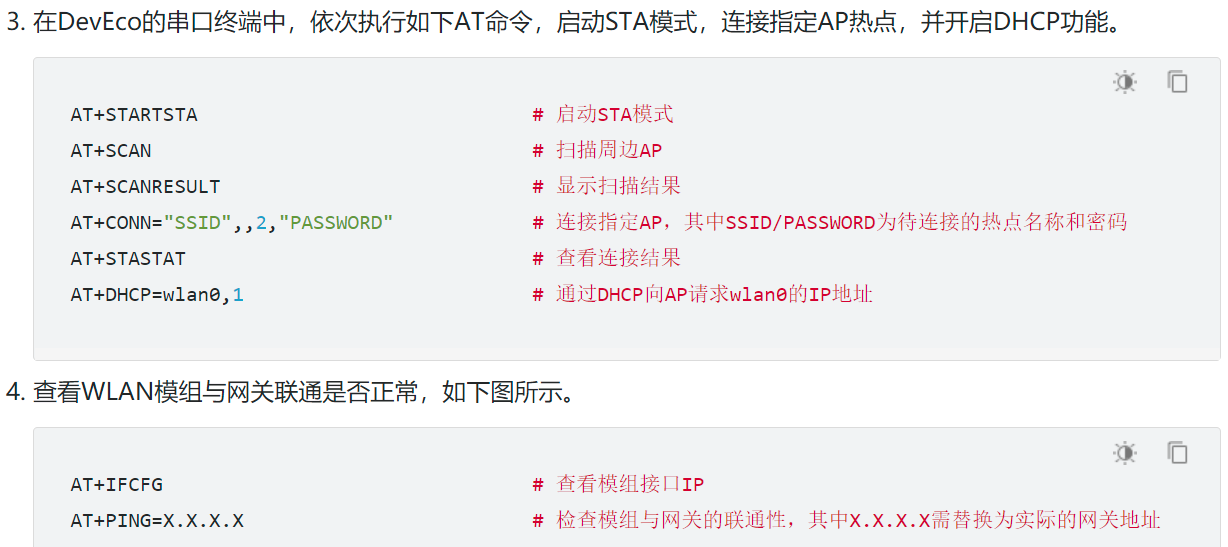
这些天在研究软总线组件,因为要连接WiFi进行调试,如果按照官方文档的如下步骤进行操作,肯定不合适:
Hi3861_WiFi IoT工程:WiFi自动连接

在社区上找到连志安老师的《Hi3861 WiFi操作,热点连接》以及网友double__整理的《Hi3861 WiFi连接》,参考代码可以运行和连接WiFi,但个人感觉仍稍显复杂/繁杂,于是我自己就研究了一下。


首先,上面官方的步骤,我们可以简化为:

step 1: AT+STARTSTA                                         # 启动STA模式

step 2: AT+CONN="SSID", ,2,"PASSWORD"   # 连接指定AP,其中SSID/PASSWORD为待连接的热点名称和密码

step 3: AT+DHCP=wlan0,1                                # 通过DHCP向AP请求wlan0的IP地址

中间的其他步骤,完全可以省略。


我们到 at 模块去看一下:

hi_void app_main(hi_void)
{
#if defined(CONFIG_AT_COMMAND) || defined(CONFIG_FACTORY_TEST_MODE)     //AT指令模块的初始化。如果初始化成功,则开始注册各类AT指令。
    ret = hi_at_init();       // @//vendor/hisi/hi3861/hi3861/components/at/src/hi_at.c
    if (ret == HI_ERR_SUCCESS) {
        hi_at_sys_cmd_register();      // 同上 hi_at.c
    }
#endif
}
hi_void hi_at_sys_cmd_register(hi_void)
{
    //vendor/hisi/hi3861/hi3861/components/at/src/at_general.c
    hi_at_general_cmd_register();
	
#ifndef CONFIG_FACTORY_TEST_MODE
    //vendor/hisi/hi3861/hi3861/components/at/src/at_wifi.c
    hi_at_sta_cmd_register();
    hi_at_softap_cmd_register();  //同上 at_wifi.c
#endif
    //vendor/hisi/hi3861/hi3861/components/at/src/at_hipriv.c
    hi_at_hipriv_cmd_register();

#ifndef CONFIG_FACTORY_TEST_MODE
#ifdef LOSCFG_APP_MESH
    hi_at_mesh_cmd_register();     //同上 at_wifi.c
#endif
    //vendor/hisi/hi3861/hi3861/components/at/src/at_lowpower.c
    hi_at_lowpower_cmd_register();
#endif

    hi_at_general_factory_test_cmd_register();      //同上 at_general.c
    hi_at_sta_factory_test_cmd_register();          //同上 at_wifi.c
    hi_at_hipriv_factory_test_cmd_register();       //同上 at_hipriv.c
    //vendor/hisi/hi3861/hi3861/components/at/src/at_io.c
    hi_at_io_cmd_register();
}

hi_at_sys_cmd_register() 注册了Hi3861工程所支持的所有 AT 指令,详情请各位可以自己去查阅代码,我们只看上面三条指令:

step 1: AT+STARTSTA:位于 at_wifi.c,调用 hi_wifi_sta_start(ifname, &len) 实现功能

{"+STARTSTA", 9, HI_NULL, HI_NULL, (at_call_back_func)cmd_sta_start_adv, (at_call_back_func)cmd_sta_start}

step 2: AT+CONN="SSID", ,2,"PASSWORD"      位于 at_wifi.c ,调用 hi_wifi_sta_connect(&assoc_req) 实现功能

{"+CONN", 5, HI_NULL, HI_NULL, (at_call_back_func)cmd_sta_connect, HI_NULL}

step 3: AT+DHCP=wlan0,1  位于 at_general.c,调用 netifapi_netif_find(argv[0]) 和 netifapi_dhcp_start(netif_p) 实现功能

{"+DHCP", 5, HI_NULL, HI_NULL, (at_call_back_func)at_setup_dhcp, HI_NULL}


把上面三步封装到 API: WifiLink(),实现如下:

#include "hi_wifi_api.h"
#include "lwip/netifapi.h"

void WifiLink(void)  
{
    static BOOL fgWifiConnected = FALSE;
			
    if(fgWifiConnected)   //防止重复连接WiFi
        return;

    printf("[WifiLink] Begin: fgWifiConnected[F]\n");
	
    //step 1: AT+STARTSTA   
    // #启动STA模式
    char ifname[WIFI_IFNAME_MAX_SIZE] = {0};  //“wlan0”
    int len = WIFI_IFNAME_MAX_SIZE;	

    if (HISI_OK != hi_wifi_sta_start(ifname, &len)) 
    {
        printf("[WifiLink] hi_wifi_sta_start fail\n");
        return;
    }

    //step 2: AT+CONN="SSID", ,2,"PASSWORD"
    //# 连接指定AP,其中SSID/PASSWORD为待连接的热点名称和密码
    hi_wifi_assoc_request request = {0};
    request.auth = HI_WIFI_SECURITY_WPA2PSK; //2

    char* ssid = "SSID";          //Your SSID, HI_WIFI_MAX_SSID_LEN 32 Byte
    char* pswd = "PASSWORD";      //Your PSWD, HI_WIFI_MAX_KEY_LEN  64 Byte

    memcpy(request.ssid, ssid, strlen(ssid));
    memcpy(request.key, pswd, strlen(pswd));
    
    if (HISI_OK != hi_wifi_sta_connect(&request)) 
    {
        printf("[wifilink] hi_wifi_sta_connect fail\n");
        return;
    }

    //step 3: AT+DHCP=wlan0,1  
    //# 通过DHCP向AP请求wlan0的IP地址
    struct netif* p_netif = netifapi_netif_find(ifname);
    if(NULL == p_netif) 
    {
        printf("[WifiLink] netifapi_netif_find fail\n");
        return;
    }	
	
#if 1  //DHCP 自动分配IP
    if(HISI_OK != netifapi_dhcp_start(p_netif)) 
    {
        printf("[WifiLink] netifapi_dhcp_start fail\n");
        return;
    }	
#else  //设置固定 IP
    ip4_addr_t gw;
    ip4_addr_t ipaddr;
    ip4_addr_t netmask;
    IP4_ADDR(&gw,      192, 168,  1, 1);
    IP4_ADDR(&ipaddr,  192, 168,  1, 200);   //固定到这个 IP 
    IP4_ADDR(&netmask, 255, 255, 255, 0);

    if (HISI_OK != netifapi_netif_set_addr(p_netif, &ipaddr, &netmask, &gw)) 
    {
        printf("[WifiLink] netifapi_netif_set_addr fail\n");
        return;
    }

    if (HISI_OK != hi_wifi_start_connect()) 
    {
        printf("[WifiLink] hi_wifi_start_connect fail\n");
        return;
    }
#endif
	
    fgWifiConnected = TRUE;
    printf("[WifiLink] End.   fgWifiConnected[T]\n");

    return;
}

注意在 BUILD.gn 的include_dirs要添加:

"//vendor/hisi/hi3861/hi3861/include",
"//vendor/hisi/hi3861/hi3861/third_party/lwip_sack/include",

上面这个函数你可以把它做成 SYS_RUN(WifiLink), 也可以放到你的代码中合适的地方去调用,就可以实现WiFi的自动连接了。


我本地log:

[WifiLink] Begin: fgWifiConnected[F]
[WifiLink] End.   fgWifiConnected[T]
+NOTICE:SCANFINISH
+NOTICE:CONNECTED

然后可以通过AT+STASTAT、AT+IFCFG、AT+PING=www.baidu.com等指令去确认连接状态,完全OK。

作者:liangkz

想了解更多内容,请访问51CTO和华为合作共建的鸿蒙社区:https://harmonyos.51cto.com

posted @ 2021-05-13 11:13  HarmonyOS技术社区  阅读(926)  评论(0编辑  收藏  举报