jenkins创建任务的参数,以及部署django前期
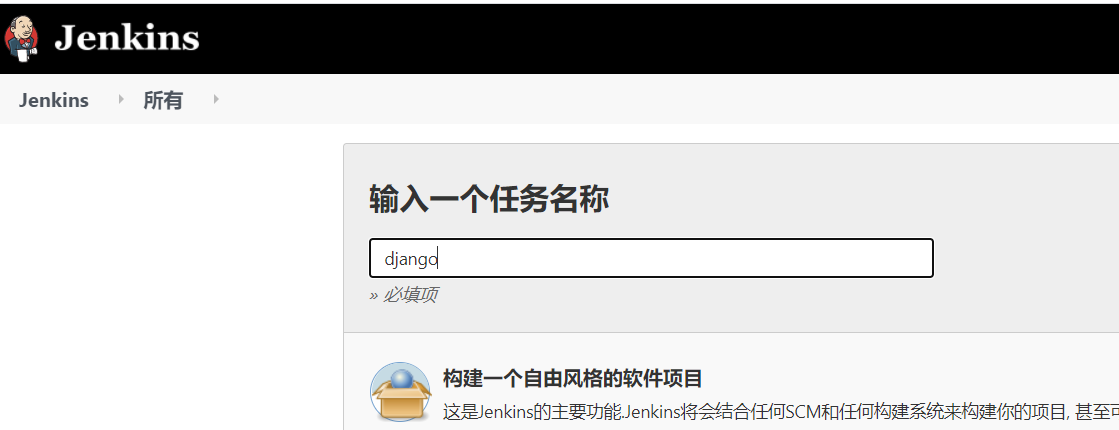
1、创建Job

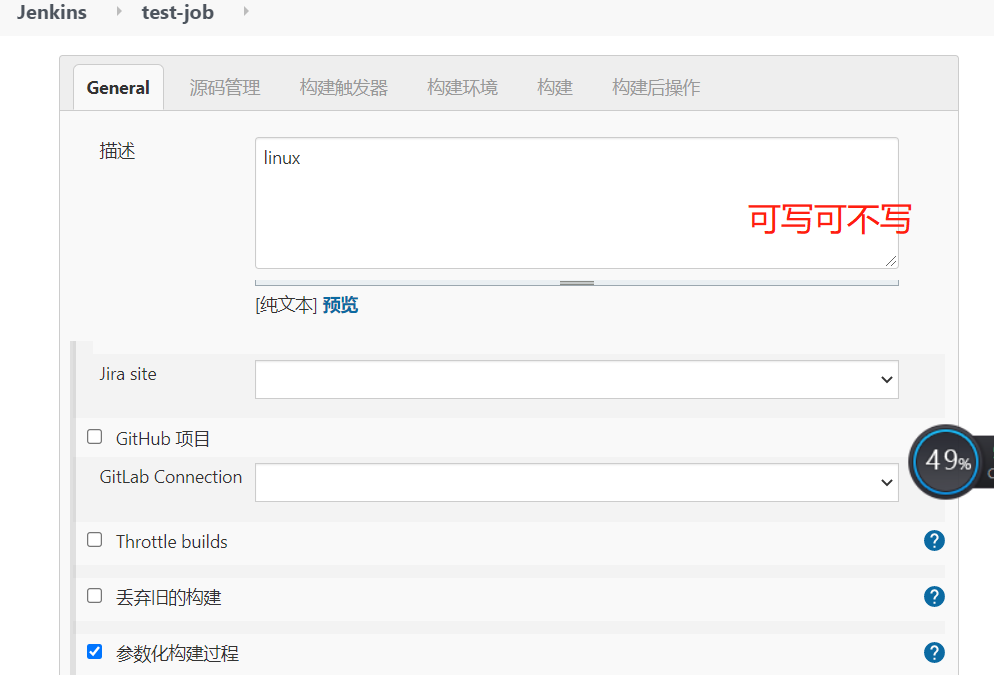
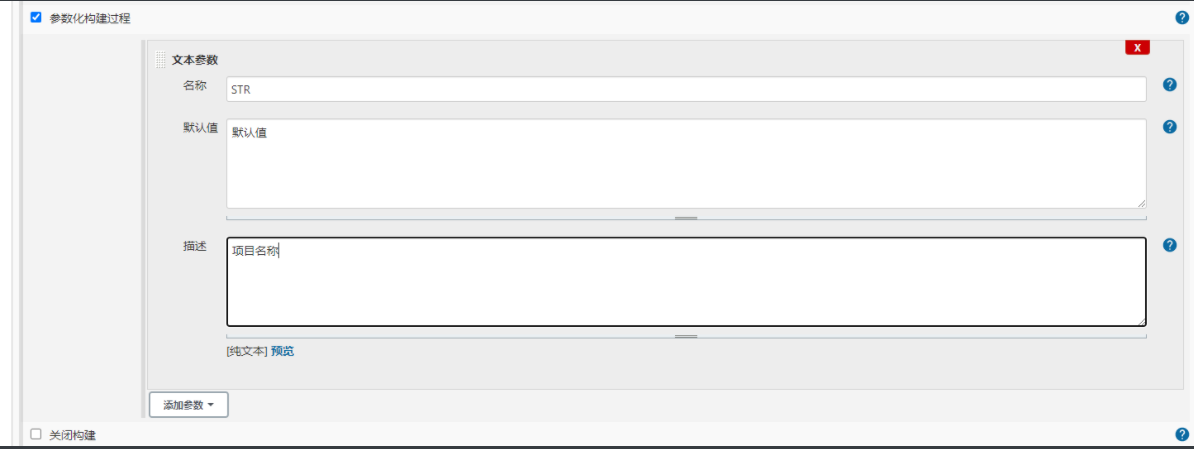
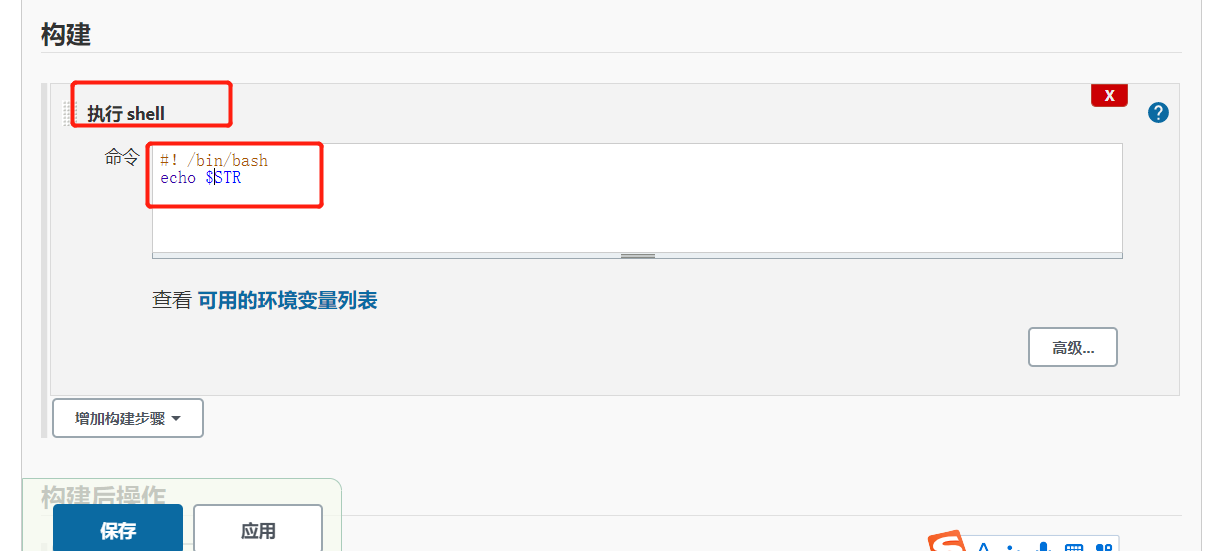
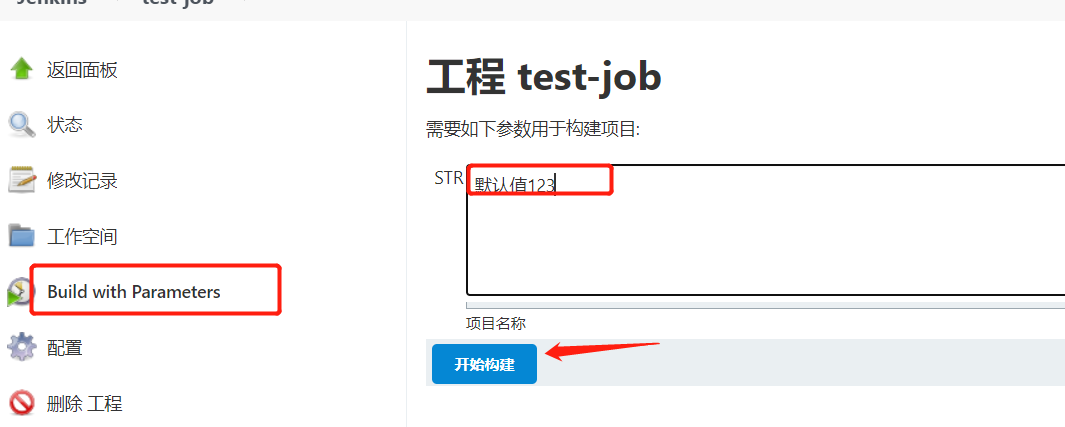
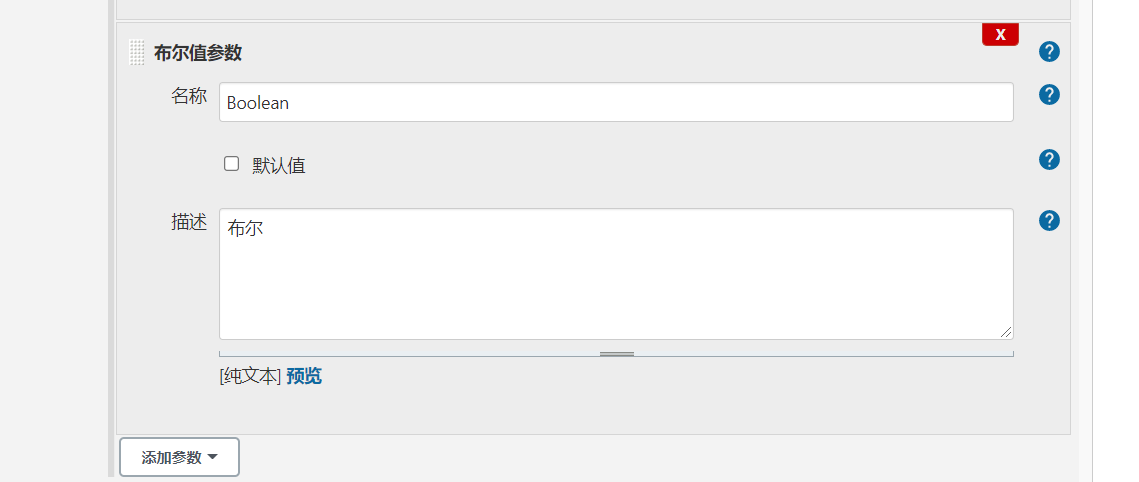
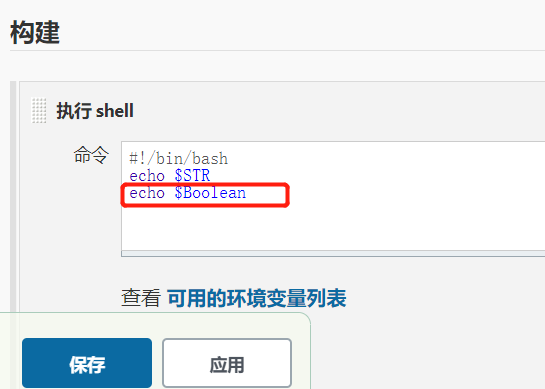
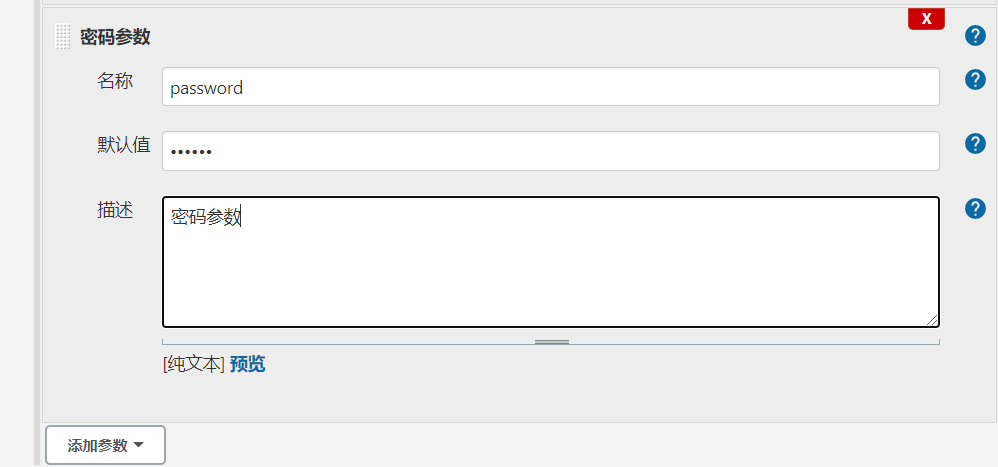
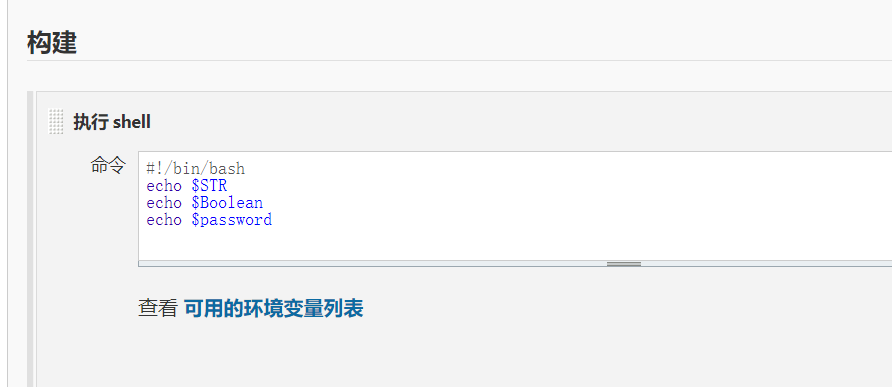
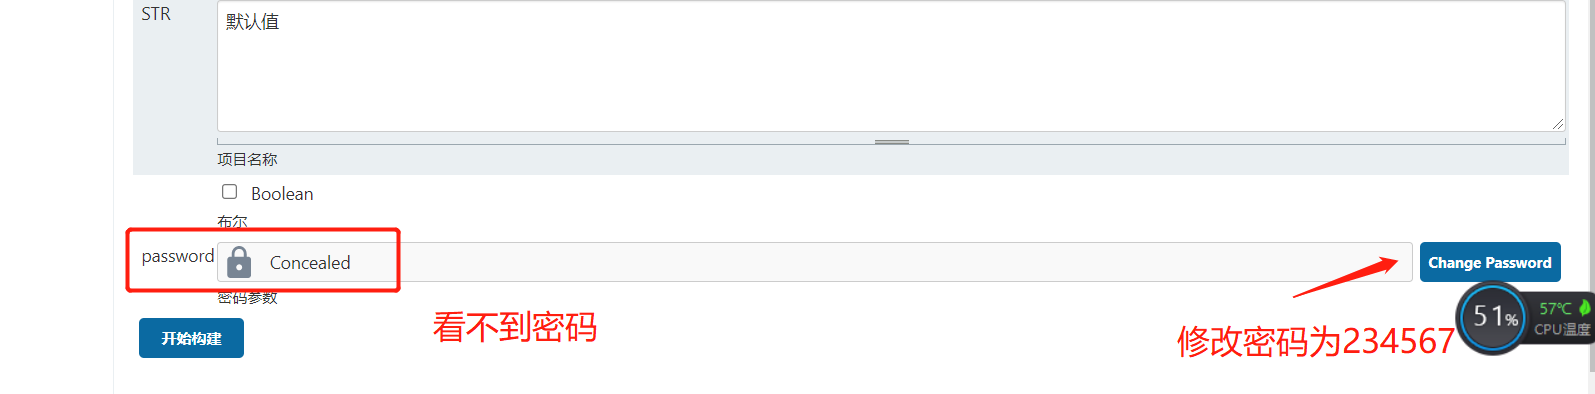
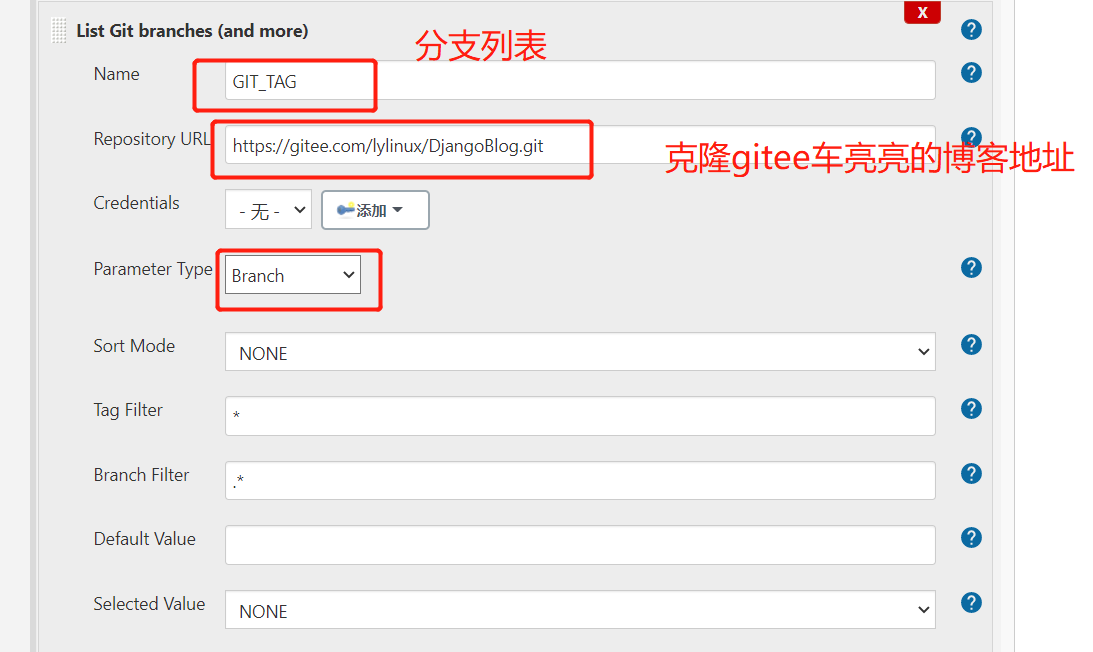
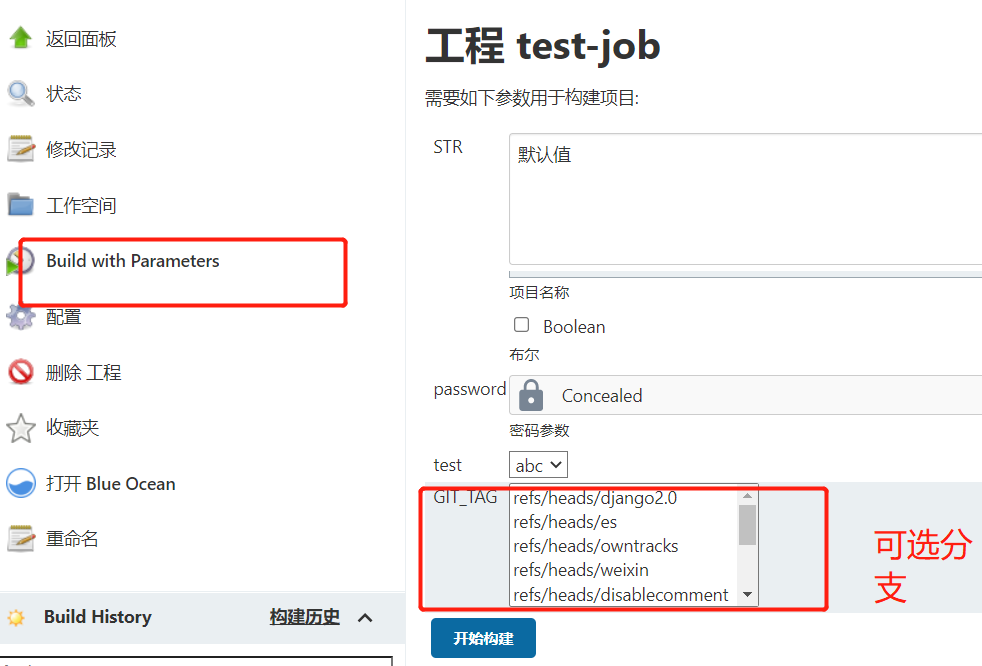
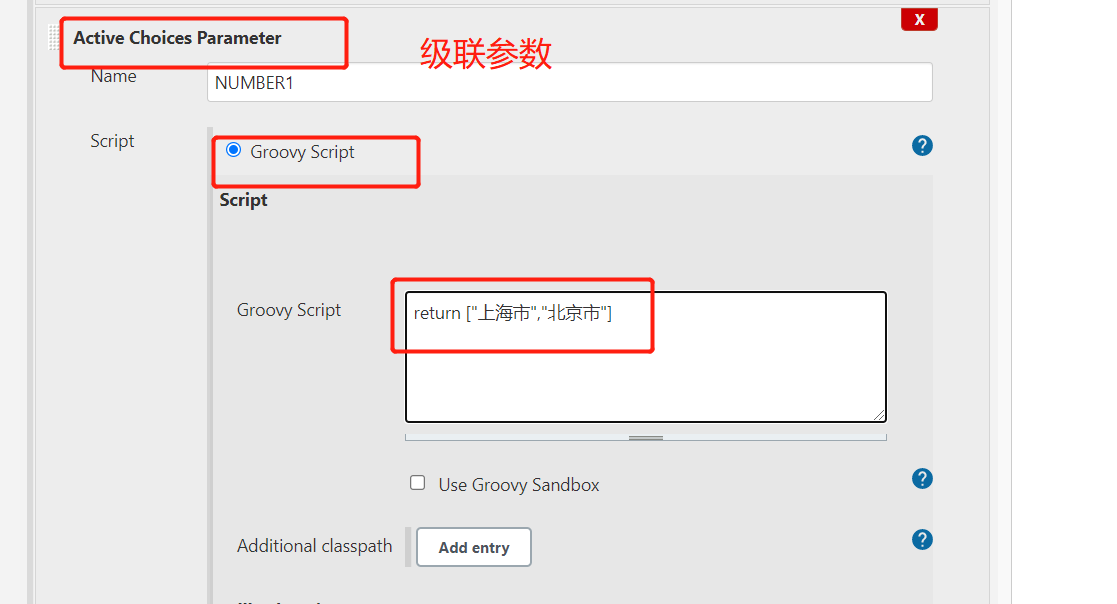
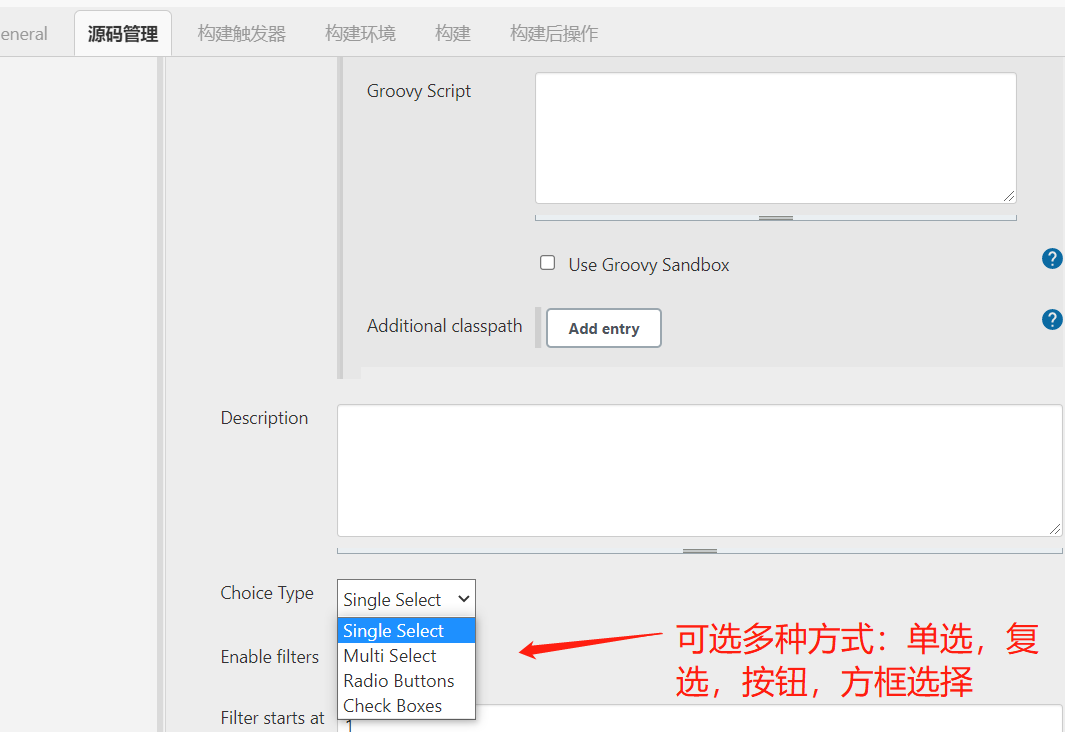
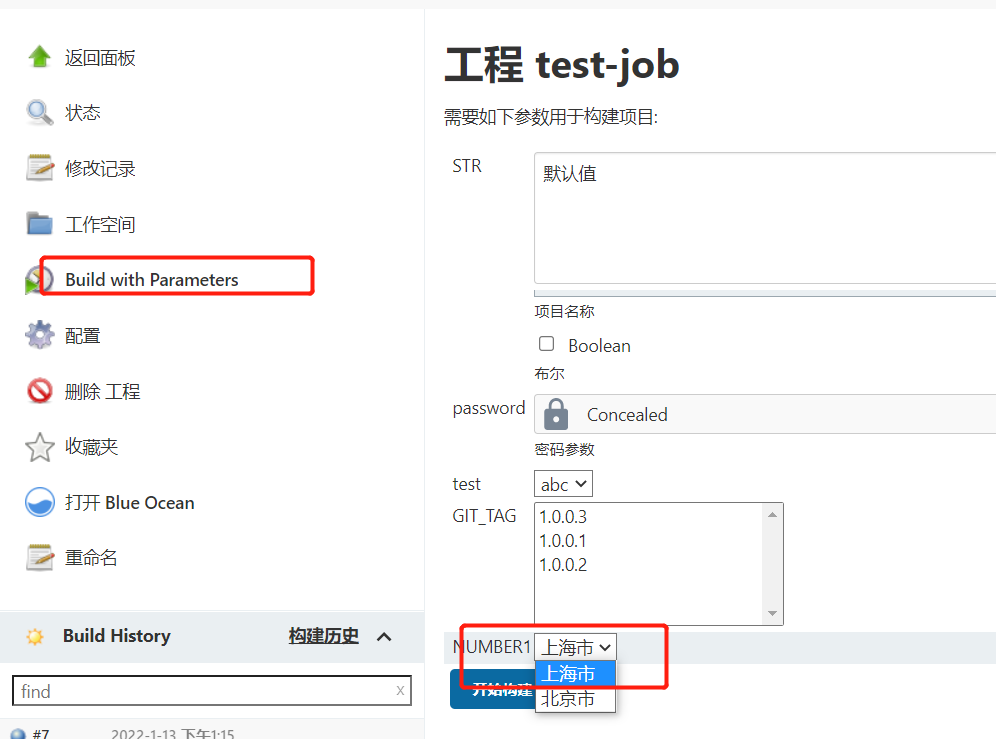
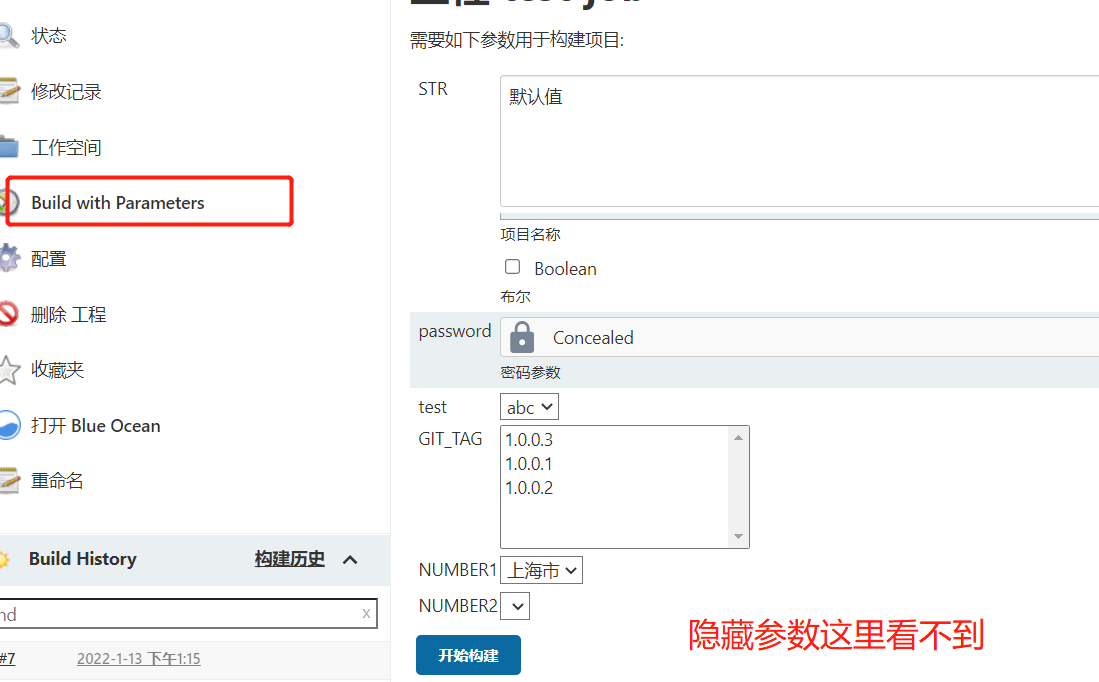
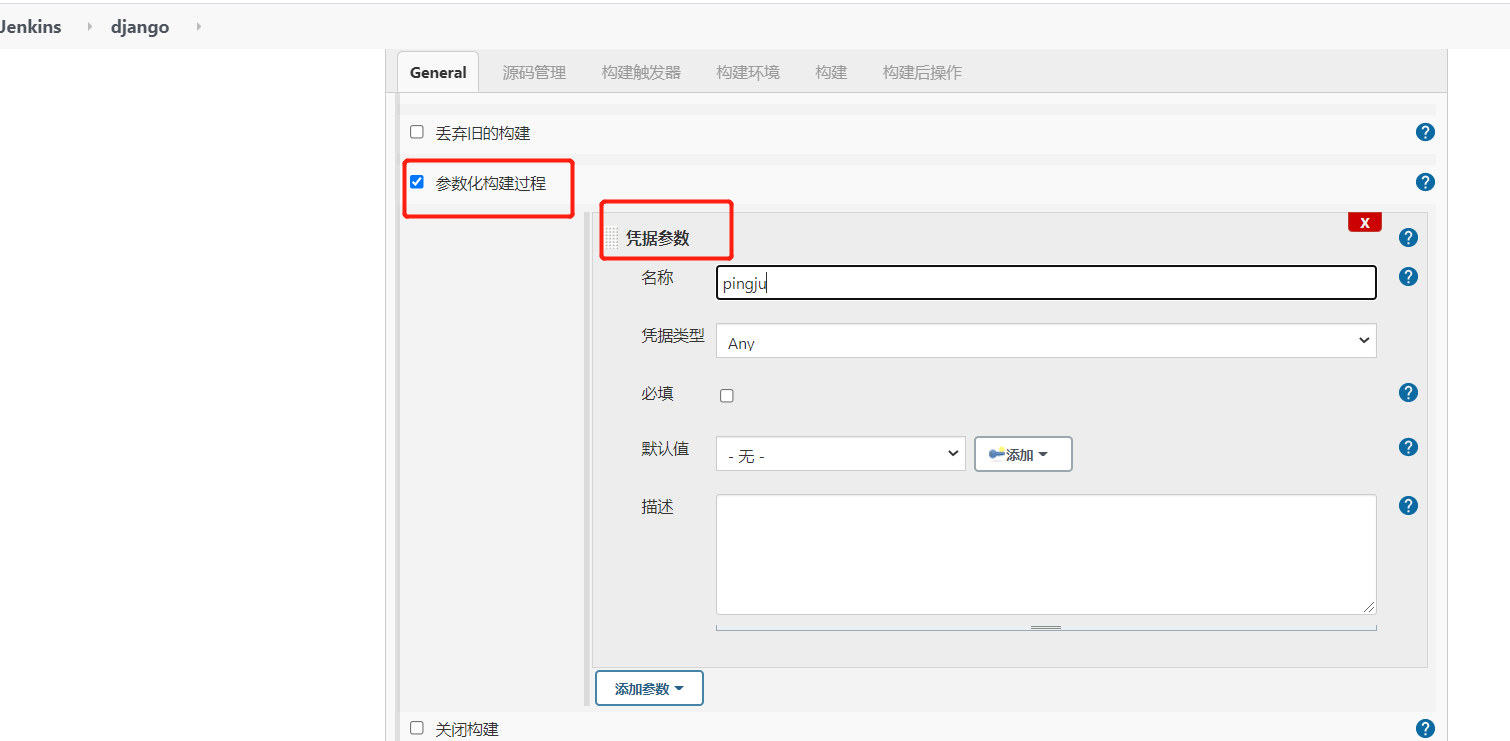
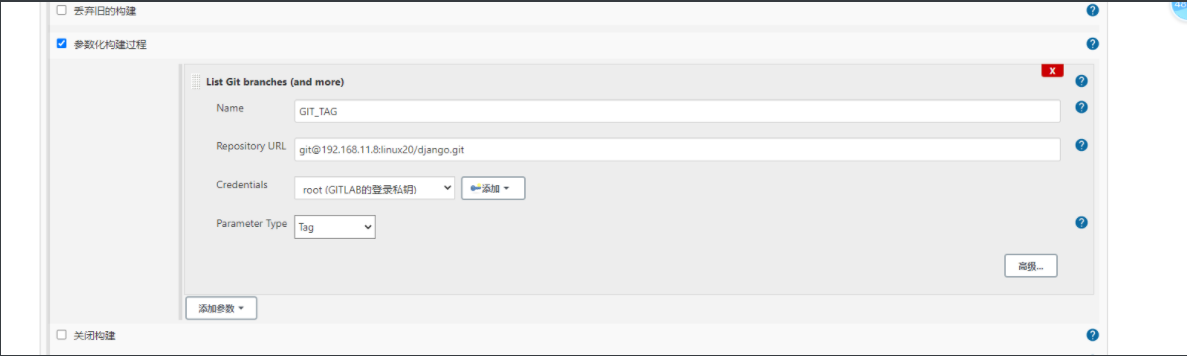
1.1、参数化
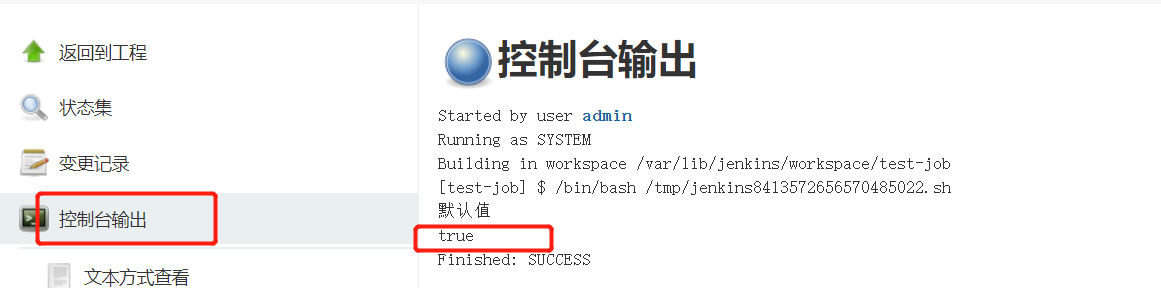
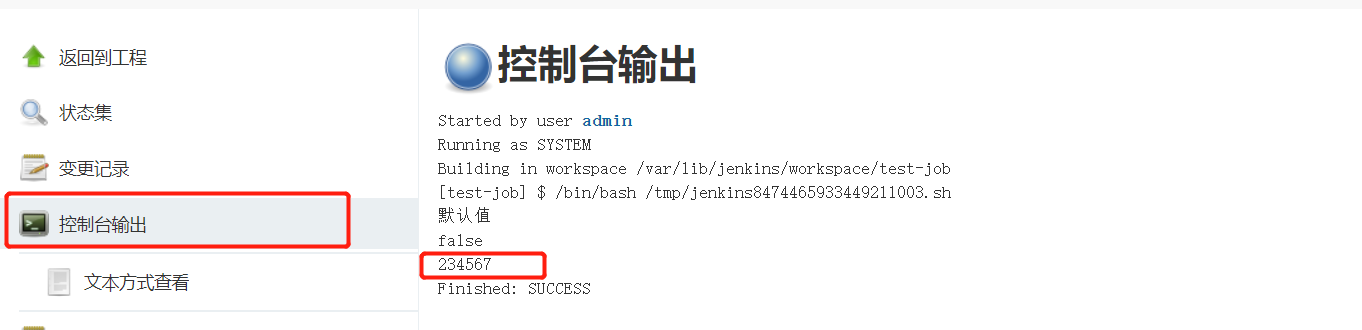
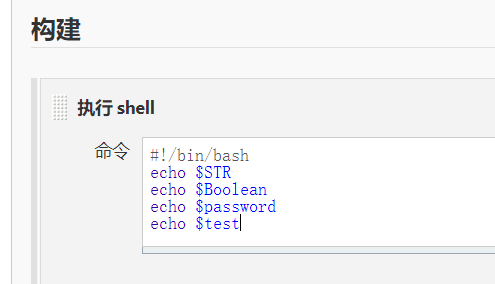
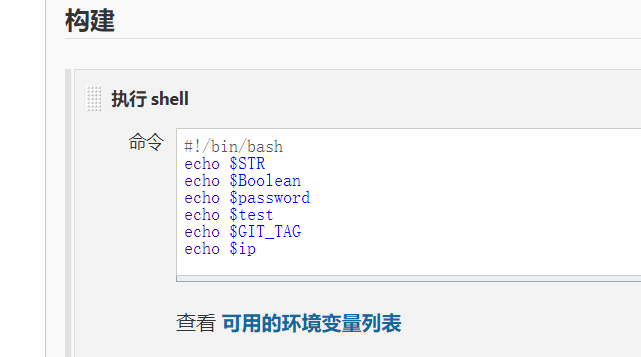
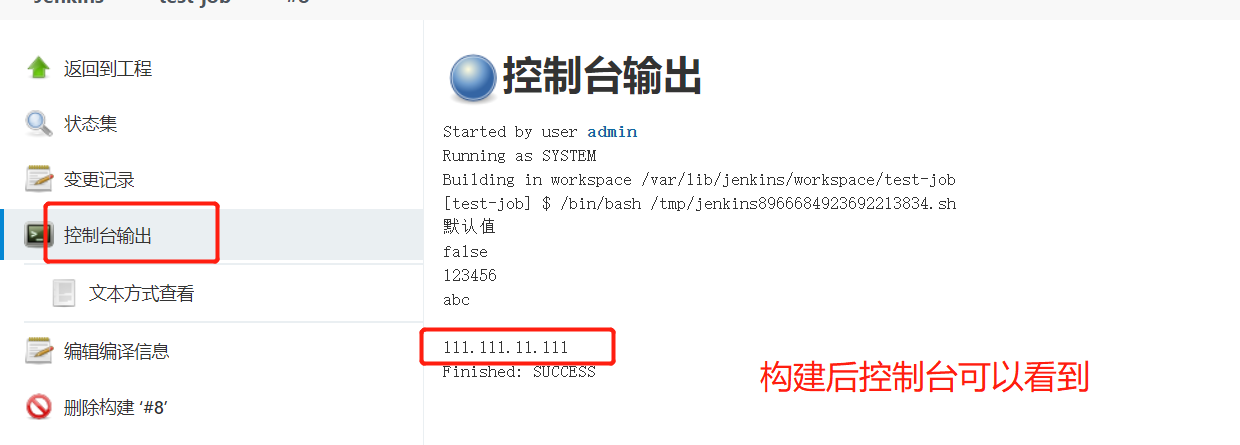
1.1.1、文本参数


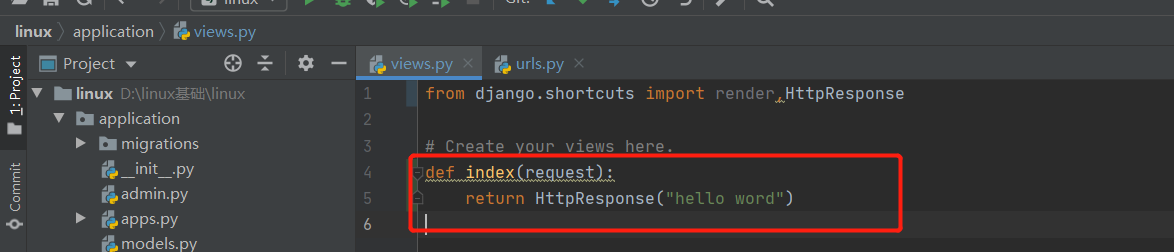
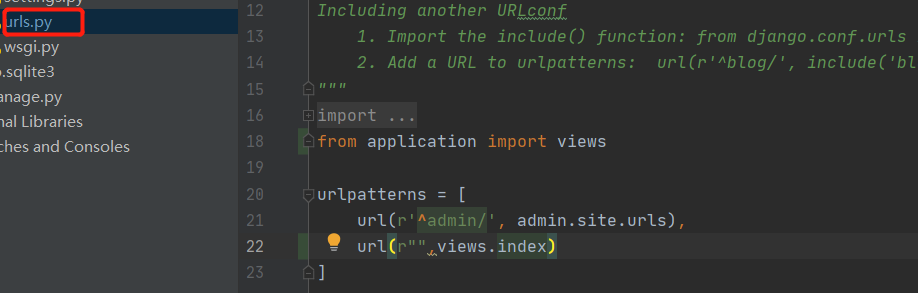
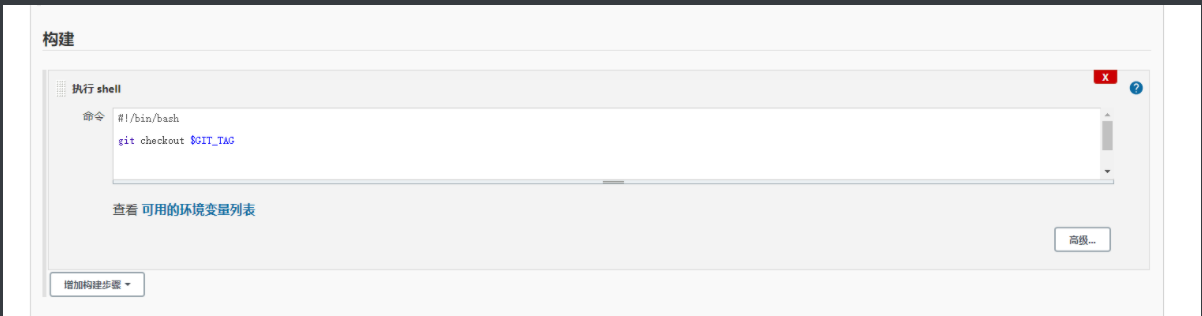
2、部署Django
安装git ,下载download——Windows版——选择64-bit Git for Windows Setup,下载好了,直接下一步安装,安装完之后点击git-bash,出现命令行窗口
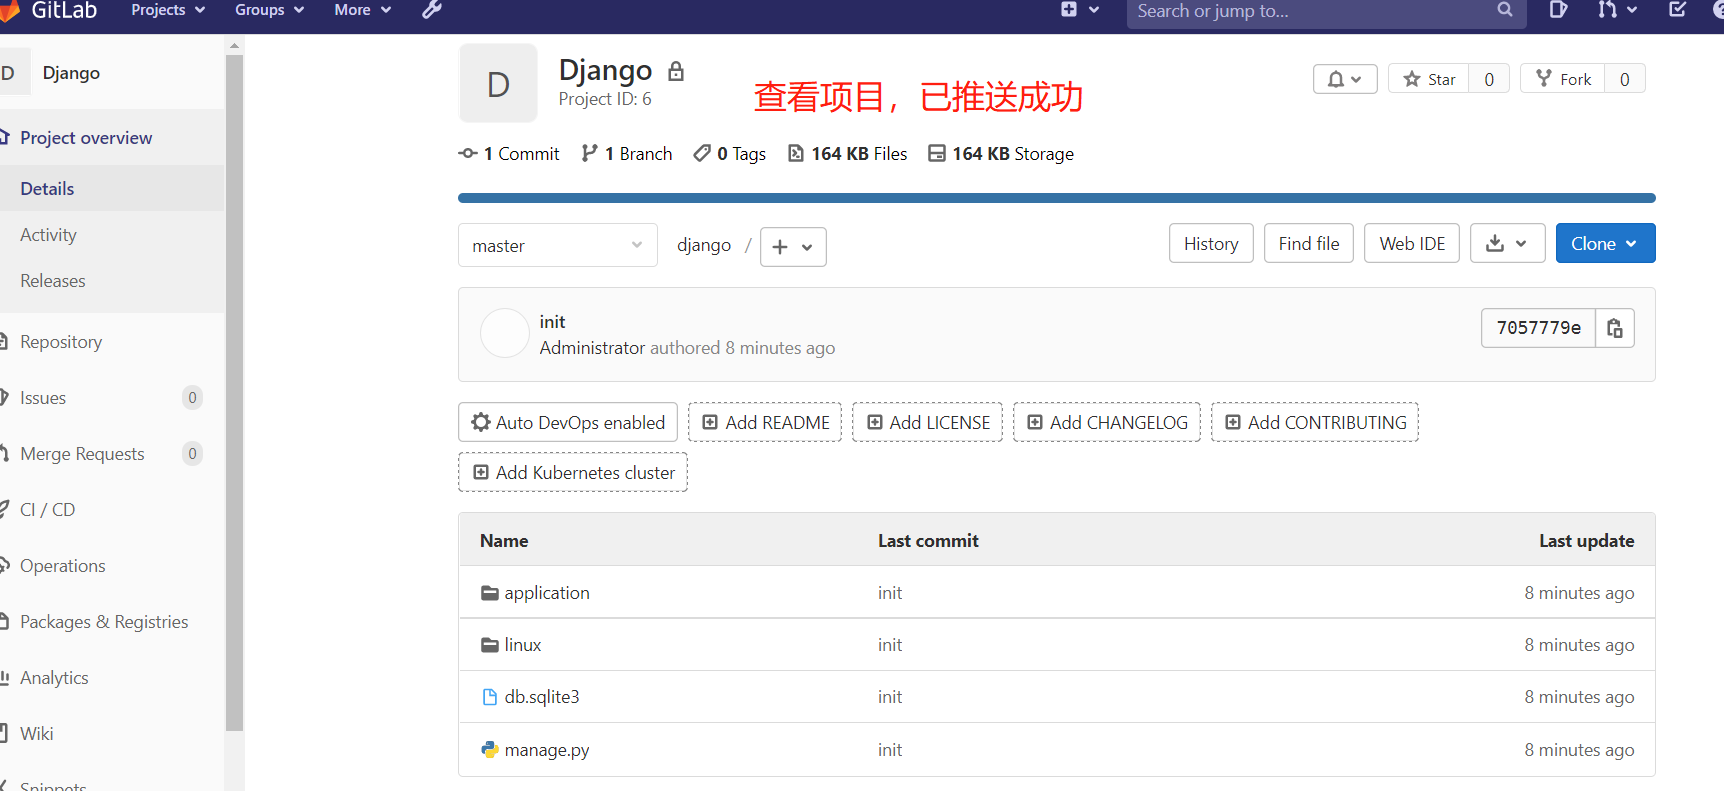
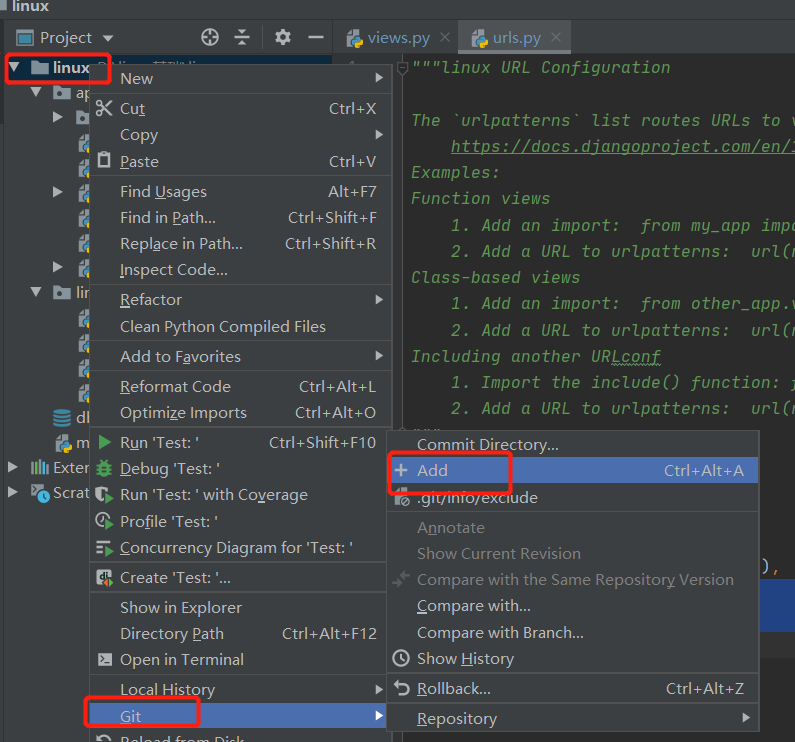
tiantian@LAPTOP-SQK3LOMS MINGW64 /d/linux基础/linux (master) tiantian@LAPTOP-SQK3LOMS MINGW64 /d/linux基础/linux $ git init tiantian@LAPTOP-SQK3LOMS MINGW64 /d/linux基础/linux (master) $ git config --global user.name "Administrator" tiantian@LAPTOP-SQK3LOMS MINGW64 /d/linux基础/linux (master) $ git config --global user.email "admin@example.com" tiantian@LAPTOP-SQK3LOMS MINGW64 /d/linux基础/linux (master) $ git remote add origin git@192.168.15.8:linux14/django.git tiantian@LAPTOP-SQK3LOMS MINGW64 /d/linux基础/linux (master) $ git add . tiantian@LAPTOP-SQK3LOMS MINGW64 /d/linux基础/linux (master) $ git commit -m 'init'
#此时,推送到远程仓库会报错,原因是没有公钥 tiantian@LAPTOP-SQK3LOMS MINGW64 /d/linux基础/linux (master) $ git push origin master The authenticity of host '192.168.15.8 (192.168.15.8)' can't be established. ED25519 key fingerprint is SHA256:jqZw2NcdtxhS9h2h0hhjicEQNMqaXInsw4zjb4o2kwY. This key is not known by any other names Are you sure you want to continue connecting (yes/no/[fingerprint])? Host key verification failed. fatal: Could not read from remote repository. Please make sure you have the correct access rights and the repository exists.
#生成公钥 tiantian@LAPTOP-SQK3LOMS MINGW64 /d/linux基础/linux (master) $ ssh-keygen Generating public/private rsa key pair. Enter file in which to save the key (/c/Users/tiantian/.ssh/id_rsa): Created directory '/c/Users/tiantian/.ssh'. Enter passphrase (empty for no passphrase): Enter same passphrase again: Your identification has been saved in /c/Users/tiantian/.ssh/id_rsa Your public key has been saved in /c/Users/tiantian/.ssh/id_rsa.pub The key fingerprint is: SHA256:7CDGuE+6jPKFYJPohJYsHNN05QgWekeZpB9z7719iCA tiantian@LAPTOP-SQK3LOMS The key's randomart image is: +---[RSA 3072]----+ | =o++. | | = =oo | | + + = o | |= *oo +.. | |=X. +.. S. | |*..+ . E... | | .o o o.... . | |.o = .o. . | |o.=.. . .. | +----[SHA256]-----+
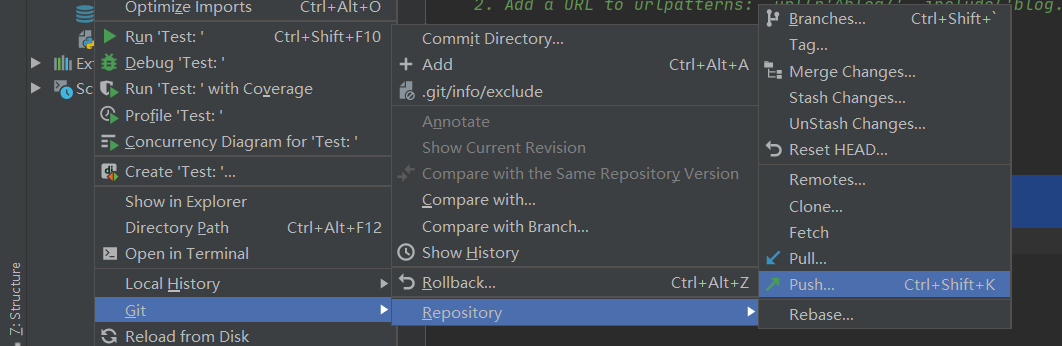
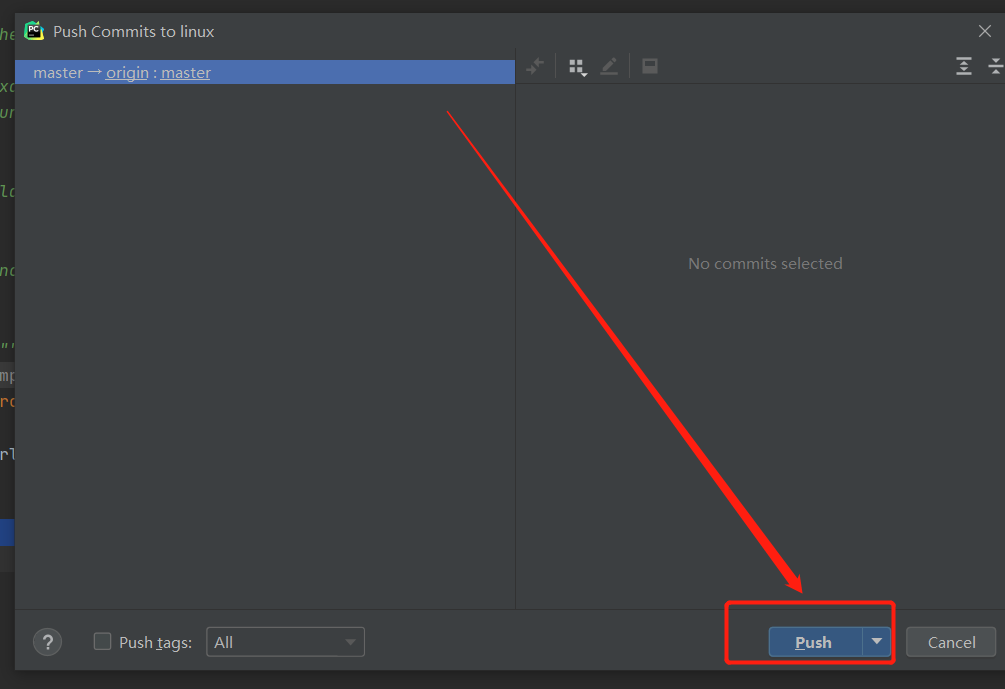
#查看公钥,将公钥复制到gitlab-preferences-ssh key,然后再推送,就成功了 tiantian@LAPTOP-SQK3LOMS MINGW64 /d/linux基础/linux (master) $ cat ~/.ssh/id_rsa.pub ssh-rsa AAAAB3NzaC1yc2EAAAADAQABAAABgQCXJOdx4y1fWt2j55pTN/n4OKqFNILQ5MpKzsjUfo5oT7i9q6jESNwu9la286+JLBNUdkmq/A9eCXXJi9cH8ESofOQAdzv+dS0I6ofZ21g6WVlIHocjeTYI1wP7WFX6b63H6xcu6RCPL9F4J9mX0zUTLdYj/j1FDYWADHzI/SKrhtW4p3qKKnfx5Pucoulr2HRPkcqWsBNljHpDb3OZijfui1UuRWYPhQPqPrksk5ah5Y2XrNIuAzD1bh7mgW9JcaFlzoUcW2rnRzm8wby7bfkUWu+JQbVptKexQN7m01wOZyOJfmPljdCKlhJnfVoUHsPe+OUA6YbSnPTo4VAEAiBuzOsEvtBJu7Cdbn/fbGhH7Bvb0ISilpNkF/aCIyBZgxngmTmgHdUvRGjC6/zADwkt3HvCYt5DTIt02urhANQfmmrI7ZybtI2VaISg91ak+BJigYV6GVU9ieUVcGAz1iVF7PnrqugIUHwo4UjBeXd643YLhPCR3wHx7Cw6Ni94Erc= tiantian@LAPTOP-SQK3LOMS tiantian@LAPTOP-SQK3LOMS MINGW64 /d/linux基础/linux (master) $ git push origin master
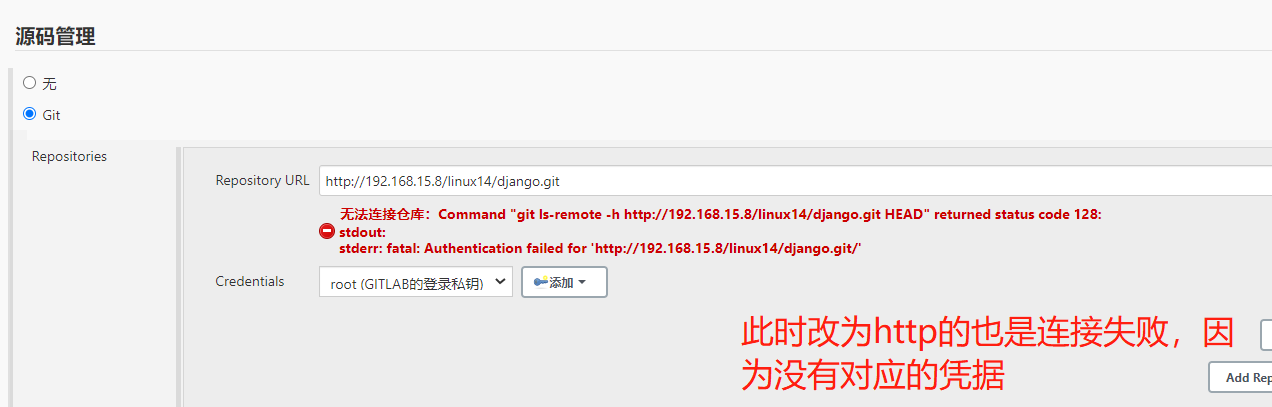
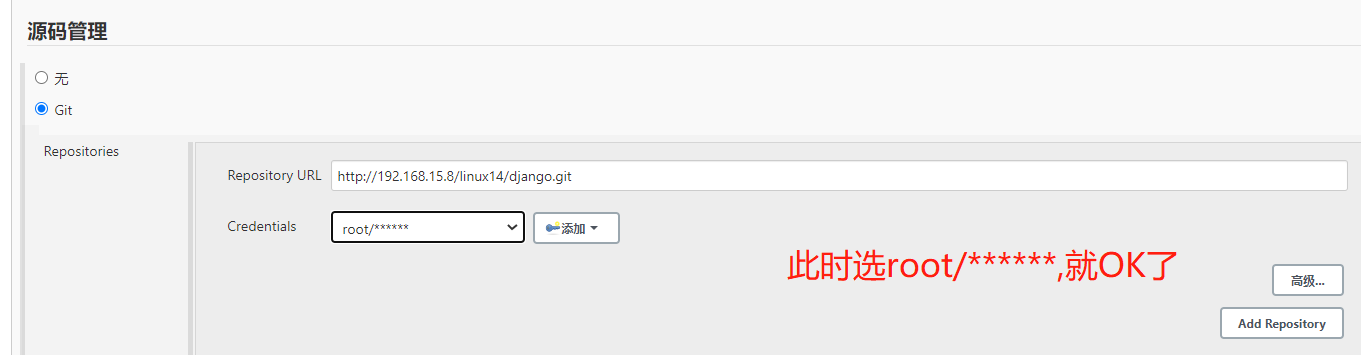
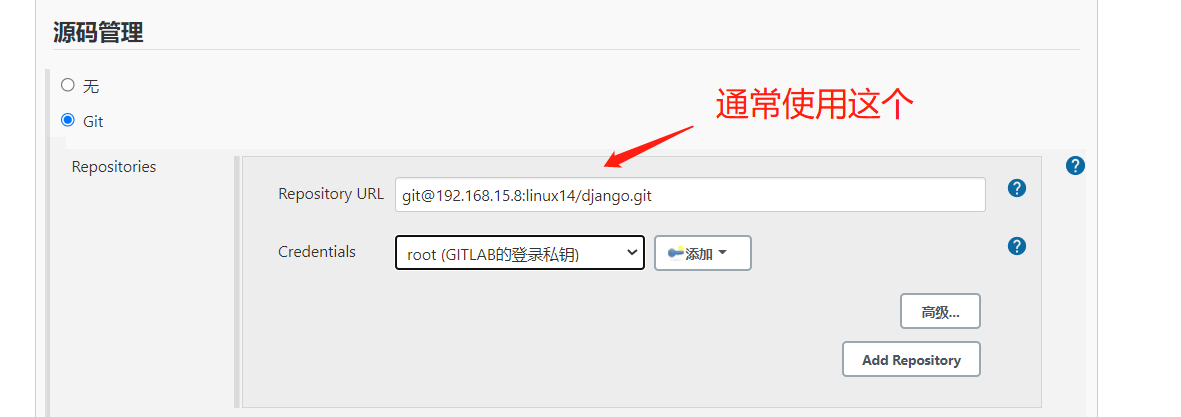
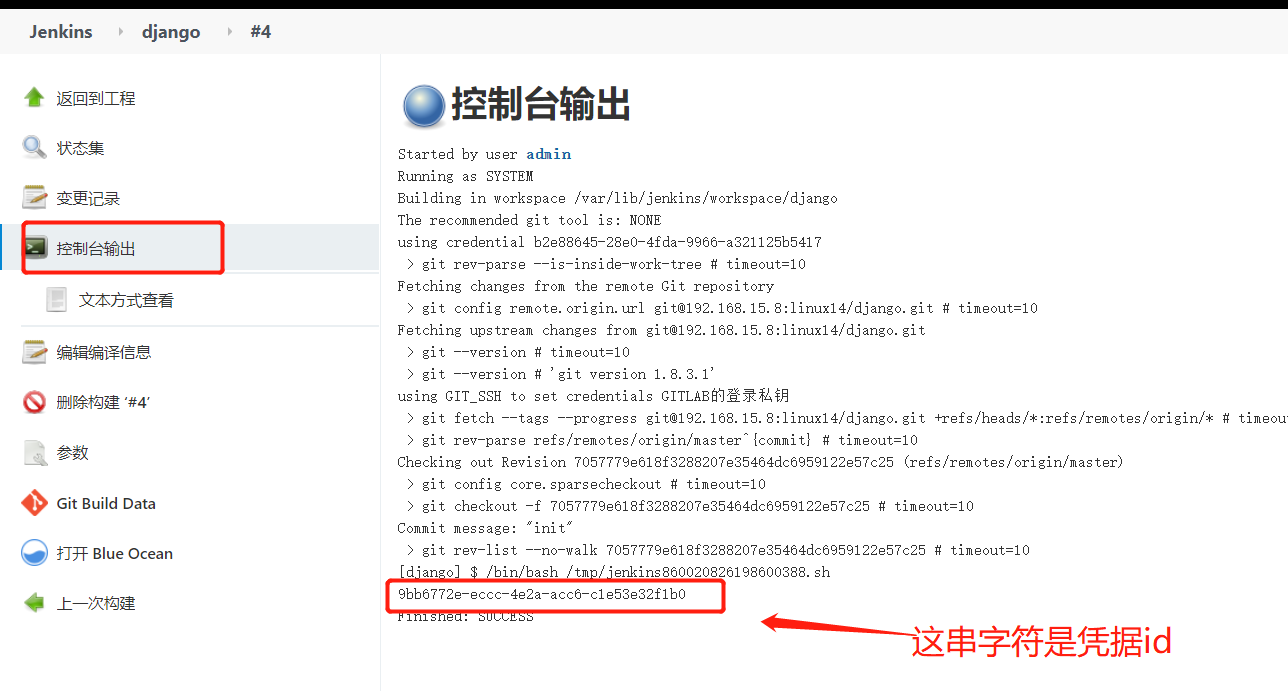
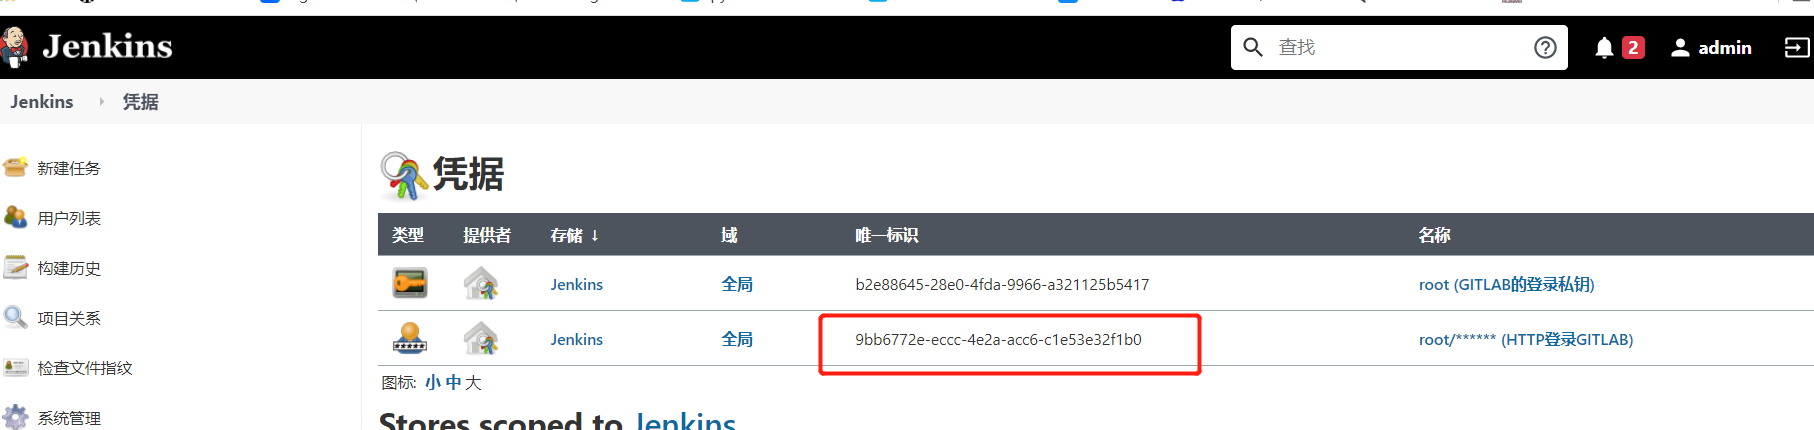
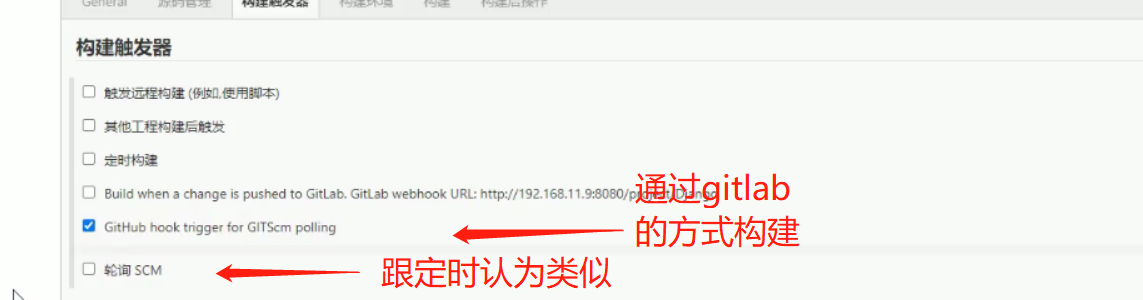
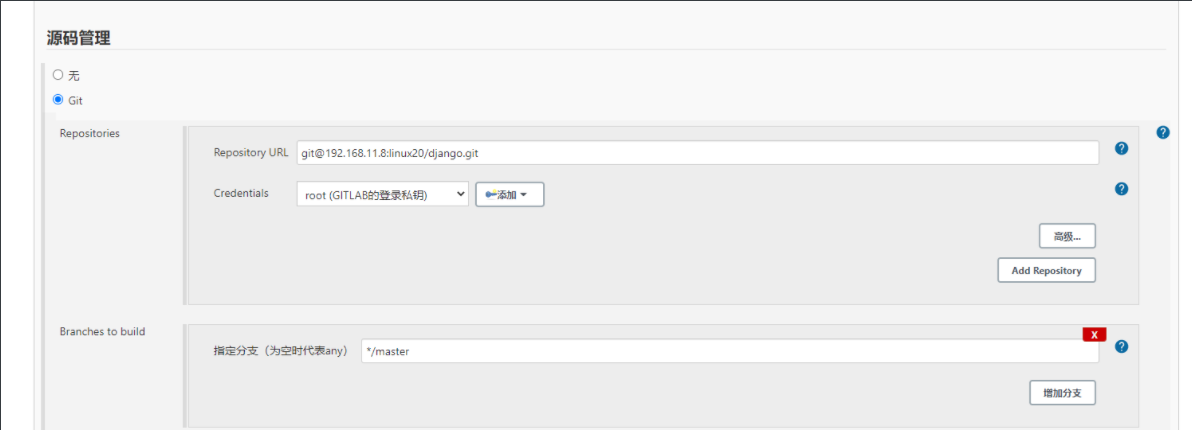
如何让jenkins拉取gitlab上的代码呢?选择源码管理

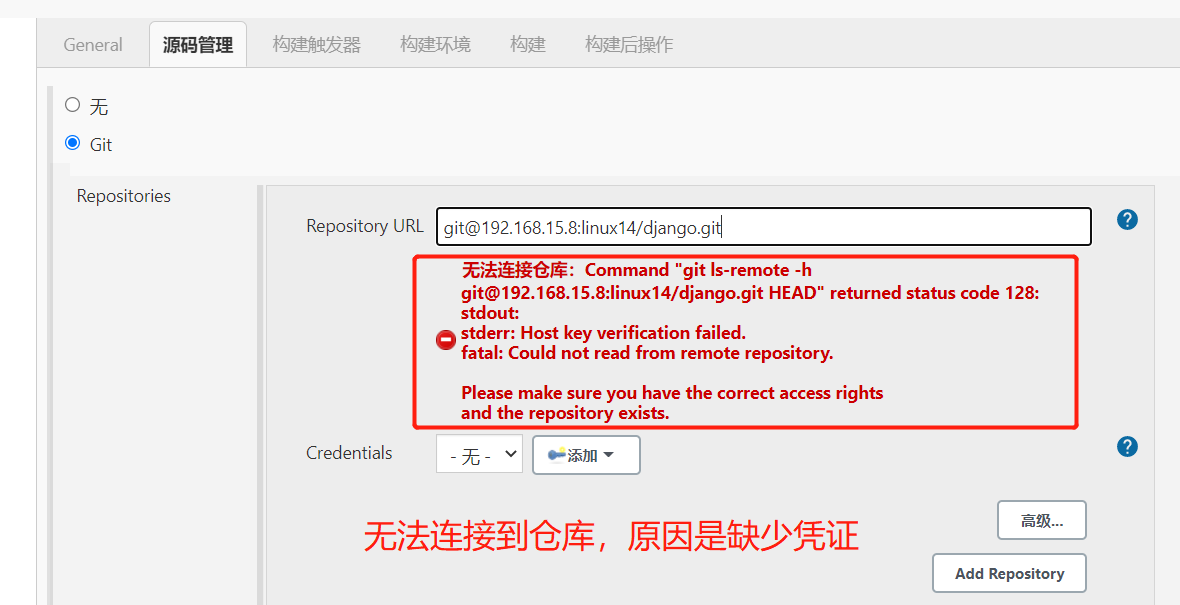
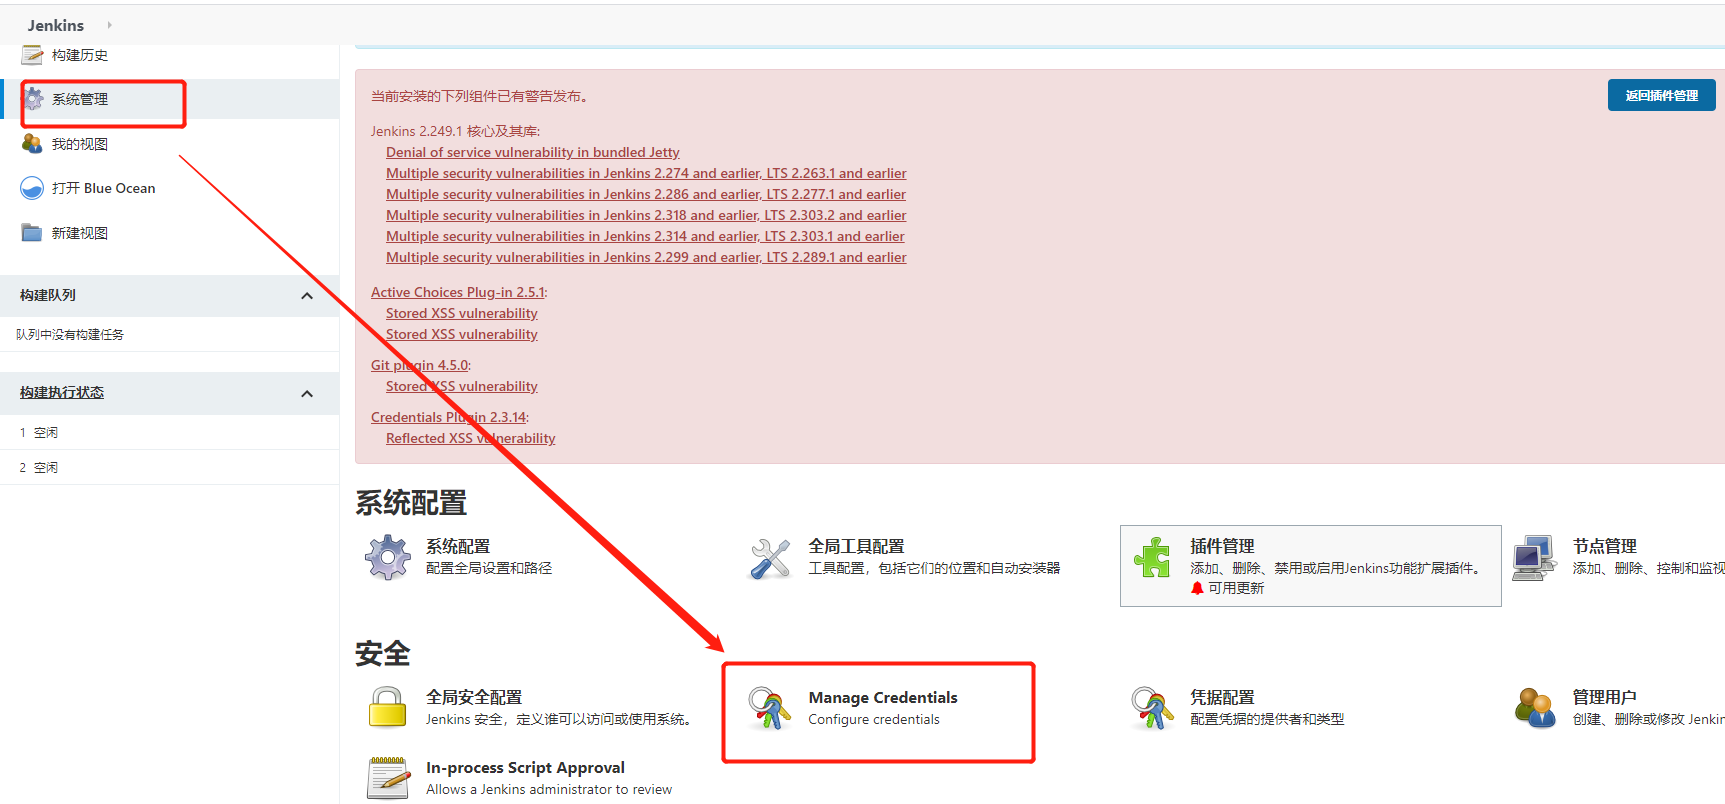
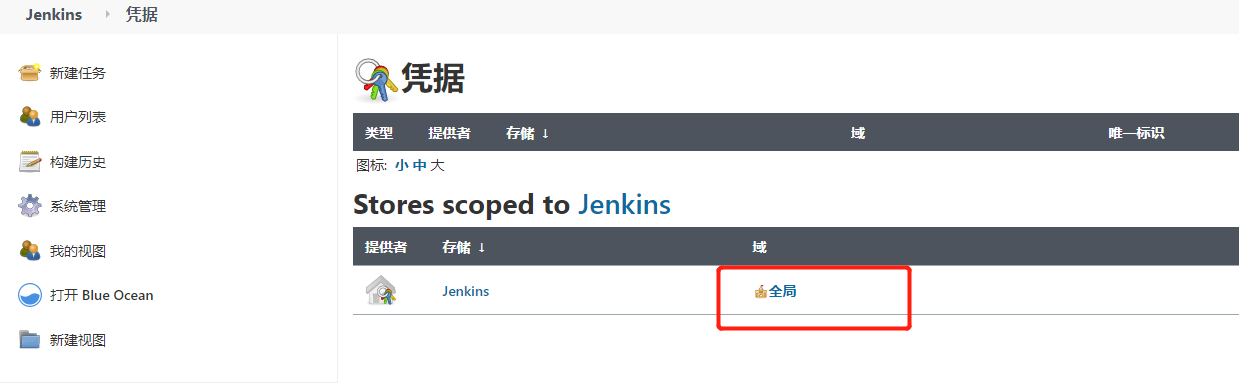
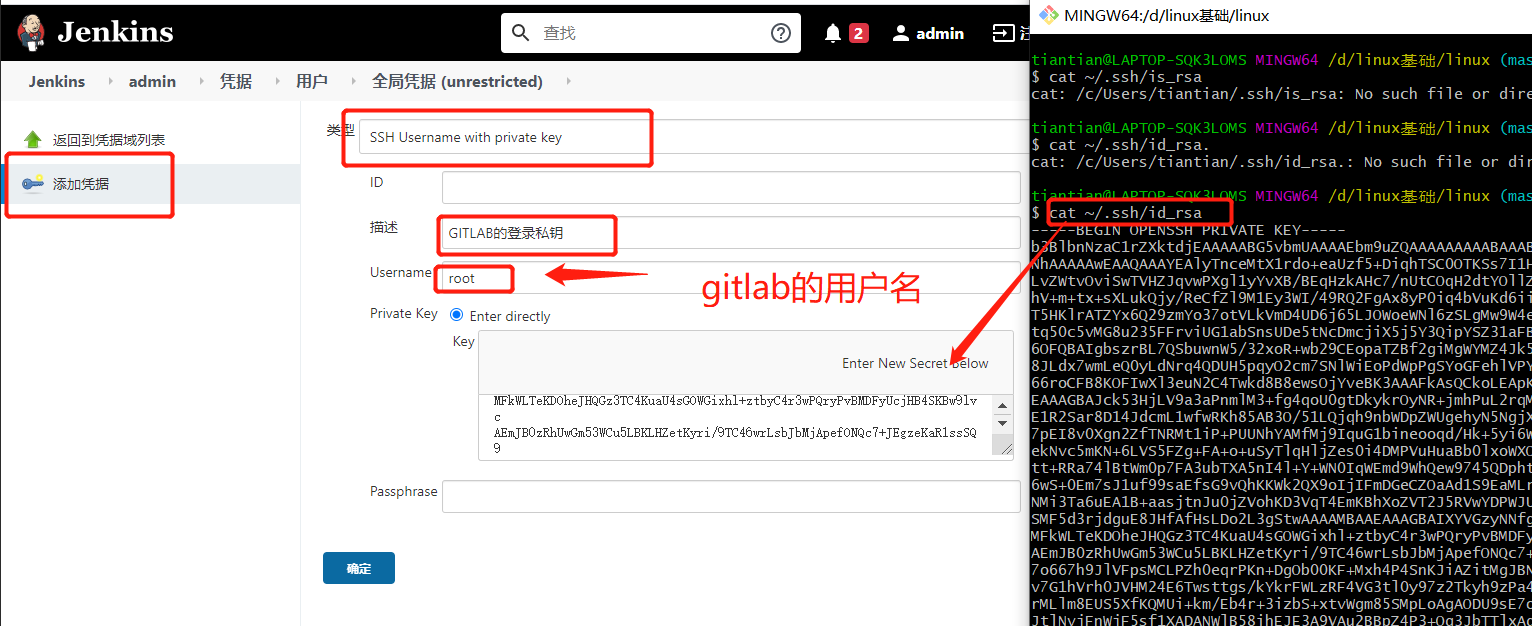


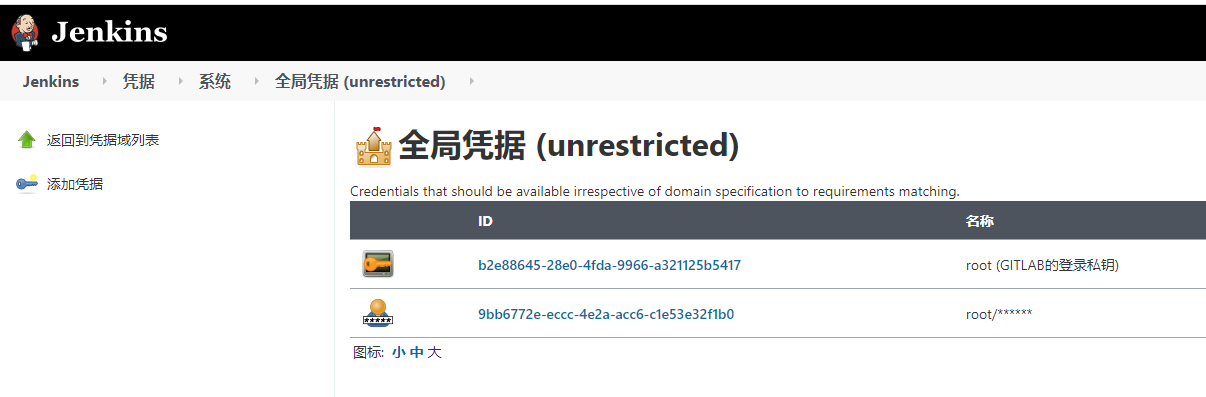
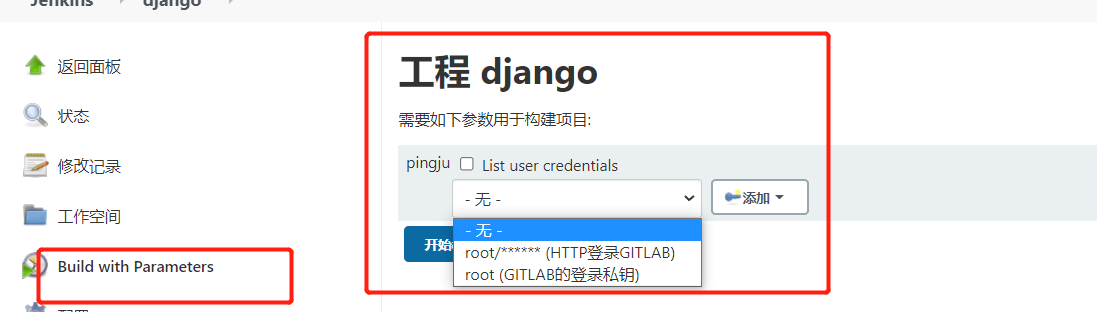
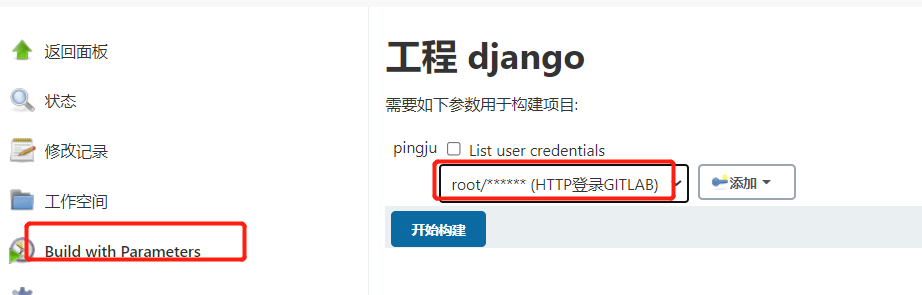
去生成对应的凭据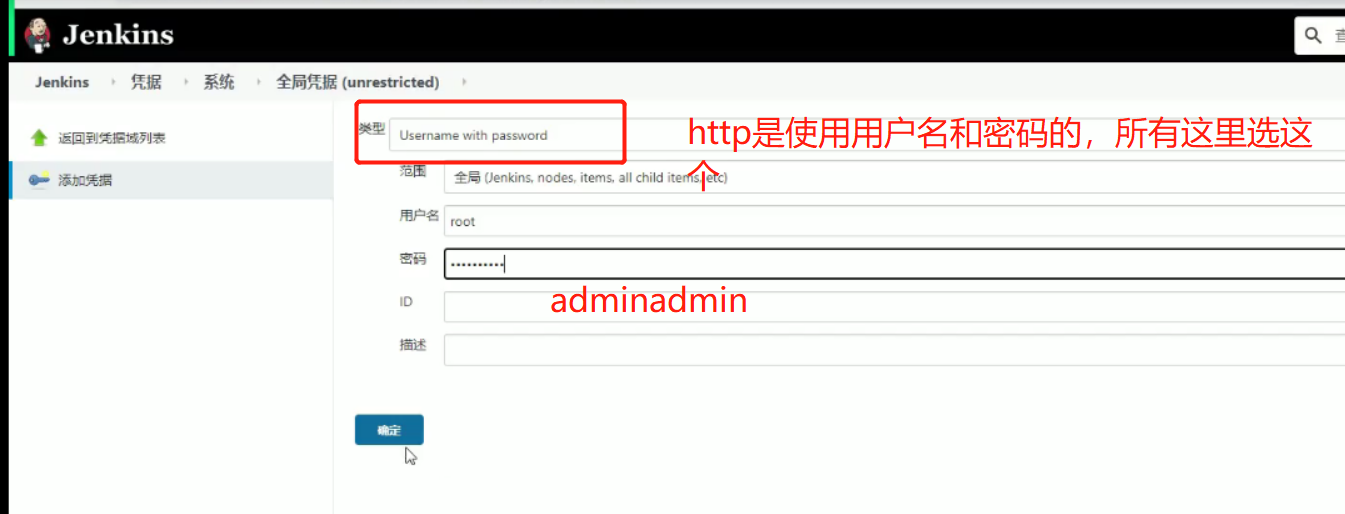
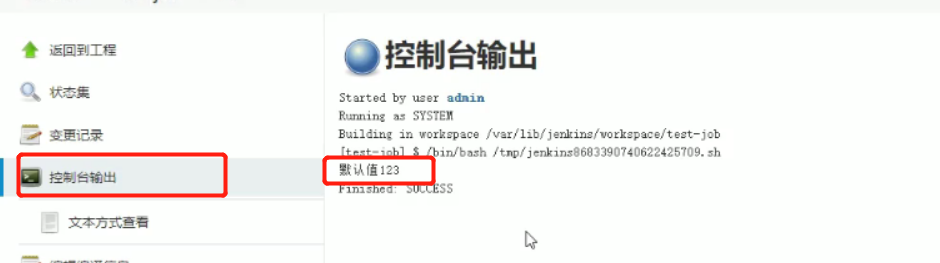
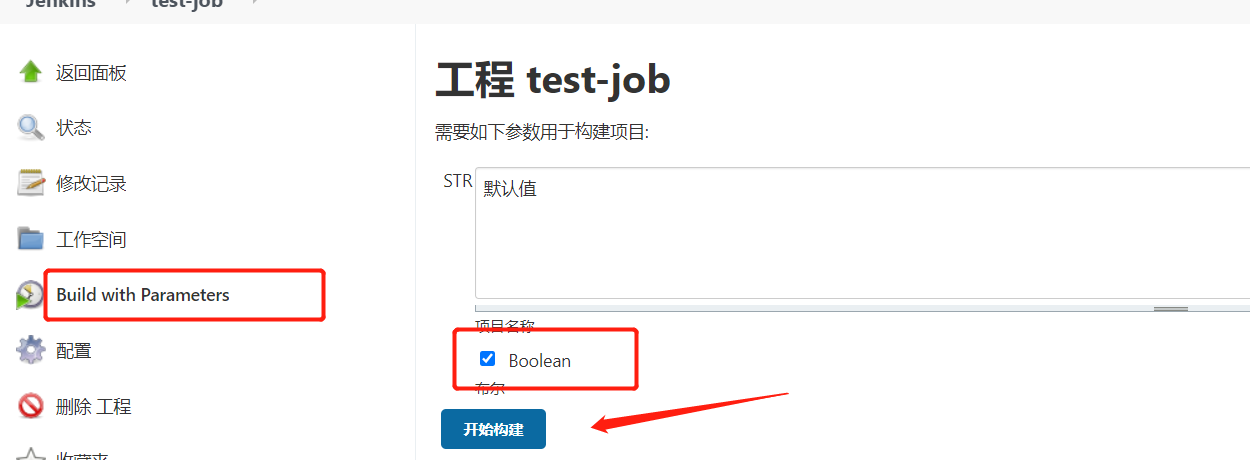
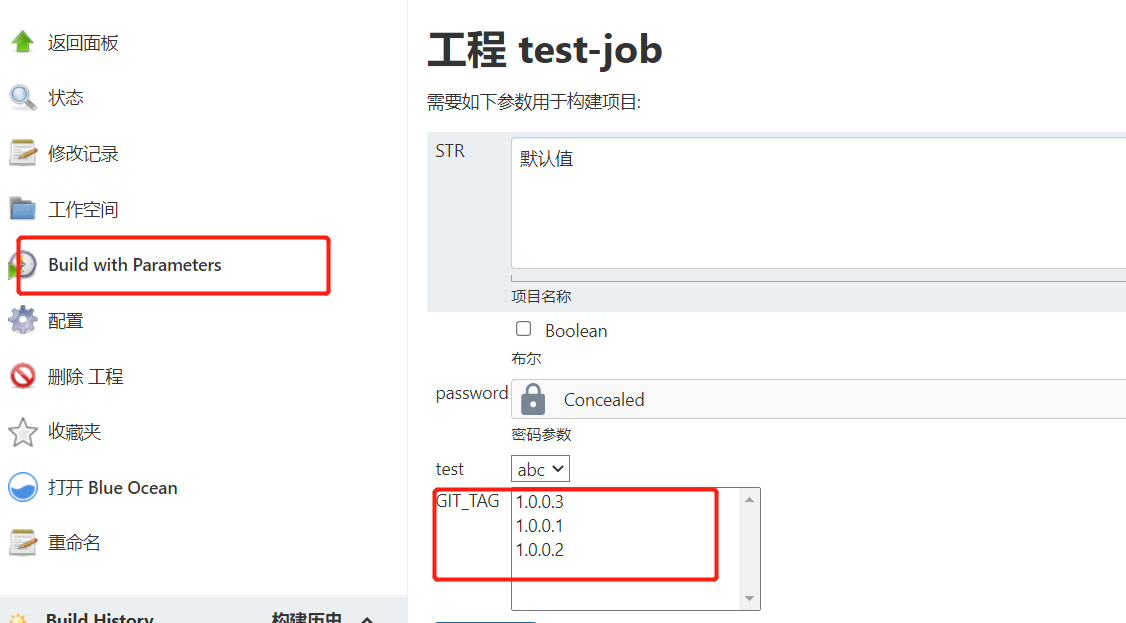
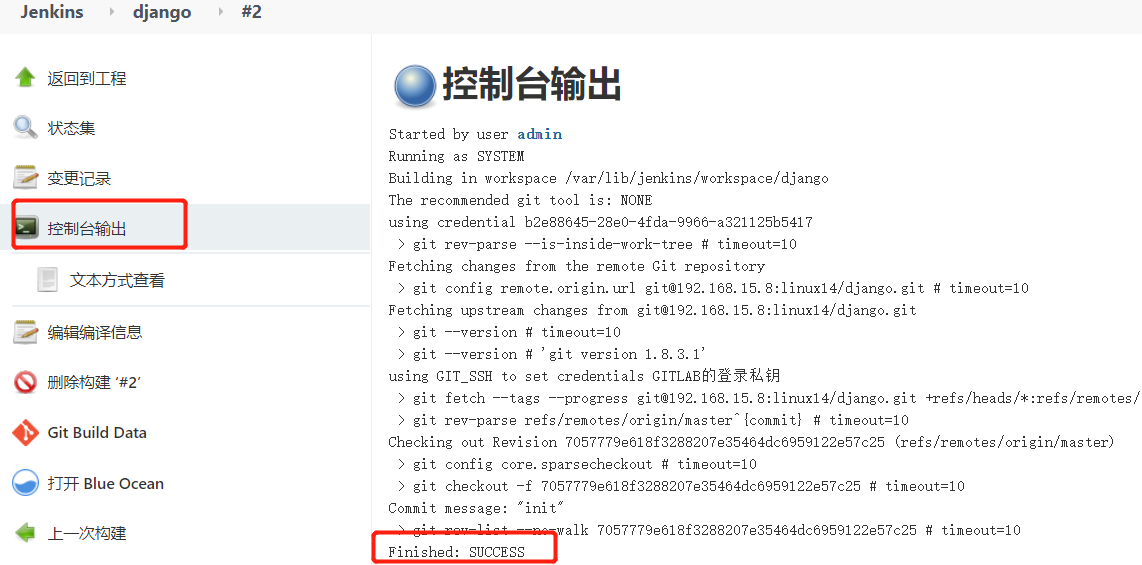
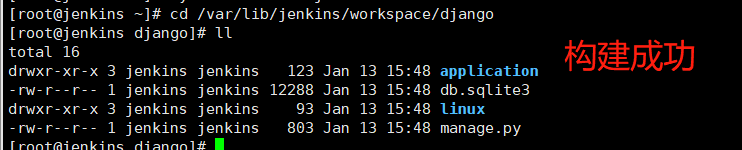
保存之后点立即构建
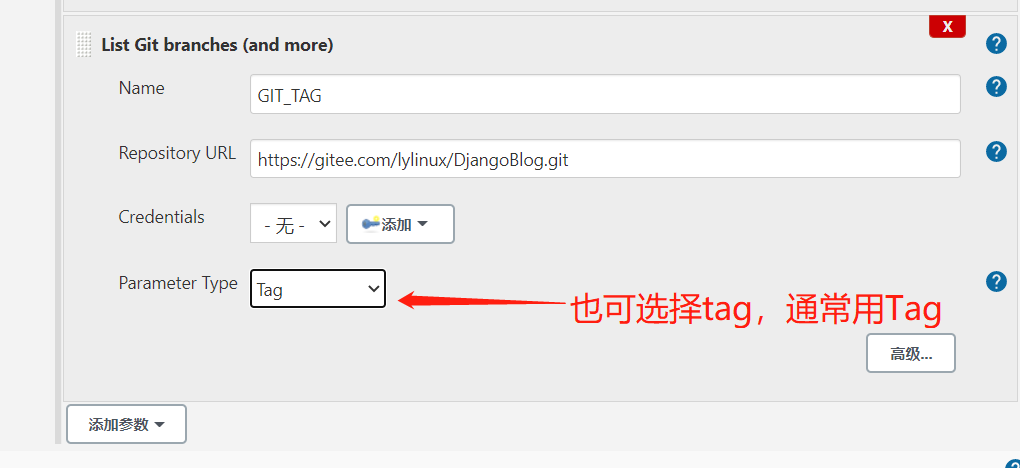
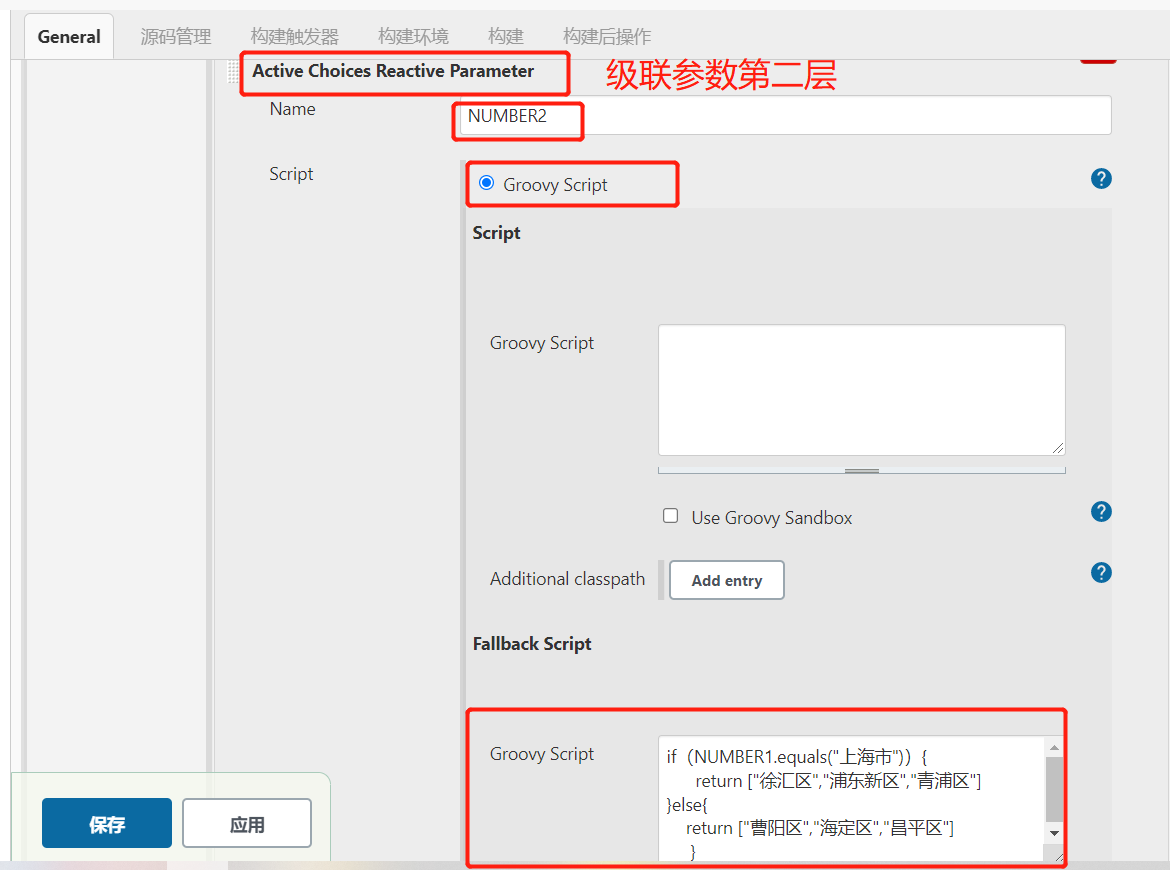
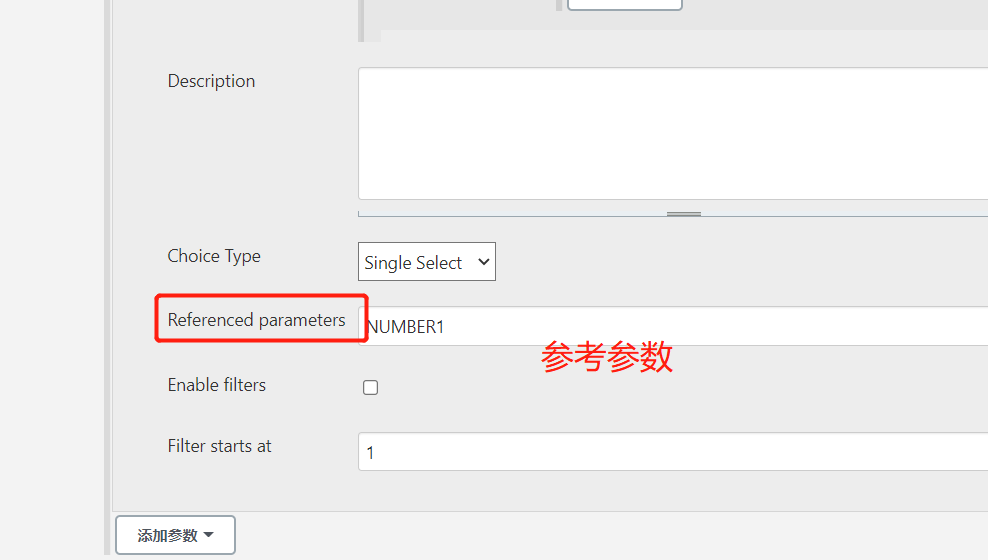
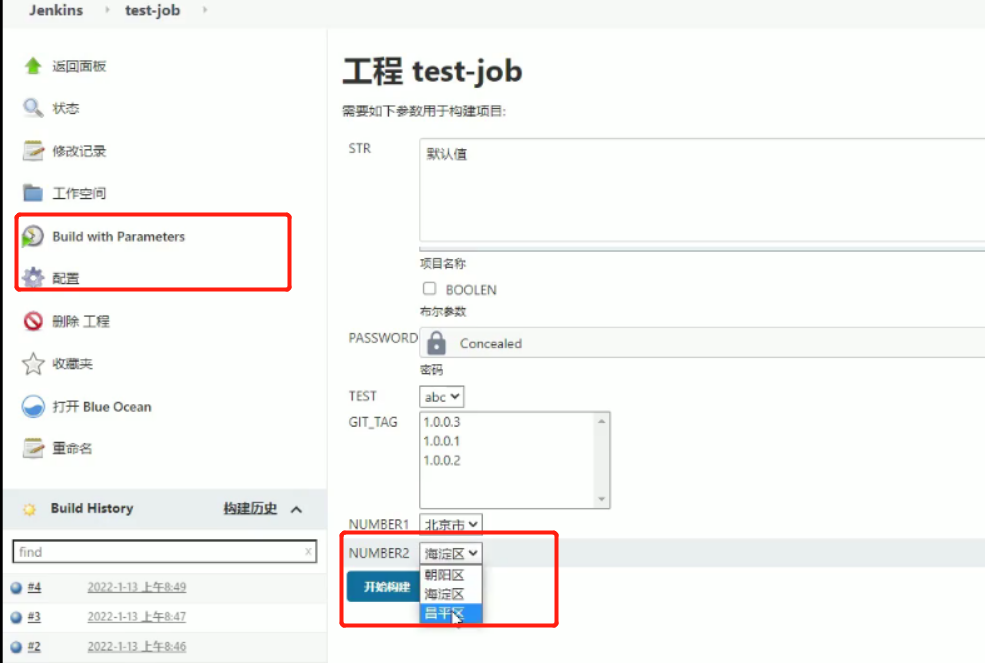
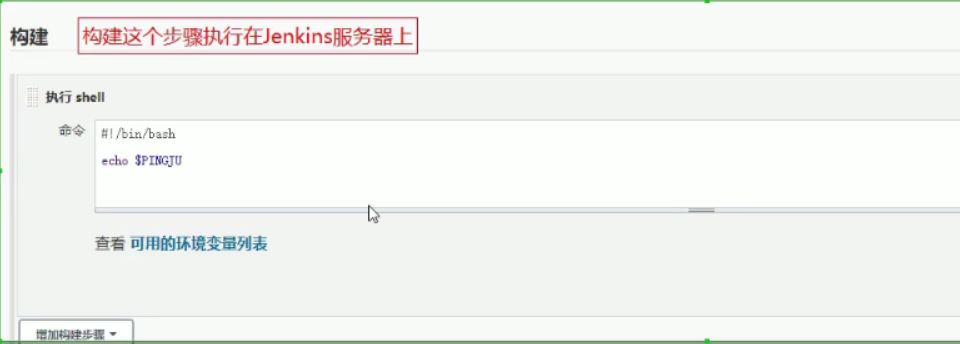
参数补充:
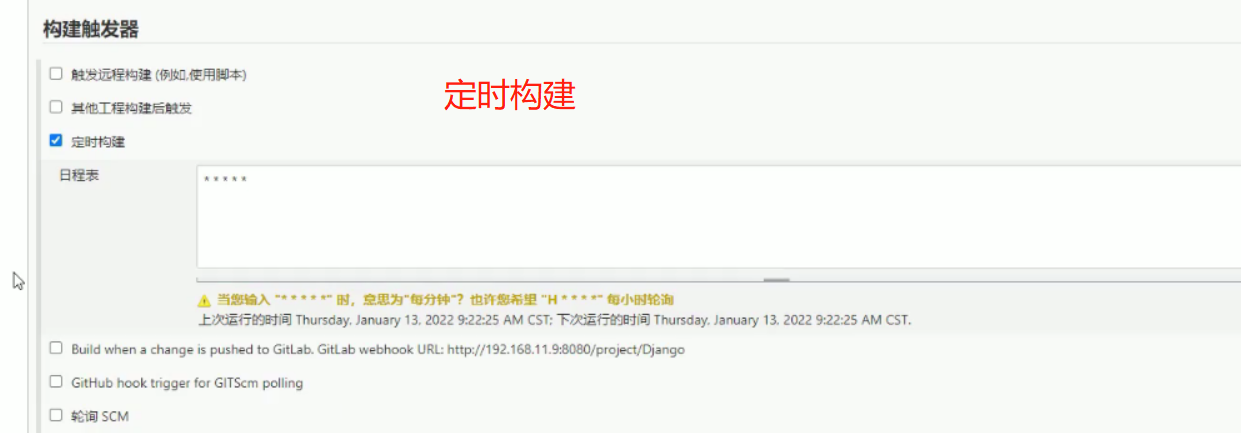
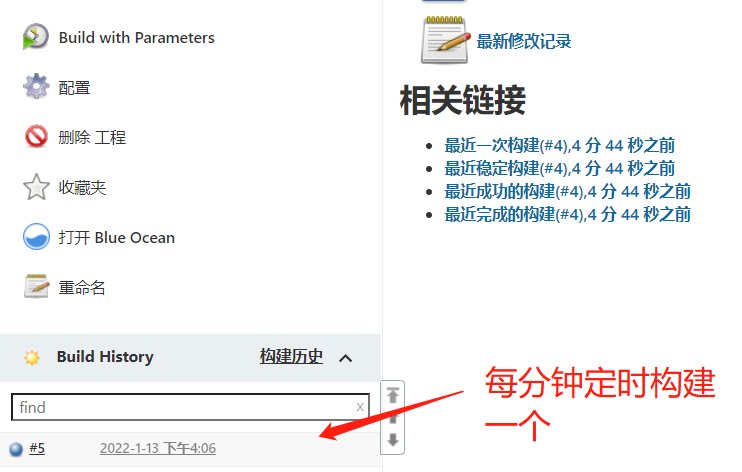
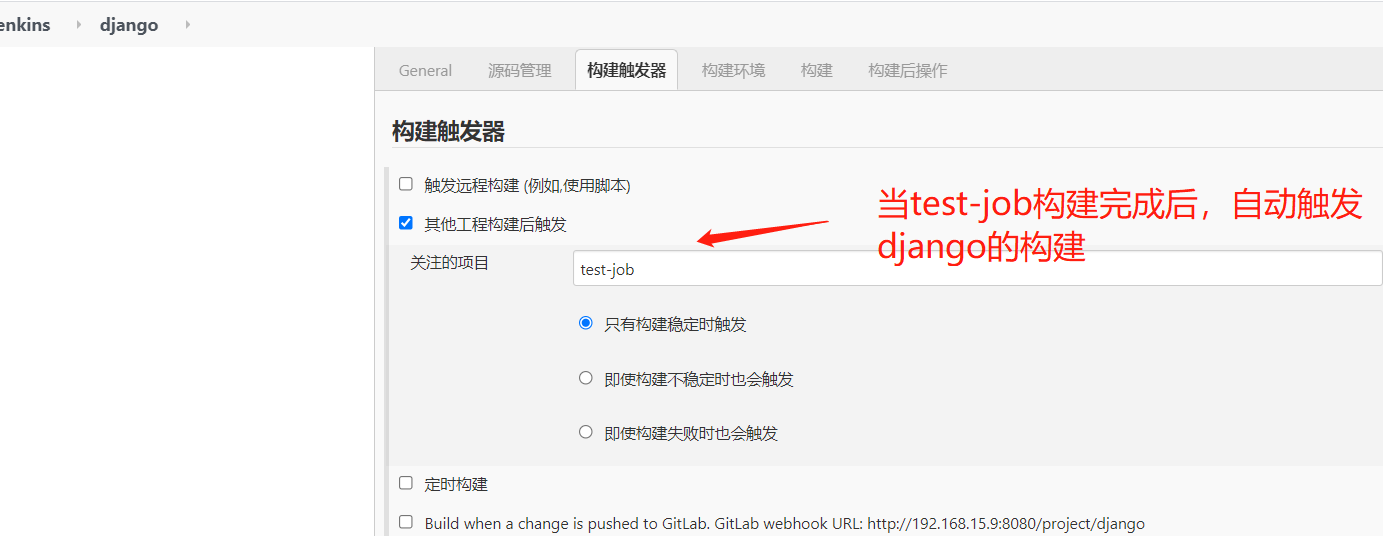
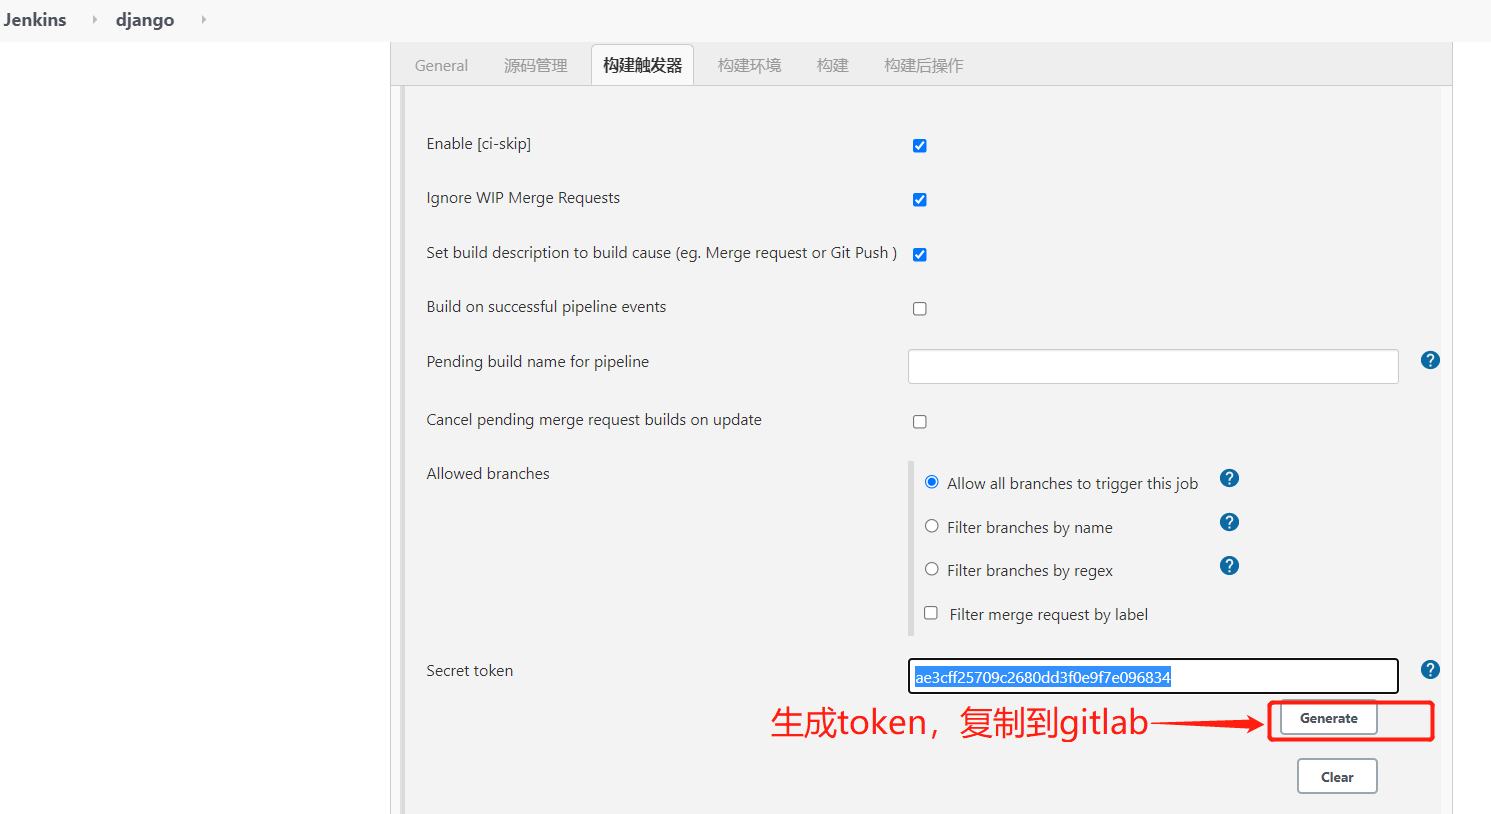
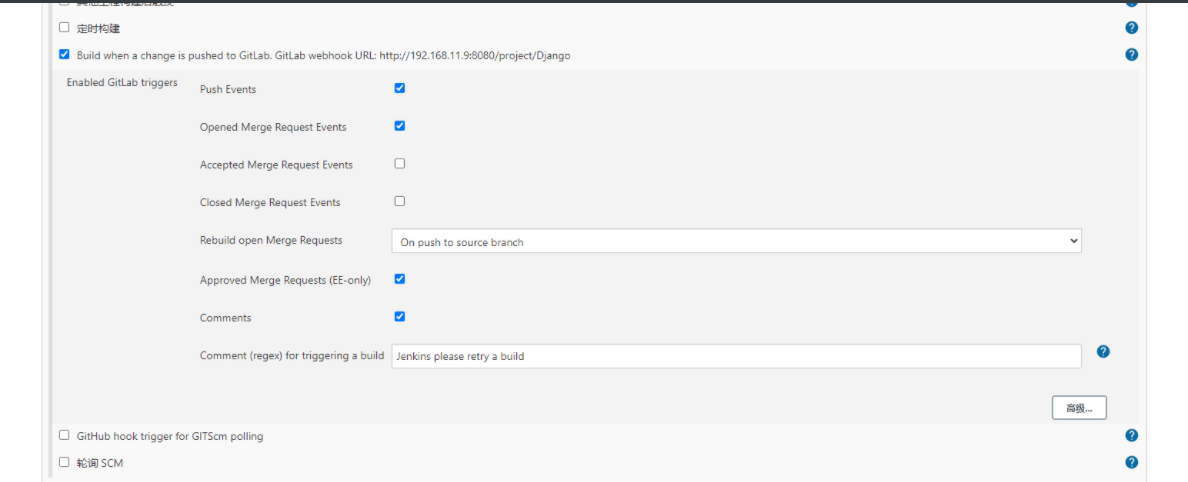
构建触发器
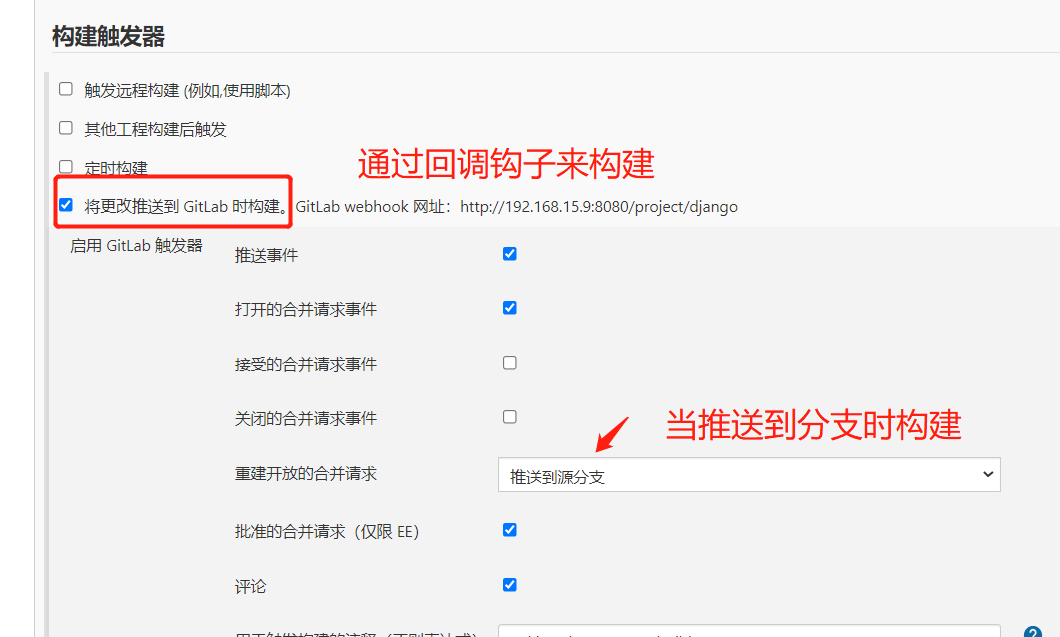
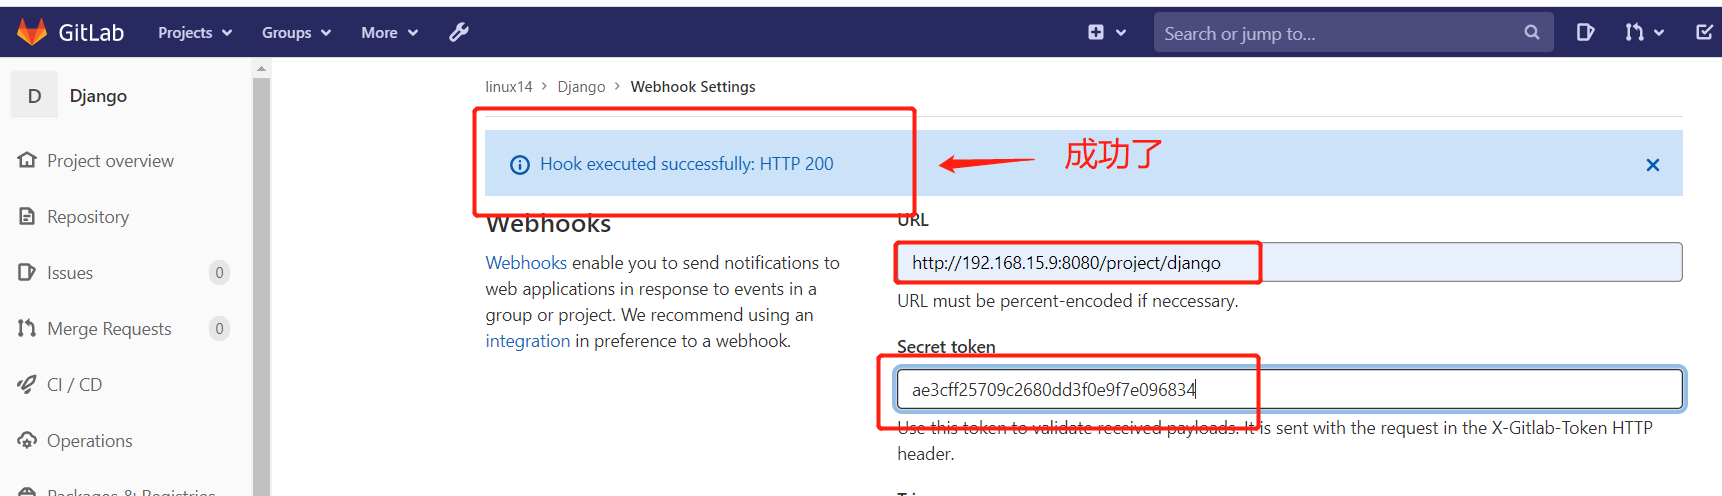
复制 上图的链接

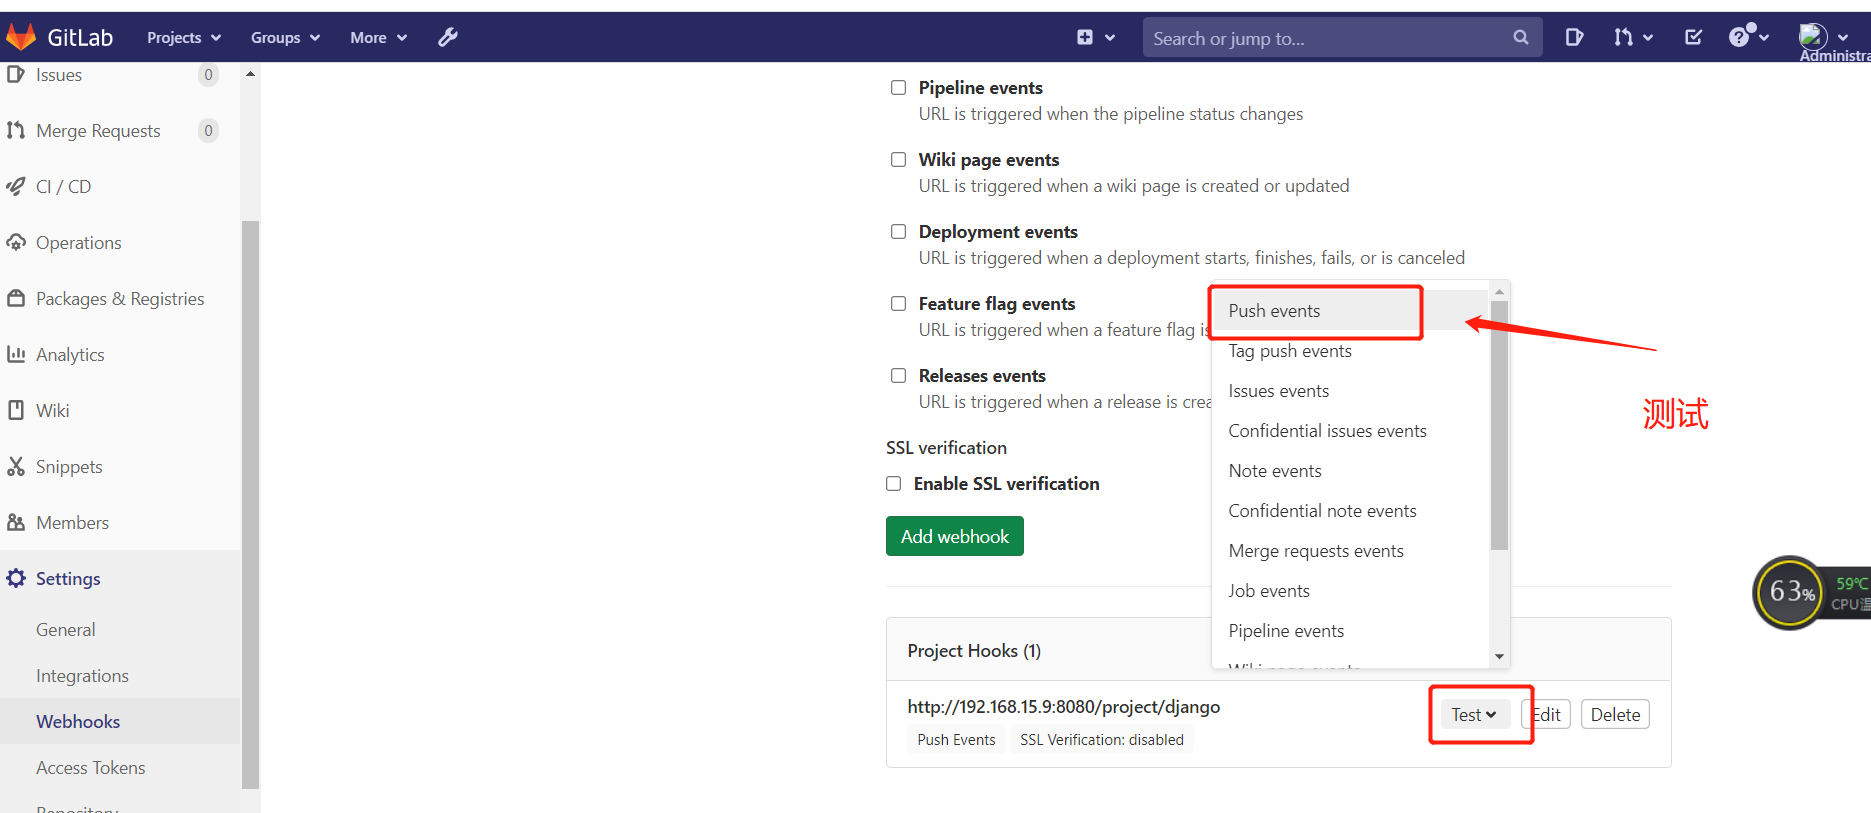
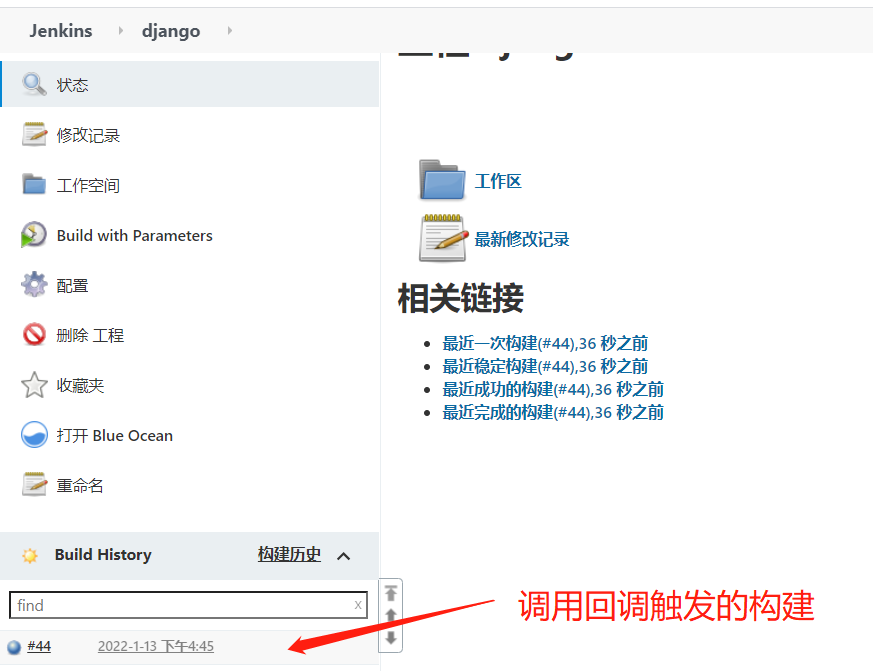
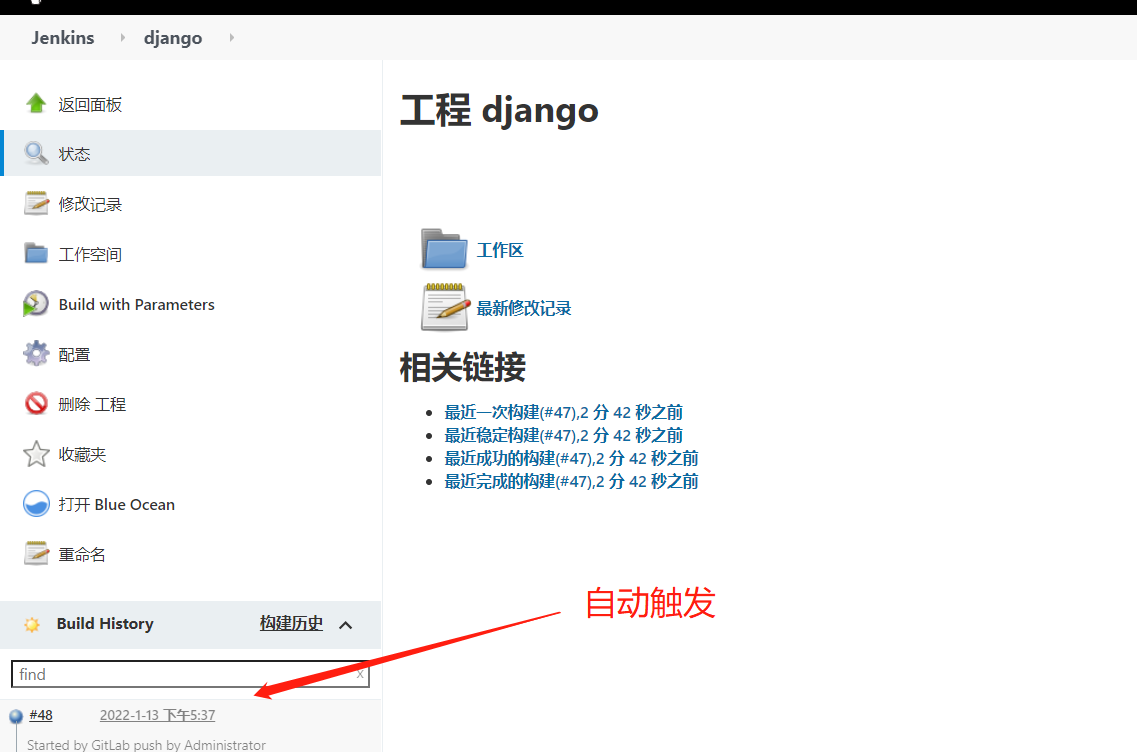
只要代码一提交立马构建

2.1、部署实验环境
yum install python3 python3-devel -y
pip3 install django==2.2.2
pip3 install uwsgi
mkdir /opt/linux
yum install nginx -y
vim /etc/nginx/nginx.conf
user nginx;
worker_processes auto;
error_log /var/log/nginx/error.log;
pid /run/nginx.pid;
events {
worker_connections 1024;
}
http {
log_format main '$remote_addr - $remote_user [$time_local] "$request" '
'$status $body_bytes_sent "$http_referer" '
'"$http_user_agent" "$http_x_forwarded_for"';
access_log /var/log/nginx/access.log main;
sendfile on;
tcp_nopush on;
tcp_nodelay on;
keepalive_timeout 65;
types_hash_max_size 4096;
include /etc/nginx/mime.types;
default_type application/octet-stream;
include /etc/nginx/conf.d/*.conf;
}
vim /etc/nginx/conf.d/django.conf
server {
# 监听的端口
listen 80;
# 配置域名
server_name bbs.test.com;
# 配置路径
location / {
# 加载Nginx代理uwsgi的配置项
include uwsgi_params;
# 指定uwsgi的访问地址
uwsgi_pass 127.0.0.1:8000;
# 连接uwsgi的超时时间
uwsgi_read_timeout 2;
# 自定义uwsgi代理项目的路径及配置项
uwsgi_param UWSGI_SCRIPT linux.wsgi;
# 指定python项目的路径
uwsgi_param UWSGI_CHDIR /opt/linux;
# 索引文件
index index.html index.htm;
# 客户端上传文件的最大值
client_max_body_size 35m;
}
}
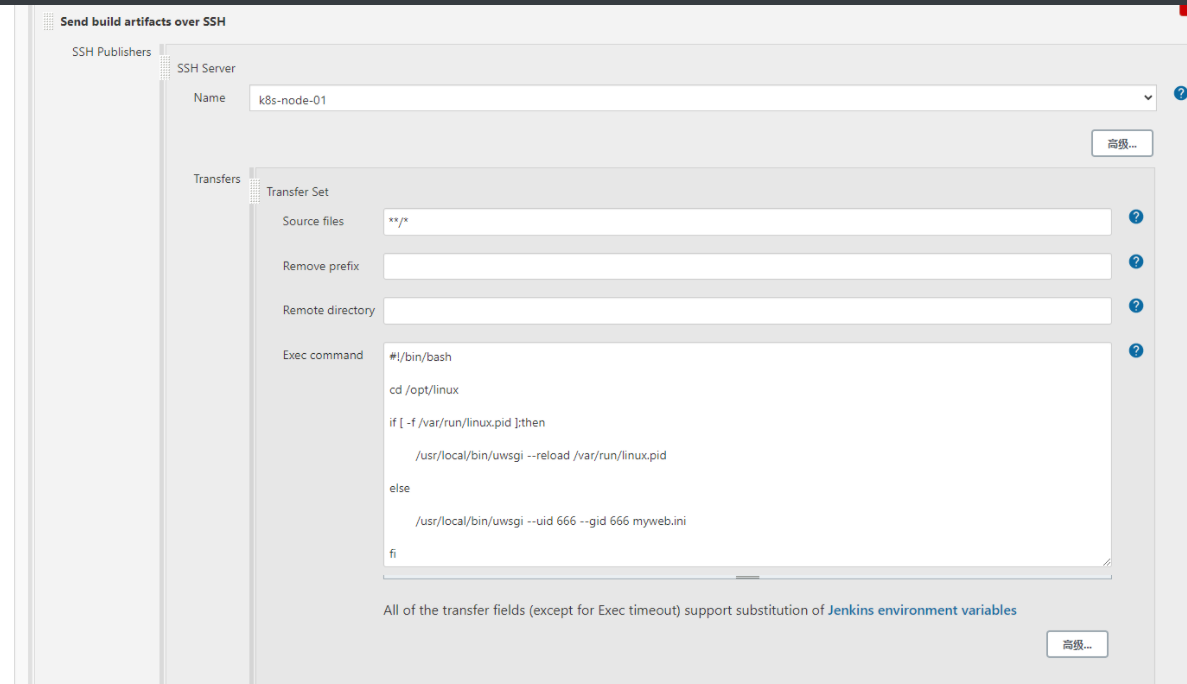
2.2、在Jenkins中增加实验环境
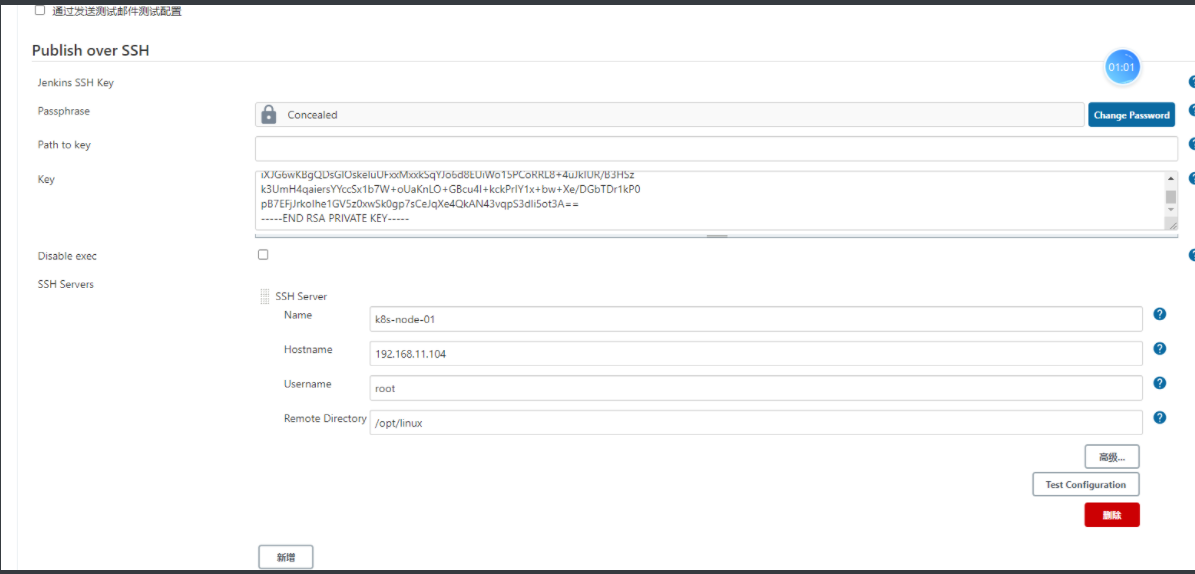
2.3、部署环境

 浙公网安备 33010602011771号