04上 sersync 实时自动故障切换
sersync = inotify + rsync +守护进程 实现NFS的实时同步
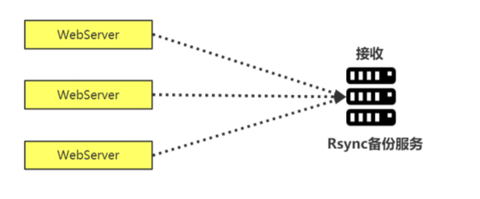
实时同步:自动故障切换
监控nfs中的/data 目录,备份到rsync服务器的/sersync目录
nfs中的/data 挂载到web01服务器的/var/www/html/img
nfs中的/data 挂载到web02服务器的/var/www/html/upload
nfs服务器宕机,web01和web02重新挂载到rsync服务器的/sersync目录
1 准备服务器
| 主机 | ip | 身份 |
|---|---|---|
| nfs | 192.168.15.31 | 服务端 |
| rsync | 192.168.15.41 | 服务端 |
| web01 | 192.168.15.7 | 客户端 |
| web02 | 192.168.15.8 | 客户端 |
2 nfs服务器配置参考下面:

上面部署完成后,配置sersync
1 安装依赖环境
yum install -y inotify-tools rsync2 下载sersync包
wget https://raw.githubusercontent.com/wsgzao/sersync/master/sersync2.5.4_64bit_binary_stable_final.tar.gz3 解压安装
tar -xf sersync2.5.4_64bit_binary_stable_final.tar.gz -C /usr/local4 配置sersync
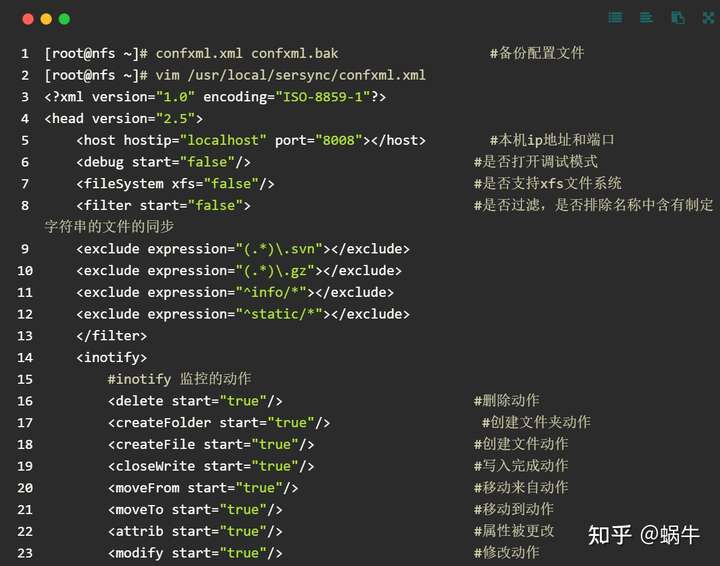
vi /usr/local/GNU-Linux-x86/confxml.xml配置以下内容:
<?xml version="1.0" encoding="ISO-8859-1"?>
<head version="2.5">
<host hostip="localhost" port="8008"></host>
<debug start="false"/>
<fileSystem xfs="false"/>
<filter start="false">
<exclude expression="(.*)\.svn"></exclude>
<exclude expression="(.*)\.gz"></exclude>
<exclude expression="^info/*"></exclude>
<exclude expression="^static/*"></exclude>
</filter>
<inotify>
<delete start="true"/>
<createFolder start="true"/>
<createFile start="true"/>
<closeWrite start="true"/>
<moveFrom start="true"/>
<moveTo start="true"/>
<attrib start="true"/>
<modify start="true"/>
</inotify>
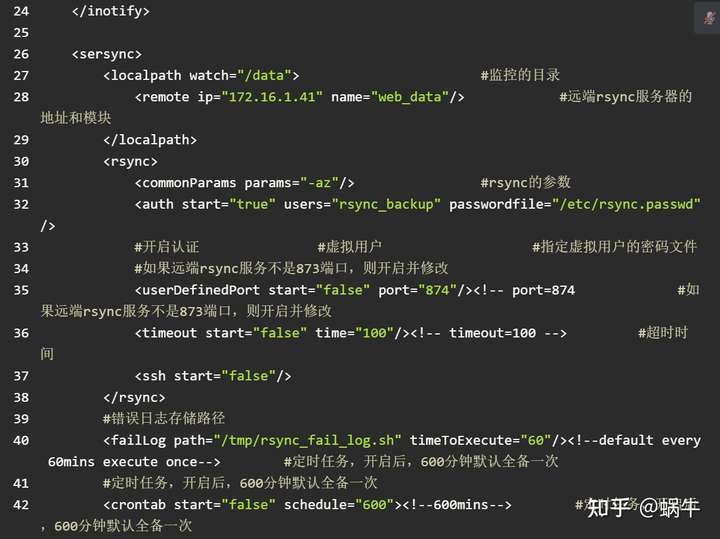
<sersync>
<localpath watch="/data">
<remote ip="172.16.1.41" name="sersync"/>
<!--<remote ip="192.168.8.39" name="tongbu"/>-->
<!--<remote ip="192.168.8.40" name="tongbu"/>-->
</localpath>
<rsync>
<commonParams params="-az"/>
<auth start="true" users="rsync_backup" passwordfile="/etc/rsync.passwd"/>
<userDefinedPort start="false" port="874"/><!-- port=874 -->
<timeout start="false" time="100"/><!-- timeout=100 -->
<ssh start="false"/>
</rsync>
<failLog path="/tmp/rsync_fail_log.sh" timeToExecute="60"/><!--default every 60mins execute once-->
<crontab start="true" schedule="600"><!--600mins-->
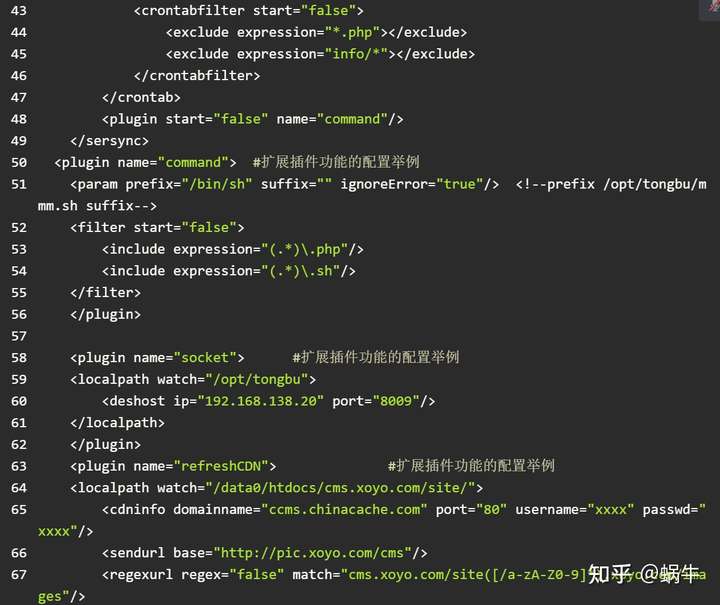
<crontabfilter start="false">
<exclude expression="*.php"></exclude>
<exclude expression="info/*"></exclude>
</crontabfilter>
</crontab>
<plugin start="false" name="command"/>
</sersync>
<plugin name="command">
<param prefix="/bin/sh" suffix="" ignoreError="true"/> <!--prefix /opt/tongbu/mmm.sh suffix-->
<filter start="false">
<include expression="(.*)\.php"/>
<include expression="(.*)\.sh"/>
</filter>
</plugin>
<plugin name="socket">
<localpath watch="/opt/tongbu">
<deshost ip="192.168.138.20" port="8009"/>
</localpath>
</plugin>
<plugin name="refreshCDN">
<localpath watch="/data0/htdocs/cms.xoyo.com/site/">
<cdninfo domainname="ccms.chinacache.com" port="80" username="xxxx" passwd="xxxx"/>
<sendurl base="http://pic.xoyo.com/cms"/>
<regexurl regex="false" match="cms.xoyo.com/site([/a-zA-Z0-9]*).xoyo.com/images"/>
</localpath>
</plugin>
</head>相关参数解析:

5 创建虚拟用户密码文件
echo '123456' > /etc/rsync.passwd
chmod 600 /etc/rsync.passwd
6 查看参数
/usr/local/GNU-Linux-x86/sersync2 -h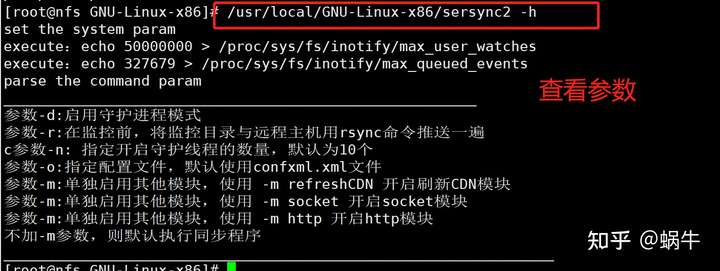
7 启动sersync服务
/usr/local/GNU-Linux-x86/sersync2 -dro /usr/local/GNU-Linux-x86/confxml.xml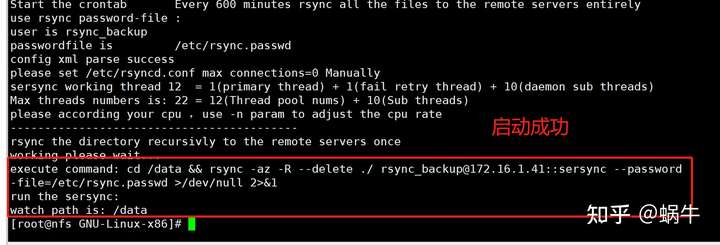
8 nfs相关配置
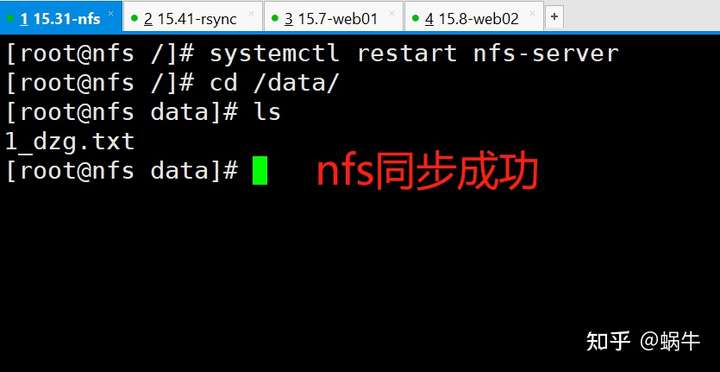
9 启动NFS服务
systemctl start nfs-server rpcbind3 rsync服务器以守护进程的方式配置参考下面:
注意:
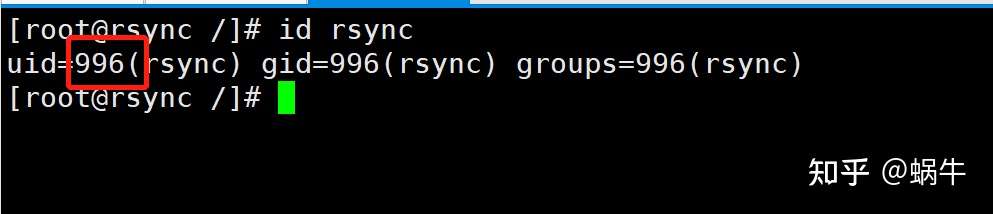
1、id要一致
2、新加一个sersync模块
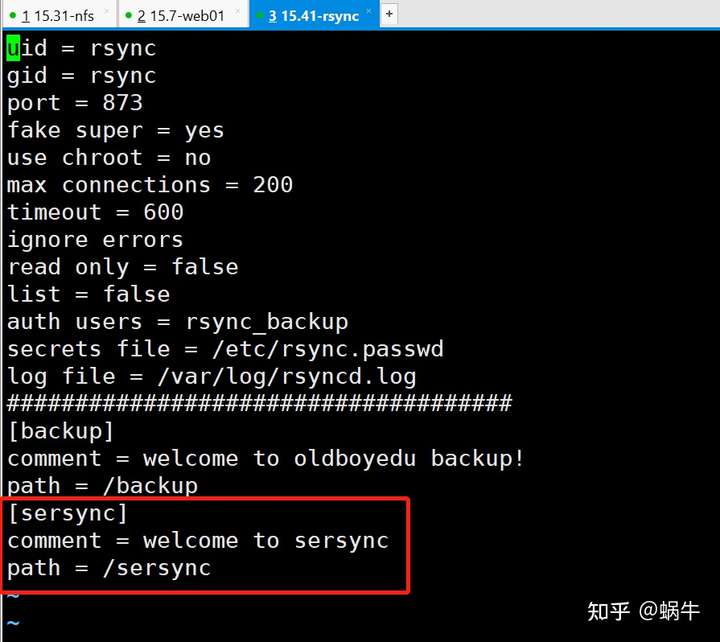
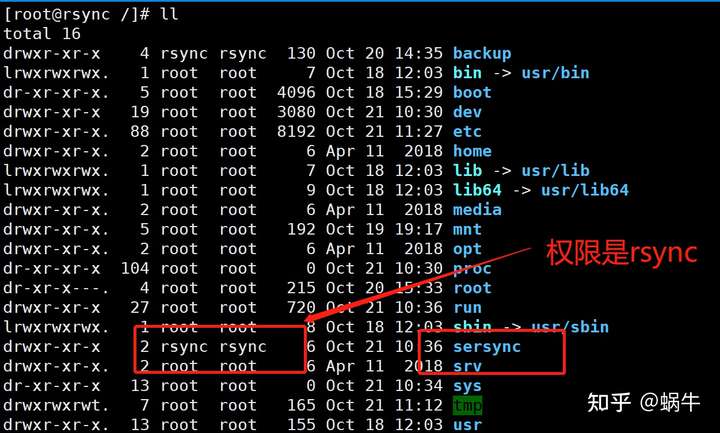
3 新建一个目录
4、部署nfs服务:参考如下
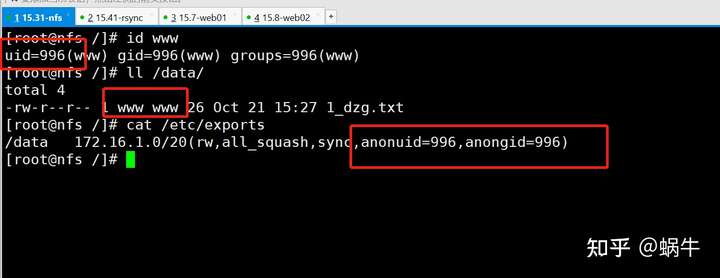
5、编辑/etc/exports
/sersync 172.16.1.0/20(rw,all_squash,sync,anonuid=996,anongid=996)
6、启动NFS服务
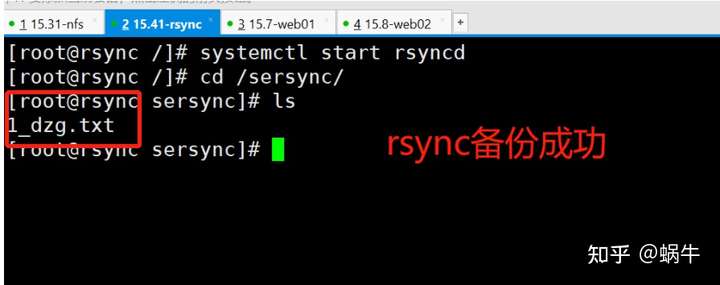
systemctl start nfs-server rpcbind7 、启动rsync服务
systemctl start rsyncd4 web01客户端
相关配置参考:

WEB服务软件挂载nfs服务器/data目录
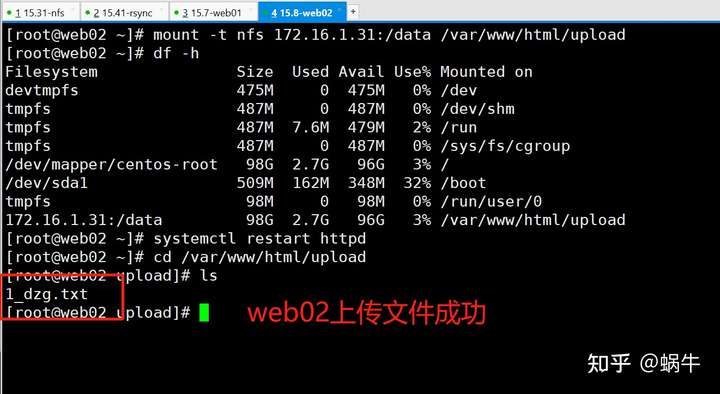
mount -t nfs 172.16.1.31:/data /var/www/html/img5 web02客户端
相关配置参考:

1、 挂载nfs服务器/data目录
mount -t nfs 172.16.1.31:/data /var/www/html/upload2 、启动WEB服务软件
systemctl start httpd3、上传文件测试
http://192.168.15.8/

6、实现自动故障切换
1、判断是否故障
showmount -e 2 、编写脚本
vi nfs-test.sh 写入以下内容:
[root@web02 ~]# cat nfs-test.sh
#!/bin/bash
showmount -e 172.16.1.31
if [ $? -ne 0 ];then
mount -t nfs 172.16.1.41:/sersync /var/www/html/upload
fi
3、加入定时任务
* * * * * /root/nfs-test.sh &>/dev/null

 浙公网安备 33010602011771号