android闪频的实现非常简单,使用Handler对象的postDelayed()方法就可以实现。在这个方法里传递一个Runnable对象和一个延迟的时间。该方法实现了一个延迟执行的效果,延迟的时间由第2个参数指定,单位是毫秒。第一个参数是Runnable对象,里面包含了延迟后需要执行的操作。我在这里给他加了个简单的放大效果。下面贴上代码:
package com.msn.zn.splashdemo;

import android.app.Activity;
import android.content.Intent;
import android.os.Bundle;
import android.os.Handler;
import android.view.Window;
import android.view.WindowManager;
import android.view.animation.Animation;
import android.view.animation.AnimationUtils;
import android.widget.ImageView;

public class SplashActivity extends Activity {
    private ImageView iv_logo;

    @Override
    protected void onCreate(Bundle savedInstanceState) {
        super.onCreate(savedInstanceState);
        //取消标题
        this.requestWindowFeature(Window.FEATURE_NO_TITLE);
        //取消状态栏
        this.getWindow().setFlags(WindowManager.LayoutParams.FLAG_FULLSCREEN,
                WindowManager.LayoutParams.FLAG_FULLSCREEN);
        setContentView(R.layout.activity_splash);
        iv_logo= (ImageView) findViewById(R.id.logo);

        //加载xml文件中的动画
        Animation anim= AnimationUtils.loadAnimation(this,R.anim.splash);
        iv_logo.startAnimation(anim);

        Handler handler=new Handler();
        handler.postDelayed(new Runnable() {
            @Override
            public void run() {
                Intent intent=new Intent(SplashActivity.this,MainActivity.class);
                startActivity(intent);
                finish();
            }
        },3000);
    }
}
布局xml:
<?xml version="1.0" encoding="utf-8"?>
<RelativeLayout xmlns:android="http://schemas.android.com/apk/res/android"
    xmlns:tools="http://schemas.android.com/tools"
    android:layout_width="match_parent"
    android:layout_height="match_parent"
    tools:context="com.msn.zn.splashdemo.SplashActivity">
<ImageView
    android:id="@+id/logo"
    android:layout_width="match_parent"
    android:layout_height="match_parent"
    android:scaleType="fitXY"
    android:src="@mipmap/splasht2"/>
</RelativeLayout>

动画xml:
<?xml version="1.0" encoding="utf-8"?>
<set xmlns:android="http://schemas.android.com/apk/res/android"
    android:duration="1500"
    android:fillAfter="true">
    <scale
        android:fromXScale="1.0"
        android:fromYScale="1.0"
        android:pivotX="50%"
        android:pivotY="50%"
        android:toXScale="1.1"
        android:toYScale="1.1"/>
    <alpha
        android:fromAlpha="1.0"
        android:toAlpha="0.8"/>
<!--
duration="1500"设置动画的持续时间为1.5s
fillAfter="true"设置动画结束后保持当前的位置(即不返回动画开始前的位置)
这些也可以在代码中实现
animation.setDuration(1500);
animation.setFillAfter(true);
-->
</set>
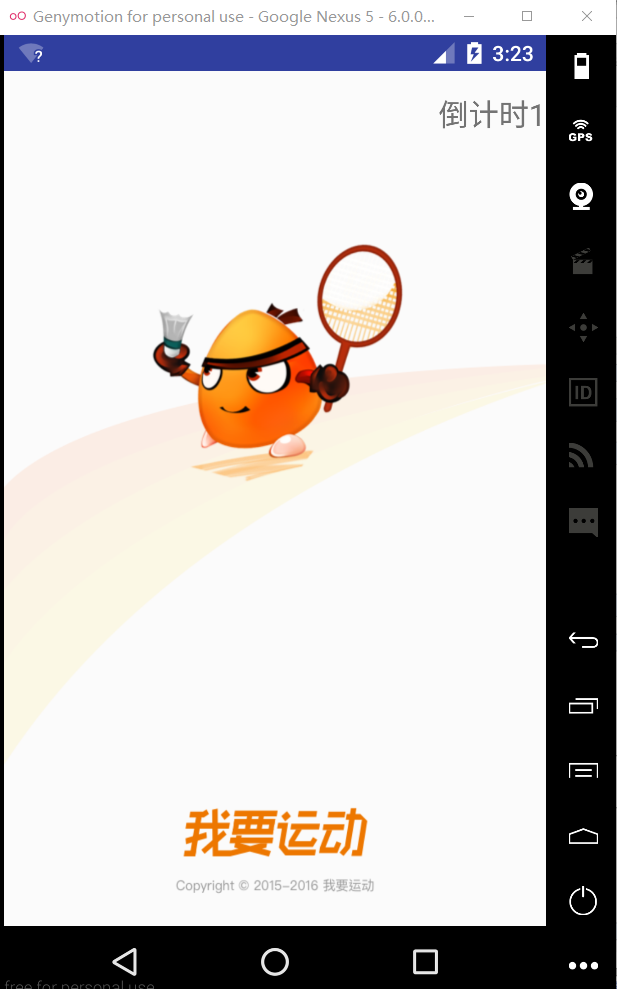
倒计时效果图:


我是用了个android封装好了的一个倒计时类CountDownTimer,其实是将后台线程的创建和Handler队列封装成为了一个方便的类调用。下面附上代码:
package com.msn.zn.splashdemo;
import android.app.Activity;
import android.content.Intent;
import android.os.Bundle;
import android.os.CountDownTimer;
import android.os.Handler;
import android.widget.TextView;
public class SplashTimeActivity extends Activity {
    private TextView tv_time;
    private MyCountDownTimer mc;
    @Override
    protected void onCreate(Bundle savedInstanceState) {
        super.onCreate(savedInstanceState);
        setContentView(R.layout.activity_splash_time);
        tv_time= (TextView) findViewById(R.id.tv_time);
        mc=new MyCountDownTimer(5000,1000);
        mc.start();//启动倒计时
        handler.postDelayed(new Runnable() {
            @Override
            public void run() {
                Intent intent=new Intent(SplashTimeActivity.this,MainActivity.class);
                startActivity(intent);
            }
        },5000);
    }
    private Handler handler=new Handler();
    /**
     * 定义一个倒计时的内部类
     */
    class MyCountDownTimer extends CountDownTimer {
        /**
         *
         * @param millisInFuture 从开始调用start()到倒计时完成并onfinish()方法被调用的毫秒数
         * @param countDownInterval 接收onTick(long)回调的间隔时间
         */
        public MyCountDownTimer(long millisInFuture, long countDownInterval) {
            super(millisInFuture, countDownInterval);
        }
        @Override
        public void onTick(long l) {
            tv_time.setText("倒计时"+l/1000);
        }
        @Override
        public void onFinish() {
            tv_time.setText("正在跳转");
        }
    }
}

xml:
<?xml version="1.0" encoding="utf-8"?>
<RelativeLayout xmlns:android="http://schemas.android.com/apk/res/android"
    xmlns:tools="http://schemas.android.com/tools"
    android:layout_width="match_parent"
    android:layout_height="match_parent"
    android:background="@mipmap/splasht2"
    tools:context="com.msn.zn.splashdemo.SplashTimeActivity">
    <TextView
        android:id="@+id/tv_time"
        android:layout_width="wrap_content"
        android:layout_height="wrap_content"
        android:layout_marginTop="15dp"
        android:textSize="20sp"
        android:text="闪一下"
        android:layout_alignParentRight="true"
        android:layout_alignParentEnd="true" />

</RelativeLayout>


 浙公网安备 33010602011771号