Python模块(二)
hashlib模块
Python的hashlib提供了常见的摘要算法,如MD5,SHA1等等。
什么是摘要算法呢?摘要算法又称哈希算法、散列算法。它通过一个函数,把任意长度的数据转换为一个长度固定的数据串(通常用16进制的字符串表示)。用于加密操作
常见的MD5算法,计算出一个字符串的MD5值:
import hashlib
md5 = hashlib.md5()
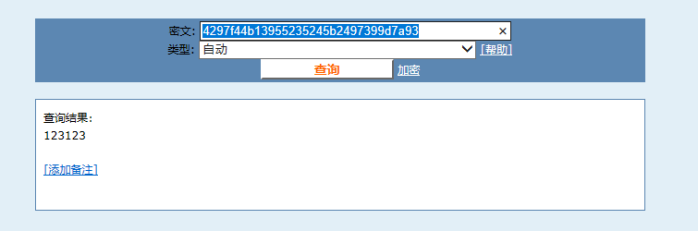
md5.update(b'123123')
print(md5.hexdigest())
#计算结果
4297f44b13955235245b2497399d7a93
===============================》
import hashlib
md5 = hashlib.md5()
md5.update('123123'.encode('utf-8'))
print(md5.hexdigest())
#计算结果
4297f44b13955235245b2497399d7a93
这里需要注意的是在你加密的时候必须要对字符串进行转码才能得出结果,不转便会报:TypeError: Unicode-objects must be encoded before hashing错误
如果数据量很大,可以分块多次调用update(),最后计算的结果是一样的:
import hashlib

md5 = hashlib.md5()

md5.update('123123'.encode('utf-8'))

md5.update('456456'.encode('utf-8'))

print(md5.hexdigest())
但当你对字符串进行加密后你就觉得安全了吗???这里便设计到一个名词为MD5撞库的问题
例如我对字符串123123进行加密把而别人要加密的内容也为123123且都是通过md5进行加密,此时便会发现加密内容一样结果也是一样的
可以将下面算出来的结果复制到http://www.cmd5.com/
import hashlib

md5 = hashlib.md5()

md5.update('123123'.encode('utf-8'))

print(md5.hexdigest())

#结果:

4297f44b13955235245b2497399d7a93
轻轻松松便破解了你加密的内容
为了不让其他人轻易破解此时便又出现了md5加盐的方法
#加盐前

import hashlib

md5 = hashlib.md5()

md5.update('123123'.encode('utf-8'))

print(md5.hexdigest())

#输出结果

4297f44b13955235245b2497399d7a93

=============================》

#加盐后,经过Salt处理的MD5口令,只要Salt不被黑客知道,即使用户输入简单口令,也很难通过MD5反推明文口令。

import hashlib

md5 = hashlib.md5('Python'.encode('utf-8'))

md5.update('123123'.encode('utf-8'))

print(md5.hexdigest())

#输出结果

5cefb27b8780a2e42af482b6d8b265dd
MD5加密总结
第一 使用相同的算法对同一个字符串进行摘要
在任意时刻 任意平台 任意语言结果总是不变的
第二 这个摘要过程不可逆
第三 对于不同的数据的计算结果总是不同的
其他加密方式
#sha1加密

hash = hashlib.sha1()

hash.update('admin'.encode('utf-8'))

print(hash.hexdigest())

d033e22ae348aeb5660fc2140aec35850c4da997

#sha256加密

hash = hashlib.sha256()

hash.update('admin'.encode('utf-8'))

print(hash.hexdigest())

8c6976e5b5410415bde908bd4dee15dfb167a9c873fc4bb8a81f6f2ab448a918
。。。。。。。。。。。。。这里便不一一演示了
configparser模块
该模块适用于配置文件的格式与windows ini文件类似,可以包含一个或多个节(section),每个节可以有多个参数(键=值)。
创建文件
来看一个好多软件的常见文档格式如下:
[DEFAULT]

ServerAliveInterval = 45

Compression = yes

CompressionLevel = 9

ForwardX11 = yes

[bitbucket.org]

User = hg

[topsecret.server.com]

Port = 50022

ForwardX11 = no
用Python生成一个这样的文档
import configparser

config = configparser.ConfigParser()

config["DEFAULT"] = {'ServerAliveInterval': '45',

                      'Compression': 'yes',

                     'CompressionLevel': '9',

                     'ForwardX11':'yes'

                     }

config['bitbucket.org'] = {'User':'hg'}

config['topsecret.server.com'] = {'Host Port':'50022','ForwardX11':'no'}

with open('example.ini', 'w') as configfile:

   config.write(configfile)
查找文件
config = configparser.ConfigParser()

config.read('example.ini')  #读取配置文件

print(config.sections())   #获取对象所有组

print('bitbucket.org' in config)   #查找bitbucket.org在不在config里面

print('www.baidu.com' in config)   #查找www.baidu.com在不在config里面,返回False

print(config['bitbucket.org']["user"])  #查找'bitbucket.org'下user所对应的值

print(config['DEFAULT']['Compression']) #yes

print(config['bitbucket.org'])          #<Section: bitbucket.org>

for key in config['bitbucket.org']:     # 注意,有default会默认default的键

    print(key)

print(config.options('bitbucket.org'))  # 同for循环,找到'bitbucket.org'下所有键

print(config.items('bitbucket.org'))    #找到'bitbucket.org'下所有键值对

print(config.get('bitbucket.org','compression')) # yes       get方法Section下的key对应的value
增删改操作
import configparser

config = configparser.ConfigParser()

config.read('example.ini')

config.add_section('yuan')

config.remove_section('bitbucket.org')

config.remove_option('topsecret.server.com',"forwardx11")

config.set('topsecret.server.com','k1','11111')

config.set('yuan','k2','22222')

config.write(open('new2.ini', "w"))
logging模块
import logging

logging.debug('debug message')

logging.info('info message')

logging.warning('warning message')

logging.error('error message')

logging.critical('critical message')
默认情况下Python的logging模块将日志打印到了标准输出中,且只显示了大于等于WARNING级别的日志,这说明默认的日志级别设置为WARNING(日志级别等级CRITICAL > ERROR > WARNING > INFO > DEBUG),默认的日志格式为日志级别:Logger名称:用户输出消息。
灵活配置日志级别,日志格式,输出位置:
import logging

logging.basicConfig(level=logging.DEBUG,

                    format='%(asctime)s %(filename)s[line:%(lineno)d] %(levelname)s %(message)s',

                    datefmt='%a, %d %b %Y %H:%M:%S',

                    filename='/tmp/test.log',

                    filemode='w')

logging.debug('debug message')

logging.info('info message')

logging.warning('warning message')

logging.error('error message')

logging.critical('critical message')
配置参数说明
logging.basicConfig()   #函数中可通过具体参数来更改logging模块默认行为,可用参数有:

filename:#用指定的文件名创建FiledHandler,这样日志会被存储在指定的文件中。

filemode:#文件打开方式,在指定了filename时使用这个参数,默认值为“a”还可指定为“w”。

format:#指定handler使用的日志显示格式。

datefmt:#指定日期时间格式。

level:#设置rootlogger(后边会讲解具体概念)的日志级别

stream:#用指定的stream创建StreamHandler。

#可以指定输出到sys.stderr,sys.stdout或者文件(f=open(‘test.log’,’w’)),默认为sys.stderr。

#若同时列出了filename和stream两个参数,则stream参数会被忽略。


format   #参数中可能用到的格式化串:

%(name)s #Logger的名字

%(levelno)s #数字形式的日志级别

%(levelname)s #文本形式的日志级别

%(pathname)s #调用日志输出函数的模块的完整路径名,可能没有

%(filename)s #调用日志输出函数的模块的文件名

%(module)s #调用日志输出函数的模块名

%(funcName)s #调用日志输出函数的函数名

%(lineno)d  #调用日志输出函数的语句所在的代码行

%(created)f #当前时间,用UNIX标准的表示时间的浮 点数表示

%(relativeCreated)d #输出日志信息时的,自Logger创建以 来的毫秒数

%(asctime)s #字符串形式的当前时间。默认格式是 “2003-07-08 16:49:45,896”。逗号后面的是毫秒

%(thread)d #线程ID。可能没有

%(threadName)s #线程名。可能没有

%(process)d #进程ID。可能没有

%(message)s  #用户输出的消息
logger对象配置
import logging

logger = logging.getLogger()# 创建一个handler,用于写入日志文件

fh = logging.FileHandler('test.log',encoding='utf-8')

# 再创建一个handler,用于输出到控制台

ch = logging.StreamHandler()

formatter = logging.Formatter('%(asctime)s - %(name)s - %(levelname)s - %(message)s')

fh.setLevel(logging.DEBUG)

fh.setFormatter(formatter)

ch.setFormatter(formatter)

logger.addHandler(fh) #logger对象可以添加多个fh和ch对象

logger.addHandler(ch)

logger.debug('logger debug message')

logger.info('logger info message')

logger.warning('logger warning message')

logger.error('logger error message')

logger.critical('logger critical message')
logging库提供了多个组件:Logger、Handler、Filter、Formatter。Logger对象提供应用程序可直接使用的接口,Handler发送日志到适当的目的地,Filter提供了过滤日志信息的方法,Formatter指定日志显示格式。另外,可以通过:logger.setLevel(logging.Debug)设置级别,当然,也可以通过fh.setLevel(logging.Debug)单对文件流设置某个级别。
序列化模块
什么叫序列化——将原本的字典、列表等内容转换成一个字符串的过程就叫做序列化。
序列化的目的
1、以某种存储形式使自定义对象持久化;
2、将对象从一个地方传递到另一个地方。
3、使程序更具维护性。

json
Json模块提供了四个功能:dumps、dump、loads、load
dumps序列化和loads反序列化
用于将列表、字典、元祖转换成字符串(常见用于文件存储、网络传输)
import json

dic = {'k1':'a1','k2':'a2','k3':'a3'}

str_dic = json.dumps(dic)

print(type(str_dic),str_dic)

di2 =  json.loads(str_dic)

print(type(di2),di2)

list_dic = [1,['a','b','c'],3,{'k1':'a1','k2':'a2'}]

str_dic = json.dumps(list_dic)

print(type(str_dic),str_dic)

list2_dic = json.loads(str_dic)

print(type(list2_dic),list2_dic)
load和dump
import json

f = open('json_file','w')

dic = {'k1':'v1','k2':'v2','k3':'v3'}

json.dump(dic,f)  #dump方法接收一个文件句柄,直接将字典转换成json字符串写入文件f.close()

f = open('json_file')

dic2 = json.load(f)  #load方法接收一个文件句柄,直接将文件中的json字符串转换成数据结构返回f.close()print(type(dic2),dic2)
其他用法


import json

f = open('file','w')

json.dump({'国籍':'中国'},f)

ret = json.dumps({'国籍':'中国'})

f.write(ret+'\n')

json.dump({'国籍':'美国'},f,ensure_ascii=False)

ret = json.dumps({'国籍':'美国'},ensure_ascii=False)

f.write(ret+'\n')

f.close()
import json

data = {'username':['李华','二愣子'],'sex':'male','age':16}

json_dic2 = json.dumps(data,sort_keys=True,indent=2,separators=(',',':'),ensure_ascii=False)

print(json_dic2)
Pickle
json & pickle 模块
用于序列化的两个模块
- json,用于字符串 和 python数据类型间进行转换
- pickle,用于python特有的类型 和 python的数据类型间进行转换
pickle模块提供了四个功能:dumps、dump(序列化,存)、loads(反序列化,读)、load (不仅可以序列化字典,列表...可以把python中任意的数据类型序列化)
import pickle

dic = {'k1':'v1','k2':'v2','k3':'v3'}

str_dic = pickle.dumps(dic)

print(str_dic)  #一串二进制内容

dic2 = pickle.loads(str_dic)

print(dic2)    #字典

import time

struct_time  = time.localtime(1000000000)

print(struct_time)

f = open('pickle_file','wb')

pickle.dump(struct_time,f)

f.close()

f = open('pickle_file','rb')

struct_time2 = pickle.load(f)

print(struct_time2.tm_year)
shelve
shelve也是python提供给我们的序列化工具,比pickle用起来更简单一些。
shelve只提供给我们一个open方法,是用key来访问的,使用起来和字典类似。
import shelve

f = shelve.open('shelve_file')

f['key'] = {'int':10, 'float':9.5, 'string':'Sample data'}  #直接对文件句柄操作,就可以存入数据f.close()

import shelve

f1 = shelve.open('shelve_file')

existing = f1['key']  #取出数据的时候也只需要直接用key获取即可,但是如果key不存在会报错

f1.close()

print(existing)
这个模块有个限制,它不支持多个应用同一时间往同一个DB进行写操作。所以当我们知道我们的应用如果只进行读操作,我们可以让shelve通过只读方式打开DB
import shelve

f = shelve.open('shelve_file', flag='r')

existing = f['key']

f.close()

print(existing)
由于shelve在默认情况下是不会记录待持久化对象的任何修改的,所以我们在shelve.open()时候需要修改默认参数,否则对象的修改不会保存。
import shelve

f1 = shelve.open('shelve_file')

print(f1['key'])

f1['key']['new_value'] = 'this was not here before'

f1.close()

f2 = shelve.open('shelve_file', writeback=True)

print(f2['key'])

f2['key']['new_value'] = 'this was not here before'

f2.close()
writeback方式有优点也有缺点。优点是减少了我们出错的概率,并且让对象的持久化对用户更加的透明了;但这种方式并不是所有的情况下都需要,首先,使用writeback以后,shelf在open()的时候会增加额外的内存消耗,并且当DB在close()的时候会将缓存中的每一个对象都写入到DB,这也会带来额外的等待时间。因为shelve没有办法知道缓存中哪些对象修改了,哪些对象没有修改,因此所有的对象都会被写入。

 浙公网安备 33010602011771号