Eclipse安装spring-tool-suite插件、OpenExplorer插件、使用Jetty启动项目
1、下载Eclipse
地址:https://www.eclipse.org/downloads/
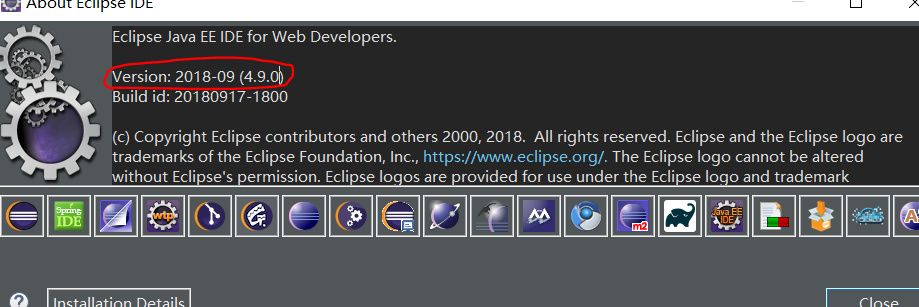
安装完成后,打开eclipse-->Help-->About Eclipse IDE,查看eclipse的版本

2、安装spring-tool-suite插件
地址:https://spring.io/tools3/sts/all/
找到与eclipse版本相对应的sts插件

3、eclipse安装sts插件
解压sts插件压缩包
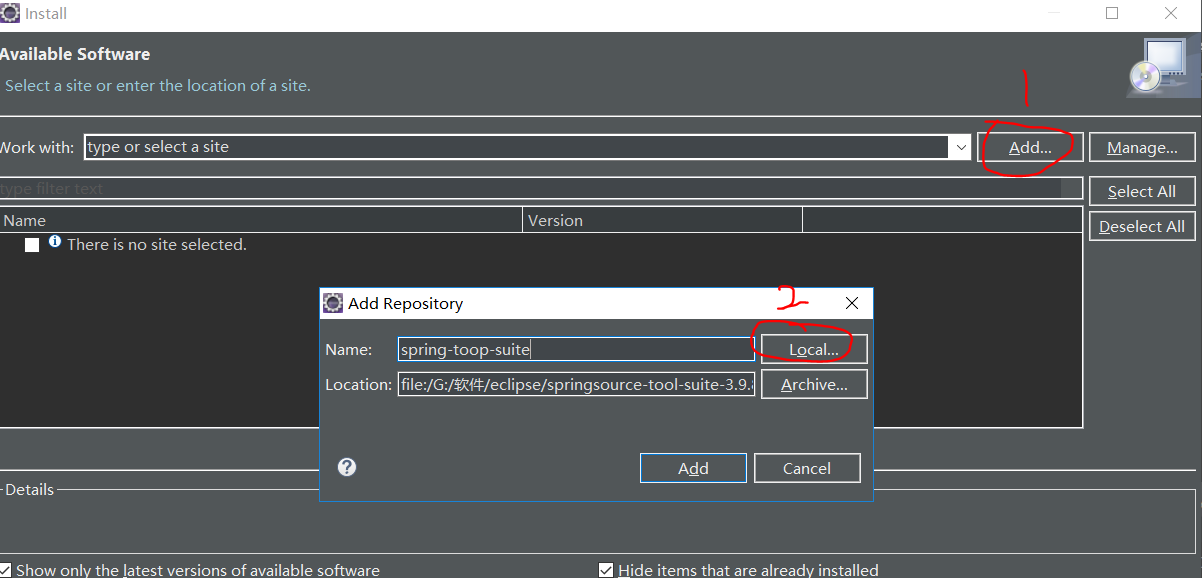
eclipse-->Help-->Install Nes Software-->

添加解压好的插件文件夹。

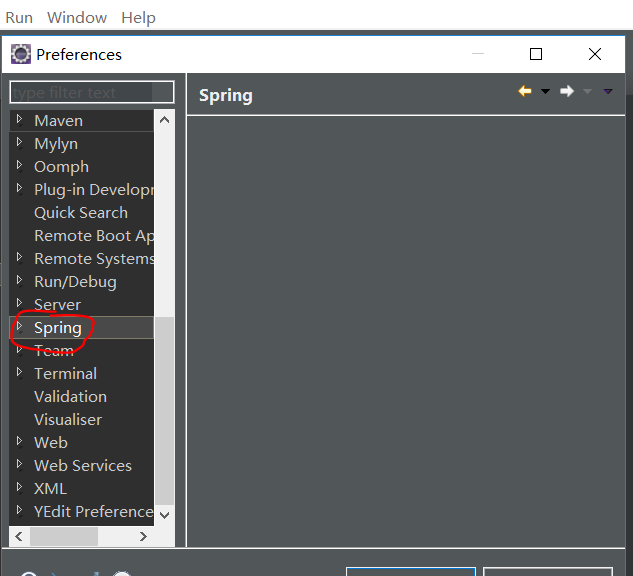
记住:一定要联网安装,否则会失败。虽然这个方式是离线安装,但是sts插件包会依赖其他插件包,如果没有联网会可能由于其他插件没有下载造成sts插件安装不完全,导致eclipse中没有Spring出现。尽量不要使用局域网,局域网下插件地址可能会被拦截。。。
3、插件安装完成后,重启eclipse

OpenExplorer插件:
打开项目的文件位置方式:安装OpenExplorer插件,并将插件jar放到eclipse的dropins下,并且重启eclipse。项目右击也会出现OpenExplorer

使用eclipsen内置Jetty启动sptingBoot安装:
使用Jetty运行springBoot,eclipse中含有内置Jetty插件,命令:jetty:run -Djetty.port=8081
maven的settings.xml中 添加
1 <pluginGroups>
2         <!-- pluginGroup
3          | Specifies a further group identifier to use for plugin lookup.
4         <pluginGroup>com.your.plugins</pluginGroup>
5         -->
6         <pluginGroup>org.mortbay.jetty</pluginGroup>
7     </pluginGroups>
pom.xml
        <dependency>
            <groupId>org.springframework.boot</groupId>
            <artifactId>spring-boot-starter-web</artifactId>
       <!--排除spring boot web中的tomcat插件-->
            <exclusions>
                <exclusion>
                    <groupId>org.springframework.boot</groupId>
                    <artifactId>spring-boot-starter-tomcat</artifactId>
                </exclusion>
            </exclusions>
        </dependency>

        <dependency>
               <groupId>org.springframework.boot</groupId>
               <artifactId>spring-boot-starter-jetty</artifactId>
        </dependency>
   <!-- jetty插件 -->

   <plugin>
    <groupId>org.eclipse.jetty</groupId>
    <artifactId>jetty-maven-plugin</artifactId>
    <version>9.4.16.v20190411</version>
    <configuration>
     <webApp>
      <contextPath>/demo</contextPath> <!-- 项目访问前缀 -->
     </webApp>
     <scanIntervalSeconds>10</scanIntervalSeconds>
    </configuration>
   </plugin>


