6.19(junit-->在maven和Spring中的使用)
写文章要不忘初心,今天也要继续努力~
白盒测试:是一种测试用例设计方法,在这里盒子指的是被测试的软件,白盒,顾名思义即盒子是可视的,你可以清楚盒子内部的东西以及里面是如何运作的,因此白盒测试需要你对系统内部的结构和工作原理有一个清楚的了解,并且基于这个知识来设计你的用例。
白盒测试主要是单元测试,不是测试岗就不深究了
用main方法测试
//首先用main方法来测试
public class SumUtil {
    public static void main(String[] args) {
        int result = sum1(1,2);
        System.out.println(result);
        int result2 = sum2(1,2,3);
        System.out.println(result2);
    }
    public static int sum1(int i,int j){
        return i+j;
    }
    public static int sum2(int i,int j,int k){
        return i+j+k;
    }
    //原先的测试很繁琐,还有可能破坏原来的测试逻辑


    }
junit测试
import org.junit.Assert;
import org.junit.Test;

public class TestCase1 {

    @Test
    public void testSum1() {
        int result = SumUtil.sum1(1, 2);
        Assert.assertEquals(result, 3);

    }
}
import org.junit.After;
import org.junit.Before;
import org.junit.Test;
import junit.framework.Assert;
public class TestCase2 {
@Before
public void before() {
System.out.println("测试前的准备工作,比如链接数据库等等");
}
@After
public void after() {
System.out.println("测试结束后的工作,比如关闭链接等等");
}
@Test
public void testSum1() {
int result = SumUtil.sum1(1, 2);
Assert.assertEquals(result, 3);
}
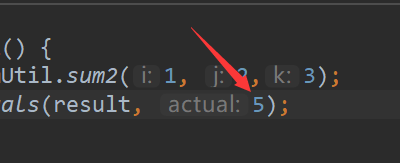
@Test
public void testSum2() {
int result = SumUtil.sum2(1, 2,3);
Assert.assertEquals(result, 6);
}
}
import org.junit.runner.RunWith;
import org.junit.runners.Suite;
@RunWith(Suite.class)
@Suite.SuiteClasses({TestCase1.class,TestCase2.class})
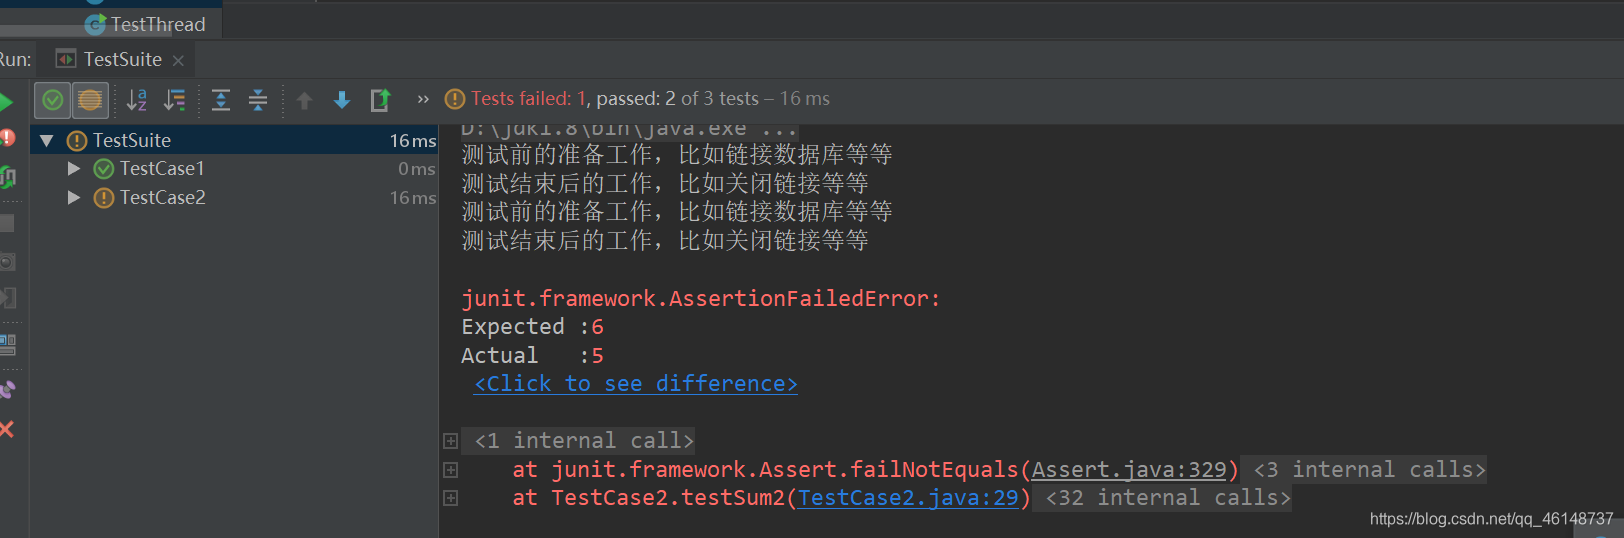
public class TestSuite {
}
测试结果:
在maven中使用,只要在pom.xml中添加依赖就可
<project xmlns="http://maven.apache.org/POM/4.0.0" xmlns:xsi="http://www.w3.org/2001/XMLSchema-instance" xsi:schemaLocation="http://maven.apache.org/POM/4.0.0 http://maven.apache.org/xsd/maven-4.0.0.xsd">
  <modelVersion>4.0.0</modelVersion>
  <groupId>cn.how2j</groupId>
  <artifactId>junit</artifactId>
  <version>0.0.1-SNAPSHOT</version>
  <name>junit</name>
  <description>junit</description>
  <dependencies>
    <dependency>
        <groupId>junit</groupId>
        <artifactId>junit</artifactId>
        <version>4.3.1</version>
        <scope>test</scope>
    </dependency>
  </dependencies>
</project>
在Spring中使用
先导入jar包
修改TestSpring, 并运行
-
@RunWith(SpringJUnit4ClassRunner.class)
表示这是一个Spring的测试类 -
@ContextConfiguration(“classpath:applicationContext.xml”)
定位Spring的配置文件 -
@Autowired
给这个测试类装配Category对象 -
@Test
测试逻辑,打印c对象的名称
package com.how2java.test;

import org.junit.Test;
import org.junit.runner.RunWith;
import org.springframework.beans.factory.annotation.Autowired;
import org.springframework.test.context.ContextConfiguration;
import org.springframework.test.context.junit4.SpringJUnit4ClassRunner;

import com.how2java.pojo.Category;

@RunWith(SpringJUnit4ClassRunner.class)
@ContextConfiguration("classpath:applicationContext.xml")
public class TestSpring {
    @Autowired
    Category c;

    @Test
    public void test(){
        System.out.println(c.getName());
    }
}
在SpringBoot中使用
pom.xml
-
修改junit 版本为 4.12
-
增加 spring-boot-starter-test
<?xml version="1.0" encoding="UTF-8"?>
<project xmlns="http://maven.apache.org/POM/4.0.0" xmlns:xsi="http://www.w3.org/2001/XMLSchema-instance"
    xsi:schemaLocation="http://maven.apache.org/POM/4.0.0 http://maven.apache.org/xsd/maven-4.0.0.xsd">
    <modelVersion>4.0.0</modelVersion>

  <groupId>com.how2java</groupId>
  <artifactId>springboot</artifactId>
  <version>0.0.1-SNAPSHOT</version>
  <name>springboot</name>
  <description>springboot</description>
  <packaging>war</packaging>

    <parent>
        <groupId>org.springframework.boot</groupId>
        <artifactId>spring-boot-starter-parent</artifactId>
        <version>1.5.9.RELEASE</version>
    </parent>

    <dependencies>
        <dependency>
            <groupId>org.springframework.boot</groupId>
            <artifactId>spring-boot-starter-web</artifactId>
        </dependency>
        <dependency>
            <groupId>org.springframework.boot</groupId>
            <artifactId>spring-boot-starter-tomcat</artifactId>

        </dependency>

        <dependency>
            <groupId>junit</groupId>
            <artifactId>junit</artifactId>
            <version>4.12</version>
            <scope>test</scope>
        </dependency>

        <!-- servlet依赖. -->
        <dependency>
              <groupId>javax.servlet</groupId>
              <artifactId>javax.servlet-api</artifactId>
        </dependency>
              <dependency>
                     <groupId>javax.servlet</groupId>
                     <artifactId>jstl</artifactId>
              </dependency>
        <!-- tomcat的支持.-->
        <dependency>
               <groupId>org.apache.tomcat.embed</groupId>
               <artifactId>tomcat-embed-jasper</artifactId>

        </dependency>
        <dependency>
            <groupId>org.springframework.boot</groupId>
            <artifactId>spring-boot-devtools</artifactId>
            <optional>true</optional> <!-- 这个需要为 true 热部署才有效 -->
        </dependency>

        <!-- mysql-->
        <dependency>
            <groupId>mysql</groupId>
            <artifactId>mysql-connector-java</artifactId>
            <version>5.1.21</version>
        </dependency>

        <!-- jpa-->
        <dependency>
            <groupId>org.springframework.boot</groupId>
            <artifactId>spring-boot-starter-data-jpa</artifactId>
        </dependency>

        <!-- springboot test -->
        <dependency>
            <groupId>org.springframework.boot</groupId>
            <artifactId>spring-boot-starter-test</artifactId>
            <scope>test</scope>
        </dependency>
    </dependencies>

    <properties>
        <java.version>1.8</java.version>
    </properties>

    <build>
        <plugins>
            <plugin>
                <groupId>org.springframework.boot</groupId>
                <artifactId>spring-boot-maven-plugin</artifactId>
            </plugin>
        </plugins>
    </build>

</project>
测试类
-
需要加上2个注解:
@RunWith(SpringRunner.class)
@SpringBootTest(classes = Application.class) -
自动装配 CategoryDAO dao; 以便于使用
-
test 方法加上 @Test 注解,然后就可以使用dao来工作了
-
运行的时候选择 JUnit Test 方式
package com.how2java.springboot.test;

import java.util.List;

import org.junit.Test;
import org.junit.runner.RunWith;
import org.springframework.beans.factory.annotation.Autowired;
import org.springframework.boot.test.context.SpringBootTest;
import org.springframework.test.context.junit4.SpringRunner;
import com.how2java.springboot.Application;
import com.how2java.springboot.dao.CategoryDAO;
import com.how2java.springboot.pojo.Category;

@RunWith(SpringRunner.class)
@SpringBootTest(classes = Application.class)
public class TestJPA {

    @Autowired CategoryDAO dao;

    @Test
    public void test() {
        List<Category> cs=  dao.findAll();
        for (Category c : cs) {
            System.out.println("c.getName():"+ c.getName());
        }

    }
}
唯有不争,举世间莫能与之争!


 浙公网安备 33010602011771号