静态QQ登录代码学习
记录学习 @搬砖界泰斗这只小狐狸 的静态QQ登陆页面源码,了解静态登陆页面如何书写&&拓宽自己对css的理解
Q1:用css调节子级元素位置时什么时候调节margin,什么时候调节padding?
A1:margin对外,padding对内
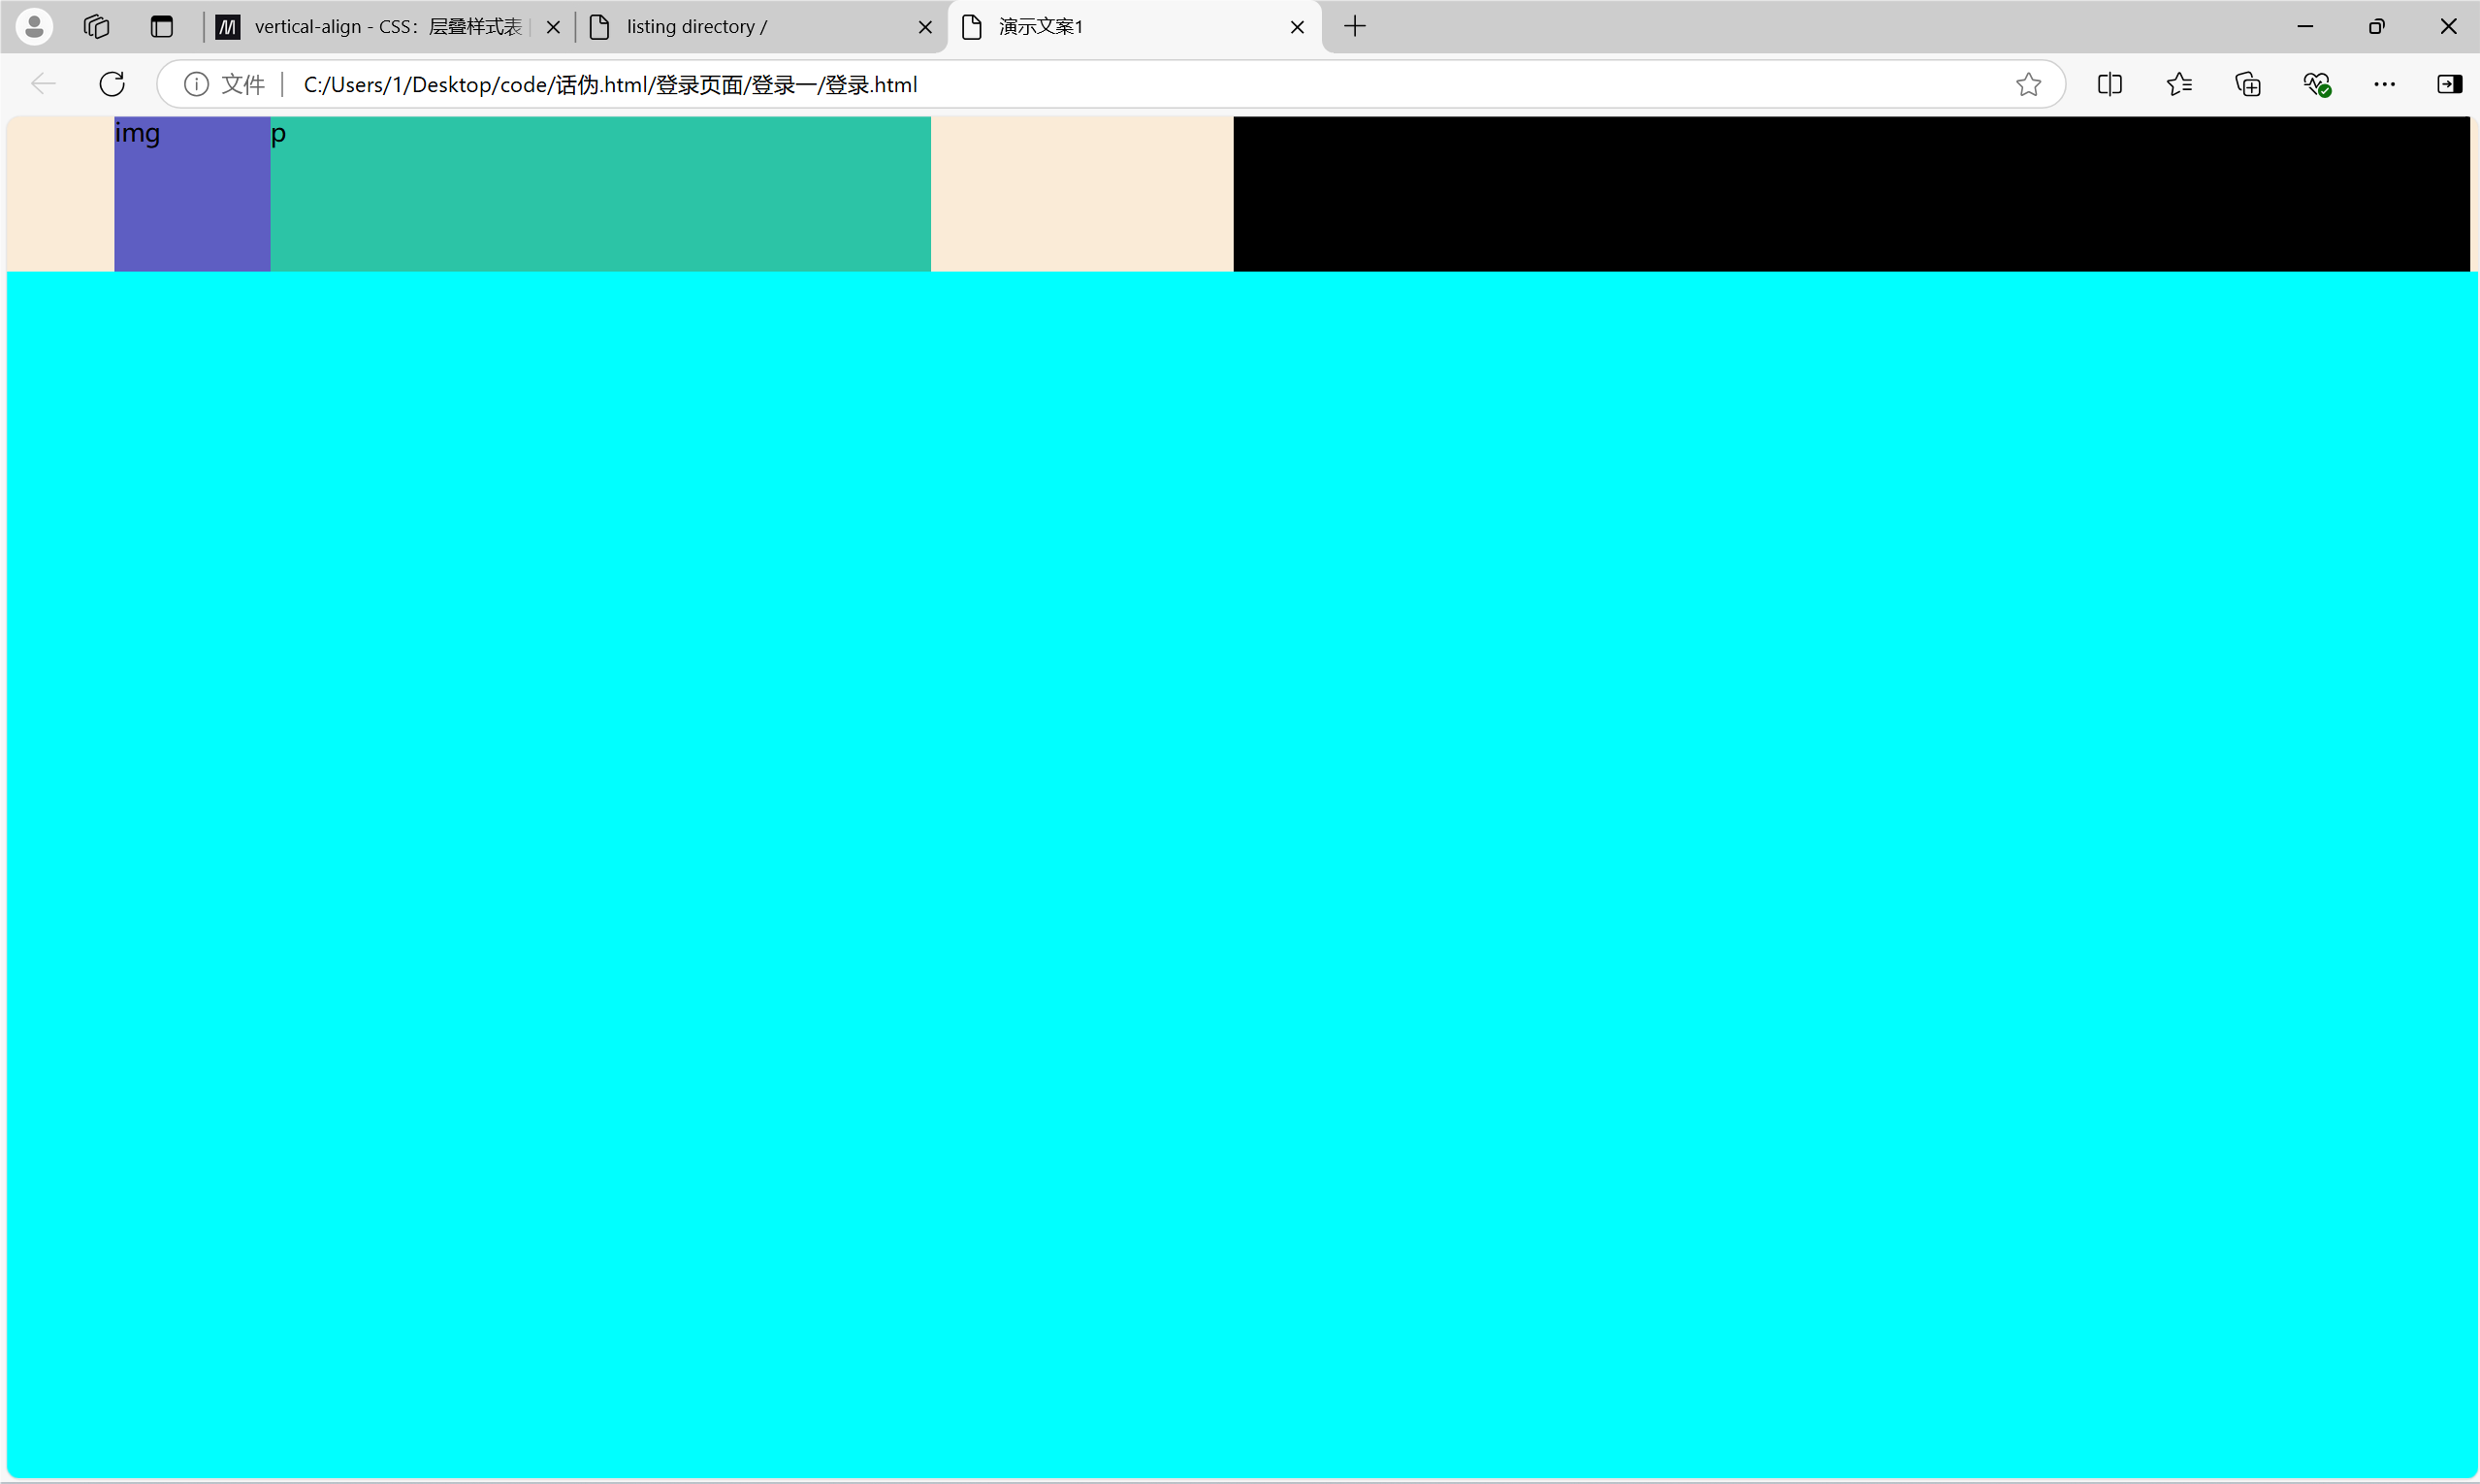
e.g.要实现一个这样的排版
有一个大大盒子fafather,里面其中一个是大盒子father,再有两个小盒子,son-img&&son-p
<!DOCTYPE html>
<html lang="ch">
<head>
    <meta charset="UTF-8">
    <meta name="viewport" content="width=device-width, initial-scale=1.0">
    <title>演示文案1</title>
    <link rel="stylesheet" href="./登录.css">
</head>
<body>
    <div class="fafather">
        <div class="father">
                <div class="son-img">img</div>
                <div class="son-p">p</div>
        </div>
        <div class="other"></div>
    </div>
</body>
</html>
- 整体位置在页面的左上角距离左边70px

无脑调节father的margin【调节father在上级fafather里的位置】
*{
    margin: 0;
    padding: 0;
    box-sizing: border-box;
}
body {
    background-color: aqua;
}
.fafather {
    float: left;
    background-color: antiquewhite;
    width: 100%;
    height: 100px;
}
.father{
    margin: 0 70px;
    float: left;
    width: 33%;
    height: 100px;
    background-color: azure;

}
.other{
    float: right;
    margin: 0 5px;
    width: 50%;
    height: 100px;
    background-color: black;
}
.son-img{
    float: left;
    height: 100px;
    width: 100px;
    background-color: rgb(94, 94, 194);

}
.son-p{
    /* float: right; */
    background-color: rgb(44, 196, 166);
    height: 100%;
    /* width: 300px; */
}
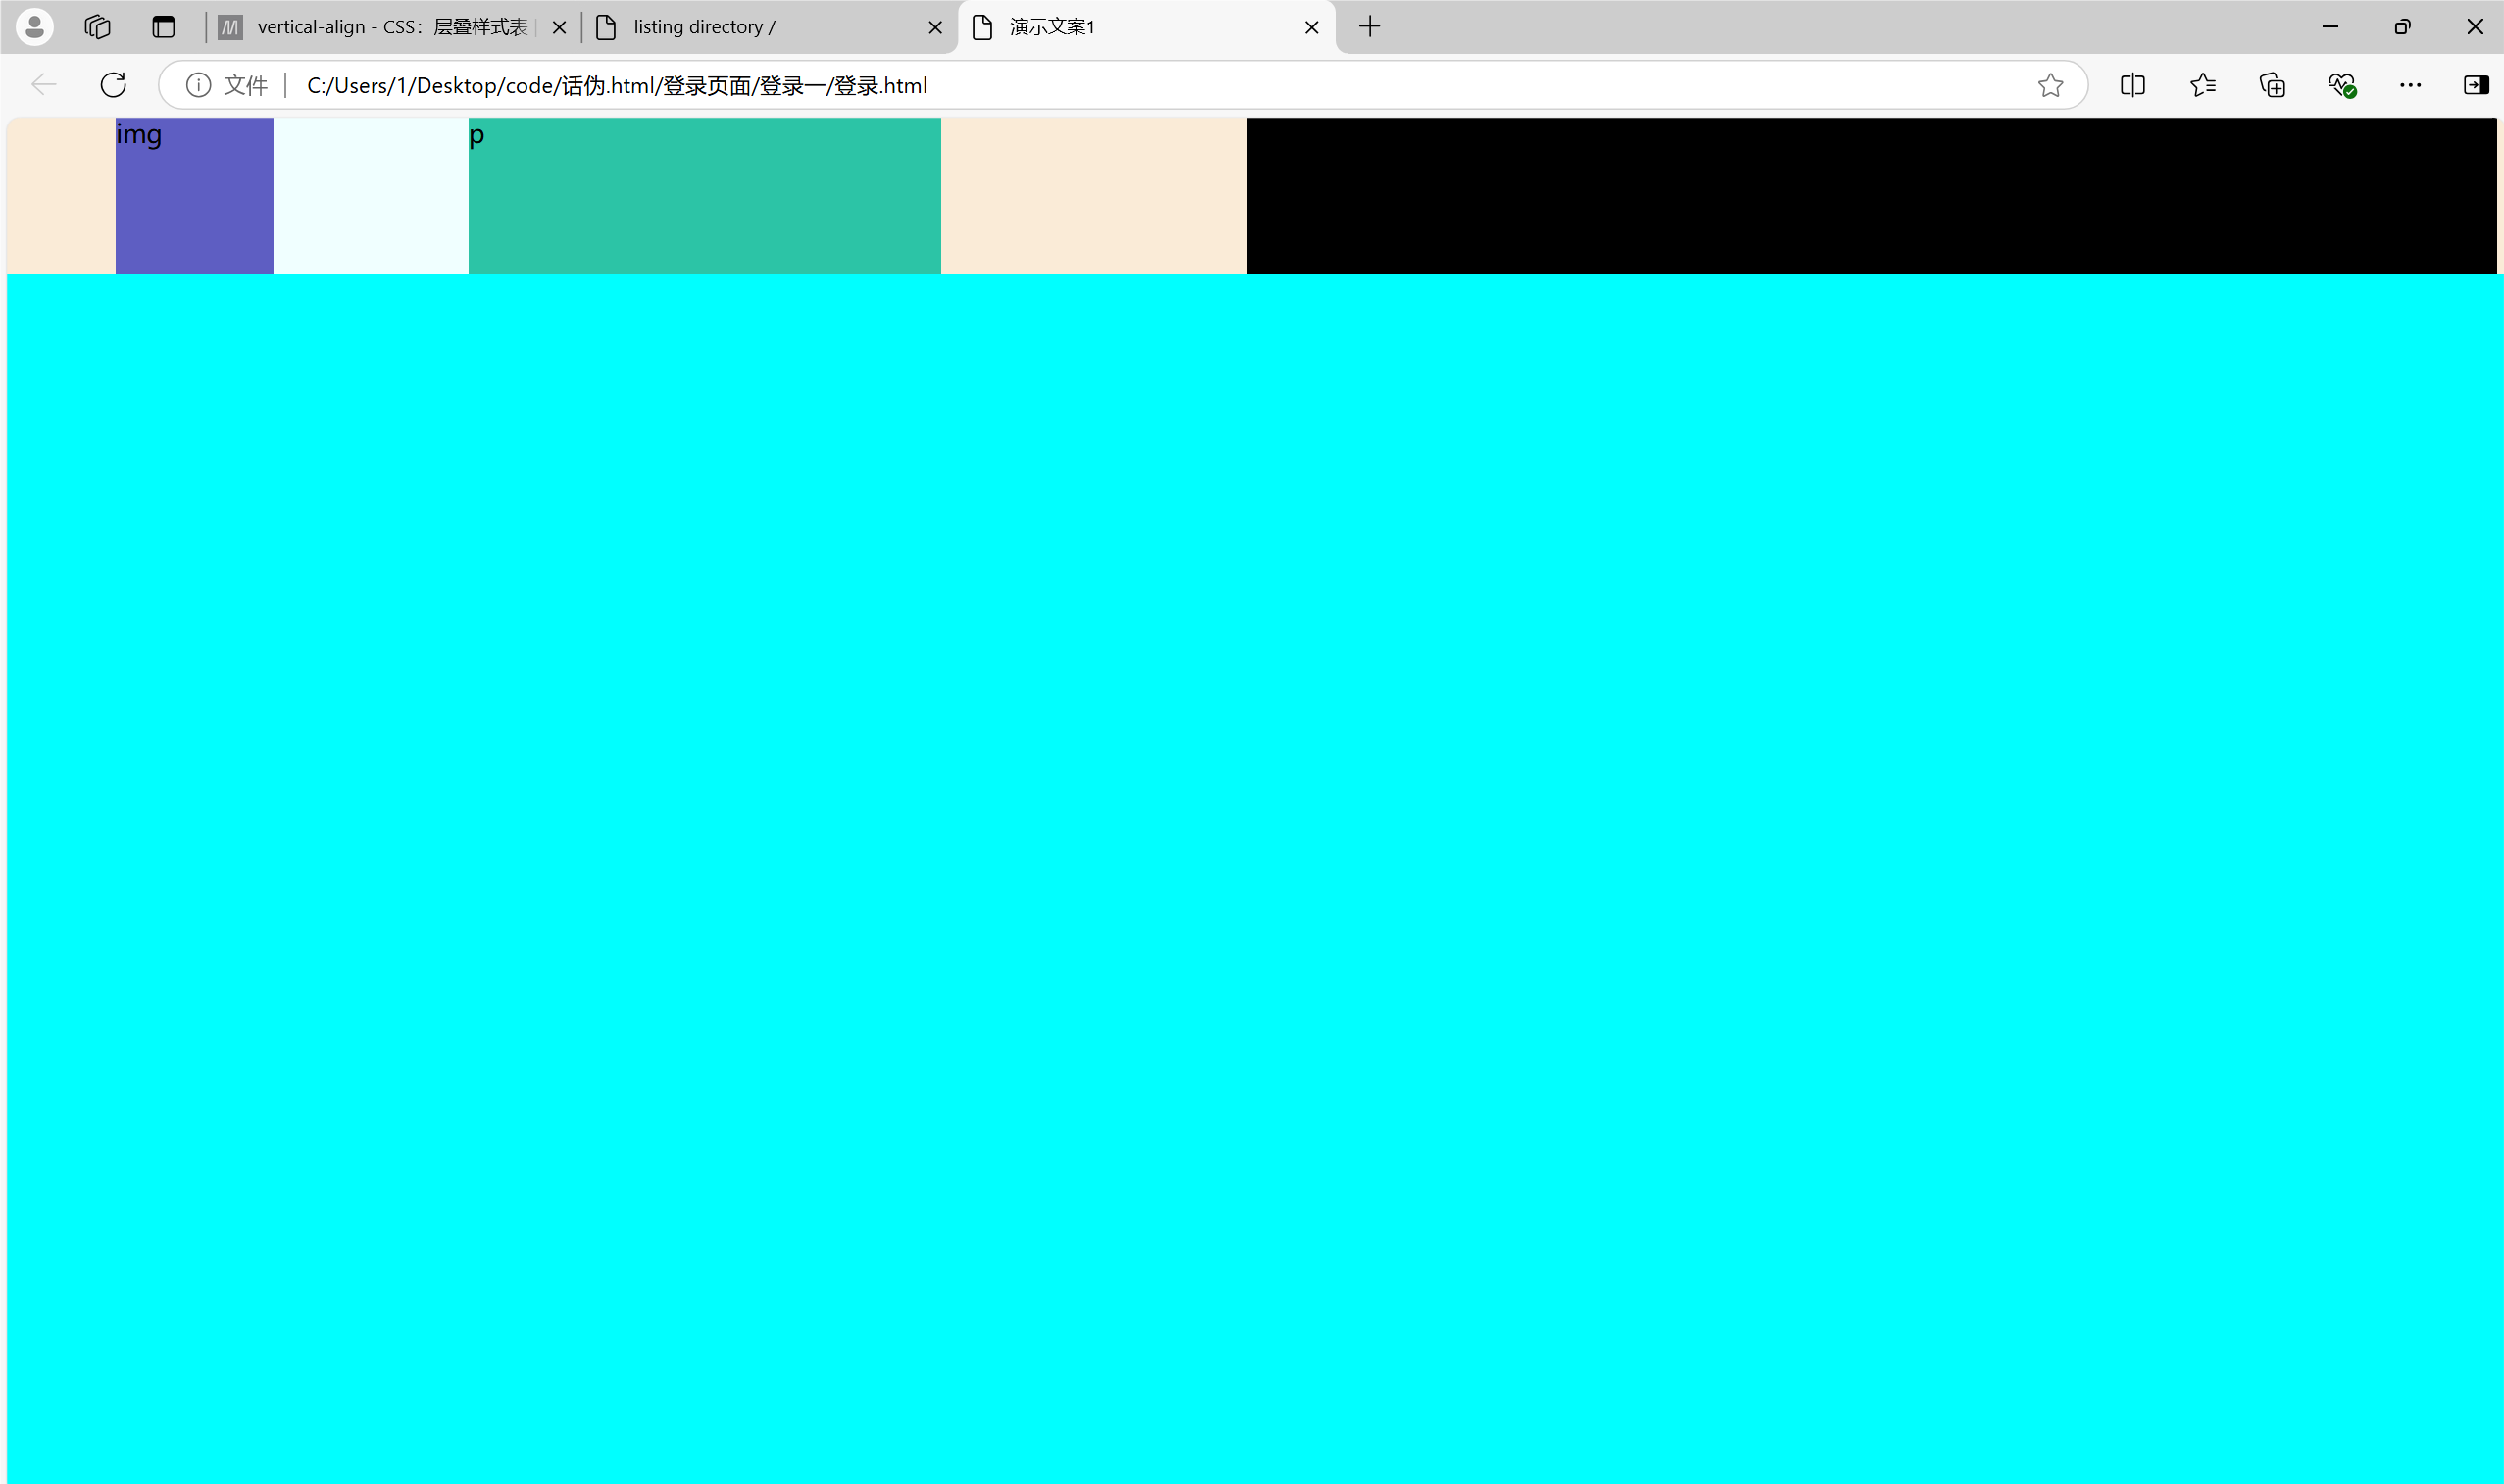
- son-img和son-p之间距离存在距离
也别调节什么padding margin了,直接用float-left,float-right绝绝子

*{
    margin: 0;
    padding: 0;
    box-sizing: border-box;
}
body {
    background-color: aqua;
}
.fafather {
    float: left;
    background-color: antiquewhite;
    width: 100%;
    height: 100px;
}
.father{
    margin: 0 70px;
    float: left;
    width: 33%;
    height: 100px;
    background-color: azure;

}
.other{
    float: right;
    margin: 0 5px;
    width: 50%;
    height: 100px;
    background-color: black;
}
.son-img{
    float: left;
    height: 100px;
    width: 100px;
    background-color: rgb(94, 94, 194);

}
.son-p{
    float: right;
    background-color: rgb(44, 196, 166);
    height: 100%;
    width: 300px;
}
CNCLD1:基本上跨级用margin,同级用float-X属性
p.s.一次性调节上下左右,之间用空格隔开【上 右 下 左,上 左右 下,上下 左右】
我靠,感觉自己会布局了!
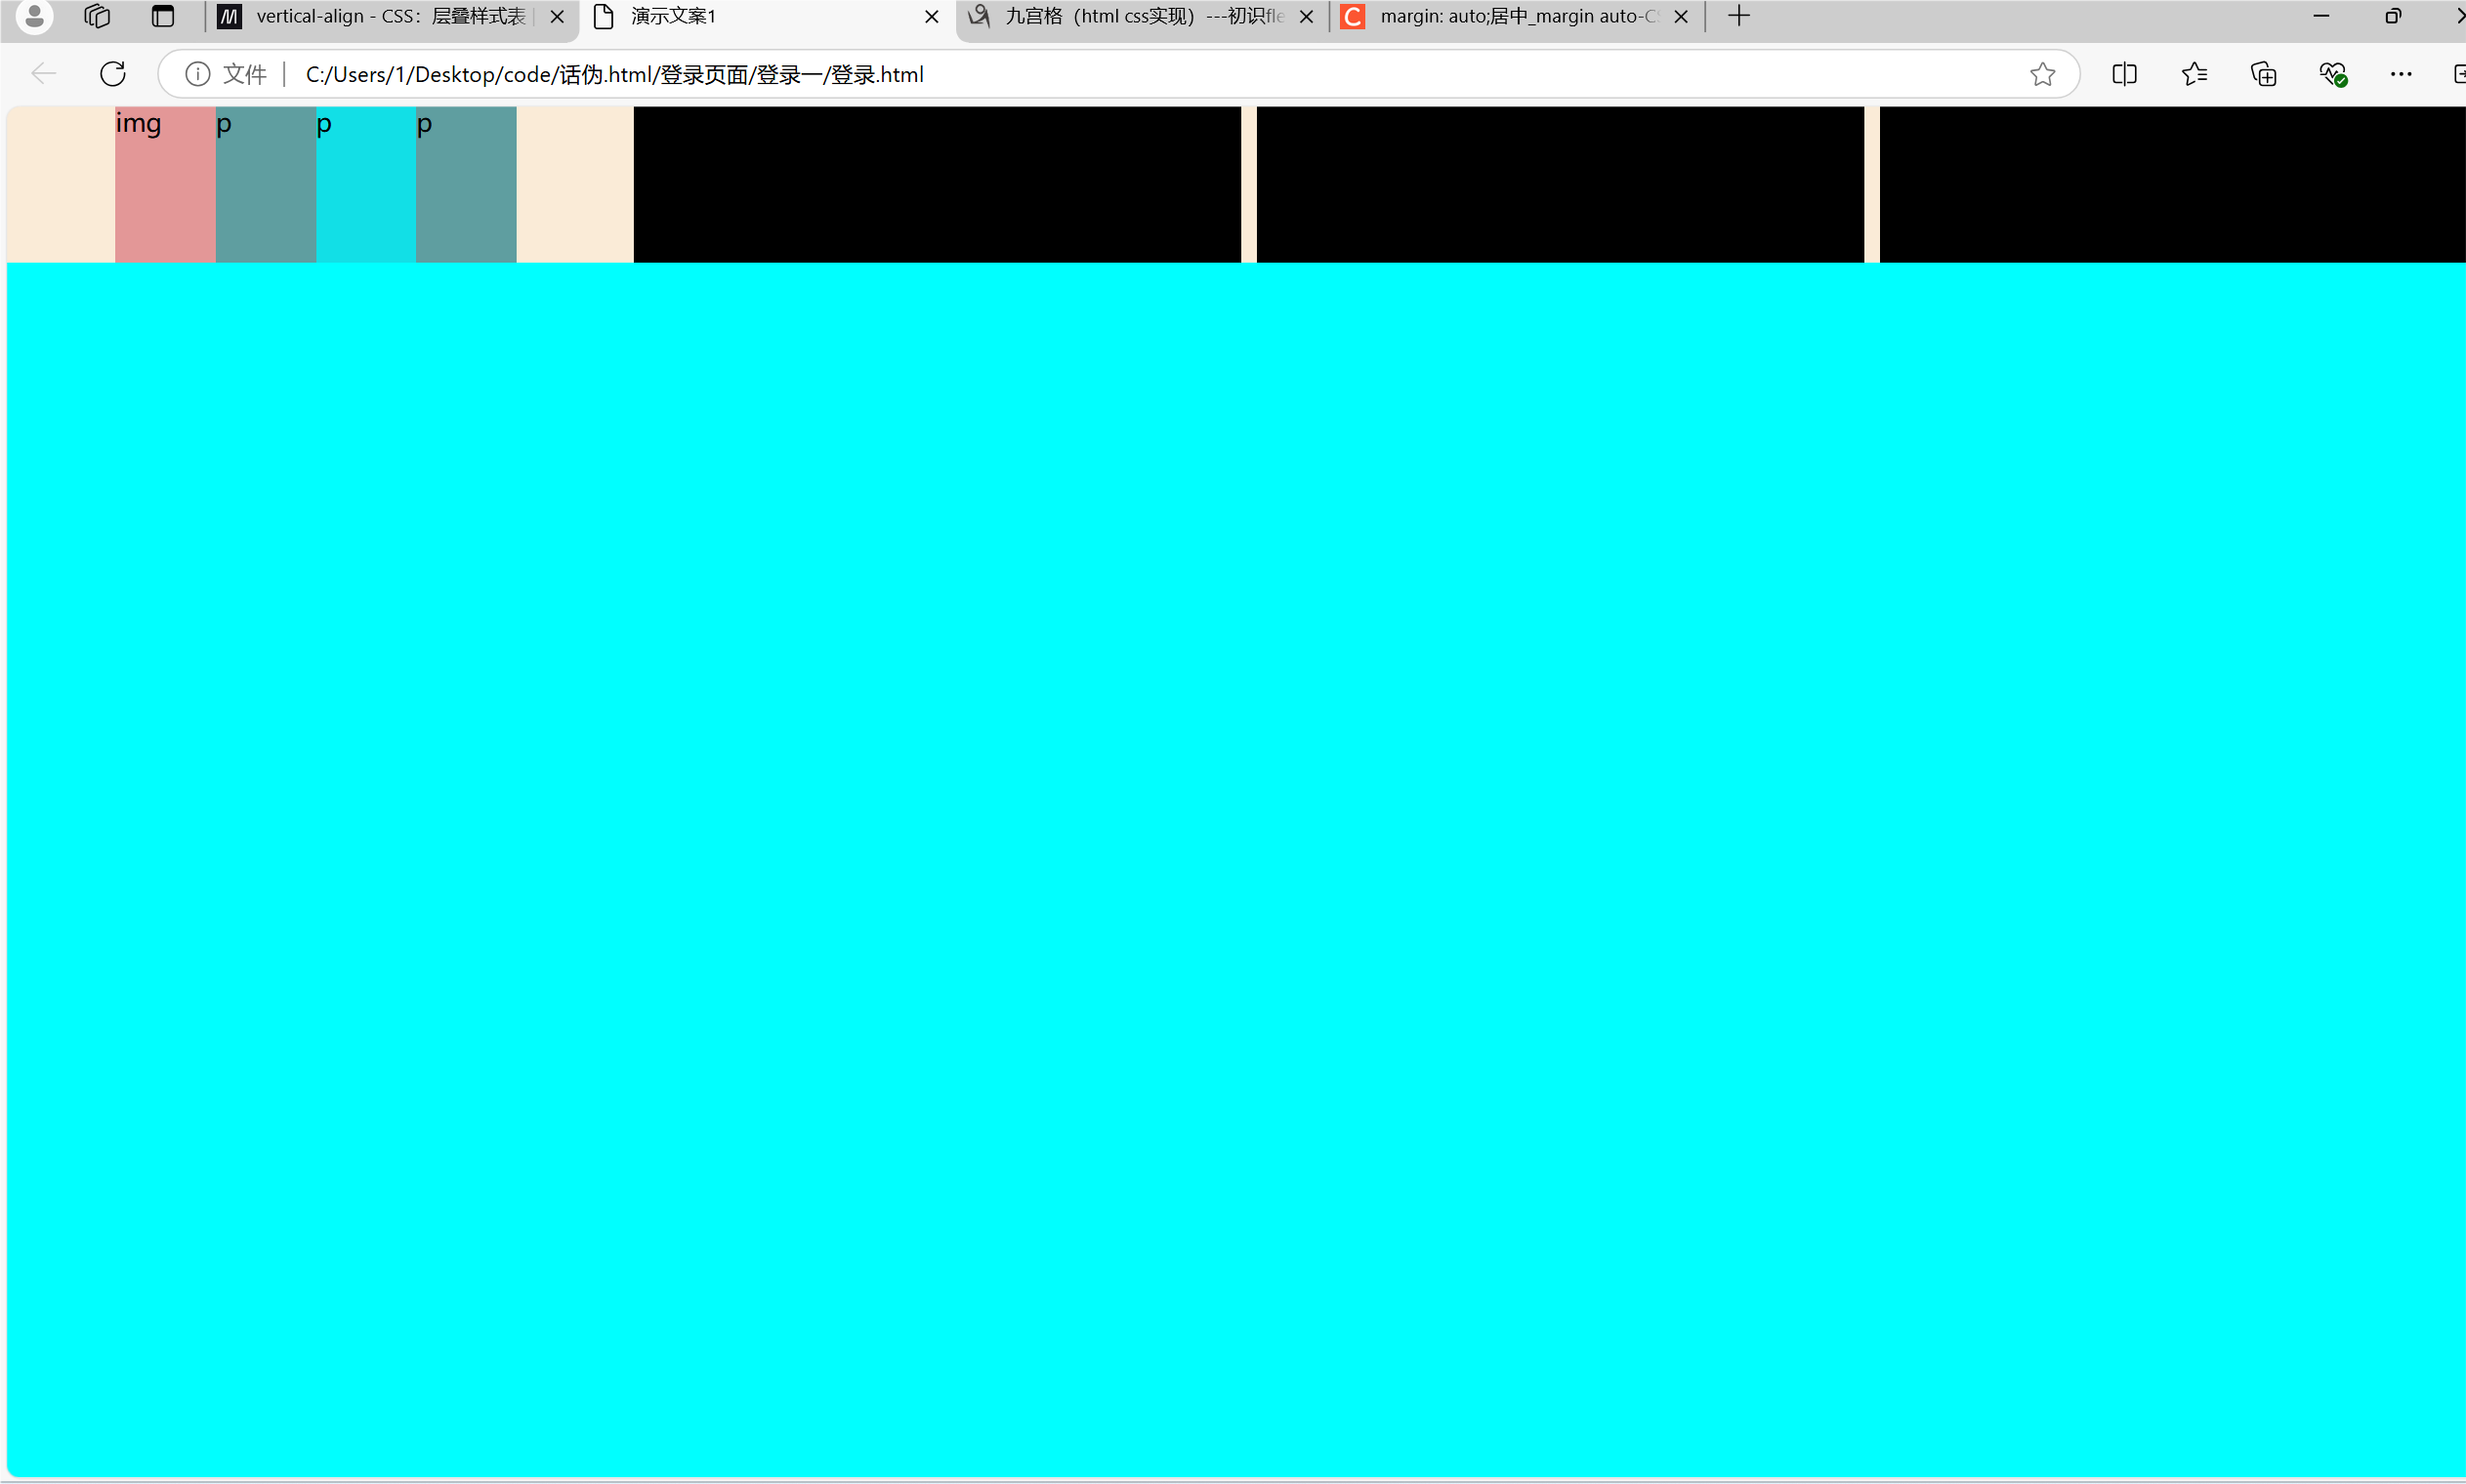
然而并没有,我要有>2个元素水平放怎么办?
还是用flex布局
float用于2个盒子排布,flex更flex哈哈哈

<!DOCTYPE html>
<html lang="ch">
<head>
    <meta charset="UTF-8">
    <meta name="viewport" content="width=device-width, initial-scale=1.0">
    <title>演示文案1</title>
    <link rel="stylesheet" href="./登录.css">
</head>
<body>
    <div class="fafather">
        <div class="father">
                <div class="son-img">img</div>
                <div class="son-p1">p</div>
                <div class="son-p2">p</div>
                <div class="son-p3">p</div>

        </div>
        <div class="other"></div>
        <div class="another"></div>
        <div class="others"></div>
    </div>
</body>
</html>
*{
    margin: 0;
    padding: 0;
    box-sizing: border-box;
}
body {
    background-color: aqua;
}
.fafather {
    /* float: left; */
    background-color: antiquewhite;
    width: 100%;
    height: 100px;
    display: flex;
    flex-direction: row;
}
P{
    display:block;
}
.father{
    margin: 0 70px;
    /* float: left; */
    width: 33%;
    /* height: 100px; */
    background-color: azure;
    display: flex;
    flex-direction: row;
}

.other{
        /* float: right; */
        margin: 0 5px;
        width: 50%;
        /* height: 100px; */
        background-color: black;
    }
.another{
        /* float: right; */
        margin: 0 5px;
        width: 50%;
        /* height: 100px; */
        background-color: black;
    }
.others{
        /* float: right; */
        margin: 0 5px;
        width: 50%;
        /* height: 100px; */
        background-color: black;
    }
.son-img{
width: 25%;
background-color: rgba(217, 74, 74, 0.576);
}
.son-p1{
width: 25%;
background-color: cadetblue;
}
.son-p2{
width: 25%;
background-color: rgb(18, 223, 230);
}
.son-p3{
width: 25%;
background-color: cadetblue;
}
float就图一乐,还是flexyyds
Q2:怎么调节图片透明度?
A2:
opacity: 0.8;
/* 0[全透明]--1【完全不透明,默认】 */
美中不足
因为文字和图片在同一个层级(即它们的父元素没有设置背景)。当你调节图片的透明度时,文字会受到影响,因为它们都是在同一个上下文中绘制的。
improvement
- 使用绝对定位:将文字放在图片上方,确保它们在不同的层级。
牺牲图片里有文字效果 - 使用背景图:将图片设置为元素的背景,而不是作为
标签,这样你可以独立控制透明度
图片有盒子大小要求
.container {
    background-image: url('image.jpg');
    background-size: cover;
    opacity: 0.5; /* 背景透明 */
    color: black; /* 文字不透明 */
}
- 使用伪元素:使用 ::before 或 ::after 伪元素为容器添加背景图片。
然并卵,没人鸟我,先搁置
Q3:怎么使得图片和文字一行对齐?
A3:使用vertical-align: baseline;
Q4: position:relative;是个啥?
A4: 学习学习position
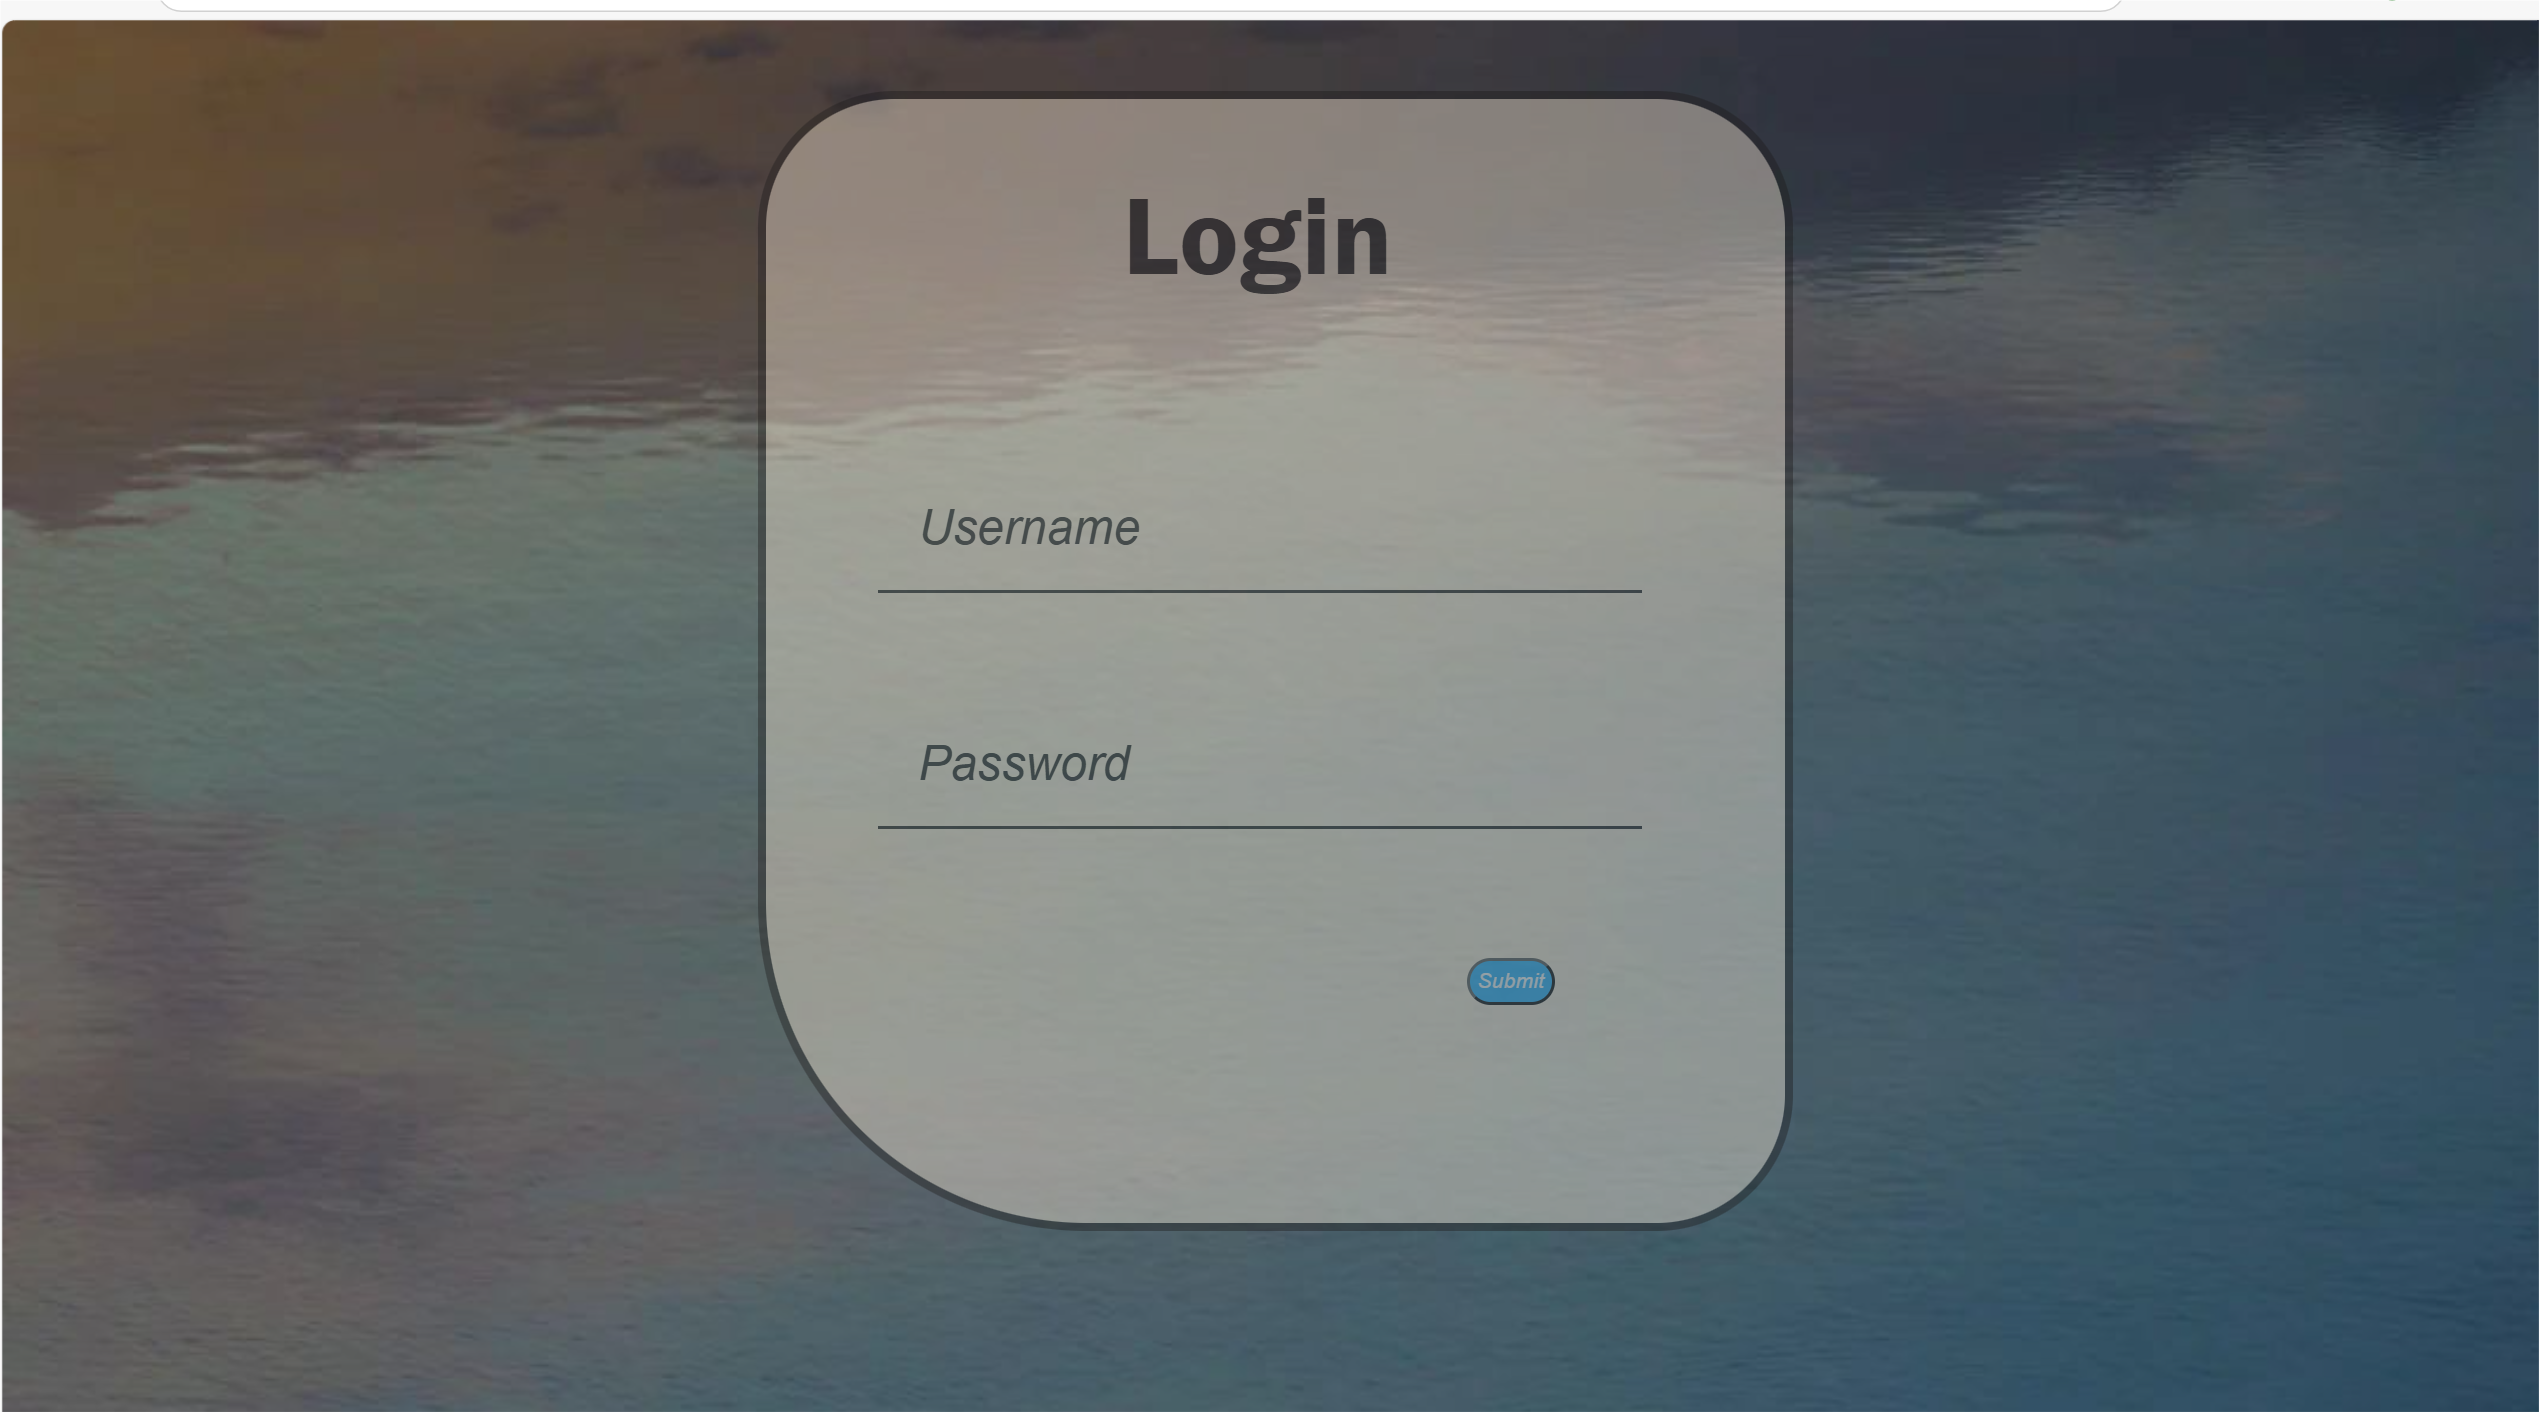
我觉得我可以搞一个登陆页面了好好好,开做!


写了1h+,但是完成了
源码如下
<!DOCTYPE html>
<html lang="ch">
<head>
  <meta charset="UTF-8">
  <meta name="viewport" content="width=device-width, initial-scale=1.0">
  <title>Document</title>
  <link rel="stylesheet" href="./登录.css">
</head>
<body>
  <div class="fst">
    <div class="scnd">Login</div>
    <div class="thd">
      <input type="text" placeholder="Username" >
      <input type="text" placeholder="Password" >
      <button>Submit</button>
    </div>
  </div>
</body>
</html>
*{
    padding: 0;
    margin: 0;
    box-sizing: border-box;
}
body{
    background-image: url('./background-login2.jpg');
    background-size: cover;
    height: 600px;
    opacity: 0.8;
}
.fst{
    display: flex;
    margin: 50px 30%;
    flex-wrap: wrap;
    background-color: antiquewhite;
    flex-direction: column;
    height: 700px;
    opacity: 0.5;
    box-shadow:0 0 0 5px#1b1919;
    border-radius: 80px 80px 80px 200px;
}
.scnd{
    height: 20%;
    /* background-color: blueviolet; */
    font-size: 70px;
    font-family: 'Franklin Gothic Medium', 'Arial Narrow', Arial, sans-serif;
    color: #1b1919;
    padding-left: 35%;
    padding-top: 45px;
}
.thd{
    /* background-color: aqua; */
    padding: 100px 20px;
    margin-top: auto;
    height: 80%;
}
input{
    display: block; /* 设置为块级元素 */
    margin-bottom: 80px; /* 设置每个输入框之间的间距 */
    margin-left: 50px;
    width: 80%;
    padding: 25px;
    border: none;
    background: transparent;
    border-bottom: 2px solid#1b1919; /* 添加底部边框 */
    cursor: pointer;
}
input::placeholder {
    color:  #1b1919;
    font-style: italic;
    font-size: 30px;
}
button{
    color:  #FFF;
    font-style: italic;
    background-color: rgb(31, 177, 255);
    margin-left: 70%;
    border-radius: 40px 40px;
    cursor: pointer;
    padding: 5px;
}


