整合SSM需要配置的xml
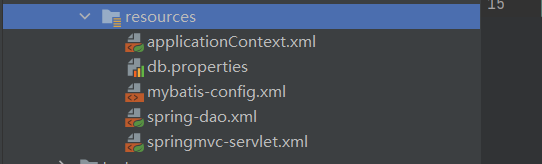
Resources目录下的xml配置图:
数据库的配置,db.properties:
jdbc.driver=com.mysql.cj.jdbc.Driver
jdbc.url=jdbc:mysql://localhost:3306/ssmbuild?useSSL=true&characterEncoding=utf-8&useUnicode=true&serverTimezone=UTC
jdbc.username=root
jdbc.password=123456
我们在这里使用了jdbc前缀的原因是为了防止整合SSM的时候出现名称的问题
Mybatis的核心配置文件:
<?xml version="1.0" encoding="UTF-8" ?>
<!DOCTYPE configuration
        PUBLIC "-//mybatis.org//DTD Config 3.0//EN"
        "http://mybatis.org/dtd/mybatis-3-config.dtd">

<!--Mybatis的核心配置文件-->
<configuration>
<!--    在mybatis的核心配置文件中,仅留下这些,其余的都放到spring-dao.xml中进行配置-->

<!--    日志信息和驼峰命名规则-->
    <settings>
<!--        配置日志信息,使用标准日志输出-->
        <setting name="logImpl" value="STDOUT_LOGGING"/>
<!--        开启驼峰命名-->
        <setting name="mapUnderscoreToCamelCase" value="true"/>
    </settings>

<!--    给实体类起别名-->
    <typeAliases>
        <package name="com.fu.pojo"/>
    </typeAliases>


</configuration>
,在Mybatis的配置文件中,我们仅保留setting标签和typeAliases标签,其余的内容都放到spring-dao.xml中进行配置,在这里我们使用了标准日志输出,如果需要使用log4j日志信息,可以自主导入log4j的依赖
spring整合Mybatis的配置,spring-dao.xml:
第一步:开启注解开发,并扫描对应的包
第二步:引入外部的资源配置
第三步:配置数据源(我们这里使用C3P0),注意别导错包
第四步:sqlSessionFactory
第五步:配置dao层扫描包,动态实现dao层接口注入到spring容器中
<?xml version="1.0" encoding="UTF-8"?>
<beans xmlns="http://www.springframework.org/schema/beans"
       xmlns:xsi="http://www.w3.org/2001/XMLSchema-instance"
       xmlns:context="http://www.springframework.org/schema/context"
       xmlns:mvc="http://www.springframework.org/schema/mvc"
       xsi:schemaLocation="http://www.springframework.org/schema/beans
        https://www.springframework.org/schema/beans/spring-beans.xsd
        http://www.springframework.org/schema/context
        https://www.springframework.org/schema/context/spring-context.xsd
        http://www.springframework.org/schema/mvc
        https://www.springframework.org/schema/mvc/spring-mvc.xsd">

<!--    1.开启注解开发,并扫描对应的包-->
    <context:annotation-config></context:annotation-config>
    <context:component-scan base-package="com.fu.dao"/>

<!--    2.引入外部的配置资源-->
    <context:property-placeholder location="db.properties"/>

<!--    3.配置数据源:C3P0-->
    <bean class="com.mchange.v2.c3p0.ComboPooledDataSource" id="dataSource">
        <property name="driverClass" value="${jdbc.driver}"/>
        <property name="jdbcUrl" value="${jdbc.url}"/>
        <property name="user" value="${jdbc.username}"/>
        <property name="password" value="${jdbc.password}"/>

<!--        允许连接数的大小-->
        <property name="maxPoolSize" value="30"/>
        <property name="minPoolSize" value="10"/>
<!--        关闭连接后不自动commit -->
        <property name="autoCommitOnClose" value="false"/>
<!--        获取连接超时时间 -->
        <property name="checkoutTimeout" value="10000"/>
<!--        当获取连接失败重试次数 -->
        <property name="acquireRetryAttempts" value="2"/>
    </bean>

<!--    4.sqlSessionFactory-->
    <bean class="org.mybatis.spring.SqlSessionFactoryBean" id="sqlSessionFactory">
<!--        引入数据池-->
        <property name="dataSource" ref="dataSource"/>
<!--        引入mybatis的核心配置文件-->
        <property name="configLocation" value="classpath:mybatis-config.xml"/>
<!--        引入mapper配置-->
        <property name="mapperLocations" value="classpath:com/fu/dao/UserMapper.xml"/>
    </bean>

<!--    5.配置dao层的扫描包,动态实现Dao接口注入到spring的容器中-->
    <bean class="org.mybatis.spring.mapper.MapperScannerConfigurer">
<!--        注入sqlSessionFactory-->
        <property name="sqlSessionFactoryBeanName" value="sqlSessionFactory"/>
<!--        指定需要扫描的包接口-->
        <property name="basePackage" value="com.fu.dao"/>
    </bean>


</beans>
视图层的配置:springmvc-servlet.xml:
<?xml version="1.0" encoding="UTF-8"?>
<beans xmlns="http://www.springframework.org/schema/beans"
       xmlns:xsi="http://www.w3.org/2001/XMLSchema-instance"
       xmlns:context="http://www.springframework.org/schema/context"
       xmlns:mvc="http://www.springframework.org/schema/mvc"
       xsi:schemaLocation="http://www.springframework.org/schema/beans
        https://www.springframework.org/schema/beans/spring-beans.xsd
        http://www.springframework.org/schema/context
        https://www.springframework.org/schema/context/spring-context.xsd
        http://www.springframework.org/schema/mvc
        https://www.springframework.org/schema/mvc/spring-mvc.xsd">

<!--    开启注解支持以及其对应扫描的包-->
    <context:annotation-config></context:annotation-config>
    <context:component-scan base-package="com.fu.controller"/>

<!--    使用注解自动配置控制器适配器,控制器映射器-->
    <mvc:annotation-driven/>
<!--    静态资源问题-->
    <mvc:default-servlet-handler/>

<!--    配置视图解析器-->
    <bean class="org.springframework.web.servlet.view.InternalResourceViewResolver" id="internalResourceViewResolver">
<!--        前缀-->
        <property name="prefix" value="/WEB-INF/jsp/"/>
<!--        后缀-->
        <property name="suffix" value=".jsp"/>
    </bean>


</beans>
最终,我们再写一个applicationContext.xml,用来放置其他的spring的配置,我们就可以实现分工协作,把所有的spring配置都引入到这里:
<?xml version="1.0" encoding="UTF-8"?>
<beans xmlns="http://www.springframework.org/schema/beans"
       xmlns:xsi="http://www.w3.org/2001/XMLSchema-instance"
       xsi:schemaLocation="http://www.springframework.org/schema/beans
        https://www.springframework.org/schema/beans/spring-beans.xsd">

    <import resource="springmvc-servlet.xml"/>
    <import resource="spring-dao.xml"/>

<!--    注册bean-->
    <bean class="com.fu.dao.UserMapperImpl" id="userMapperImpl">
        <property name="sqlSessionFactory" ref="sqlSessionFactory"/>
    </bean>

</beans>
这里的注册bean,我们可以使用注解的方式实现注册
sqlSessionFactory

 浙公网安备 33010602011771号