SpringBoot笔记之HelloWord
1 环境要求
- Java 8 & 兼容java14 .
- Maven 3.3+
- idea 2019.1.2
2 maven配置
找到maven安装目录/bin/settings.xml打开
设置阿里云镜像,提高下载速度。配置使用jdk1.8
<mirrors>
      <mirror>
        <id>nexus-aliyun</id>
        <mirrorOf>central</mirrorOf>
        <name>Nexus aliyun</name>
        <url>http://maven.aliyun.com/nexus/content/groups/public</url>
      </mirror>
  </mirrors>

  <profiles>
         <profile>
              <id>jdk-1.8</id>
              <activation>
                <activeByDefault>true</activeByDefault>
                <jdk>1.8</jdk>
              </activation>
              <properties>
                <maven.compiler.source>1.8</maven.compiler.source>
                <maven.compiler.target>1.8</maven.compiler.target>
                <maven.compiler.compilerVersion>1.8</maven.compiler.compilerVersion>
              </properties>
         </profile>
  </profiles>
3 编写HelloWord
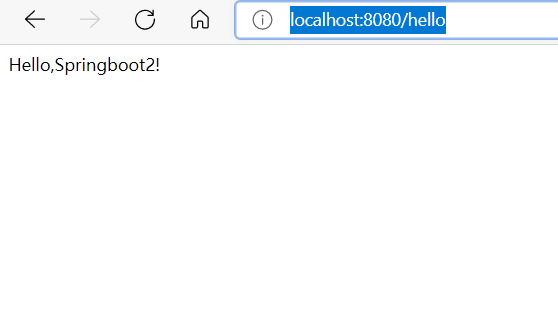
浏览器发送/hello请求,响应hello,Springboot2
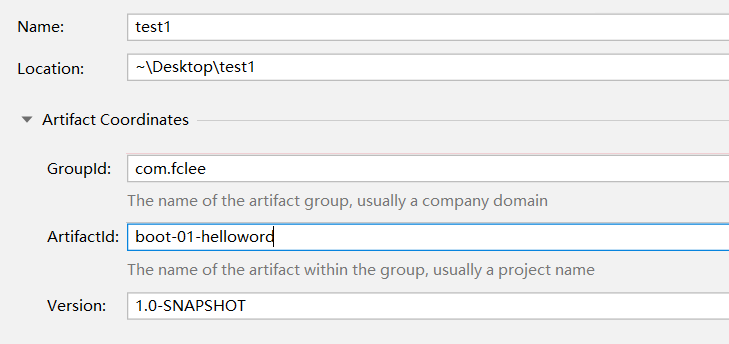
3.1 创建maven工程

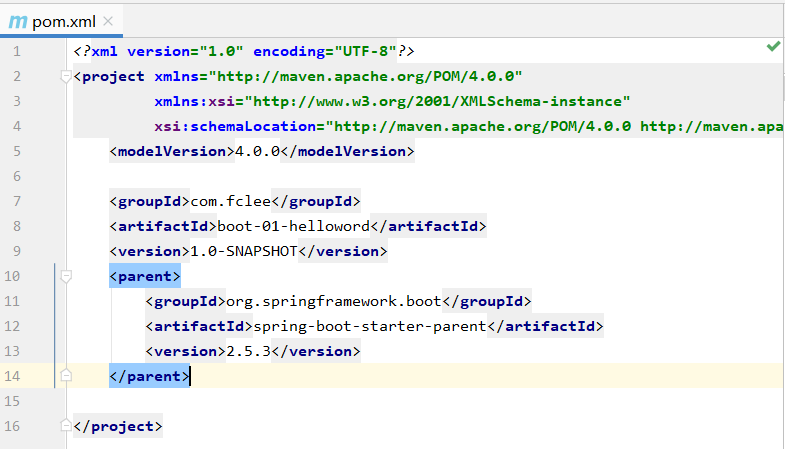
3.2 配置 pom.xml
<?xml version="1.0" encoding="UTF-8"?>
<project xmlns="http://maven.apache.org/POM/4.0.0" xmlns:xsi="http://www.w3.org/2001/XMLSchema-instance"
    xsi:schemaLocation="http://maven.apache.org/POM/4.0.0 https://maven.apache.org/xsd/maven-4.0.0.xsd">
    <modelVersion>4.0.0</modelVersion>

    <groupId>com.example</groupId>
    <artifactId>myproject</artifactId>
    <version>0.0.1-SNAPSHOT</version>

    <parent>
        <groupId>org.springframework.boot</groupId>
        <artifactId>spring-boot-starter-parent</artifactId>
        <version>2.5.3</version>
    </parent>

    <!-- Additional lines to be added here... -->

</project>
3.3 添加开发系统所需要的依赖
这里实现的是web开发,web开发只需添加一个依赖,这与整合的SSM框架配置比起来简洁了许多。
<dependencies>
    <dependency>
        <groupId>org.springframework.boot</groupId>
        <artifactId>spring-boot-starter-web</artifactId>
    </dependency>
</dependencies>
3.4 编写代码
tips:快速生成main函数快捷键: psvm
MainApplication.java
package com.fclee.boot;
import org.springframework.boot.SpringApplication;
import org.springframework.boot.autoconfigure.SpringBootApplication;
/**
 * 主程序类
 * 这个注解表明这是一个Springboot应用
 */
@SpringBootApplication
public class MainApplication {
    public static void main(String[] args) {
        SpringApplication.run(MainApplication.class,args);
    }
}
HelloController.java
@RestController注解包含了以下注解

@Target({ElementType.TYPE})
@Retention(RetentionPolicy.RUNTIME)
@Documented
@Controller
@ResponseBody
package com.fclee.boot.controller;
import org.springframework.web.bind.annotation.RequestMapping;
import org.springframework.web.bind.annotation.RestController;

@RestController
public class HelloController {
    @RequestMapping("/hello")
    public String handle01(){
       return "Hello,Springboot2!";
    }
}
3.5直接运行MainApplication的main方法
浏览器输入localhost:8080/hello
运行成功
3.6 小结
可以看出,SpringBoot大大简化了我们的开发步骤以及各种配置信息
基本流程如下
创建maven工程——配置pom.xml引入依赖——创建主程序——编写业务——测试
3.7 后续
①简化配置
所有的配置都可以整合到一个配置文件中
在idea项目中的resources下创建application.properties
可以的配置详见官方文档关于application.properties的设定Common Application Properties (spring.io)
②简化部署
创建一个可执行的jar包,这个jar包自带运行环境
We finish our example by creating a completely self-contained executable jar file that we could run in production. Executable jars (sometimes called “fat jars”) are archives containing your compiled classes along with all of the jar dependencies that your code needs to run.
将以下插件配置代码写到pom.xml中
<build>
    <plugins>
        <plugin>
            <groupId>org.springframework.boot</groupId>
            <artifactId>spring-boot-maven-plugin</artifactId>
        </plugin>
    </plugins>
</build>
右侧任务栏同时选取clean与package,点击绿色横三角,打包
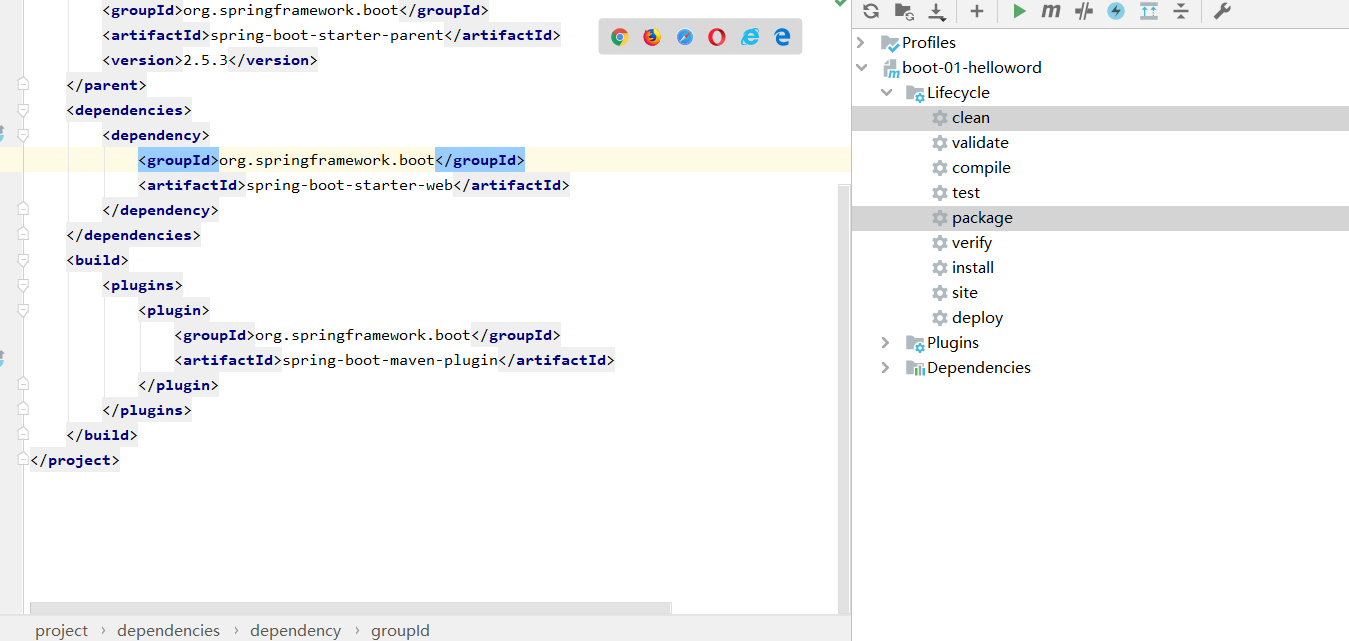
打包完成,打开左侧target
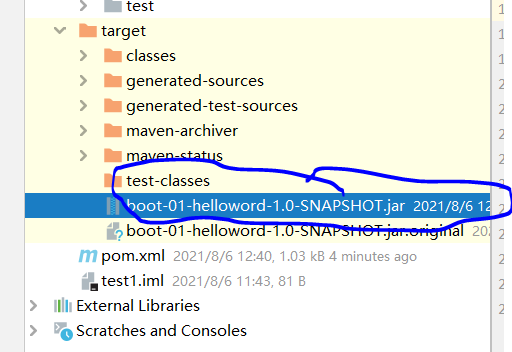
右键点击target,打开所在文件夹,这个jar包可以直接执行
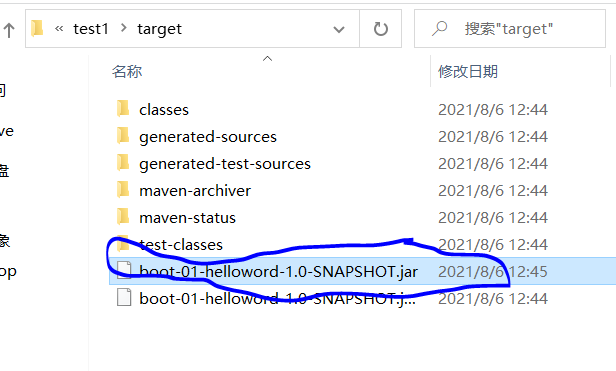
在上方文件夹地址栏直接输入cmd回车,即可进入该文件夹下的cmd命令符端口
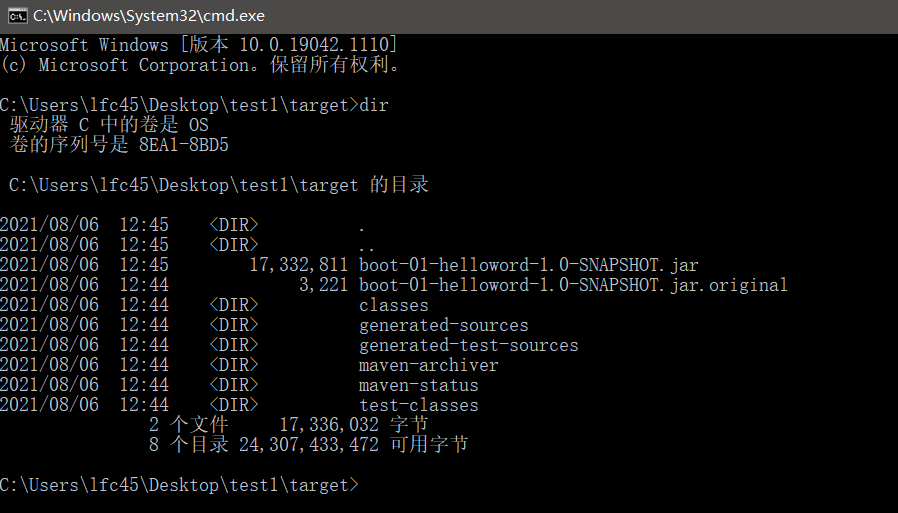
输入 java -jar boot-01-helloword-1.0-SNAPSHOT.jar

在地址栏输入localhost:8080/hello即可运行

