Electron把网页打包成桌面应用并进行源码加密
前言
最近想把自己用html+css+js做的网页界面打包成桌面应用,网上一搜,发现Electron是一个不错的选择,试了试,发现效果真的不错。这里记录一下打包过程以作记录,便于自己以后查看学习。
一、简介
Electron是由Github开发,用HTML,CSS和JavaScript来构建跨平台桌面应用程序的一个开源库。 Electron通过将Chromium和Node.js合并到同一个运行时环境中,并将其打包为Mac,Windows和Linux系统下的应用来实现这一目的。
二、打包过程
1.首先保证自己计算机全局安装了nodejs,并且利用nodejs自带的npm全局安装了electron和打包神器electron-packager。两个命令:(npm install electron -g),(npm install electron-packager -g)。注意:npm速度较慢,可以尝试用cnpm,下载安装速度快。
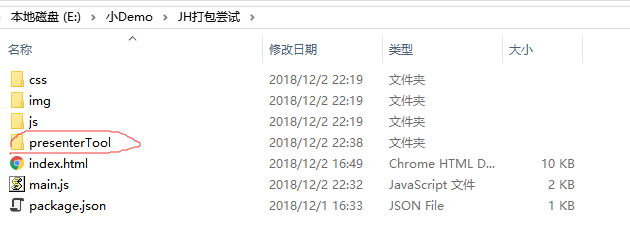
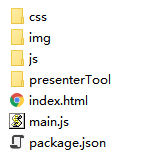
2.在自己的前端网页项目文件夹下,新建 package.json、main.js、index.html 三个文件(注:其中的 index.html 是你的网页首页,就是自己已经写好的网页界面)。

3.在 package.json 中添加如下内容:(name属性值可以自定义,Version属性值也可以自定义,main属性值是根据新建的main.js文件名来的)
{
  "name"    : "app-name",
  "version" : "0.1.0",
  "main"    : "main.js"
}
4.在main.js中插入如下代码:
const {app, BrowserWindow} = require('electron')
const path = require('path')
const url = require('url')

// Keep a global reference of the window object, if you don't, the window will
// be closed automatically when the JavaScript object is garbage collected.
let win

function createWindow () {
  // Create the browser window.
  win = new BrowserWindow({width: 800, height: 600})

  // and load the index.html of the app.
  win.loadURL(url.format({
    pathname: path.join(__dirname, 'index.html'),
    protocol: 'file:',
    slashes: true
  }))

  // Open the DevTools.
  //win.webContents.openDevTools()     //注意:这行代码取消注释的话,就可以使打包生成的应用程序带有开发者模式,类似于chrome的调试模式,可以调试程序的出现的bug

  // Emitted when the window is closed.
  win.on('closed', () => {
    // Dereference the window object, usually you would store windows
    // in an array if your app supports multi windows, this is the time
    // when you should delete the corresponding element.
    win = null
  })
}

// This method will be called when Electron has finished
// initialization and is ready to create browser windows.
// Some APIs can only be used after this event occurs.
app.on('ready', createWindow)

// Quit when all windows are closed.
app.on('window-all-closed', () => {
  // On macOS it is common for applications and their menu bar
  // to stay active until the user quits explicitly with Cmd + Q
  if (process.platform !== 'darwin') {
    app.quit()
  }
})

app.on('activate', () => {
  // On macOS it's common to re-create a window in the app when the
  // dock icon is clicked and there are no other windows open.
  if (win === null) {
    createWindow()
  }
})

// In this file you can include the rest of your app's specific main process
// code. You can also put them in separate files and require them here.
注:上面这行代码win.webContents.openDevTools()很有用,如果这行代码取消注释,可以使生成的应用程序自带调试框,方便程序的调试。
4.在自己的前端网页项目文件夹下,输入 electron-packager . app --win --out presenterTool --arch=x64 --electron-version 3.0.10 --overwrite --ignore=node_modules 即可开始打包。

注:可根据自己需求更改命令如下:
electron-packager . 可执行文件的文件名 --win --out 打包成的文件夹名 --arch=x64位还是32位 --electron-version 版本号 --overwrite --ignore=node_modules
补充:这里的electron版本号可直接在命令行输入electron得到(因为electron全局安装的)。
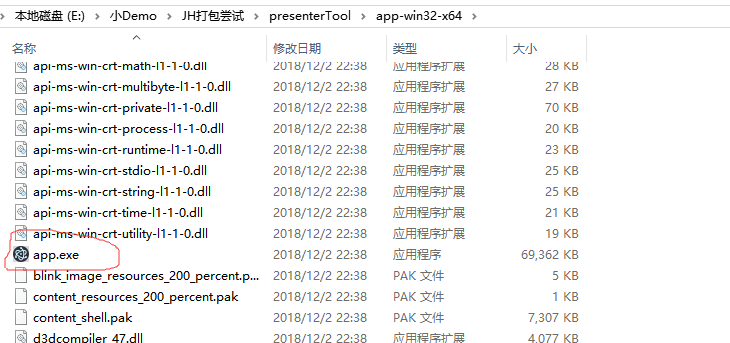
5.打包结果

这个presenterTool文件夹下就有生成的app文件。

三、源码加密
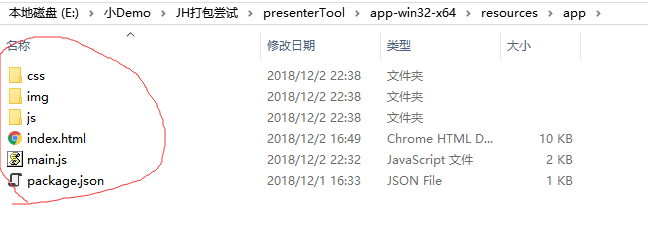
在上面打包完成后的文件夹下,我们会发现,在每个包下的resources文件夹里的app文件夹里都有我们写的源程序。


这样我们写的代码就是完全暴露在用户电脑上的,这是非常不安全的,但是我们可以通过electron 自带的加密功能解决这个问题。
1.全局安装 asar
npm install asar -g
安装完asar以后,就可以使用asar命令将程序文件打包了。
2.在resources目录下使用asar指令进行加密
asar pack ./app app.asar
如下所示:

3.结果

将原来的app文件夹删除就可以了,这样生成的app.asar就加密了之前的源代码,保证了安全性。

四、最终效果:(展示一部分)

参考:
https://blog.csdn.net/a727911438/article/details/70834467?utm_source=itdadao&utm_medium=referral
https://blog.csdn.net/u010683528/article/details/56279647
https://newsn.net/say/electron-asar.html


 浙公网安备 33010602011771号