基于ubuntu16的mqtt服务器(apache-apollo1.7.1)
感谢博客:https://www.cnblogs.com/chenrunlin/p/5109028.html
需要环境:
java1.8

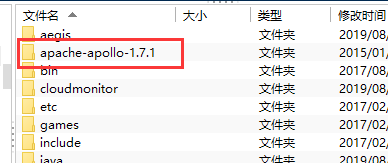
把文件通过finalshell扔到/usr/local目录下
使用命令
# sudo tar -zxvf apache-apollo-1.7.1-unix-distro.tar.gz

然后
我配置了一下apollo_home 更改 /etc/profile

按exc键后输入:wq保存
然后
# sudo -s
# source /etc/profile
刷新配置
再进入/var/lib
# cd /var/lib/
新建Mybroker
# /usr/local/apache-apollo-1.7.1/bin/apollo create mybroker

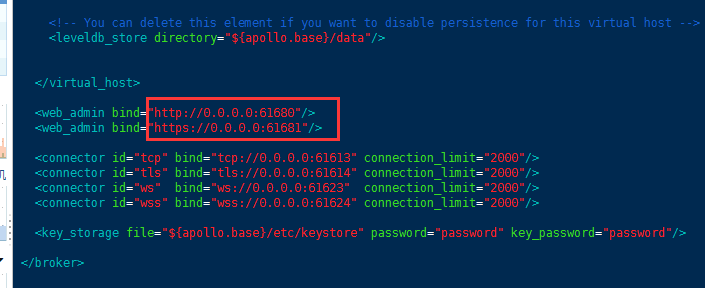
再更改mybroker中/etc/apollo.xml
#vim /var/lib/mybroker/etc/apollo.xml

红框中改为0.0.0.0
最后运行
# nohup /var/lib/mybroker/bin/apollo-broker run
nohup是为了关闭ssh之后也能在后台运行

注意点:
1、可能有时候需要sh命令 比如说 sh apollo create mybroker
2、阿里云必须开放apollo.xml中的端口,如61680.61681等。
3、是否成功通过ip+61680即可知道。
4、初始账号密码是admin,password,存放在etc目录的users.properties下
5、注意nohup命令运行,不然可能断开连接后自动关停服务
成功截图:

附送一下测试Demo,需要的jar包是
org.eclipse.paho.client.mqttv3-1.2.0.jar

服务器端server:
import org.eclipse.paho.client.mqttv3.MqttClient;
import org.eclipse.paho.client.mqttv3.MqttConnectOptions;
import org.eclipse.paho.client.mqttv3.MqttDeliveryToken;
import org.eclipse.paho.client.mqttv3.MqttException;
import org.eclipse.paho.client.mqttv3.MqttMessage;
import org.eclipse.paho.client.mqttv3.MqttPersistenceException;
import org.eclipse.paho.client.mqttv3.MqttTopic;
import org.eclipse.paho.client.mqttv3.persist.MemoryPersistence;
/**
 *
 * Title:Server
 * Description: 服务器向多个客户端推送主题,即不同客户端可向服务器订阅相同主题*/
public class Server {
    public static final String HOST="tcp://IP地址:61613";
    public static final String TOPIC1="toclient/1";
    public static final String TOPIC2="toclient/2";
    public static final String clientid="server";

    public MqttClient client;
    public MqttTopic topic1;
    public MqttTopic topic2;
    public String userName = "admin";
    public String passWord = "password";

    public MqttMessage message;

    public void connect() {
        MqttConnectOptions options = new MqttConnectOptions();
        options.setCleanSession(false);
        options.setUserName(userName);
        options.setPassword(passWord.toCharArray());
        options.setConnectionTimeout(10);//设置超时时间
        options.setKeepAliveInterval(20);//设置
        try {
            client.setCallback(new PushCallback());
            client.connect(options);
            topic1 = client.getTopic(TOPIC1);
            topic2 = client.getTopic(TOPIC2);
        }catch (Exception e) {
            // TODO: handle exception
            e.printStackTrace();
        }
    }
    public void publish(MqttTopic topic,MqttMessage message) throws MqttPersistenceException, MqttException {
        MqttDeliveryToken token = topic.publish(message);
        token.waitForCompletion();
        System.out.println("消息推送成功 !"+ token.isComplete());
    }
    public Server() throws MqttException {
        client = new MqttClient(HOST, clientid,new MemoryPersistence());
        connect();
    }

    public static void main(String[] args) throws MqttException {
       Server server = new Server();

       server.message= new MqttMessage();
       server.message.setQos(2);
       /*
        QoS 0,最多一次送达。也就是发出去就fire掉。
        QoS 1,至少一次送达。发出去之后必须等待ack,没有ack,就要找时机重发
        QoS 2,准确一次送达。消息id将拥有一个简单的生命周期。
        * */
       server.message.setRetained(true);
       server.message.setPayload("发送消息到Topic1".getBytes());
       server.publish(server.topic1, server.message);
       System.out.println(server.message.isRetained() + "----ratained状态");
    }
}
监听端Client:
import java.util.concurrent.ScheduledExecutorService;

import org.eclipse.paho.client.mqttv3.MqttClient;
import org.eclipse.paho.client.mqttv3.MqttConnectOptions;
import org.eclipse.paho.client.mqttv3.MqttTopic;

public class Client {
    public static final String HOST="tcp://IP地址:61613";
    public static final String TOPIC="toclient/1";
    private static final String clientid="clientid1";

    private MqttClient client;
    private MqttConnectOptions options;
    private String userName = "admin";
    private String passWord = "password";

    private ScheduledExecutorService scheduler;

    private void start() {
        try {
            client = new MqttClient(HOST, clientid);
            options = new MqttConnectOptions();
            options.setCleanSession(true);
            options.setUserName(userName);
            options.setPassword(passWord.toCharArray());
             // 设置超时时间 单位为秒
            options.setConnectionTimeout(10);
            // 设置会话心跳时间 单位为秒 服务器会每隔1.5*20秒的时间向客户端发送个消息判断客户端是否在线,但这个方法并没有重连的机制
            options.setKeepAliveInterval(20);

            client.setCallback(new PushCallback());

            MqttTopic topic = client.getTopic(TOPIC);
            options.setWill(topic, "close".getBytes(), 2, true);
            client.connect(options);
            int []Qos = {1};
            String [] topic1 = {TOPIC};
            client.subscribe(topic1,Qos);
        }catch (Exception e) {
            // TODO: handle exception
            e.printStackTrace();
        }
    }


    public static void main(String[] args) {
        // TODO Auto-generated method stub
        Client client = new Client();
        client.start();
    }

}
回调函数 PushCallback:
import org.eclipse.paho.client.mqttv3.IMqttDeliveryToken;
import org.eclipse.paho.client.mqttv3.MqttCallback;
import org.eclipse.paho.client.mqttv3.MqttMessage;

/**
 * 发布消息的回调类
 *
 * 必须实现MqttCallback的接口并实现对应的相关接口方法CallBack 类将实现 MqttCallBack。
 * 每个客户机标识都需要一个回调实例。在此示例中,构造函数传递客户机标识以另存为实例数据。
 * 在回调中,将它用来标识已经启动了该回调的哪个实例。
 * 必须在回调类中实现三个方法:
 *
 *  public void messageArrived(MqttTopic topic, MqttMessage message)接收已经预订的发布。
 *
 *  public void connectionLost(Throwable cause)在断开连接时调用。
 *
 *  public void deliveryComplete(MqttDeliveryToken token))
 *  接收到已经发布的 QoS 1 或 QoS 2 消息的传递令牌时调用。
 *  由 MqttClient.connect 激活此回调。
 *
 */
public class PushCallback implements MqttCallback {

    public void connectionLost(Throwable cause) {
        System.out.println("连接断开,可以重连!");
    }

    public void deliveryComplete(IMqttDeliveryToken token) {
        // TODO Auto-generated method stub
        System.out.println("deliveryComplete -- "+token.isComplete());

    }

    public void messageArrived(String topic, MqttMessage msg) throws Exception {
        // TODO Auto-generated method stub
        System.out.println("接收消息主题 : "+topic);
        System.out.println("接收消息Qos: "+msg.getQos());
        System.out.println("接收消息 : "+ new String(msg.getPayload()));

    }
}
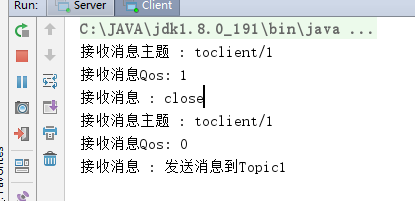
效果:
先运行client端。

再运行server端发送给订阅者:

再次查看监听端:


