React—07—setState原理;scu优化;ref操作原生dom和组件;
一、基本使用
注意一点,setState是异步的
那么如何可以获取到更新后的值呢?
方式一:setState的回调 setState接受两个参数:第二个参数是一个回调函数,这个回调函数会在更新后会执行;格式如下:setState(partialState, callback)
方式二: 当然,我们也可以在生命周期函数:componentDidUpdate(),
而且componentDidUpdate会比setState里的回调函数callback还先打印出来,下面的代码执行顺序就是 111 222 333.
  handleClick = par => {
    // 1.基本使用,传递一个对象,对象里面有几个属性,就修改几个属性;react内部会使用Object.assign()方法来合并对象
    // this.setState({ message: par });

    // 2.函数式使用;默认会将this.state和this.props作为参数传入;
    //   函数返回的对象就是要修改的属性;
    // this.setState((state, props) => {
    //   console.log('%c [ props ]-22',  props);
    //   console.log('%c [ state ]-22',  state);
    //   return { message: par };
    // });

    // 3.注意,setState是异步的;如果想立马获取更新后的结果,可以使用回调函数
    this.setState({ message: par }, () => {
      console.log('[ 333执行此代码 ]',  this.state.message);
    });
    console.log(' [ 111先执行此代码]',  this.state.message);
  };

  componentDidUpdate() {
    console.log(' [ 222执行此代码 ]-componentDidUpdate',  this.state.message);
  }
二、setState为什么是异步的?
setState的更新是异步的?
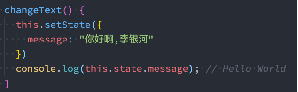
最终打印结果是Hello World而不是“你好啊李银河”; 可见setState是异步的操作,我们并不能在执行完setState之后立马拿到最新的state的结果
为什么setState设计为异步呢?
setState设计为异步其实之前在GitHub上也有很多的讨论;
React核心成员(Redux的作者)Dan Abramov也有对应的回复,有兴趣的同学可以参考一下; https://github.com/facebook/react/issues/11527#issuecomment-360199710;
简单的总结:
- setState设计为异步,可以显著的提升性能;如果每次调用 setState都进行一次更新,那么意味着render函数会被频繁调用,界面重新渲染,这样效率是很低的; 最好的办法应该是获取到多个更新,之后进行批量更新;
- 如果同步更新了state,但是还没有执行render函数,那么state和props不能保持同步; state和props不能保持一致性,会在开发中产生很多的问题;(假如同步,那么一旦调用setState函数父组件的state的值就已经发生了改变,但是由于此时还没有执行render函数,所以传递给子组件的props还是老的值,state和props不能保持同步会出现很多问题。)
setState一定是异步的吗?
分情况:

react18之前,如果把setState放在微任务或宏任务之中,那么会是同步操作,
react18之后,所有全部都是异步操作,会进行批处理。
如果就想要同步执行一次setState,需要用到flushSync函数,并且有一个副作用,那就是flushSync函数执行之后会立马先执行一次render函数(保持sttate和props一致),然后才去执行setState后面的代码。
所以下面的代码执行顺序是111 222render 333.
import React from 'react';
import { flushSync } from 'react-dom';

// 编写一个组件
class App extends React.Component {
  constructor() {
    super();
    this.state = {
      message: 'Hello React ',
      counter: 0
    };
  }

  handleClick = par => {
    // 通过flushSync来实现同步
    flushSync(() => {
      console.log('%c [111  ]-35', 'font-size:13px; background:pink; color:#bf2c9f;', )
      this.setState({ message: par });
    });
    console.log('%c [ 333 ]-37', 'font-size:13px; background:pink; color:#bf2c9f;', )
  };


  render() {
    console.log('%c [ 2222render ]-39', 'font-size:13px; background:pink; color:#bf2c9f;', )
    return (
      <div>
        <h1>{this.state.message}</h1>
        <h1>{this.state.counter}</h1>
        <button
          onClick={() => {
            this.handleClick('hello world');
          }}>
          点击
        </button>
      </div>
    );
  }
}

export default App;
三、scu优化
也就是使用shouldComponentUpdate函数去判断render函数是否要更新;

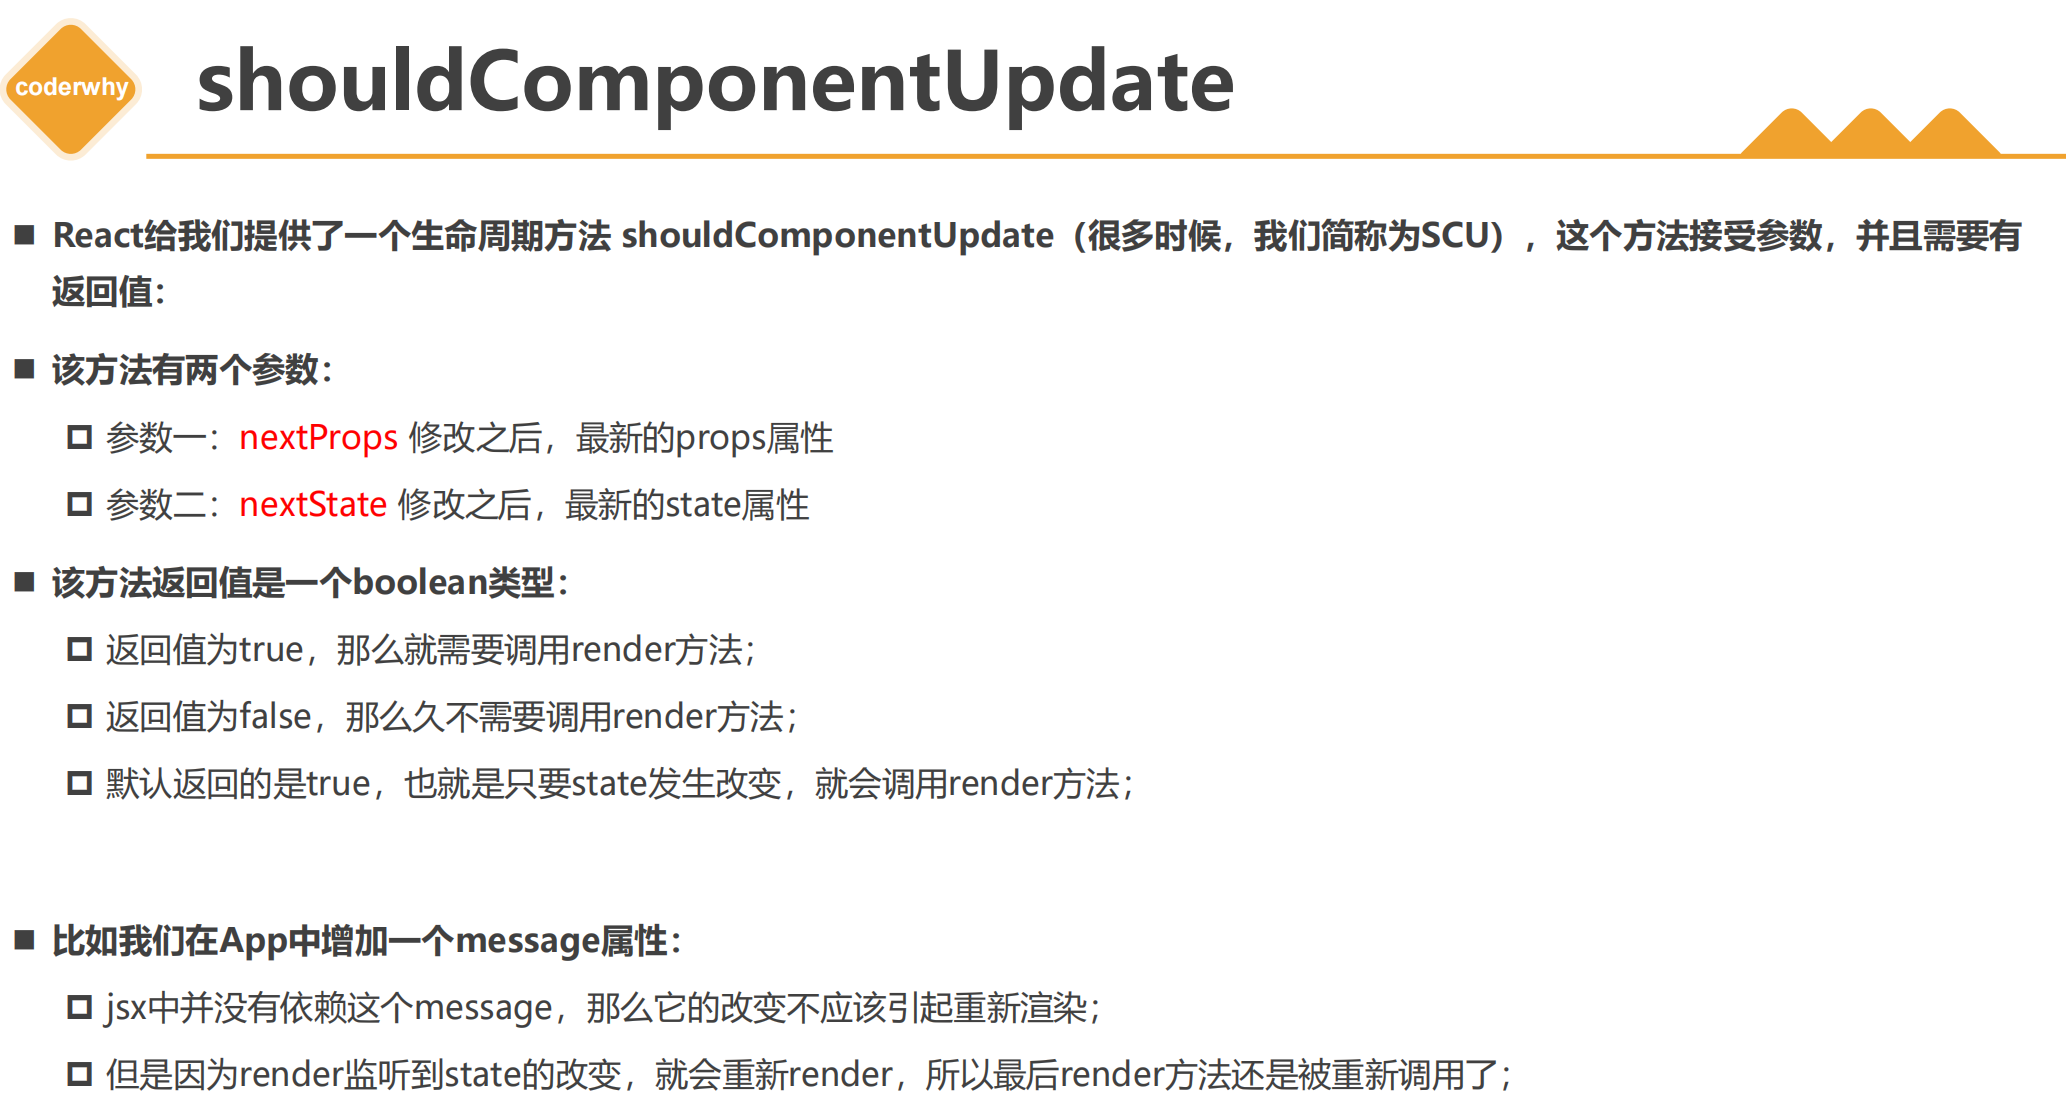
如下代码,我们点击按钮1,render函数是不会调用的,因为shouldComponentUpdate返回false;
点击按钮2,render函数才会被调用。
import React from 'react';

// 编写一个组件
class App extends React.Component {
  constructor() {
    super();
    this.state = {
      message: 'Hello React ',
      counter: 0
    };
  }

  handleClickSame = par => {
    this.setState({ message: 'Hello React ' });
  };
  handleClickDifferent = par => {
    this.setState({ message: 'Hello React 2'});
  }

  shouldComponentUpdate(nextProps, nextState) {
    if(nextState.message === this.state.message) {
      return false;
    }
    return true;
  }

  render() {
    console.log('render函数被调用了');
    return (
      <div>
        <h1>{this.state.message}</h1>
        <h1>{this.state.counter}</h1>
        <button onClick={e => this.handleClickSame()}>点击(新值和原值一样)</button>
        <button onClick={e => this.handleClickDifferent()}>点击(新值和原值不一样)</button>
      </div>
    );
  }
}

export default App;
四、pureComponent和memo
如果每一个组件都用shouldComponentUpdate判断实在是太麻烦了,如果有10个state变量岂不是要写10次?
所以,react内部帮我们做了判断,只需要继承pureComponent租价即可,
pureCompunent自动帮我们做了一次浅层的比较,,如果state变脸的值一样就不执行render函数,如果不一样再执行。
import React,{PureComponent} from 'react';
import Profile from './Profile.jsx';

// 编写一个组件
class App extends PureComponent {
  constructor() {
    super();
    this.state = {
      message: 'Hello React ',
      counter: 0
    };
  }

  handleClickSame = par => {
    this.setState({ message: 'Hello React ' });
  };
  handleClickDifferent = par => {
    this.setState({ message: 'Hello React 2'});
  }
  handleCounter = par => {
    this.setState({ counter: this.state.counter + 1});
  }

  render() {
    console.log('app render函数被调用了');
    return (
      <div>
        <h1>{this.state.message}</h1>
        <h1>{this.state.counter}</h1>
        <button onClick={e => this.handleClickSame()}>点击(新值和原值一样)</button>
        <button onClick={e => this.handleClickDifferent()}>点击(新值和原值不一样)</button>

        <button onClick={e => this.handleCounter()}>点击数字</button>

        <Profile message={this.state.message}></Profile>

      </div>
    );
  }
}

export default App;
这个是类组件,如果我们的组件是函数组件,应该如何判断?
使用memeo函数包裹即可。
import { memo } from 'react';

const Profile = memo(function (props) {
  console.log('Profile render');
  return <h2>profile: {props.message}</h2>;
});

export default Profile;
这个时候,如果依赖的props的变量没有变化,profile组件的render函数(也就是本函数)是不会执行的。
比如,我们点击counter时,由于profile没有依赖counter,所以只有app组件会执行render函数,但是profile不会执行render函数。
4.2、使用pureCompunent需要注意的地方
import React, { PureComponent } from 'react';

// 编写一个组件
class App extends PureComponent {
  constructor() {
    super();
    this.state = {
      book: [
        {
          name: '西游记',
          price: 100
        },
        {
          name: '红楼梦',
          price: 200
        },
        {
          name: '水浒传',
          price: 300
        }
      ]
    };
  }

  handleClick = par => {
    const newBook = { name: '三国演义', price: 400 };

    //方式一: 直接修改原值,在pureComponent组件中不会重新渲染
    // this.state.book.push(newBook);
    // this.setState({ book: this.state.book });

    //方式二: 利用展开运算符,在pureComponent组件中会重新渲染
    this.setState({ book: [...this.state.book, newBook] });
  };

  render() {
    return (
      <div>
        <h1>{this.state.book.map(e => <div key={e.name}>{e.name}</div>)}</h1>
        <button onClick={e => this.handleClick()}>点击</button>
      </div>
    );
  }
}

export default App;
purecomponent是一个浅层的比较(shollowEqual方法),对于引用数据类型,就是比较引用地址罢了,所以,在此例子中,
方式一,虽然通过push方法改变了原数组,使得原数组加了一个元素,但是在setState时,由于仍然是原数组的引用地址,所以pureComponent认为state没有遍,所以不会重新渲染。
方式二,通过展开字面量写法和展开运算符,实例了一个新的数组,有了新的引用地址,所以pureComponent会认为state变化了,所以会重新渲染。
一、操作原生dom
三种方式
import React, { PureComponent, createRef } from 'react';

// 编写一个组件
class App extends PureComponent {
  constructor() {
    super();
    this.state = {};

    this.titleRef2 = createRef();
    this.titleRef3 = createRef();
  }

  handleConsole = par => {
    // 方式一
    console.log(this.refs.m1);
    // 方式二
    console.log(this.titleRef2.current);
    // 方式三
    console.log(this.titleRef3.current);
  };

  render() {
    return (
      <div>
        <h1 ref="m1">方式一</h1>
        <h1 ref={this.titleRef2}>方式二</h1>
        <h1 ref={e => (this.titleRef3.current = e)}>方式三</h1>

        <button onClick={e => this.handleConsole()}>点击</button>
      </div>
    );
  }
}

export default App;
二、操作组件
1.类组件
和获取原生dom的方式二一样,先通过createRef()得到一个变量,然后绑定上去即可。
2.函数组件
也要先通过createRef()得到一个变量,但是子组件函数要用forwardRef包裹起来。然后把ref放到函数返回的元素的上面。
import React, { PureComponent, createRef ,forwardRef } from 'react';


const Footer = forwardRef((props,ref)=>{
  return <h3 ref={ref}>Footer child component</h3>
})

class Body extends PureComponent {

  test(){
    console.log(111);
  }

  render() {
     return <h3>body child component</h3>
  }
}

// 编写一个组件
class App extends PureComponent {
  constructor() {
    super();
    this.state = {};

    this.titleRef = createRef();
    this.titleRef2 = createRef();
  }

  handleConsole = par => {
    // 获取类组件的ref实例
    console.log(this.titleRef.current);
    this.titleRef.current.test(); // 调用类组件的方法
    // 方式二
    console.log(this.titleRef2.current);

  };

  render() {
    return (
      <div>

        <Body ref={this.titleRef}></Body>
        <Footer ref={this.titleRef2}></Footer>
        <button onClick={e => this.handleConsole()}>点击</button>
      </div>
    );
  }
}

export default App;

 浙公网安备 33010602011771号