Nginx缓存配置及nginx ngx_cache_purge模块的使用
ngx_cache_purge模块的作用:用于清除指定url的缓存
1、编译如下:
# ./configure --prefix=/app/nginx --with-http_stub_status_module --with-http_ssl_module --add-module=../ngx_cache_purge-2.3
# make
# make install
2、nginx配置如下:
proxy_cache_path  /app/proxy_cache_dir  levels=1:2 keys_zone=cache1:200m inactive=1d max_size=10g;
#设置Web缓存区名称为cache1,内存缓存空间大小为200MB,1天没有被访问的内容自动清除,硬盘缓存空间大小为30GB。levels=1:2 表示缓存目录的第一级目录是1个字符,第二级目录是2个字符,即/app/proxy_cache_dir/cache1/a/1b这种形式
server {
        listen       80;
        server_name  localhost;

        #charset koi8-r;

        #access_log  logs/host.access.log  main;

        location / {
            root   html;
            index  index.html index.htm;
        }
        location ~ /purge(/.*) {
            allow           127.0.0.1;
            allow           192.168.116.0/24
            deny            all;
            proxy_cache_purge    cache1 $host$1$is_args$args;
        }
        location ~ \.(gif|jpg|jpeg|png|bmp|ico)$ {
            proxy_set_header Host  $host;
            proxy_set_header X-Forwarded-For  $remote_addr;
            proxy_pass http://127.0.0.1:8080;
            proxy_cache cache1; #设置资源缓存的zone
            proxy_cache_key $host$uri$is_args$args; #设置缓存的key,以域名、URI、参数组合成Web缓存的Key值,Nginx根据Key值哈希,存储缓存内容到二级缓存目录内
            proxy_cache_valid 200 304 12h;  #对不同的HTTP状态码设置不同的缓存时间
            expires 7d; #缓存时间
        }
        #error_page  404              /404.html;

        # redirect server error pages to the static page /50x.html
        #
        error_page   500 502 503 504  /50x.html;
        location = /50x.html {
            root   html;
        }
}
启动nginx,查看进程,发现新增了两个进程:

3、验证缓存及手动清除指定url缓存功能
如果在缓存时间之类需要更新被缓存的静态文件怎么办呢,这时候就需要手动来清除缓存了。
访问一张图片:

查看缓存的文件:

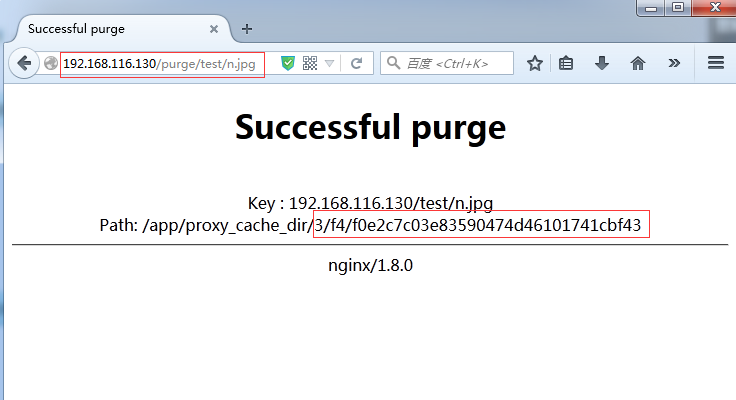
更换图片内容,然后清除缓存后再访问:
http://192.168.116.130/purge/test/n.jpg #访问此url可以清楚缓存。

再次访问原来的url,图片已更新:


 浙公网安备 33010602011771号