
服务-FTP文件传输服务
FTP文件传输服务
FTP(File Transfer Protocol,文件传输协议)是典型的C/S结构的应用层协议,需要由服务器端软件、客户端软件两个部分共同实现文件传输功能。
FTP连接及传输模式
FTP服务器默认使用TCP协议的20、21端口与客户端进行通信。20端口用与建立数据连接,并传输文件数据;21端口用与建立控制连接,并传输FTP控制命令。根据FTP服务器在建立数据连接过程中的主、被动关系,FTP数据连接分为主动模式和被动模式
主动模式:服务器主动发起数据连接。首先由客户端向服务器端的21端口建立FTP控制连接,当需要传输数据时,客户端以PORT命令告知服务器“我开启了某端口,你过来连接我”于是服务器从20端口向客户端的该端口发送请求并建立数据连接。
被动模式:服务器被动等待数据连接。如果客户机所在网络的防火墙禁止主动模式连接,通常会使用被动模式。首先由客户端向服务端的21端口建立FTP控制连接,当需要传输数据时,服务器以PASV命令告知客户端“我打开了某端口,你过来连接我,”于是客户端向服务器的该端口(非20)发送请求并建立数据连接。
FTP传输模式:
文本模式:ASCLL模式,以文本序列传输数据,用与纯文本模式的传输
二进制模式:Binary模式,以二进制序列传输数据,适合传输程序、图片等非纯文本字符的文件。
FTP用户类型:
匿名用户:使用FTP客户端访问服务器时,用户名为ftp或anonymous,提供任意密码,或空密码都可以通过验证的叫匿名用户
本地用户:使用本机系统用户账号来进行验证叫本地用户。
虚拟用户:有些FTP服务器软件还可以维护一份独立的用户数据库文件,而不是直接使用系统用户账号。这些位于独立数据库文件中的FTP用户账号叫做虚拟用户。
FTP服务器软件的种类:
Windows系统中常见的FTP服务器软件包括FileZilla Sener、Serv-U等,而在Linux操作系统中vsftpd是最应用广泛的。
vsftpd服务的名称来源于“Very Secure FTP Daemon”,该软件针对安全性方面做了大量的设计。除了安全性以外,vsftpd在速度和稳定性方面的表现也相当突出。根据ftp.redhat.com服务器反应的数据,vsftpd可以支持15000个用户并发连接。
vsftpd的配置文件
用户列表文件ftpusers和user_list
在ftpusers、user_list文件中,各自记录了若干个FTP用户的账户名称,两个列表文件都用与FTP登录控制,但是控制方式存在一些差别。
ftpusers文件:此文件中列出的用户将禁止登录vsftpd服务器,不管该用户是否在user_list文件中出现。该文件默认包括root、bin、daemon等用于系统运行的特殊用户。
user_list文件:此文件中包含的用户是否允许登录ftp服务器取决于,配置文件(/etc/vsftpd/vsftpd.conf)当存在userlist_enable=YES时表示user_list文件以被启用,若指定:userlist_deny=YES时则在user_list文件中的用户将禁止登录ftp,=NO时,则在user_list文件中的用户将允许登录。(灰名单)
ftpusers文件相当于黑名单,为vsftpd服务器提供了一份禁止登录的用户列表;而user_list文件提供了一份可以灵活控制的用户列表。二者相互结合,为FTP账号的登录提供了便捷的途径。
主配置文件/etc/vsftpd/vsftpd.conf
[root@localhost ~]# grep -v "^#" /etc/vsftpd/vsftpd.conf  | grep  -v  "^$"  //过滤出有用的配置项
#匿名用户配置
anonymous_enable=YES     //是否允许匿名访问
anon_umask=022     //设置匿名用户所上传文件的默认权限掩码值
anon_root=/var/ftp     //设置匿名用户的FTP根目录(默认为/var/ftp/)
anon_upload_enable=YES    //是否允许匿名用户上传文件
anon_mkdir_write_enable=YES     //是否允许匿名用户有创建目录的写入权限
anon_other_write_enable=YES     //是否允许匿名用户有其他写入权限,如对文件名的修改、及覆盖、删除文件等
#本地用户配置
local_enable=YES      //是否允许启用本地系统用户
local_umask=022   //设置本地用户所上传文件的默认权限掩码值,umask是权限中‘拿走’相应的位
local_root=/var/ftp     //设置本地用户的FTP根目录(默认为用户的宿主目录)
chroot_local_user=YES      //是否将FTP本地用户禁锢在宿主目录中,针对的是local_root配置
local_max_rate=200000    //限制本地用户传输速率为200kb/s
#全局配置
listen=NO    //是否以独运行方式监听服务
listen_address=192.168.100.21     //只在一个网络接口监听服务
listen_port=21     //监听端口改为21
write_enable=YES     //是否允许写入,全局配置
download_enable=YES    //是否允许下载文件(建立仅限于浏览、上传的FTP服务器时可将其设为“NO”)
dirmessage_enable=YES   //FTP服务器的用户可以在首次进入新目录时显示消息
xferlog_enable=YES    //是否启用上传下载文件的日志记录
xferlog_std_format=YES    //启用后,将记录所有FTP请求和响应,以标准 xferlog 的格式书写
connect_from_port_20=YES     //建立数据连接开放的端口
chown_uploads=YES     //设定是否允许改变上传文件的属主,与下面一个设定项配合使用, 注意,不推荐使用root用户上传文
chown_username=whoever   //设置想要改变的上传文件的属主,如果需要,则输入一个系统用户名, 可以把上传的文件都改成root属主。whoever:任何人
xferlog_file=/var/log/xferlog    //设定系统维护记录FTP服务器上传和下载情况的日志文件, /var/log/vsftpd.log是默认的,也可以另设其它
pasv_enable=NO   //禁止被动模式连接
pasv_min_port=24500   //指定被动模式的下限端口
pasv_max_port=24600     //指定被动模式的上限端口
pam_service_name=vsftpd   //设置用与用户认证的PAM文件位置(/etc/pam.d/目录中对应的文件名)
userlist_enable=YES     //是否启用用户控制列表功能
userlist_deny=YES   //是否仅禁止用户控制列表中的用户登录ftp
max_clients=20    //限制并发客户连接最多20个
max_per_ip=2    //限制每个IP地址的连接数最多为两个
tcp_wrappers=YES   //是否启用tcpwrappers安全机制

idle_session_timeout=600     //设置数据传输中断间隔时间,此语句表示空闲的用户会话中断时间为600秒,即当数据传输结束后,用户连接FTP服务器的时间不应超过600秒。可以根据实际情况对该值进行修改
data_connection_timeout=120    //设置数据连接超时时间,该语句表示数据连接超时时间为120秒,可根据实际情况对其个修改
nopriv_user=ftpsecure    //运行vsftpd需要的非特权系统用户,缺省是nobody
async_abor_enable=YES    //是否识别异步ABOR请求。如果FTP client会下达“async ABOR”这个指令时,这个设定才需要启用,而一般此设定并不安全,所以通常将其取消
ascii_upload_enable=YES    //是否以ASCII方式传输数据。默认情况下,服务器会忽略ASCII方式的请求。 启用此选项将允许服务器以ASCII方式传输数据,不过,这样可能会导致由"SIZE /big/file"方式引起的DoS攻击
ascii_download_enable=YES
ftpd_banner=Welcome to blah FTP service.    //登录FTP服务器时显示的欢迎信息,如有需要,可在更改目录欢迎信息的目录下创建名为.message的文件,并写入欢迎信息保存后
deny_email_enable=YES    //黑名单设置。如果很讨厌某些email address,就可以使用此设定来取消他的登录权限,可以将某些特殊的email address抵挡
banned_email_file=/etc/vsftpd/banned_emails   //当上面的deny_email_enable=YES时,可以利用这个设定项来规定哪些邮件地址不可登录vsftpd服务器, 此文件需用户自己创建,一行一个email address即可
chroot_list_enable=YES    //用户登录FTP服务器后是否具有访问自己目录以外的其他文件的权限, 设置为YES时,用户被锁定在自己的home目录中,vsftpd将在下面chroot_list_file选项值的位置寻找chroot_list文件,必须与下面的设置项配合
chroot_list_file=/etc/vsftpd/chroot_list     //被列入此文件的用户,在登录后将不能切换到自己目录以外的其他目录,从而有利于FTP服务器的安全管理和隐私保护。此文件需自己建立
ls_recurse_enable=YES    //是否允许递归查询。默认为关闭,以防止远程用户造成过量的I/O

listen_ipv6=YES    //设定是否支持IPV6。如要同时监听IPv4和IPv6端口, 则必须运行两套vsftpd,采用两套配置文件, 同时确保其中有一个监听选项是被注释掉的
基于系统用户的FTP服务
以下配置操作均在关闭防火墙和selinux下进行的
匿名访问的FTP服务
过滤出有用配置行
grep -v "^#" /etc/vsftpd/vsftpd.conf.bak  | grep  -v  "^$" >>vsftpd.conf

anonymous_enable=YES
anon_upload_enable=NO
anon_root=/anon_data1    //设置匿名用户的FTP根目录(默认/var/ftp)
anon_upload_enable=NO   //是否允许匿名用户上传文件
anon_mkdir_write_enable=NO   //是否允许匿名用户有创建目录的写入权限
anon_other_write_enable=NO     //是否允许匿名用户有其他写入权限,如对文件改名、覆盖及删除文件等
local_enable=NO
write_enable=NO
local_umask=022
dirmessage_enable=YES    //进入目录的欢迎信息,在目录下创建“.message”文件,文件里的内容就是显示的信息
xferlog_enable=YES
connect_from_port_20=YES
xferlog_std_format=YES
listen=YES
pam_service_name=vsftpd
tcp_wrappers=YES
ftpd_banner=Welcome to blah FTP service.
ftp默认的根目录为/var/ftp,默认其他用户和匿名用户没有写入权限
客户机验证:
在服务器端的ftp目录创建文件
[root@localhost /]# cd anon_data1/
[root@localhost anon_data1]# touch 1.txt
Windows访问,可以下载但不能上传,

使用cmd看欢迎消息
首先在服务器端的anon_data1目录创建一个.message的文件
[root@localhost anon_data1]# vim .message

hello   word    ***************zhangbo****************
~
在cmd测试
C:\Users\BEAUTIFUL>ftp 192.168.234.50
连接到 192.168.234.50。
220 Welcome to blah FTP service.
200 Always in UTF8 mode.
用户(192.168.234.50:(none)): ftp
331 Please specify the password.
密码:
230-hello       word    ***************zhangbo****************
230 Login successful.
ftp> ls
200 PORT command successful. Consider using PASV.
150 Here comes the directory listing.
1.txt
226 Directory send OK.
ftp: 收到 10 字节,用时 0.01秒 1.11千字节/秒。
ftp>
在知道要下载的文件完整URL的情况下,可以使用wget命令下载该文件
为了效果明显一点,再启动一台Linux测试匿名下载
#服务端创建压缩包测试
[root@localhost anon_data1]# tar zcfP /anon_data1/vsftpd.tar.gz /etc/vsftpd/
[root@localhost anon_data1]# ll
total 4
-rw-r--r-- 1 root root    0 Apr 12 18:28 1.txt
-rw-r--r-- 1 root root 3447 Apr 12 19:37 vsftpd.tar.gz
#客户端下载
[root@localhost ~]# wget ftp://192.168.234.50/vsftpd.tar.gz
--2020-04-12 19:38:13--  ftp://192.168.234.50/vsftpd.tar.gz
           => “vsftpd.tar.gz”
正在连接 192.168.234.50:21... 已连接。
正在以 anonymous 登录 ... 登录成功!
==> SYST ... 完成。   ==> PWD ... 完成。
==> TYPE I ... 完成。 ==> 不需要 CWD。
==> SIZE vsftpd.tar.gz ... 3447
==> PASV ... 完成。   ==> RETR vsftpd.tar.gz ... 完成。
长度:3447 (3.4K) (非正式数据)

100%[=======================================================================================================>] 3,447       --.-K/s 用时 0s

2020-04-12 19:38:13 (458 MB/s) - “vsftpd.tar.gz” 已保存 [3447]
用户验证的FTP服务
基于匿名访问的环境
首先创建基于本地FTP的访问根目录,并赋予其他用户‘7’的权限
[root@localhost /]# mkdir local_data1

#赋予权限
[root@localhost /]# chmod 747 /local_data1/
修改主配置文件
[root@localhost /]# vim /etc/vsftpd/vsftpd.conf

anonymous_enable=NO     //禁用匿名用户
anon_upload_enable=YES
anon_root=/anon_data1
anon_mkdir_write_enable=NO
anon_other_write_enable=NO
local_enable=YES     //启用本地用户
write_enable=YES
local_umask=022
chroot_local_user=NO    //禁锢到用户宿主目录
local_root=/local_data1     //ftp根目录
allow_writeable_chroot=YES
#以下为全局配置
dirmessage_enable=YES
xferlog_enable=YES
connect_from_port_20=YES
xferlog_std_format=YES
listen=YES
pam_service_name=vsftpd
tcp_wrappers=YES
ftpd_banner=Welcome to blah FTP service.
创建用与访问ftp服务的本地用户
[root@localhost ~]# useradd us1
[root@localhost ~]# passwd us1
Changing password for user us1.
New password:
BAD PASSWORD: The password fails the dictionary check - it is too simplistic/systematic
Retype new password:
passwd: all authentication tokens updated successfully.
[root@localhost ~]#
开启服务验证:
Windows

Linux
#创建用与上传的测试文件
[root@localhost /]# echo "12345" >3.txt
#连接服务器
[root@localhost /]# ftp 192.168.234.50
Connected to 192.168.234.50 (192.168.234.50).
220 Welcome to blah FTP service.
Name (192.168.234.50:root): us1
331 Please specify the password.
Password:
230 Login successful.
Remote system type is UNIX.
Using binary mode to transfer files.
ftp> ls
227 Entering Passive Mode (192,168,234,50,112,44).
150 Here comes the directory listing.
-rw-r--r--    1 0        0               0 Apr 12 12:14 1.txt
-rw-r--r--    1 1001     1001       414613 Apr 12 13:25 10200406164609.png
drwxr-sr-x    2 1001     0               6 Apr 12 13:37 2.txt
-rw-r--r--    1 1001     0          173046 Apr 12 13:28 nmnmn.jpg
-rw-r--r--    1 1001     0          309439 Apr 12 13:25 服务器管理和工作原理00409164731.jpg
226 Directory send OK.
ftp> put 3.txt
local: 3.txt remote: 3.txt
227 Entering Passive Mode (192,168,234,50,107,212).
150 Ok to send data.
226 Transfer complete.
6 bytes sent in 7.8e-05 secs (76.92 Kbytes/sec)
ftp> ls
227 Entering Passive Mode (192,168,234,50,114,253).
150 Here comes the directory listing.
-rw-r--r--    1 0        0               0 Apr 12 12:14 1.txt
-rw-r--r--    1 1001     1001       414613 Apr 12 13:25 10200406164609.png
drwxr-sr-x    2 1001     0               6 Apr 12 13:37 2.txt
-rw-r--r--    1 1001     0               6 Apr 12 14:07 3.txt
-rw-r--r--    1 1001     0          173046 Apr 12 13:28 nmnmn.jpg
-rw-r--r--    1 1001     0          309439 Apr 12 13:25 服务器管理和工作原理00409164731.jpg
226 Directory send OK.
服务器查看3.txt
[root@localhost local_data1]# cat 3.txt
12345
启用用户列表控制文件user_list
vsftpd服务器开启了local_enable配置项后,默认除root用户都可以登录到此FTP服务器。若只希望对一小部分开放FTP服务,就需要用户列表控制文件。
修改主配置文件
#修改主配置文件增加用户列表控制选项
userlist_enable=YES
userlist_deny=NO

root[root@localhost us1]# vim /etc/vsftpd/user_list
bin
daemon
adm
lp
sync
shutdown
halt
mail
news
uucp
operator
games
nobody
us1    //新加用户us1
为什么上面的那几个用户登不上ftp因为它们同时存在于ftpusers文件
[root@localhost local_data1]# vim /etc/vsftpd/ftpusers

# Users that are not allowed to login via ftp
root
bin
daemon
adm
lp
sync
shutdown
halt
mail
news
uucp
operator
games
nobody
再创建一个系统用户,看效果
#创建用户
[root@localhost local_data1]# useradd us2
[root@localhost local_data1]# passwd us2
Changing password for user us2.
New password:
BAD PASSWORD: The password fails the dictionary check - it is too simplistic/systematic
Retype new password:
passwd: all authentication tokens updated successfully.

#在客户端验证
[root@localhost ~]# ftp 192.168.234.50
Connected to 192.168.234.50 (192.168.234.50).
220 Welcome to blah FTP service.
Name (192.168.234.50:root): us2
530 Permission denied.      //没有权限,拒绝访问
Login failed.
ftp> ^C
ftp> quit
221 Goodbye.
[root@localhost ~]# ftp 192.168.234.50
Connected to 192.168.234.50 (192.168.234.50).
220 Welcome to blah FTP service.
Name (192.168.234.50:root): us1
331 Please specify the password.
Password:
230 Login successful.         //登录成功;用户控制列表生效
Remote system type is UNIX.
Using binary mode to transfer files.
ftp> ls
227 Entering Passive Mode (192,168,234,50,238,202).
150 Here comes the directory listing.
-rw-r--r--    1 0        0               0 Apr 12 15:40 1.txt
226 Directory send OK.
ftp>
将ftp目录禁锢在家目录
在主配置文件修改
chroot_local_user=YES
#local_root=/local_data1           //在紧固到家目录后,就把手工指向的这个目录注释掉
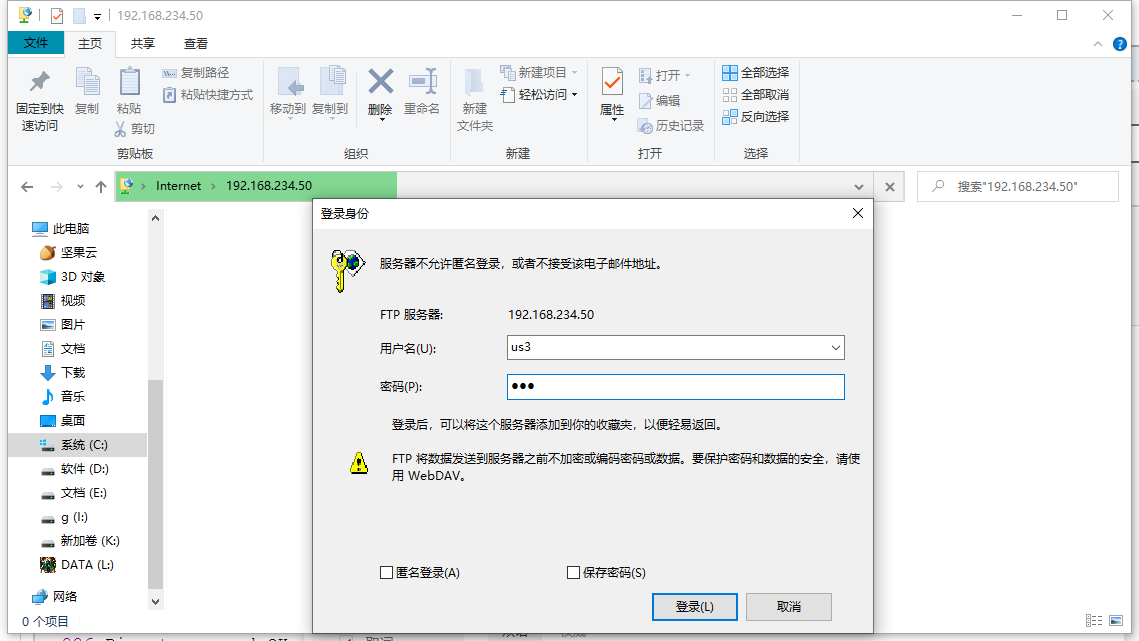
基于虚拟用户的FTP服务
使用虚拟用户的好处在于,可以将FTP登录的账号与系统登录的账号区分开,用户名和密码都不相同,从而进一步增强了FTP服务器的安全性。
创建文本格式的用户名/密码列表(奇数代表用户名,偶数代表密码)
[root@localhost vsftpd]# vim /etc/vsftpd/vusers.list

us3
123
us4
123
创建Berkeley DB格式的数据库文件
有文本格式的用户名/密码列表文件以后,以此文件为数据源通过db_load工具创建出Berkeley DB格式的数据库文件
(-f:指定数据库源文件,-T:允许非Berkeley DB的应用程序使用文本格式转换的DB数据文件,-t hash:指定读取数据库的文件的基本方法)
[root@localhost us1]# cd /etc/vsftpd/
[root@localhost vsftpd]# db_load -T -t hash -f vusers.list vusers.db
[root@localhost vsftpd]# file vusers.db
vusers.db: Berkeley DB (Hash, version 9, native byte-order)
为提高虚拟用户账号文件安全性,应将文件权限设置为600,以避免数据泄露
[root@localhost vsftpd]# chmod 600 /etc/vsftpd/vusers.*
添加虚拟用户的映射账号,创建FTP根目录
[root@localhost vsftpd]# useradd -d /var/ftproot -s /sbin/nologin virtual
[root@localhost vsftpd]# chmod 755 /var/ftproot/
为vsftpd服务添加虚拟用户支持
为虚拟用户建立PAM认证文件
vsftpd服务默认的PAM认证文件位于/etc/pam.d/vsftpd,该文件适用于Linux主机的系统用户账号进行认证。若要读取虚拟用户的账号数据文件,则需要创建新的PAM认证配置。
[root@localhost vsftpd]# vim /etc/pam.d/vsftpd.vu

#%PAM-1.0
auth    required        pam_userdb.so db=/etc/vsftpd/vusers
account required        pam_userdb.so db=/etc/vsftpd/vusers
修改vsftpd配置,添加虚拟用户支持
(虚拟用户默认作为匿名用户处理降低风险)
[root@localhost vsftpd]# vim /etc/vsftpd/vsftpd.conf

anonymous_enable=NO
local_enable=YES            //因为映射到系统用户所以开启此选项
write_enable=YES
anon_umask=022
guest_enable=YES      //开启虚拟用户
guest_username=virtual    //设定虚拟用户使用的本地系统用户
pam_service_name=vsftpd.vu   //修改身份认证方式支持虚拟用户登录
#user_config_dir=/etc/vsftpd/vusers_dir     //设定虚拟用户配置文件存放目录路径(x下面的为不同的虚拟用户建立不同的配置文件需要用到它)
chroot_local_user=YES
#local_root=/local_data1
allow_writeable_chroot=YES
#以下为全局配置
#userlist_enable=YES
#userlist_deny=NO
dirmessage_enable=YES
xferlog_enable=YES
connect_from_port_20=YES
xferlog_std_format=YES
listen=YES
tcp_wrappers=YES
ftpd_banner=Welcome to blah FTP service.
现在FTP其实就可以提供服务了
验证:
[root@localhost ~]# ftp 192.168.234.50
Connected to 192.168.234.50 (192.168.234.50).
220 Welcome to blah FTP service.
Name (192.168.234.50:root): us3
331 Please specify the password.
Password:
230 Login successful.
Remote system type is UNIX.
Using binary mode to transfer files.
ftp> ls
227 Entering Passive Mode (192,168,234,50,214,206).
150 Here comes the directory listing.
-rw-r--r--    1 0        0               8 Apr 12 16:51 1.txt
226 Directory send OK.
ftp>
为不同的虚拟用户建立独立的配置文件
在主配置文件中开启此项:#user_config_dir=/etc/vsftpd/vusers_dir(只要是开启了此项就必须为虚拟用户建立独立的配置文件,否则有可能无法登陆)
创建user_config_dir指向的目录,并为虚拟用户建立配置文件(建立空的配置文件,不能下载文件)
[root@localhost vsftpd]# mkdir /etc/vsftpd/vusers_dir
[root@localhost vsftpd]# cd /etc/vsftpd/vusers_dir/
[root@localhost vusers_dir]# vim us3

anon_umask=022
anon_upload_enable=YES
anon_mkdir_write_enable=YES

[root@localhost vusers_dir]# touch us4
验证:
[root@localhost ~]# touch test.txt
[root@localhost ~]# ftp 192.168.234.50
Connected to 192.168.234.50 (192.168.234.50).
220 Welcome to blah FTP service.
Name (192.168.234.50:root): us3
331 Please specify the password.
Password:
230 Login successful.
Remote system type is UNIX.
Using binary mode to transfer files.
ftp> ls
227 Entering Passive Mode (192,168,234,50,119,250).
150 Here comes the directory listing.
-rw-r--r--    1 0        0               8 Apr 12 16:51 1.txt
-rw-r--r--    1 1003     1003       414613 Apr 12 17:42 10200406164609.png
226 Directory send OK.
ftp> put test.txt
local: test.txt remote: test.txt
227 Entering Passive Mode (192,168,234,50,133,160).
150 Ok to send data.
226 Transfer complete.
ftp> ls
227 Entering Passive Mode (192,168,234,50,44,172).
150 Here comes the directory listing.
-rw-r--r--    1 0        0               8 Apr 12 16:51 1.txt
-rw-r--r--    1 1003     1003       414613 Apr 12 17:42 10200406164609.png
-rw-r--r--    1 1003     1003            0 Apr 12 17:49 test.txt
226 Directory send OK.
ftp> quit
221 Goodbye.
[root@localhost ~]# ftp 192.168.234.50
Connected to 192.168.234.50 (192.168.234.50).
220 Welcome to blah FTP service.
Name (192.168.234.50:root): us4
331 Please specify the password.
Password:
230 Login successful.
Remote system type is UNIX.
Using binary mode to transfer files.
ftp> ls
227 Entering Passive Mode (192,168,234,50,29,90).
150 Here comes the directory listing.
-rw-r--r--    1 0        0               8 Apr 12 16:51 1.txt
-rw-r--r--    1 1003     1003       414613 Apr 12 17:42 10200406164609.png
-rw-r--r--    1 1003     1003            0 Apr 12 17:49 test.txt
226 Directory send OK.
ftp> put test.txt
local: test.txt remote: test.txt
227 Entering Passive Mode (192,168,234,50,136,236).
550 Permission denied.         //没有权限
ftp> get test.txt
local: test.txt remote: test.txt
227 Entering Passive Mode (192,168,234,50,134,83).
150 Opening BINARY mode data connection for test.txt (0 bytes).
226 Transfer complete.      //传输完成
ftp>
******************************************

 浙公网安备 33010602011771号