


背景:
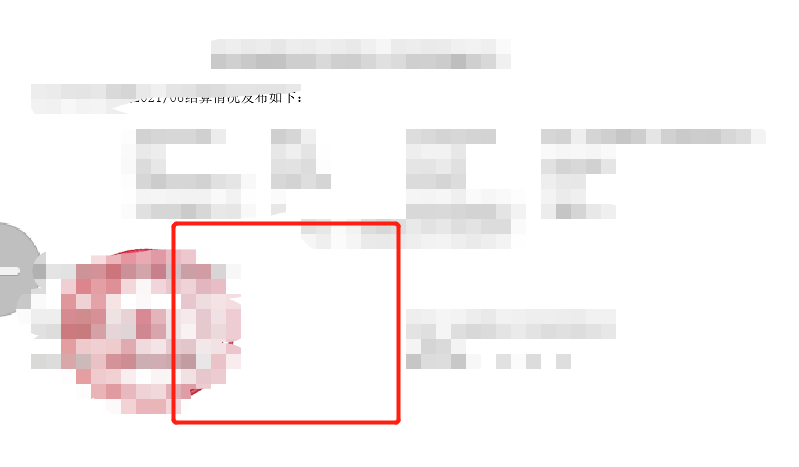
如下图所示:图片电子章那一块的区域的背景色有点深,想将其改为纯白色,与整个图片的背景色调一致,
仔细看的话,可以看到红框中,左边一半的颜色比右边一半的稍深一些

效果:
可以看到,原来电子章的背景色有点深,现在是纯白色了,而且不影响电子章的显示效果
代码:
public class Test {

    public static void main(String[] args) {
        getImageGRB("E:\\222.png");
    }


    public static int[][] getImageGRB(String filePath) {
        File file = new File(filePath);

        int[][] result = null;

        if (!file.exists()) {
            return result;
        }

        try {
            BufferedImage bufImg = ImageIO.read(file);

            int height = bufImg.getHeight();
            int width = bufImg.getWidth();

            result = new int[width][height];

            for (int i = 0; i < width; i++) {
                for (int j = 0; j < height; j++) {
                    result[i][j] = bufImg.getRGB(i, j) & 0xFFFFFF;
                    int pixel = bufImg.getRGB(i, j);
                    int rgbR = (pixel & 0xff0000) >> 16;
                    int rgbG = (pixel & 0xff00) >> 8;
                    int rgbB = (pixel & 0xff);
                    System.out.println("rgbR:" + rgbR + ",rgbG:" + rgbG+ ",rgbB" + rgbB);
            //240这个值,比电子章的背景色的RGB值稍微小一点。可以上下浮动多试试这个值,调一调哪个阈值最好
                    if(rgbR > 240 && rgbG > 240 && rgbB > 240){
                        //将图片中大于240的色值,设为白色
                        bufImg.setRGB(i, j, new Color(255,255,255).getRGB());
                    }

                }

            }
            File outputfile = new File("E:\\222.png");

            ImageIO.write(bufImg, "png", outputfile);

        } catch (IOException e) {
            e.printStackTrace();
        }

        return result;

    }
}
原理是:
一张图片是由一个个RGB的位图(一个个点)组成,当这些点密度达到一定程度,我们看着就是一副完整的图。
我们遍历这些点的RGB颜色,将获取需要更改的颜色的RGB的值,将其改为想要的值
PS:
取色器:可以通过Windows自带的画图软件,获取图片RGB的值
 posted on
