
SpringBoot-08:SpringBoot采用json的方式实现前后台通用的配置文件
------------吾亦无他,唯手熟尔,谦卑若愚,好学若饥-------------
一。需求:
本篇博客是最近笔者做的一个项目,已经上线但是还在不断开发,有些页面上的配置,测试服务器和正式服务器的参数不同,需要经常改动,所以直接改页面肯定不合适!
so;产品经理提出一个需求,需要只建一个配置文件,存储正式服务器和测试服务器的配置,要求前后台通用,读取方便,修改方便
二。结构:
采用.json文件实现的前后台通用读取
三。知识点:
前后台不同的.json静态文件读取,解析方式
编写能让springboot识别到自定义静态资源的路径的插件
四。优点:
比.js,.properties文件,以及多次请求后台的静态.class文件要优良一些,无论从性能还是被浏览器缓存Gank的因素来讲,这个.json的方式确实优良
五。方案思路以及最后解决:
1.项目结构

2.创建.json文件---->TheServerURL.json
注意:里面的格式为json


{
  "appId": "123456",
  "secret": "123456789123",
  "url61": "http://192.168.1.1",
  "urlhead": "baidu.com",
  "urlinit": "www.hao123.com",
  "urlman": "mi.com",
  "justChangeThisURL":"https://www.cnblogs.com/DawnCHENXI/"
}
3.给springboot注册插件ApplicationConfig,让他识别到放置于resource下的静态资源(.json放在此处是因为修改方便,打成war包之后,它很好找)
package com.xy.config;

import org.springframework.context.annotation.Configuration;
import org.springframework.web.servlet.config.annotation.ResourceHandlerRegistry;
import org.springframework.web.servlet.config.annotation.WebMvcConfigurerAdapter;

//这个注解需要启动类去设置一下,否者不会识别
@Configuration
public class ApplicationConfig extends WebMvcConfigurerAdapter {

    @Override
    public void addResourceHandlers(ResourceHandlerRegistry registry) {
        /**
         * 如果我们将/xxxx/** 修改为 /** 与默认的相同时,则会覆盖系统的配置,可以多次使用 addResourceLocations 添加目录,
         * 优先级先添加的高于后添加的。
         *
         * 如果是/xxxx/** 引用静态资源 加不加/xxxx/ 均可,因为系统默认配置(/**)也会作用
         * 如果是/** 会覆盖默认配置,应用addResourceLocations添加所有会用到的静态资源地址,系统默认不会再起作用
         */
        registry.addResourceHandler("/**")
                .addResourceLocations("classpath:/META-INF/resources/")
                .addResourceLocations("classpath:/resources/")
                .addResourceLocations("classpath:/static/")
                .addResourceLocations("classpath:/public/")
                .addResourceLocations("classpath:/");
        registry.addResourceHandler("classpath:/mybatis/**");
        super.addResourceHandlers(registry);
    }
}
4.前台页面的使用方式(需要jquery支持)
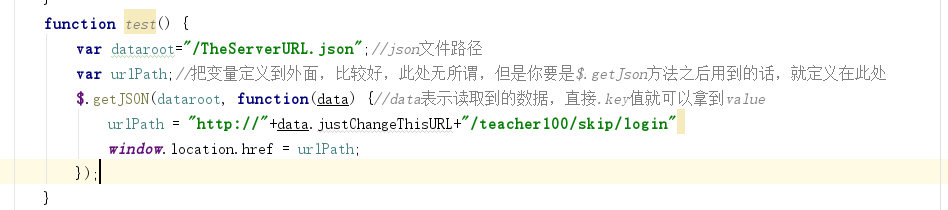
        function test() {
            var dataroot="/TheServerURL.json";//json文件路径
            var urlTemp;
            var appid;
            $.getJSON(dataroot, function(data) {
                urlTemp = "http://"+data.justChangeThisURL+"/teacher100/skip/login"
                appid=data.appId
                var path = "https://open.weixin.qq.com/connect/oauth2/authorize?appid="+appid+"&redirect_uri=" + urlTemp + "&response_type=code&scope=snsapi_userinfo&state=123#wechat_redirect";
                window.location.href = path;
            });
        }
5.后端构建个工具类,用来承载前端传回来的值(TheServerURL )
package com.xy.model;

public class TheServerURL {
    //测试服务器

    public static String urlhead="";
    public static String urlinit="";
    public static String urlman="";

    public static String appId="";
    public static String secret="";

    public static String url61 = "";

    public static  String justChangeThisURL="";


    public static String getJustChangeThisURL() {
        return justChangeThisURL;
    }

    public static void setJustChangeThisURL(String justChangeThisURL) {
        TheServerURL.justChangeThisURL = justChangeThisURL;
    }

    public static String getUrlhead() {
        return urlhead;
    }

    public static void setUrlhead(String urlhead) {
        TheServerURL.urlhead = urlhead;
    }

    public static String getUrlinit() {
        return urlinit;
    }

    public static void setUrlinit(String urlinit) {
        TheServerURL.urlinit = urlinit;
    }

    public static String getUrlman() {
        return urlman;
    }

    public static void setUrlman(String urlman) {
        TheServerURL.urlman = urlman;
    }

    public static String getAppId() {
        return appId;
    }

    public static void setAppId(String appId) {
        TheServerURL.appId = appId;
    }

    public static String getSecret() {
        return secret;
    }

    public static void setSecret(String secret) {
        TheServerURL.secret = secret;
    }

    public static String getUrl61() {
        return url61;
    }

    public static void setUrl61(String url61) {
        TheServerURL.url61 = url61;
    }


}
6.注册插件,在启动项目的时候读取配置(这个可以之后再去拓展,或者再写接口,实时刷新)
package com.xy.config;

import com.alibaba.fastjson.JSON;
import com.xy.model.TheServerURL;
import org.springframework.context.annotation.Bean;
import org.springframework.context.annotation.Configuration;
import org.springframework.core.io.ClassPathResource;

import java.io.*;
import java.util.HashMap;

@Configuration
public class TheURLLoadBean {
    public TheURLLoadBean(){
        try {
            //读取到静态资源文件
            org.springframework.core.io.Resource resource = new ClassPathResource("TheServerURL.json");
            File file = null;
            file = resource.getFile();
            //使用io读出数据
            BufferedReader br = new BufferedReader(new InputStreamReader(new FileInputStream(file)));
            String str = null;
            StringBuilder all=new StringBuilder();
            while((str = br.readLine()) != null){
                all.append(str);
            }
            if(all!=null){
                //采用阿里的fastjson解析这个json
                HashMap hashMap=JSON.parseObject(all.toString(),HashMap.class);
                //装配给这个工具类的静态字段
                TheServerURL.urlhead=(String) hashMap.get("urlhead");
                TheServerURL.urlinit=(String) hashMap.get("urlinit");
                TheServerURL.urlman=(String) hashMap.get("urlman");
                TheServerURL.appId=(String) hashMap.get("appId");
                TheServerURL.secret=(String) hashMap.get("secret");
                TheServerURL.url61=(String) hashMap.get("url61");
                TheServerURL.justChangeThisURL=(String) hashMap.get("justChangeThisURL");
            }
        } catch (IOException e) {
            e.printStackTrace();
        }
    }
}
7.后端使用配置文件的参数(直接用这个 工具类类名 . 静态字段名 )就可以调用到
TheServerURL.appId
笔者:晨曦Dawn
转载请注明出处!
如果有错误或疑惑,请您指出,互相探讨互相学习,感激不尽!!!!!!!!!!!!

