android 开发应试
android 开发应试
1添加新布局
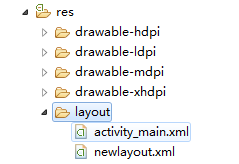
在res文件夹里新建一个布局文件:

然后在MainActivity.java里修改setContentView()函数

2在.java里使用string values
// <string name="readme">信息</string>
String s = getString(R.string.readme);
3使用TextView和EditView
<TextView
        android:id="@+id/tv_id"
        android:layout_width="200dp"
        android:layout_height="200dp"
        android:gravity="center"
        android:text="TextView(显示框)"
        android:textColor="#EA5246"
        android:textStyle="bold|italic"
        android:background="#000000"
        android:textSize="18sp" />

<EditText
        android:id = "@+id/et_id"
        android:layout_width="match_parent"
        android:layout_height="wrap_content"
        android:hint="@string/name"
        android:maxLines="1"
        android:textColor="#000000"
        android:textSize="20sp"
        android:textStyle="italic"
    />
在.java文件中
  tv = (TextView) findViewById(R.id.tv_id); // 找到
  String s= tv.getText().toString(); // 获取信息
  tv.setText(message); // 设置

  et = (EditText) findViewById(R.id.et_id); // 找到
  String s= et.getText().toString(); // 获取信息
4使用Button
<Button android:id = "@+id/ret"
        android:layout_width="wrap_content"
        android:layout_height="wrap_content"
        android:text="@string/ret"
        android:gravity="center"/>
使用内部类为其创建响应
private Button bt;
bt = (Button) findViewById(R.id.ret);
bt.setOnClickListener(new View.OnClickListener()
        {
		public void onClick(View v)
		{
			//
		}
	});
5使用RadioButton
RadioButton只能和RadioGroup一起使用
<RadioGroup xmlns:android="http://schemas.android.com/apk/res/android"
    android:layout_width="match_parent"
    android:layout_height="wrap_content"
    android:orientation="vertical">
    <RadioButton android:id="@+id/radio_1"
        android:layout_width="wrap_content"
        android:layout_height="wrap_content"
        android:text="@string/txt1"
        android:onClick="onRadioButtonClicked"/>
    <RadioButton android:id="@+id/radio_2"
        android:layout_width="wrap_content"
        android:layout_height="wrap_content"
        android:text="@string/txt2"
        android:onClick="onRadioButtonClicked"/>
</RadioGroup>
需要在.java文件里设置和上面android:onClick相同名字的函数
public void onRadioButtonClicked(View view) {
	    // Is the button now checked?
	    boolean checked = ((RadioButton) view).isChecked();

	    // Check which radio button was clicked
	    switch(view.getId()) {
	        case R.id.radio_1:
	            //
	            break;
	        case R.id.radio_2:
	            //
	            break;
	    }
6设置新的activity并传递消息
首先需要新建一个layout
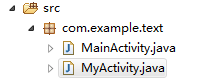
然后新建一个新activity文件
并在AndroifManifest文件里注册
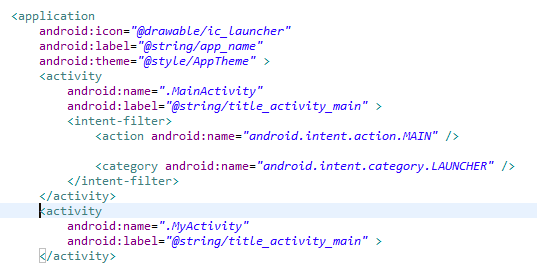
注意:主Activity才有这两行
<action android:name="android.intent.action.MAIN" />
<category android:name="android.intent.category.LAUNCHER" />
然后为新的.java文件设置类,并重载方法
public class MyActivity extends Activity {

    @Override
    public void onCreate(Bundle savedInstanceState) {
        super.onCreate(savedInstanceState);
        setContentView(R.layout.newlayout);
    }

    @Override
    public boolean onCreateOptionsMenu(Menu menu) {
        getMenuInflater().inflate(R.menu.activity_main, menu);
        return true;
    }
}
启动新Activity
Intent intent = new Intent();
intent.setClass(MainActivity.this, myActivity.class);
startActivity(intent);
intent.setFlags(Intent.FLAG_ACTIVITY_CLEAR_TOP);
退出
finish();
消息传递
//原Activity中
intent.putExtra("data", s);
//新Activity中
String message = intent.getStringExtra("data");
7 使用SharedPreferences
找到名字为mysp的SharedPreferences,如果未创建过,会自动创建。
SharedPreferences sp = this.getSharedPreferences("mysp", this.MODE_PRIVATE);
向SharedPreferences中插入键值对
SharedPreferences.Editor editor = sp.edit();
editor.putString(key, value);
editor.commit();
获得SharedPreferences中的键值对
SharedPreferences sp = this.getSharedPreferences("mysp", this.MODE_PRIVATE);
Map<String, String> data = new HashMap<String, String>();
data.put(key, sp.getString(key, ""));
return data;
更改图标
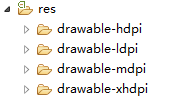
在这几个文件夹里各放入一张图片
在AndroidManifest里更改
android:icon="@drawable/icon"
8 sqlite
定义一个数据库SQLiteOpenHelper类
public class MyOpenHelper extends SQLiteOpenHelper {

    public MyOpenHelper(Context context) {
        // 数据库名字为databasedb
        super(context, "database.db", null, 1);

    }

    @Override
    public void onCreate(SQLiteDatabase db) {
       // sql创建student表
        db.execSQL("CREATE TABLE student ("
                +"id INTEGER PRIMARY KEY AUTOINCREMENT, "
                +"name VARCHAR(20) NOT NULL, "
                +"class VARCHAR(20) NOT NULL)");
    }

	@Override
	public void onUpgrade(SQLiteDatabase db, int oldVersion, int newVersion) {
		// TODO Auto-generated method stub

	}


}
主activity创建SQLiteOpenHelper类
MyOpenHelper openHelper = new MyOpenHelper(this);
增删改查
 void add_val(String n, String c)
    {
    	SQLiteDatabase writableDatabase = openHelper.getWritableDatabase();

    	 String sql = "INSERT INTO student VALUES ("+idx+",'"+n+"','"+c+"')";
    	 writableDatabase.execSQL(sql);
         writableDatabase.close();
    }

    void del_val(String n)
    {
    	SQLiteDatabase writableDatabase = openHelper.getWritableDatabase();
    	writableDatabase.delete("student", "name=?",new String[]{n});
    	writableDatabase.close();
    }

    void update_val(String n, String c)
    {
    	SQLiteDatabase writableDatabase = openHelper.getWritableDatabase();
    	ContentValues values=new ContentValues();
    	values.put("class", c);
    	int id=writableDatabase.update("student", values,"name=?", new String[]{n});
   	 	writableDatabase.close();
    }

    Vector<String> find(String n)
    {
    	SQLiteDatabase readableDatabase = openHelper.getReadableDatabase();
    	Vector<String> res = new Vector<String>();
        Cursor rawQuery = readableDatabase.rawQuery("select * from student", null);

        while (rawQuery.moveToNext())
        {
        	String id = rawQuery.getString(rawQuery.getColumnIndex("id"));
            String name = rawQuery.getString(rawQuery.getColumnIndex("name"));
            String cla = rawQuery.getString(rawQuery.getColumnIndex("class"));
            // tv.setText(tv.getText().toString()+'\n'+n + name);
            if(n.equals(name)) res.add(id+' ' + name + ' ' + cla);
		}
        return res;
    }

    Vector<String> find_all()
    {
    	SQLiteDatabase readableDatabase = openHelper.getReadableDatabase();
    	Vector<String> res = new Vector<String>();
        Cursor rawQuery = readableDatabase.rawQuery("select * from student", null);
        while (rawQuery.moveToNext()) {
        	String id = rawQuery.getString(rawQuery.getColumnIndex("id"));
            String name = rawQuery.getString(rawQuery.getColumnIndex("name"));
            String cla = rawQuery.getString(rawQuery.getColumnIndex("class"));
            res.add(id+' ' + name + ' ' + cla);
		}
        return res;
    }
Clicked函数
public void Clicked(View view) {
	    String n = et1.getText().toString();
	    String c = et2.getText().toString();
	    String resText = new String();

	    switch(view.getId()) {

	        case R.id.add:
	        	idx += 1;
	        	add_val(n, c);
	        	Toast.makeText(this, "数据添加成功",Toast.LENGTH_SHORT).show();
	            break;
	        case R.id.del:
	        	del_val(n);
	        	Toast.makeText(this, "数据删除成功",Toast.LENGTH_SHORT).show();
	            break;
	        case R.id.update:
	        	update_val(n, c);
	        	Toast.makeText(this, "数据修改成功",Toast.LENGTH_SHORT).show();
	            break;
	        case R.id.quary:
	        	Vector<String> isFound=find(n);
	        	resText = "";
			if(isFound.size() > 0)
			{
				for(int i=0;i<isFound.size();i++)
					resText += isFound.get(i)+ '\n';
				tv.setText(resText);
				Toast.makeText(this, "数据查询成功"  ,Toast.LENGTH_SHORT).show();
			}
			else
			{
				Toast.makeText(this, "数据查询失败"  ,Toast.LENGTH_SHORT).show();
			}
	            break;
	        case R.id.all:
	        	Vector<String> res_all=find_all();
	        	resText = "";
	        	if(res_all.size() > 0)
			{
	        	  for(int i=0;i<res_all.size();i++)
			  resText += res_all.get(i) + '\n';
			  tv.setText(resText);
			}
			else
			{
				tv.setText("无记录");
			}

	            break;
	    }
	    }
ListView
新建另一个布局用于显示listview
<RelativeLayout xmlns:android="http://schemas.android.com/apk/res/android"
    android:layout_width="match_parent"
    android:layout_height="match_parent" >


   <TextView
        android:id="@+id/address"
        android:layout_width="wrap_content"
        android:layout_height="wrap_content"
        android:hint="address"/>
    <TextView
        android:id="@+id/date"
        android:layout_width="wrap_content"
        android:layout_height="wrap_content"
        android:layout_toRightOf="@+id/address"
        android:hint="date" />

    <TextView
        android:id="@+id/type"
        android:layout_width="wrap_content"
        android:layout_height="wrap_content"
        android:layout_toRightOf="@+id/date"
        android:hint="type" />


    <TextView
        android:id="@+id/body"
        android:layout_width="wrap_content"
        android:layout_height="wrap_content"
        android:layout_toRightOf="@+id/type"
        android:hint="body" />

</RelativeLayout>
ListView 适配器
List<Map<String, Object>> list = new ArrayList<Map<String, Object>>();
while (cursor.moveToNext()) {
	Map<String, Object> map = new HashMap<String, Object>();
	String address = cursor.getString(0);
	String date = cursor.getString(1);
	String type = cursor.getString(2);
	String body = cursor.getString(3);
	map.put("date",date);
	map.put("type", type);
	map.put("body", body);
	map.put("address", address);
	list.add(map);
}
String[] from = {"address", "date","type", "body"};//键值
int[] to = { R.id.address,R.id.date, R.id.type, R.id.body};//布局组件

ListView mListView = (ListView) findViewById(R.id.lv);
SimpleAdapter adapter = new SimpleAdapter(this, list, R.layout.listview, from, to);
mListView.setAdapter(adapter);
更改背景
在这几个文件夹里各放入一张图片
在layout文件里加上最后一行
<LinearLayout xmlns:android="http://schemas.android.com/apk/res/android"
    android:layout_width="match_parent"
    android:layout_height="match_parent"
    android:orientation="vertical"
    android:background="@drawable/back">

 浙公网安备 33010602011771号