WEB服务器搭建(Apache+Tomcat+eclipse)
1.下载xampp安装,选择Apache+MySQL+Tomcat
官方下载链接:https://www.apachefriends.org/zh_cn/download.html
2.下载安装java,配置Java环境变量
不会安装配置的请进入下面的链接:https://www.cnblogs.com/smyhvae/p/3788534.html
3.下载Eclipse Java EE IDE for Web Developers(eclipse客户端)
官方下载地址:https://www.eclipse.org/downloads/packages/
4.打开eclipse,在资源管理界面(左侧一栏)右击new->project在弹出的对话框内选择web文件夹里的Dynamic Web Project,在选择Tomcat服务里找到刚才安装的Tomcat目录(C:\xampp\tomcat)直到finish

5.在工程目录下的WebContent下新建jsp文件(右击WebContent文件夹new->jsp file)命名为index.jsp

6.在WebContent下的WEB-INF文件夹下建立web.xml文件
<?xml version="1.0" encoding="UTF-8"?>
<!DOCTYPE web-app PUBLIC "-//Sun Microsystems, Inc.//DTD Web Application 2.3//EN" "http://java.sun.com/dtd/web-app_2_3.dtd">
<web-app id="WebApp_ID">
<display-name>MyChat</display-name>
<servlet>
<servlet-name>MainServlet</servlet-name>
<display-name>This is the display name of my J2EE component</display-name>
<description>This is the description of my J2EE component</description>
<servlet-class>com.yxtt.chat.Main</servlet-class>
</servlet>
<servlet-mapping>
<servlet-name>MainServlet</servlet-name>
<url-pattern>/main</url-pattern>
</servlet-mapping>
<welcome-file-list>
<welcome-file>index.html</welcome-file>
<welcome-file>index.htm</welcome-file>
<welcome-file>index.jsp</welcome-file>
<welcome-file>default.html</welcome-file>
<welcome-file>default.htm</welcome-file>
<welcome-file>default.jsp</welcome-file>
</welcome-file-list>
</web-app>
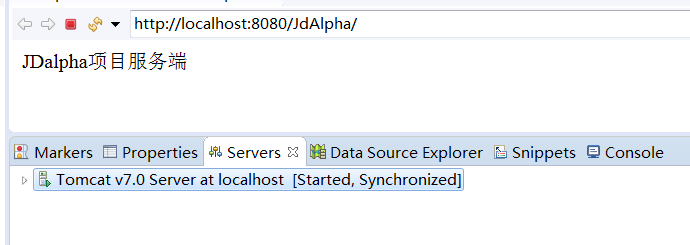
7.以上都配置完成后,选中项目名称,右击选择Run As 接着选择 Run on Server ,此时在弹出的窗口内找到已安装的Tomcat服务器,然后Finish即可。
8.正确运行如下图:


如果弹出的窗口内没有已安装的Tomcat服务器则需要自行添加:
首先点击顶部的windows->perference即可弹出下图的窗口,在窗口的左侧一栏选择server->Runtime Environment,点击右侧的Add按钮,
浏览本地Tomcat安装路径选择即可,完成后点击Apply and Close即可。


