Visual Studio Code 调试 nodejs (断点调试、自动重启、进程调试)
学习链接:
https://cnodejs.org/topic/5a9661ff71327bb413bbff5b
https://github.com/nswbmw/node-in-debugging/blob/master/4.3%20Visual%20Studio%20Code.md
1、新建 test 文件夹,新建 index.js
var http = require('http');

var server = http.createServer(function (req, rep) {
    rep.writeHead(200, {"Content-Type": "text/plain"});
    console.log(20180716211300, 'Hello');
    rep.end("Hello World!!");
})

server.listen(3000, function (err) {
     console.log('start');
});
2、用 vscode 打开 test 文件夹(项目)
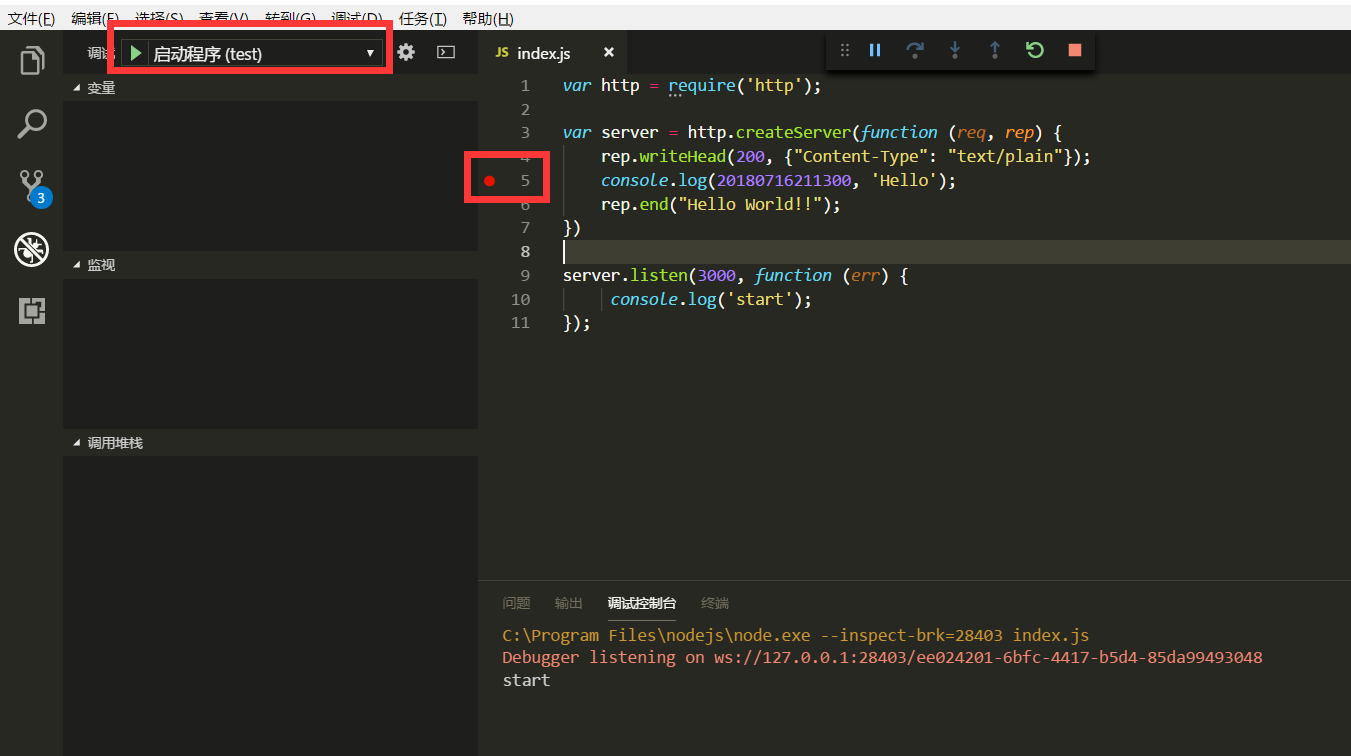
- 单击左侧第 4 个 tab,切换到调试模式。
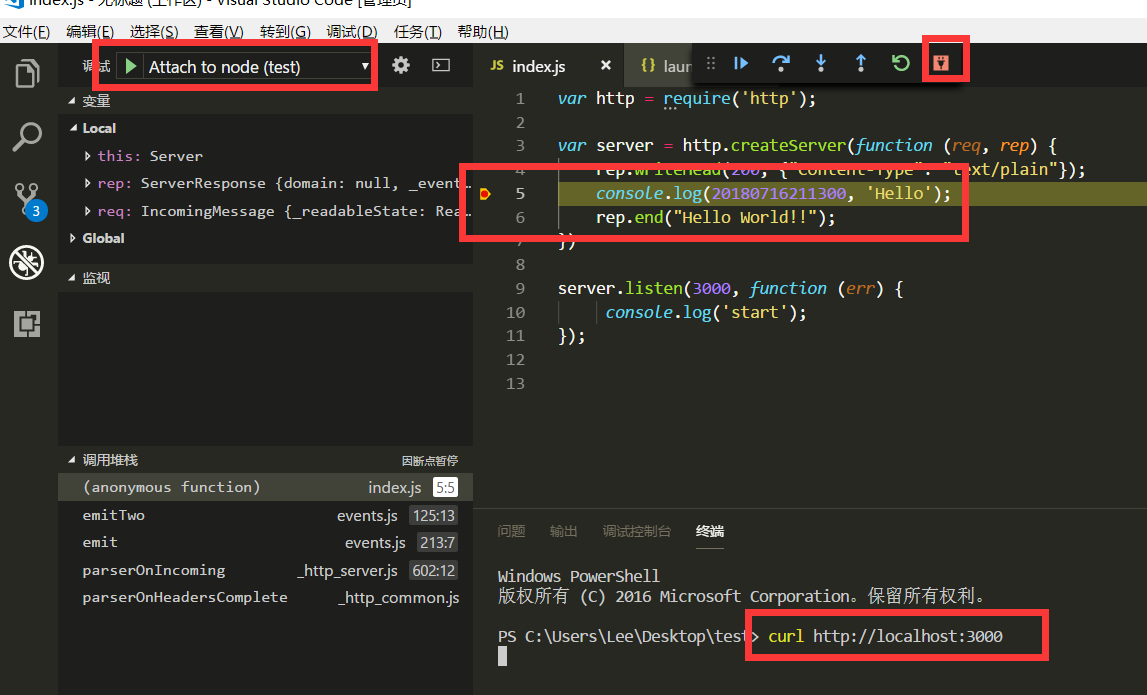
- 单击代码第 5 行
rep.end("Hello World!!");左侧空白处添加断点。 - 单击左上角 ”调试“ 的绿色三角按钮启动调试。(你可能需要配置一下launch.json)
- 单击左上角的终端图标打开调试控制台。
你可能需要配置一下launch.json:

{
    // 使用 IntelliSense 了解相关属性。
    // 悬停以查看现有属性的描述。
    // 欲了解更多信息,请访问: https://go.microsoft.com/fwlink/?linkid=830387
    "version": "0.2.0",
    "configurations": [

        {
            "type": "node",
            "request": "launch",
            "name": "启动程序",
            "program": "${workspaceFolder}/\\index.js"
        }
    ]
}
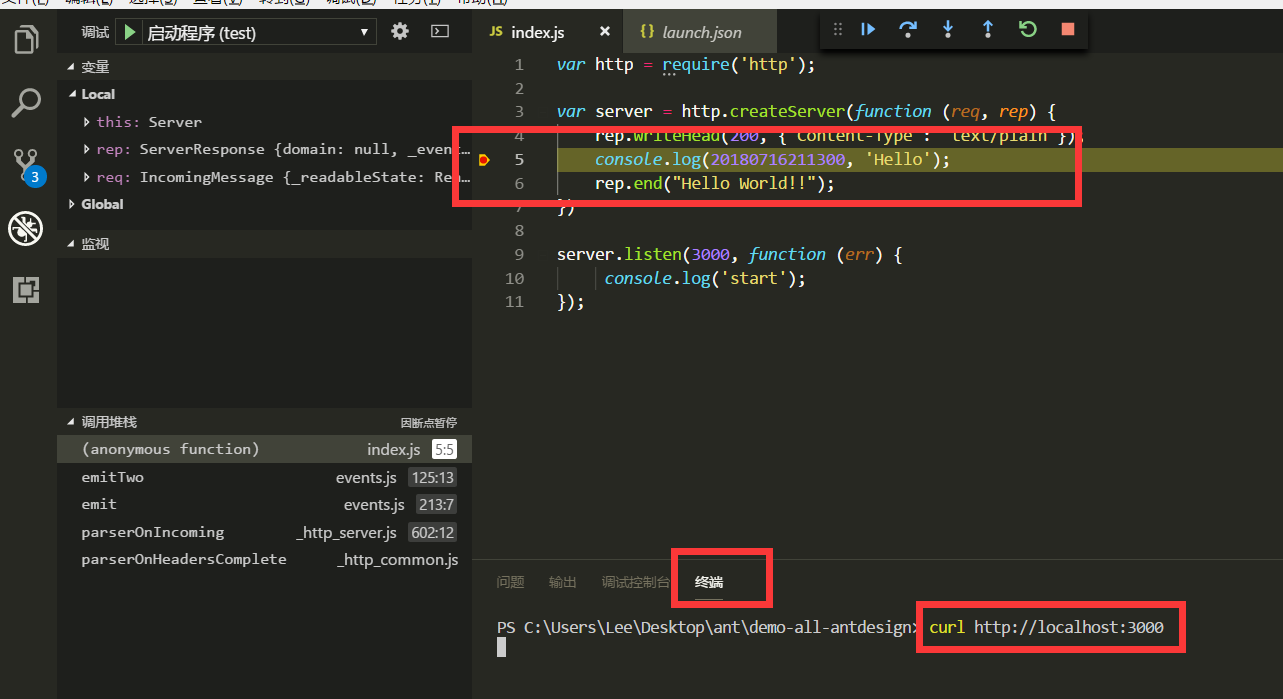
3、开始愉快的调试
切换到终端,然后输入 curl http://localhost:3000,正常的话,会发现断点成功。
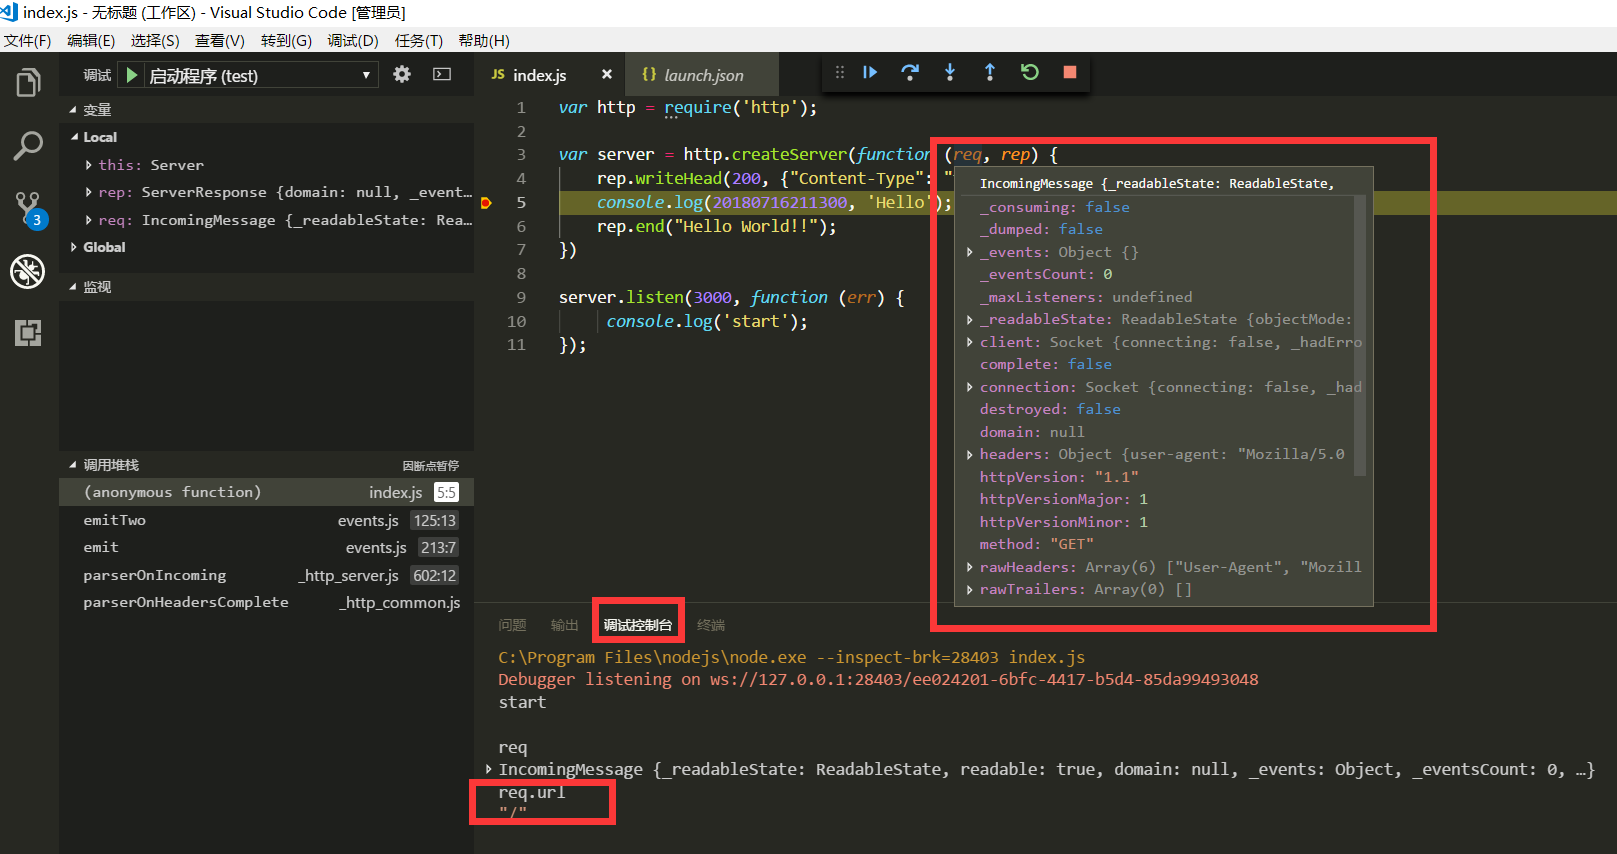
4、再切换到调试控制台(chrome Dev Tool)
就可以打印出变量了。当然通常直接通过鼠标查看变量更方便。
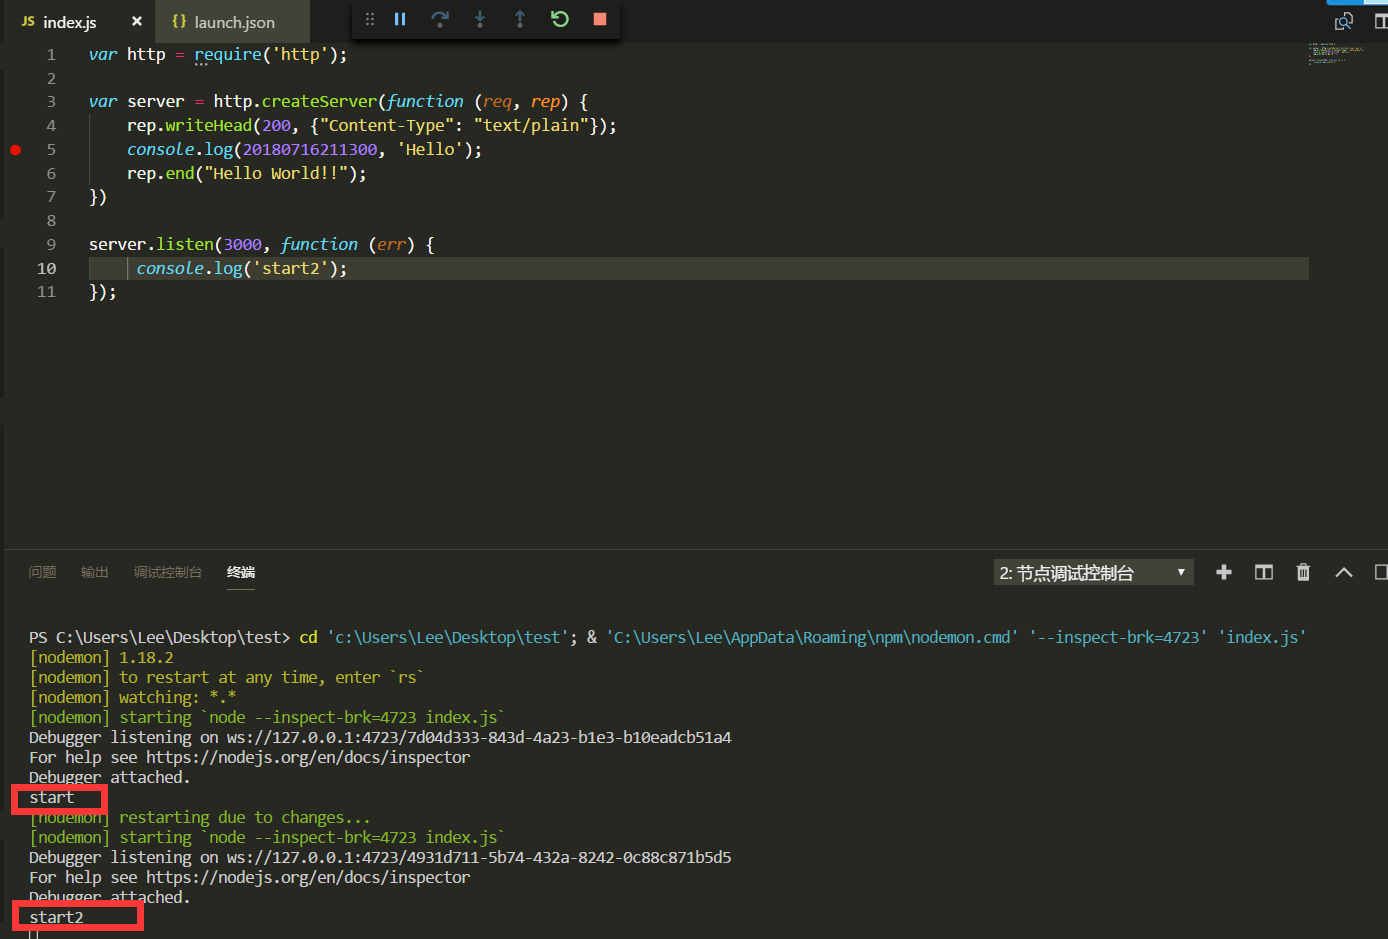
5、自动重启nodejs
首先,全局安装 nodemon:
$ npm i nodemon -g
然后,修改 launch.json:
{
    // 使用 IntelliSense 了解相关属性。
    // 悬停以查看现有属性的描述。
    // 欲了解更多信息,请访问: https://go.microsoft.com/fwlink/?linkid=830387
    "version": "0.2.0",
    "configurations": [

        {
            "type": "node",
            "request": "launch",
            "name": "启动程序",
            "runtimeExecutable": "nodemon",
            "restart": true,
            "console": "integratedTerminal",
            "program": "${workspaceFolder}/\\index.js"
        }
    ]
}
多添加了如下几个字段:
"runtimeExecutable": "nodemon",
"restart": true,
"console": "integratedTerminal",
这时候我们在运行,保存会自动重启了

6、对现有Nodejs进程进行调试
第一步:我们不使用 vs code 启动项目,而使用传统手动命令行启动 nodejs
$ node index.js

第二步:需要先对launch.js 进行配置:
{
    // 使用 IntelliSense 了解相关属性。
    // 悬停以查看现有属性的描述。
    // 欲了解更多信息,请访问: https://go.microsoft.com/fwlink/?linkid=830387
    "version": "0.2.0",
    "configurations": [

        {
            "name": "Attach to node",
            "type": "node",
            "request": "attach",
            "restart": true,
            "processId": "${command:PickProcess}"
        }
    ]
}
配置成功后,启动选项会变成 “Attach to node”

此时点击运行按钮,会列出所有的 node 线程。
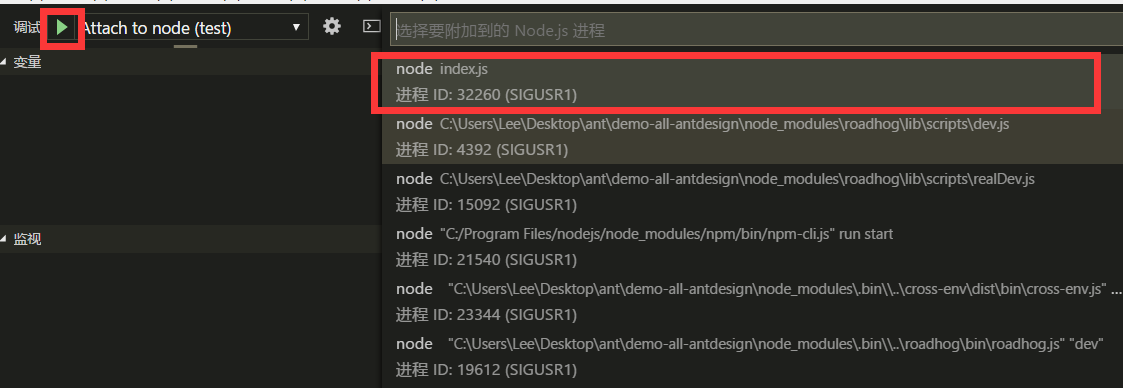
附加成功后,就可以试试上例的断点调试之类的啦~~

 浙公网安备 33010602011771号