SpringSecurityOauth2系列学习(四):自定义登陆登出接口
系列导航
SpringSecurity系列
- SpringSecurity系列学习(一):初识SpringSecurity
- SpringSecurity系列学习(二):密码验证
- SpringSecurity系列学习(三):认证流程和源码解析
- SpringSecurity系列学习(四):基于JWT的认证
- SpringSecurity系列学习(四-番外):多因子验证和TOTP
- SpringSecurity系列学习(五):授权流程和源码分析
- SpringSecurity系列学习(六):基于RBAC的授权
SpringSecurityOauth2系列
- SpringSecurityOauth2系列学习(一):初认Oauth2
- SpringSecurityOauth2系列学习(二):授权服务
- SpringSecurityOauth2系列学习(三):资源服务
- SpringSecurityOauth2系列学习(四):自定义登陆登出接口
- SpringSecurityOauth2系列学习(五):授权服务自定义异常处理
自定义登陆接口
工作中,不同的项目会采用不同的架构。我这边的项目多是注册中心模式的服务网格架构,通常会通过一个聚合服务来访问各个微服务,聚合服务被称之为业务网关,微服务之间的交互都在这个聚合服务中,微服务之间不会单独进行交互。聚合服务最外层对接API网关,进行内容分发。
这个时候,如果实现一个登陆接口,就需要通过聚合服务区调用授权服务器的接口,获取token,并将结果组成统一的返回体返回,涉及到RPC,这里我们使用Feign进行远程调用
有小朋友就会问了,直接Feign调用/oauth/token接口不就行了吗?
通过实践,这种方法是不行的,还记得,SpringSecurity中的filter吗?SpringSecurityOauth2授权服务也有类似的filter,其类似UsernamePasswordAuthenticationFilter,会对client-id和secret进行验证,组成UsernamePasswordAuthenticationToken。所以在/oauth/token接口中,会验证principal入参是不是Authentication接口的实现。
也有小朋友会问,请求聚合服务的时候带上http header的Authorization,然后RPC调用时,保持http header不变不就行了吗?
这也是个办法,如果不是使用feign去调用的话,这种方法是可行的,如果是使用feign调用,这种方法传参比较困难,因为/oauth/token接口方法的入参是这样的
public ResponseEntity<OAuth2AccessToken> postAccessToken(Principal principal, @RequestParam Map<String, String> parameters){...}
这里有个principal入参,就是上文提到的UsernamePasswordAuthenticationToken,使用feign调用,传参比较麻烦
这里有一个很简单,也很巧妙的解决办法,可以直接在授权服务器上面写一个获取token的接口,内部调用postAccessToken()方法,然后自行组装返参,既简单又满足需求。
这就需要我们自定义登陆接口了
package com.cupricnitrate.authority.controller;

import com.cupricnitrate.authority.http.req.LoginReq;
import com.cupricnitrate.authority.http.resp.LoginResp;
import com.cupricnitrate.authority.http.resp.Result;
import org.springframework.security.authentication.UsernamePasswordAuthenticationToken;
import org.springframework.security.core.userdetails.User;
import org.springframework.security.oauth2.common.OAuth2AccessToken;
import org.springframework.security.oauth2.provider.endpoint.TokenEndpoint;
import org.springframework.web.HttpRequestMethodNotSupportedException;
import org.springframework.web.bind.annotation.PostMapping;
import org.springframework.web.bind.annotation.RequestBody;
import org.springframework.web.bind.annotation.RequestMapping;
import org.springframework.web.bind.annotation.RestController;

import javax.annotation.Resource;
import java.util.ArrayList;
import java.util.HashMap;
import java.util.Map;

/**
 * @author 硝酸铜
 * @date 2021/9/23
 */
@RestController
@RequestMapping("/oauth")
public class AuthorityController {

    @Resource
    private TokenEndpoint tokenEndpoint;

    @PostMapping(value = "/login")
    public Result<LoginResp> login(@RequestBody LoginReq req) throws HttpRequestMethodNotSupportedException {
        //创建客户端信息,客户端信息可以写死进行处理,因为Oauth2密码模式,客户端双信息必须存在,所以伪装一个
        //如果不想这么用,需要重写比较多的代码
        //这里设定,调用这个接口的都是资源服务
        User clientUser = new User("resource-server", "12345678", new ArrayList<>());
        //生成已经认证的client
        UsernamePasswordAuthenticationToken token = new UsernamePasswordAuthenticationToken(clientUser, null, new ArrayList<>());
        //封装成一个UserPassword方式的参数体
        Map<String, String> map = new HashMap<>();
        map.put("username", req.getUsername());
        map.put("password", req.getPassword());
        //授权模式为:密码模式
        map.put("grant_type", "password");

        //调用自带的获取token方法。
        OAuth2AccessToken resultToken = tokenEndpoint.postAccessToken(token, map).getBody();
        LoginResp resp = new LoginResp();
        resp.setAccessToken(resultToken.getValue())
                .setTokenType(resultToken.getTokenType())
                .setRefreshToken(resultToken.getRefreshToken().getValue())
                .setExpiresIn(resultToken.getExpiresIn())
                .setScope(resultToken.getScope())
                .setJti((String) resultToken.getAdditionalInformation().get("jti"));
        return Result.success(resp);
    }
}
其中,相关dto类定义:
/**
 * 登陆请求体
 * @author 硝酸铜
 * @date 2021/9/23
 */
@Data
public class LoginReq {
    private String username;

    private String password;
}


/**
 * 登陆返回体
 * @author 硝酸铜
 * @date 2021/9/23
 */
@Data
@Accessors(chain = true)
public class LoginResp {

    private String accessToken;

    private String tokenType;

    private String refreshToken;

    private Integer expiresIn;

    private Set<String> scope;

    private String jti;

}

/**
 * @author 硝酸铜
 * @date 2021/9/23
 */
@Data
@AllArgsConstructor
@NoArgsConstructor
public class Result<T> {

    private T result;

    private Integer code;

    public static <Q> Result success(Q q){
        return new Result(q,200);
    }

    public static Result success(){
        return new Result(null,200);
    }

    public static Result error(String message,Integer code){
        return new Result(message,code);
    }

    public static Result error(){
        return new Result("Internal Server Error",500);
    }

    public static Result error(Exception e){
        return new Result(e,500);
    }

    public static <Q> Result error(Q q){
        return new Result(q,500);
    }

}
postAccessToken()位于SpringSecurityOauth2内部源码的org.springframework.security.oauth2.provider.endpoint.TokenEndpoint中,有兴趣的小伙伴可以看一下
这里我们将TokenEndpoint注入,然后伪装一个客户端的认证流程,调用TokenEndpoint.postAccessToken()获取接口。
为什么我们伪装认证流程的时候,使用的是resource-server呢?其实一开始在搭建授权服务的时候,有的小伙伴在看到sql中,oauth_client_details表插入了两行数据,一个是web-client,一个是resource-server,可能就有疑惑。
这里的web-client是模拟一个第三方客户端,比如前端。
而resource-server是资源服务,文章开头说过,某些场景下,会发生资源服务调用授权服务接口的情况,那这个时候资源服务其实也是一种客户端,那我们在伪装客户端认证的时候,默认为调用这个接口的是其他的资源服务,那么就可以使用resource-server作为client-id了。
自定义登出接口
授权服务器登出逻辑很简单,就是调用一个接口,在调用接口的时候,删除tokenStore中保存的AccessToken和RefreshToken即可
package com.cupricnitrate.authority.controller;

import com.cupricnitrate.authority.http.req.LoginReq;
import com.cupricnitrate.authority.http.resp.LoginResp;
import com.cupricnitrate.authority.http.resp.Result;
import org.springframework.context.annotation.Lazy;
import org.springframework.security.authentication.UsernamePasswordAuthenticationToken;
import org.springframework.security.core.userdetails.User;
import org.springframework.security.oauth2.common.OAuth2AccessToken;
import org.springframework.security.oauth2.common.OAuth2RefreshToken;
import org.springframework.security.oauth2.provider.endpoint.TokenEndpoint;
import org.springframework.security.oauth2.provider.token.TokenStore;
import org.springframework.util.Assert;
import org.springframework.web.HttpRequestMethodNotSupportedException;
import org.springframework.web.bind.annotation.*;

import javax.annotation.Resource;
import java.util.ArrayList;
import java.util.HashMap;
import java.util.Map;

/**
 * @author 硝酸铜
 * @date 2021/9/23
 */
@RestController
@RequestMapping("/oauth")
public class AuthorityController {
    ...

    @Resource
    @Lazy
    private TokenStore tokenStore;

    ...
    @PostMapping(value = "/logout")
    public Result<String> logOut(@RequestBody LogoutReq req) {
       Assert.notNull(req.getAccessToken(), "传参错误,入参accessToken为空");
       OAuth2AccessToken oAuth2AccessToken = tokenStore.readAccessToken(req.getAccessToken());
       OAuth2AccessToken oAuth2AccessToken = tokenStore.readAccessToken(accessToken);
        if (oAuth2AccessToken != null) {
            OAuth2RefreshToken oAuth2RefreshToken = oAuth2AccessToken.getRefreshToken();
            //从tokenStore中移除token
            tokenStore.removeAccessToken(oAuth2AccessToken);
            tokenStore.removeRefreshToken(oAuth2RefreshToken);
            tokenStore.removeAccessTokenUsingRefreshToken(oAuth2RefreshToken);
            return Result.success("登出成功");
        } else {
            return Result.error("token已失效,请勿重复登出", 500);
        }
    }
}

/**
 * 登出请求体
 * @author 硝酸铜
 * @date 2021/9/23
 */
@Data
public class LogoutReq {
    private String accessToken;
}
RPC调用
接下来的内容要求小伙伴们有使用nacos注册中心的经验,有点小要求的哈
我们在授权服务和资源服务加上nacos注册中心,在资源服务加上openfeign,通过资源服务调用一下这两个接口
添加依赖
    <properties>
        ...
        <spring-cloud.alibaba.version>2021.1</spring-cloud.alibaba.version>
        <spring-cloud.version>2020.0.2</spring-cloud.version>
    </properties>

    <dependencies>
       ...
        <!-- https://mvnrepository.com/artifact/com.alibaba.cloud/spring-cloud-starter-alibaba-nacos-discovery -->
        <dependency>
            <groupId>com.alibaba.cloud</groupId>
            <artifactId>spring-cloud-starter-alibaba-nacos-discovery</artifactId>
            <exclusions>
                <exclusion>
                    <groupId>org.springframework.cloud</groupId>
                    <artifactId>spring-cloud-starter-netflix-ribbon</artifactId>
                </exclusion>
            </exclusions>
        </dependency>
        <!--nacos注册中心依赖-->
        <dependency>
            <groupId>org.springframework.cloud</groupId>
            <artifactId>spring-cloud-starter-loadbalancer</artifactId>
        </dependency>

				<!--授权服务不需要引入openfeign-->
        <dependency>
            <groupId>org.springframework.cloud</groupId>
            <artifactId>spring-cloud-starter-openfeign</artifactId>
        </dependency>
    </dependencies>

    <dependencyManagement>
        <dependencies>
            <!-- https://mvnrepository.com/artifact/com.alibaba.cloud/spring-cloud-alibaba-dependencies -->
            <dependency>
                <groupId>com.alibaba.cloud</groupId>
                <artifactId>spring-cloud-alibaba-dependencies</artifactId>
                <version>${spring-cloud.alibaba.version}</version>
                <type>pom</type>
                <scope>import</scope>
            </dependency>

            <dependency>
                <groupId>org.springframework.cloud</groupId>
                <artifactId>spring-cloud-dependencies</artifactId>
                <version>${spring-cloud.version}</version>
                <type>pom</type>
                <scope>import</scope>
            </dependency>
        </dependencies>
    </dependencyManagement>
...
采用的依赖版本:
spring-cloud.alibaba:2021.1spring-cloud:2020.0.2
SpringCloud部分主要是引入了nacos注册中心,之后的demo会演示如何通过openFeign调用登陆和登出接口
Ps:如果引入了nacos配置中心,application.yml则需要改名为bootstrap.yml,因为nacos配置中心依赖spring-cloud-starter-bootstrap,我们这里只有nacos注册中心,所以不需要改名
依赖导入完成之后,配置好项目
spring:
...
  cloud:
    nacos:
      discovery:
        server-addr: 127.0.0.1:8848
        service: ${spring.application.name}
定义feign和接口
在资源服务器,定义好feign
/**
 * @author 硝酸铜
 * @date 2021/9/15
 */
@FeignClient(
        value = "authorization-server",
        path = "/authorization-server",
        configuration = FeignConfig.class
)
public interface OauthFeign {

    @PostMapping(value = "/oauth/login")
    <T> Result<T> login(@RequestBody LoginReq req);

    @PostMapping(value = "/oauth/logout")
    <T> Result<T> logout(@RequestBody LogoutReq req);
}


/**
 * @author 硝酸铜
 * @date 2021/9/23
 */
@Configuration
public class FeignConfig {

    /**
     * 替换解析queryMap的类,实现父类中变量的映射
     * Bean的name一定要全局唯一
     *
     * @return
     */
    @Bean(name = "resource-server-feignBuilder")
    public Feign.Builder feignBuilder() {
        return Feign.builder()
                .queryMapEncoder(new BeanQueryMapEncoder())
                .retryer(Retryer.NEVER_RETRY);
    }
}
这里的入参和返参DTO和授权服务是一样的,就不多做赘述了
定义接口去调用即可
package com.cupricnitrate.resource.controller;

import com.cupricnitrate.resource.feign.OauthFeign;
import com.cupricnitrate.resource.http.req.LoginReq;
import com.cupricnitrate.resource.http.req.LogoutReq;
import com.cupricnitrate.resource.http.resp.LoginResp;
import com.cupricnitrate.resource.http.resp.Result;
import org.springframework.web.bind.annotation.*;

import javax.annotation.Resource;

/**
 * @author 硝酸铜
 * @date 2021/9/23
 */
@RestController
@RequestMapping("/auth")
public class AuthorityController {
    @Resource
    private OauthFeign oauthFeign;

    @PostMapping(value = "/login")
    public Result<LoginResp> login(@RequestBody LoginReq req){
        return oauthFeign.login(req);
    }

    @PostMapping(value = "logout")
    public Result<String> logOut(@RequestBody LogoutReq req) {
        return oauthFeign.logout(req);
    }
}
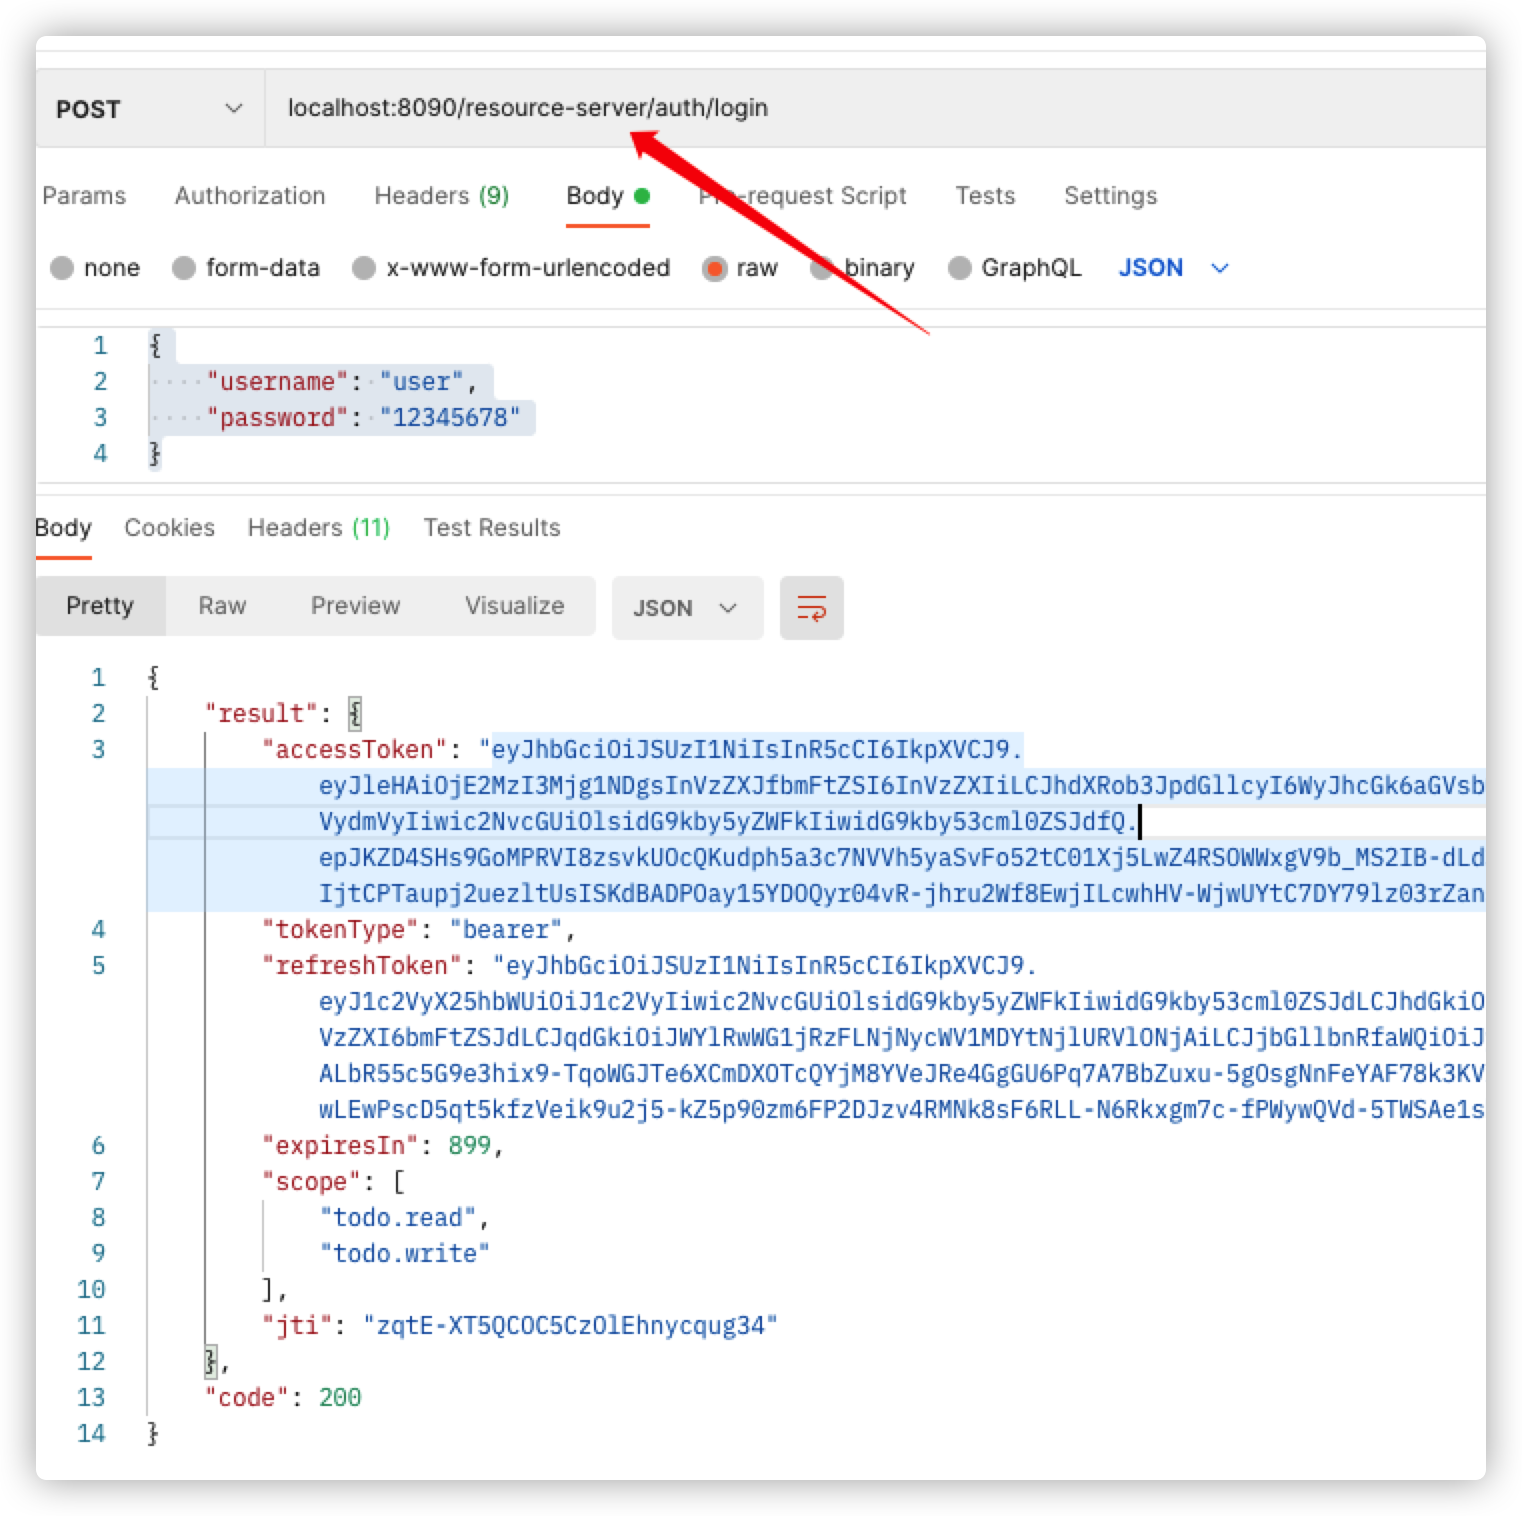
启动nacos,启动项目,调用登陆接口

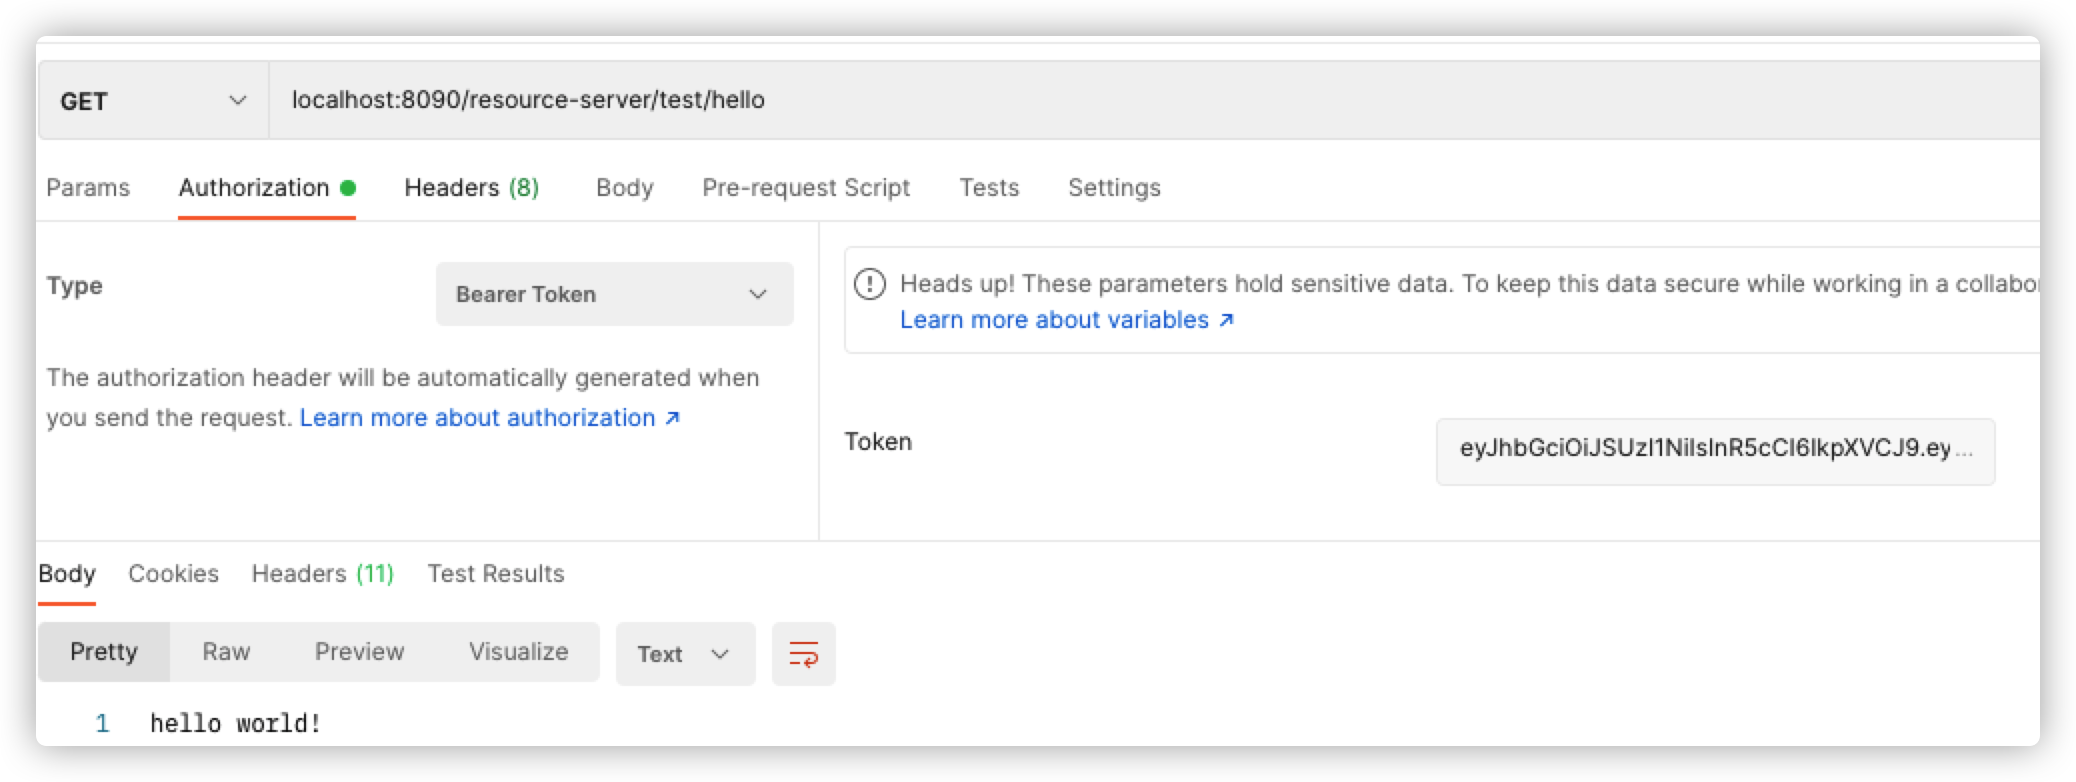
调用的资源服务接口
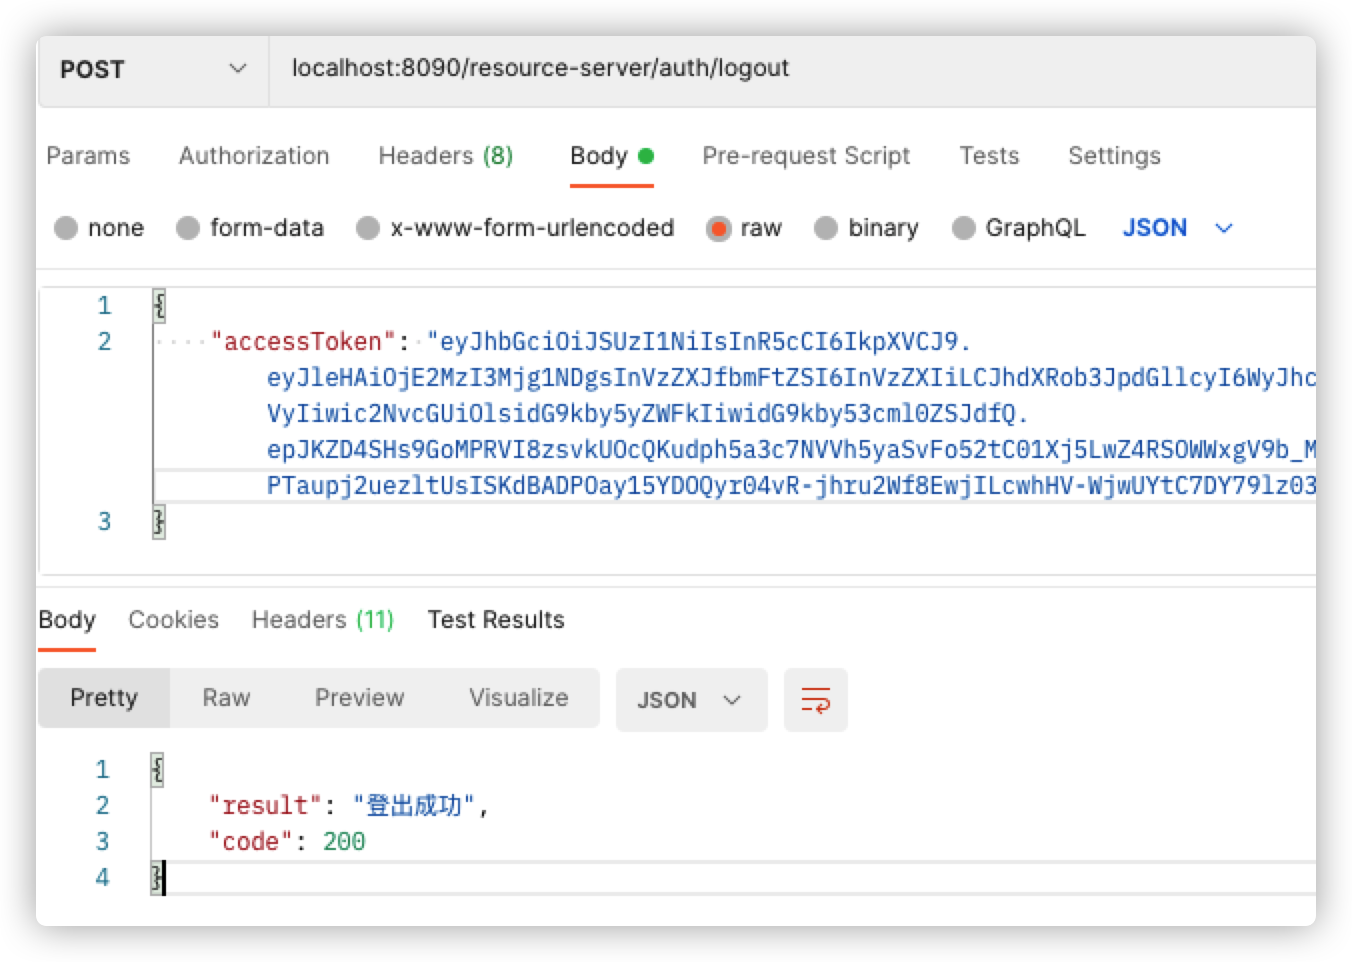
调用登出接口

资源服务验证token有效性
现在又出现了一个问题,就算我把授权服务器tokenStore中保存的token删除了,但是资源服务器还是可以通过被删除的token调用资源,这是为什么呢?

这是因为现在搭建的资源服务器只是对token做了一个验签和过期判断,并没有访问授权服务器的/oauth/check_token接口去校验这个token的有效性。
在其他场景下,资源服务器不去校验token的有效性其实是可以的,因为accessToken的时效一般很短,accessToken失效后需要去刷新token,刷新token的接口也会检查tokenStore中是否存在accessToken和refreshToken,如果调用了logout接口,刷新token的接口也会报错。
但是如果在调用了logout接口后,必须要使这个token失效的场景下,就要求资源服务器必须去调用授权服务器的/oauth/check_token接口检查token的有效性了,这个时候就需要增加一些配置
在修改资源服务之前,谈一个有趣的东西,前几天在知乎摸鱼的时候看到一个有趣的问题:jwt与token+redis,哪种方案更好用? - 栾海鹏的回答 - 知乎
这里面提到,jwt token有点在于去中心话,但是缺点在于服务端无法主动让token失效,这一点我们在前面也提到过。
如果想实现服务端主动让jwt token失效,有个优化的方法,就是将其保存在redis中,这种方式牺牲了JWT去中心话的特点。
对比SpringSecurityOauth2,现在我们实现的资源服务就是去中心化的jwt,资源服务并没有调用/oauth/check_token接口去检验token有效性,只是基于jwt做验签和过期判断,并根据jwt中所包含的用户信息作鉴权。
如果需要实现授权服务主动让jwt token失效,就需要让资源服务去调用/oauth/check_token接口,失去了去中心化的特点,依赖授权服务redis中的token(授权服务配置的redisTokenStore)
添加依赖修改配置
其实只需要增加一个资源服务的配置就可以,需要增加依赖
<properties>
  ...
        <security.oauth2.version>2.5.0.RELEASE</security.oauth2.version>
      <security.oauth2.autoconfigure.version>2.3.0.RELEASE</security.oauth2.autoconfigure.version>
  ...
    </properties>
...

       <dependency>
            <groupId>org.springframework.security.oauth.boot</groupId>
            <artifactId>spring-security-oauth2-autoconfigure</artifactId>
            <version>${security.oauth2.autoconfigure.version}</version>
        </dependency>

        <dependency>
            <groupId>org.springframework.security.oauth</groupId>
            <artifactId>spring-security-oauth2</artifactId>
            <version>${security.oauth2.version}</version>
        </dependency>
然后编写一个资源服务的配置
package com.cupricnitrate.resource.config;

import org.springframework.context.annotation.Configuration;
import org.springframework.core.convert.converter.Converter;
import org.springframework.security.authentication.AbstractAuthenticationToken;
import org.springframework.security.authentication.UsernamePasswordAuthenticationToken;
import org.springframework.security.config.annotation.web.builders.HttpSecurity;
import org.springframework.security.core.GrantedAuthority;
import org.springframework.security.core.authority.SimpleGrantedAuthority;
import org.springframework.security.oauth2.config.annotation.web.configuration.EnableResourceServer;
import org.springframework.security.oauth2.config.annotation.web.configuration.ResourceServerConfigurerAdapter;
import org.springframework.security.oauth2.config.annotation.web.configurers.ResourceServerSecurityConfigurer;
import org.springframework.security.oauth2.jwt.Jwt;
import org.springframework.security.oauth2.provider.token.RemoteTokenServices;
import org.springframework.security.oauth2.provider.token.ResourceServerTokenServices;

import java.util.List;
import java.util.stream.Collectors;
import java.util.stream.Stream;


/**
 * @author 硝酸铜
 * @date 2021/9/23
 */
@Configuration
@EnableResourceServer
public class ResourceServerConfig extends ResourceServerConfigurerAdapter {
    @Override
    public void configure(HttpSecurity http) throws Exception {
        http
                .requestMatchers(req -> req.mvcMatchers("/auth/**"))
                .authorizeRequests(req -> req
                        .antMatchers("/auth/**").permitAll()
                )
                //oauth2使用jwt模式,会走接口拿取公钥解密验签
                .oauth2ResourceServer(resourceServer -> resourceServer.jwt()
                //读取权限默认读取scopes,这里配置一个转换器,使其也读取Authorities
                .jwtAuthenticationConverter(customJwtAuthenticationTokenConverter())
        );
        super.configure(http);
    }

    private Converter<Jwt, AbstractAuthenticationToken> customJwtAuthenticationTokenConverter() {
        return jwt -> {
            List<String> userAuthorities = jwt.getClaimAsStringList("authorities");
            List<String> scopes = jwt.getClaimAsStringList("scope");
            List<GrantedAuthority> combinedAuthorities = Stream.concat(
                    userAuthorities.stream(),
                    //加上 SCOPE_前缀
                    scopes.stream().map(scope -> "SCOPE_" + scope))
                    .map(SimpleGrantedAuthority::new)
                    .collect(Collectors.toList());
            String username = jwt.getClaimAsString("user_name");
            return new UsernamePasswordAuthenticationToken(username, null, combinedAuthorities);
        };
    }

    @Override
    public void configure(ResourceServerSecurityConfigurer resources) throws Exception {
        resources.tokenServices(tokenServices());
    }

    /**
     *  配置资源服务器如何验证token有效性
     *  1. DefaultTokenServices
     *     如果认证服务器和资源服务器同一服务时,则直接采用此默认服务验证即可
     *  2. RemoteTokenServices (当前采用这个)
     *     当认证服务器和资源服务器不是同一服务时, 要使用此服务去远程认证服务器验证
     * */
    public ResourceServerTokenServices tokenServices(){
        RemoteTokenServices remoteTokenServices = new RemoteTokenServices();
        remoteTokenServices.setCheckTokenEndpointUrl("http://localhost:8080/authorization-server/oauth/check_token");
        remoteTokenServices.setClientId("resource-server");
        remoteTokenServices.setClientSecret("12345678");
        return remoteTokenServices;
    }
}
资源服务器通过 @EnableResourceServer 注解来开启一个 OAuth2AuthenticationProcessingFilter 类型的过滤器
这里添加了验证token有效性的配置,这里配置了clientId和clientSecret,这是为什么呢?因为调用check_token接口也需要clientId和clientSecret,设置一个专门为资源服务器使用的clientId,便于器调用check_token接口。
这里我们将Oauth2 jwt的验签配置从WebSecurityConfig转移到了ResourceServerConfig,进行了一下归纳,区分了资源服务器配置和普通的安全配置
现在WebSecurityConfig:
package com.cupricnitrate.resource.config;

import org.springframework.boot.autoconfigure.security.servlet.PathRequest;
import org.springframework.context.annotation.Configuration;
import org.springframework.security.config.annotation.method.configuration.EnableGlobalMethodSecurity;
import org.springframework.security.config.annotation.web.builders.HttpSecurity;
import org.springframework.security.config.annotation.web.builders.WebSecurity;
import org.springframework.security.config.annotation.web.configuration.EnableWebSecurity;
import org.springframework.security.config.annotation.web.configuration.WebSecurityConfigurerAdapter;
import org.springframework.security.config.annotation.web.configurers.AbstractHttpConfigurer;
import org.springframework.security.config.http.SessionCreationPolicy;

/**
 * @author 硝酸铜
 * @date 2021/9/23
 */

@Configuration
@EnableWebSecurity(debug = true)
@EnableGlobalMethodSecurity(prePostEnabled = true)
public class WebSecurityConfig extends WebSecurityConfigurerAdapter {

    @Override
    protected void configure(HttpSecurity http) throws Exception {
        http
                .formLogin(AbstractHttpConfigurer::disable)
                .csrf(AbstractHttpConfigurer::disable)
                .logout(AbstractHttpConfigurer::disable)
                .sessionManagement(sessionManagement -> sessionManagement.sessionCreationPolicy(SessionCreationPolicy.STATELESS))
                .authorizeRequests(req -> req
                        .antMatchers("/auth/**").permitAll()
                        .anyRequest().authenticated()
                );
    }

    @Override
    public void configure(WebSecurity web) {
        web
                .ignoring()
                .antMatchers("/error",
                        "/resources/**",
                        "/static/**",
                        "/public/**",
                        "/h2-console/**",
                        "/swagger-ui.html",
                        "/swagger-ui/**",
                        "/v3/api-docs/**",
                        "/v2/api-docs/**",
                        "/doc.html",
                        "/swagger-resources/**")
                .requestMatchers(PathRequest.toStaticResources().atCommonLocations());
    }
}
测试
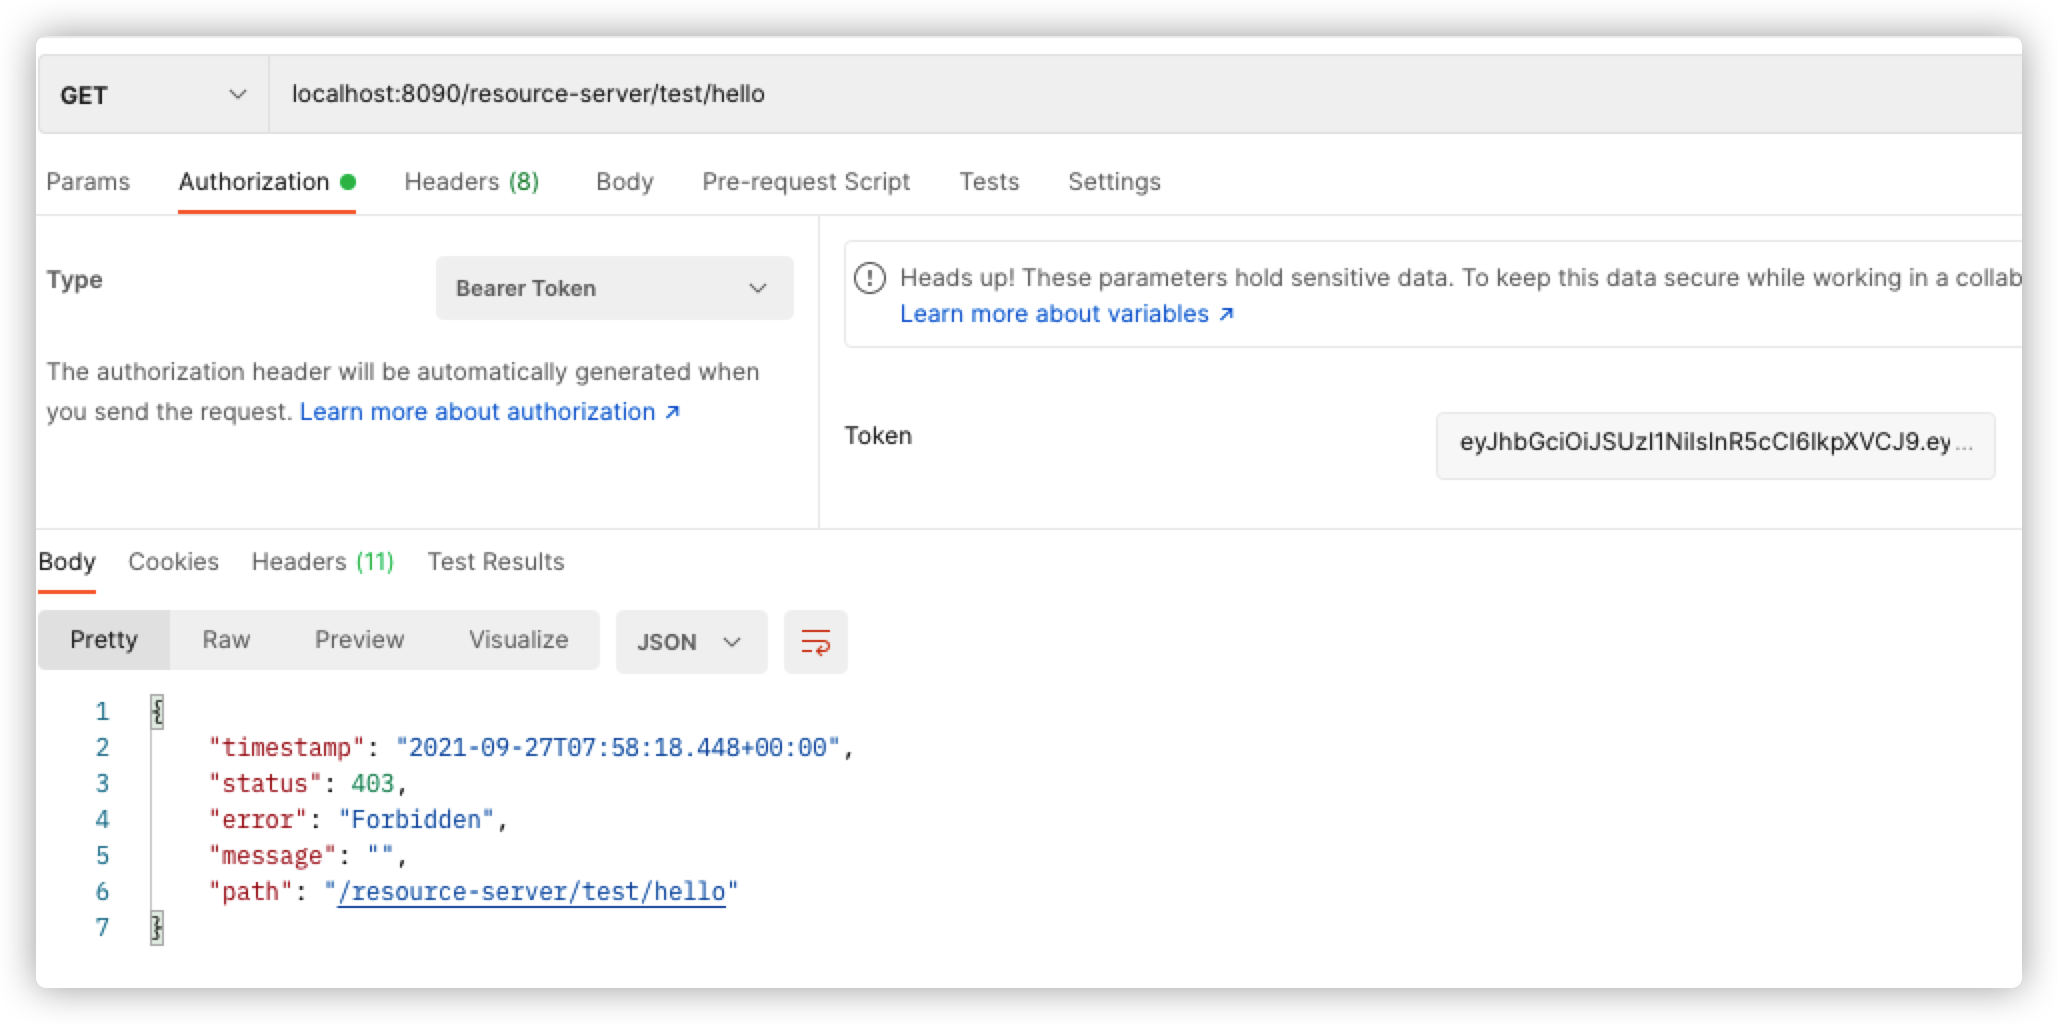
登出后,使用失效的token是无法通过授权的了

自定义授权模式
虽然 OAuth2 协议定义了4种标准的授权模式,但是在实际开发过程中还是远远满足不了各种变态的业务场景,需要我们去扩展。例如增加图形验证码、手机验证码、手机号密码登录等等的场景
下面这位老哥的博客写的贼好诶,分享一下给大家看看

