SpringSecurityOauth2系列学习(三):资源服务
系列导航
SpringSecurity系列
- SpringSecurity系列学习(一):初识SpringSecurity
- SpringSecurity系列学习(二):密码验证
- SpringSecurity系列学习(三):认证流程和源码解析
- SpringSecurity系列学习(四):基于JWT的认证
- SpringSecurity系列学习(四-番外):多因子验证和TOTP
- SpringSecurity系列学习(五):授权流程和源码分析
- SpringSecurity系列学习(六):基于RBAC的授权
SpringSecurityOauth2系列
- SpringSecurityOauth2系列学习(一):初认Oauth2
- SpringSecurityOauth2系列学习(二):授权服务
- SpringSecurityOauth2系列学习(三):资源服务
- SpringSecurityOauth2系列学习(四):自定义登陆登出接口
- SpringSecurityOauth2系列学习(五):授权服务自定义异常处理
资源服务
资源服务器就比较简单了,因为认证和授权已经在授权服务器做了,所以我们这里只需要完成鉴权就行了。
这里我们实现一个简单的服务就行,主要是演示一下调取接口
引入依赖和配置
<?xml version="1.0" encoding="UTF-8"?>
<project xmlns="http://maven.apache.org/POM/4.0.0"
         xmlns:xsi="http://www.w3.org/2001/XMLSchema-instance"
         xsi:schemaLocation="http://maven.apache.org/POM/4.0.0 http://maven.apache.org/xsd/maven-4.0.0.xsd">
    <parent>
        <groupId>org.springframework.boot</groupId>
        <artifactId>spring-boot-starter-parent</artifactId>
        <version>2.4.3</version>
        <relativePath /> <!-- lookup parent from repository -->
    </parent>
    <modelVersion>4.0.0</modelVersion>

    <artifactId>resource-server</artifactId>

    <properties>
        <maven.compiler.source>8</maven.compiler.source>
        <maven.compiler.target>8</maven.compiler.target>
    </properties>

    <dependencies>
        <dependency>
            <groupId>org.projectlombok</groupId>
            <artifactId>lombok</artifactId>
            <optional>true</optional>
        </dependency>

        <dependency>
            <groupId>org.springframework.boot</groupId>
            <artifactId>spring-boot-starter-web</artifactId>
        </dependency>

        <dependency>
            <groupId>org.springframework.boot</groupId>
            <artifactId>spring-boot-starter-security</artifactId>
        </dependency>

        <!-- Spring Security OAuth2 依赖 -->
        <dependency>
            <groupId>org.springframework.boot</groupId>
            <artifactId>spring-boot-starter-oauth2-resource-server</artifactId>
        </dependency>
    </dependencies>

</project>
主要需要spring-boot-starter-security和spring-boot-starter-oauth2-resource-server
配置项目:application.yml
server:
  port: 8090
  servlet:
    context-path: /${spring.application.name}

spring:
  application:
    #服务名称
    name: resource_server
  servlet:
    multipart:
      max-file-size: 1024MB
      max-request-size: 1024MB
  security:
    oauth2:
      resourceserver:
        jwt:
          # 配置jwk set
          jwk-set-uri: http://localhost:8080/authorization_server/.well-known/jwks.json
这里将jwk set 设定进去,接下来只需要在安全配置中配置好使用jwt验证token,SpringSecurityOauth2就会使用非对称的方式解析token的签名,会自动从这个接口中读取公钥,不需要我们去实现验签逻辑
如果这个配置错误,可能会出现token是正确的,并且也有权限访问,但是最后会报401错误的情况,资源服务器无法获取公钥,不能正确解密验签!
安全配置
import org.springframework.beans.factory.annotation.Value;
import org.springframework.boot.autoconfigure.security.servlet.PathRequest;
import org.springframework.context.annotation.Configuration;
import org.springframework.core.convert.converter.Converter;
import org.springframework.security.authentication.AbstractAuthenticationToken;
import org.springframework.security.authentication.UsernamePasswordAuthenticationToken;
import org.springframework.security.config.annotation.method.configuration.EnableGlobalMethodSecurity;
import org.springframework.security.config.annotation.web.builders.HttpSecurity;
import org.springframework.security.config.annotation.web.builders.WebSecurity;
import org.springframework.security.config.annotation.web.configuration.EnableWebSecurity;
import org.springframework.security.config.annotation.web.configuration.WebSecurityConfigurerAdapter;
import org.springframework.security.config.annotation.web.configurers.AbstractHttpConfigurer;
import org.springframework.security.config.http.SessionCreationPolicy;
import org.springframework.security.core.GrantedAuthority;
import org.springframework.security.core.authority.SimpleGrantedAuthority;
import org.springframework.security.oauth2.jwt.Jwt;

import java.util.List;
import java.util.stream.Collectors;
import java.util.stream.Stream;

/**
 * @author 硝酸铜
 * @date 2021/9/23
 */

@Configuration
@EnableWebSecurity(debug = true)
@EnableGlobalMethodSecurity(prePostEnabled = true)
public class WebSecurityConfig extends WebSecurityConfigurerAdapter {

    @Override
    protected void configure(HttpSecurity http) throws Exception {
        http
                .formLogin(AbstractHttpConfigurer::disable)
                .csrf(AbstractHttpConfigurer::disable)
                .logout(AbstractHttpConfigurer::disable)
                .sessionManagement(sessionManagement -> sessionManagement.sessionCreationPolicy(SessionCreationPolicy.STATELESS))
                .authorizeRequests(req -> req
                        .antMatchers("/auth/**").permitAll()
                        .anyRequest().authenticated()
                )
                //oauth2使用jwt模式,会走接口拿取公钥解密验签
                .oauth2ResourceServer(resourceServer -> resourceServer.jwt()
                //读取权限默认读取scopes,这里配置一个转换器,使其也读取Authorities
                .jwtAuthenticationConverter(customJwtAuthenticationTokenConverter())
        );
    }

    private Converter<Jwt, AbstractAuthenticationToken> customJwtAuthenticationTokenConverter() {
        return jwt -> {
            List<String> userAuthorities = jwt.getClaimAsStringList("authorities");
            List<String> scopes = jwt.getClaimAsStringList("scope");
            List<GrantedAuthority> combinedAuthorities = Stream.concat(
                    userAuthorities.stream(),
                    //加上 SCOPE_前缀
                    scopes.stream().map(scope -> "SCOPE_" + scope))
                    .map(SimpleGrantedAuthority::new)
                    .collect(Collectors.toList());
            String username = jwt.getClaimAsString("user_name");
            return new UsernamePasswordAuthenticationToken(username, null, combinedAuthorities);
        };
    }

    @Override
    public void configure(WebSecurity web) {
        web
                .ignoring()
                .antMatchers("/error",
                        "/resources/**",
                        "/static/**",
                        "/public/**",
                        "/h2-console/**",
                        "/swagger-ui.html",
                        "/swagger-ui/**",
                        "/v3/api-docs/**",
                        "/v2/api-docs/**",
                        "/doc.html",
                        "/swagger-resources/**")
                .requestMatchers(PathRequest.toStaticResources().atCommonLocations());
    }
}
customJwtAuthenticationTokenConverter()这个方法主要是将claims中的scopes和authorities放在一起,鉴权的时候即判断scopes + authorities 有没有需要的权限
定义接口测试
在安全配置类里面启用了方法级注解,这里写个简单的接口,方便后面调取
@RestController
@RequestMapping(value = "/test")
public class TestController {


    @PreAuthorize("hasAnyAuthority('api:hello')")
    @GetMapping(value = "/hello")
    public String hello(){
        return "hello world!";
    }
}
启动授权服务和资源服务
直接进行访问,401错误

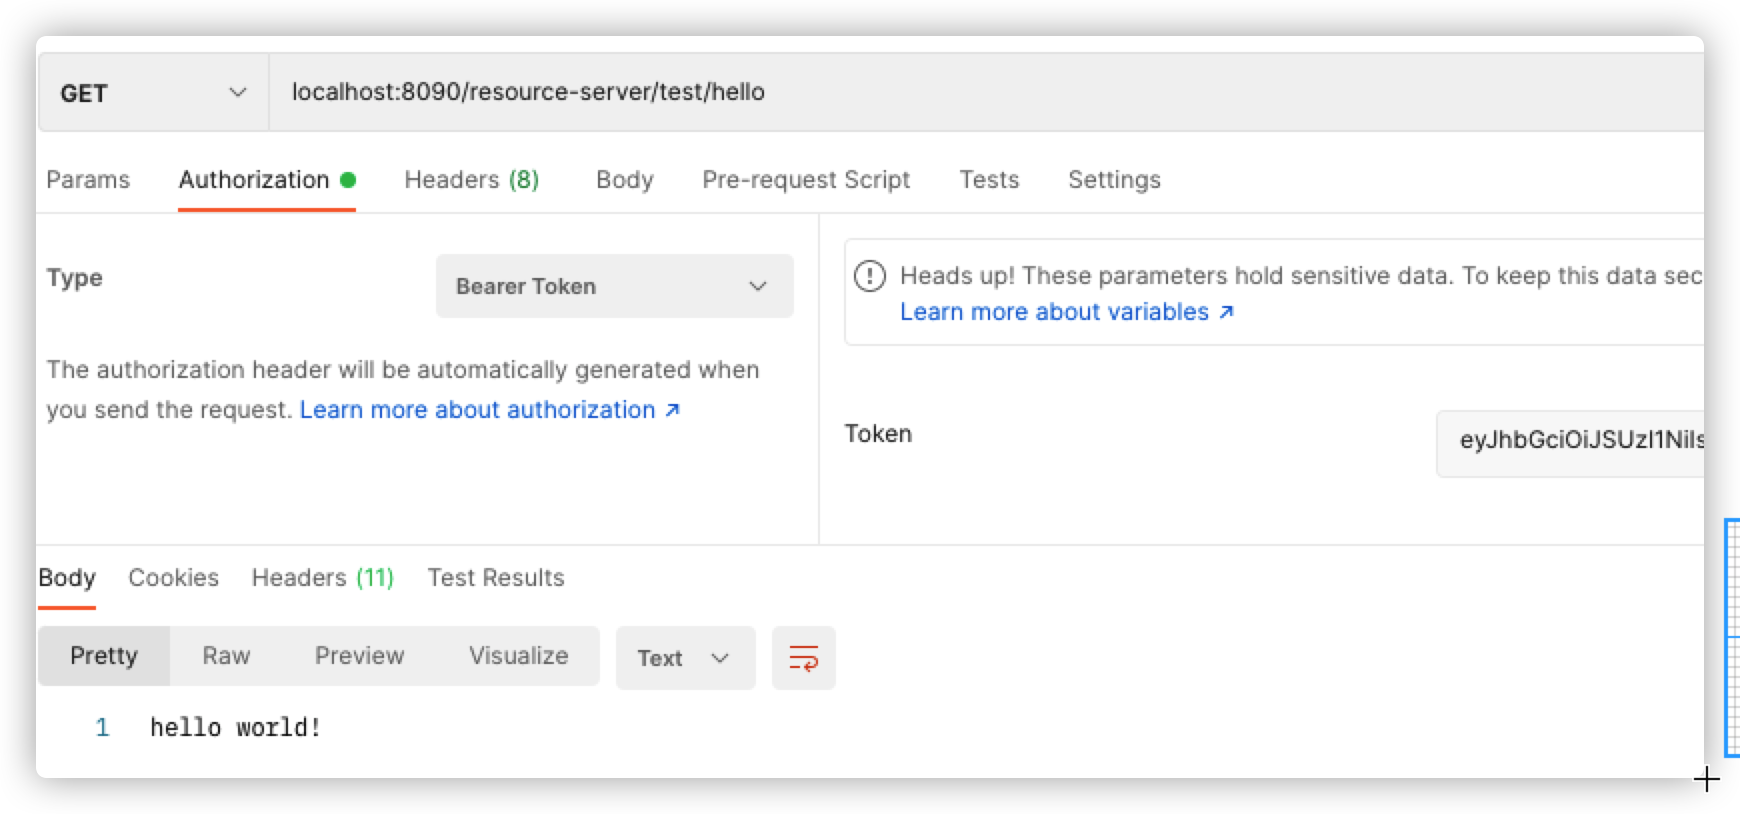
登陆后,在Headers里面加上Authorization,token为从授权服务器中获取的token,可以调取成功


