Pytorch深度学习入门
一、配环境和基础知识
1.1 创建pytorch环境
在Anaconda Prompt中输入
conda create -n pytorch python=3.6
Proceed ([y]/n)? >>> y(装包)
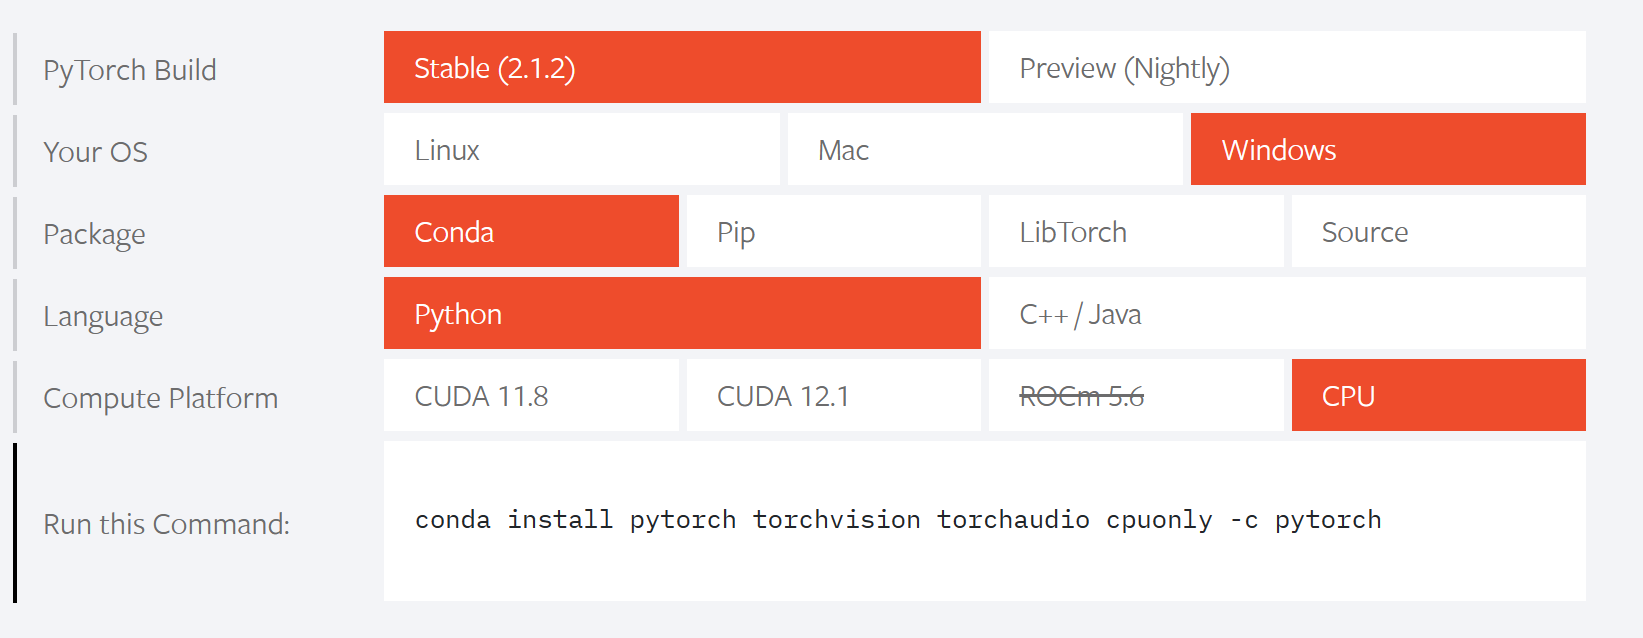
下载Pytorch
进入官网,注意选cpu(因为显卡不是英伟达)
在Anaconda Prompt中进入之前创建的conda环境
运行上面给的指令
conda install pytorch torchvision torchaudio cpuonly -c pytorch
Proceed ([y]/n)? >>> y(装包)
验证是否安装成功(不报错则√)
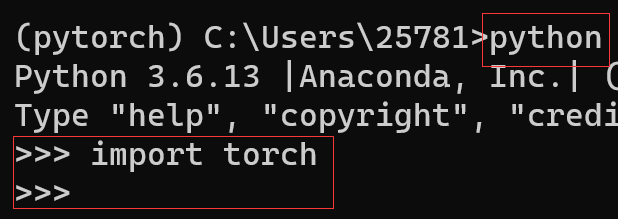
(或往下再输入print(torch.cuda_is_avaliable)返回False则√,因是cpu版本)
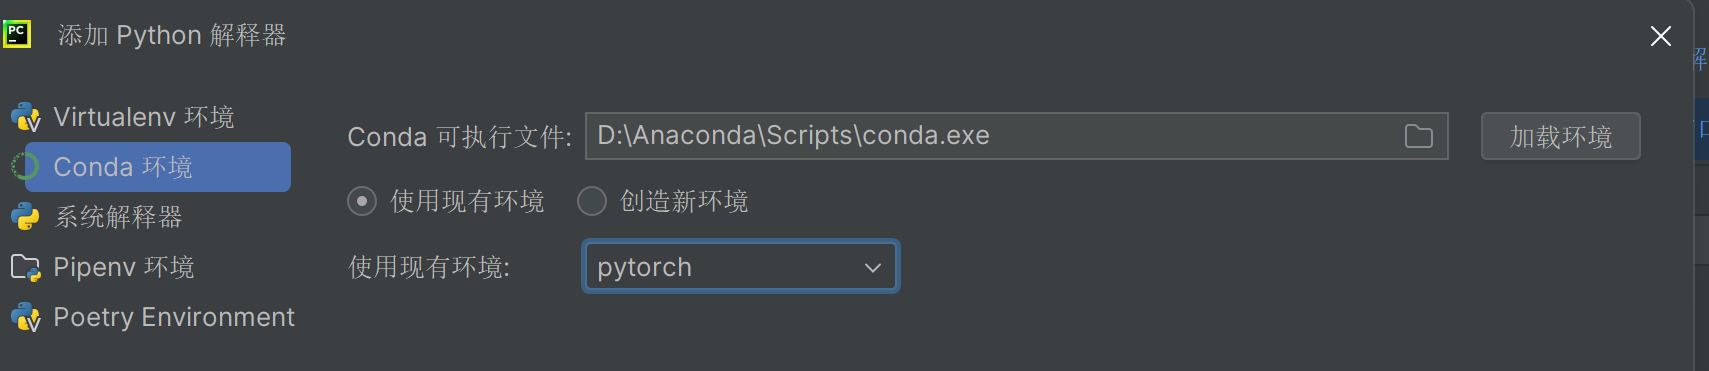
1.2 Python编辑器1——PyCharm
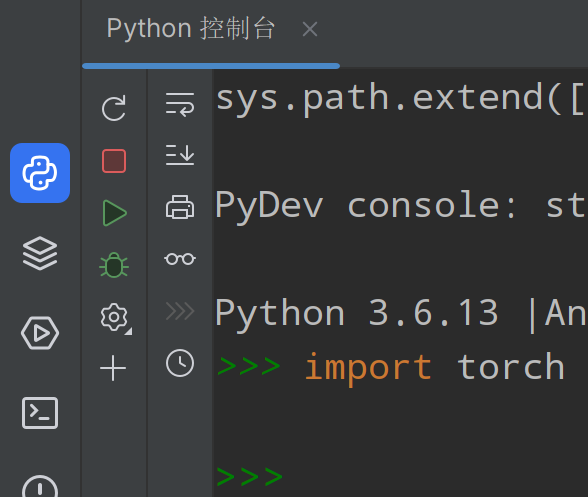
在控制台验证环境是否可用(不报错则√)
1.3 Python编辑器2——Jupyter
为了更方便进入jupyter:
conda install nb_conda
此时应该能够直接打开jupyter nootebook,但出现报错:

csdn查了下是我安装的tornado版本与jupyter不匹配,解决方法是输入以下
conda install tornado=4.5
此时再输入
jupyter nootebook
直接完成跳转。选择New→Python [conda env:pytorch] * 创建新的文件
import torch
输入以上代码后shift+回车,验证环境是否可用(不报错则√)
1.3 Python中的两大工具函数
将Python的package(如pytorch)类比为工具箱(其中有许多分区和工具)
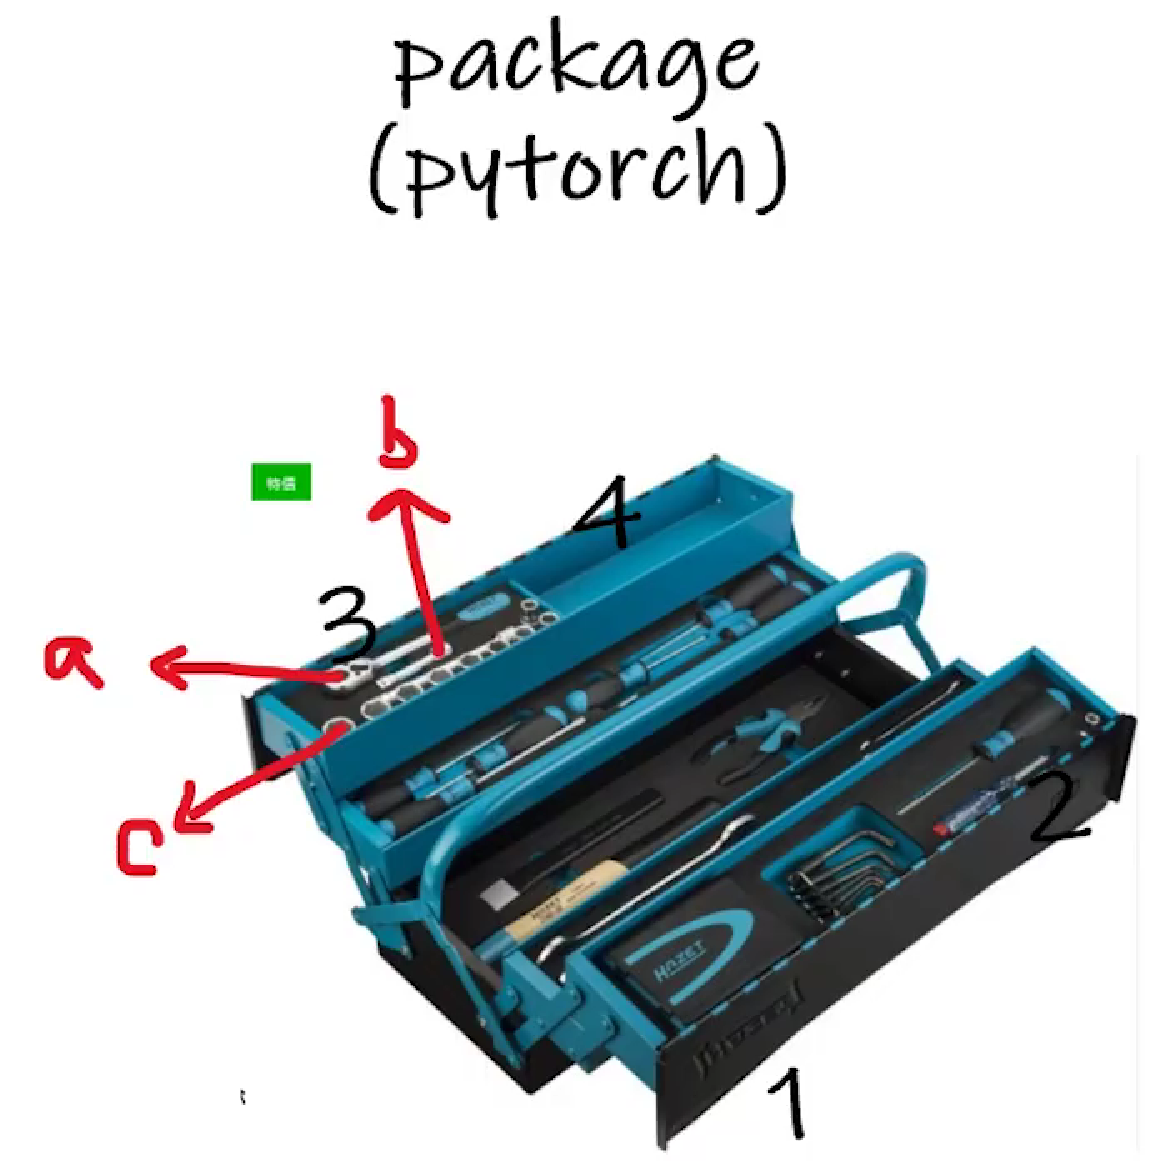
(1)dir()函数:打开工具箱(或它的某分区),返回里面有什么
(2)help()函数:返回某工具具体怎么用(官方解释文档)
示例(在Python控制台中)
In[5]:dir(torch)
Out[5]:
['AVG',
 'AggregationType',
 'AliasDb',
  ...
 'cuda',
  ...]
In[6]:dir(torch.cuda)
Out[6]:
['Any',
 'BFloat16Storage',
 'BFloat16Tensor',
  ...
  'is_available',
  ...]
In[7]:help(torch.cuda.is_available)
Help on function is_available in module torch.cuda:
is_available() -> bool                                        # 输出为布尔值
    Returns a bool indicating if CUDA is currently available. # 返回一个布尔值,指示 CUDA 当前是否可用。
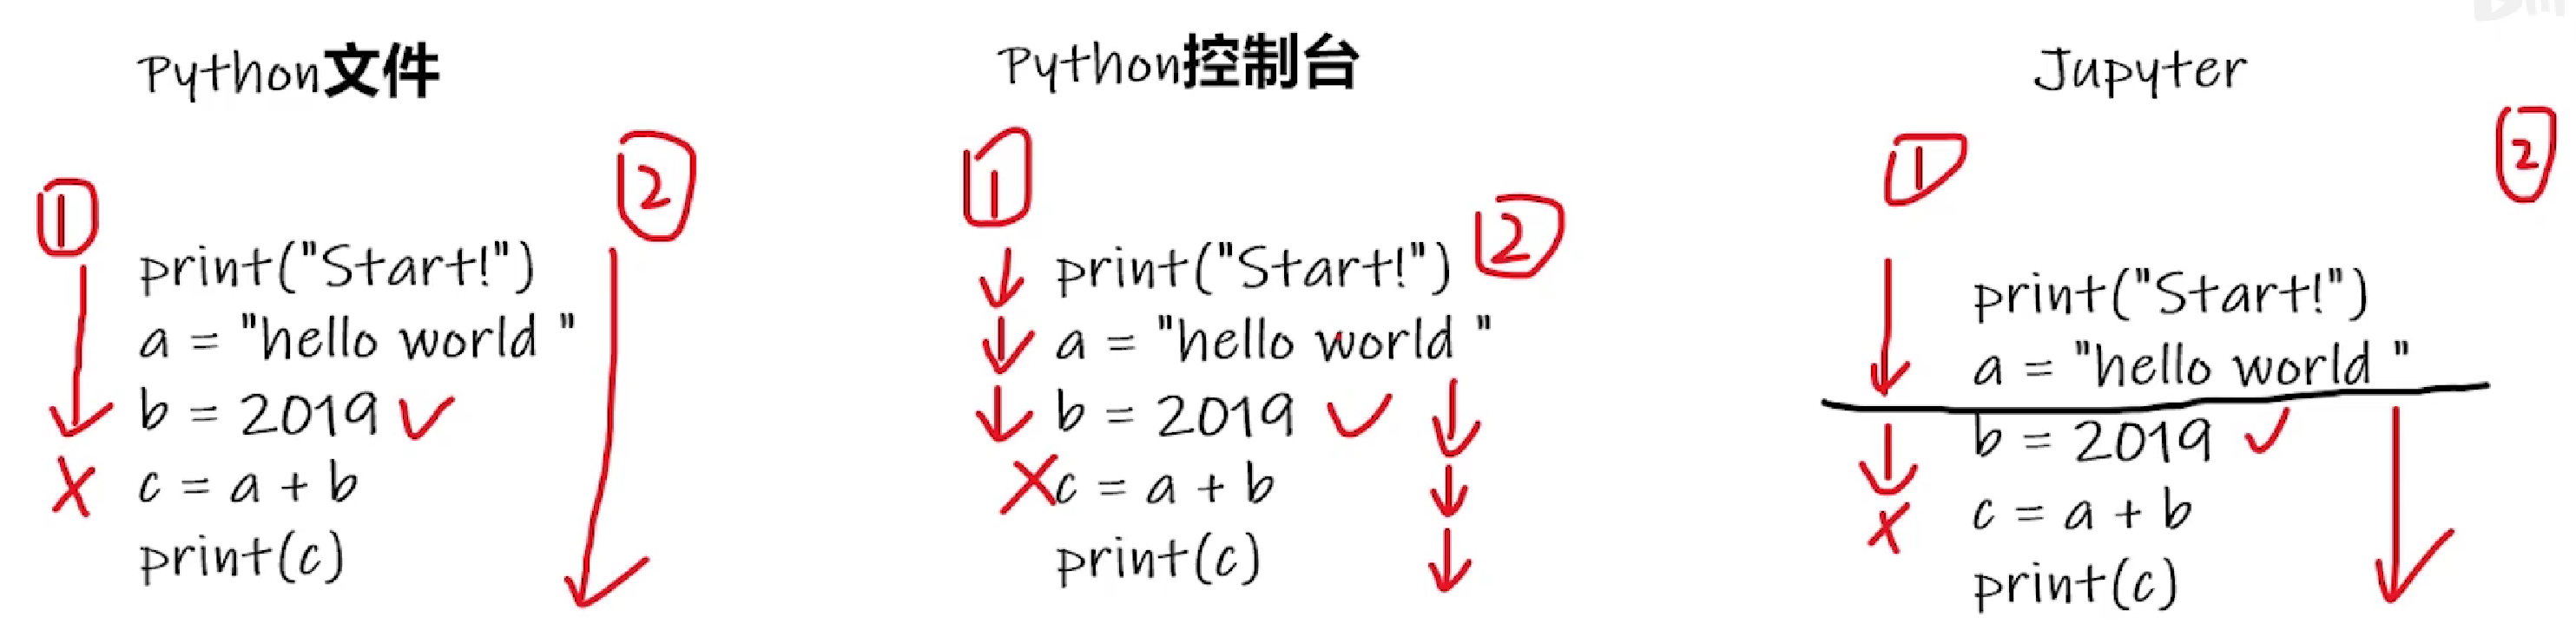
1.4 三种代码运行方式对比
| Python文件 | Python控制台 | Jupyter | |
|---|---|---|---|
| 运行单位 | 所有行的代码为一块 | 以任意行为块 | 以任意行为块 |
| 优点 | 文件保存、传播方便,适用于大型项目 | 显示每个变量的属性 | 有利于代码阅读及修改 |
| 缺点 | 需要从头运行 | 不利于代码阅读及修改 | 环境需要配置 |
代码运行流程示例:
二、数据集的认识和制作
pytorch中关于读取数据的两个类:
| Dataset | Dataloader |
|---|---|
| 获取数据及其label、编号(size) | 为网络提供不同的数据形式 |
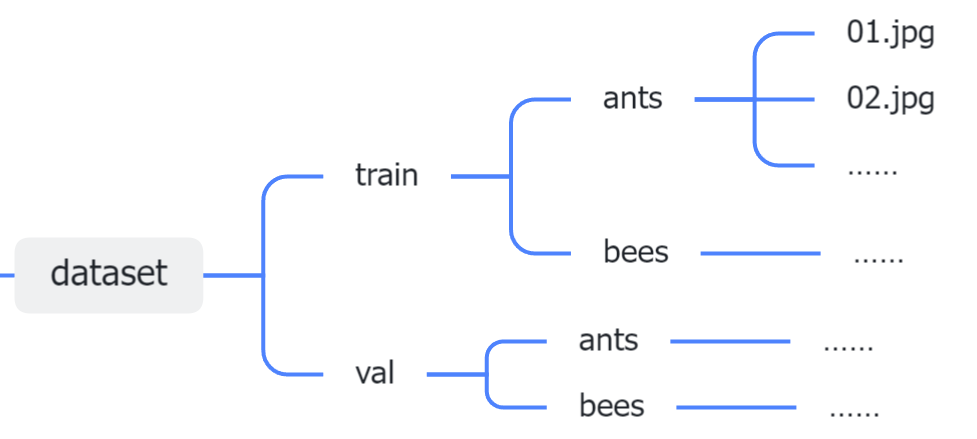
本次实验的数据集存储形式
开始动手!
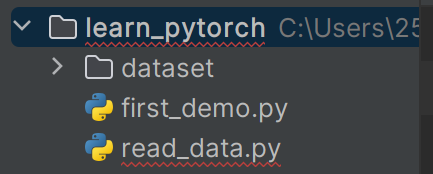
①手动将数据集移入python工程文件所在根目录下
②读取数据(图片)
# 法1
from PIL import Image
img_path = "xxx"
img = Image.open(img_path)
img.show()

# 法2:利用opencv读取图片,获得numpy型图片数据
import cv2
cv_img=cv2.imread(img_path)
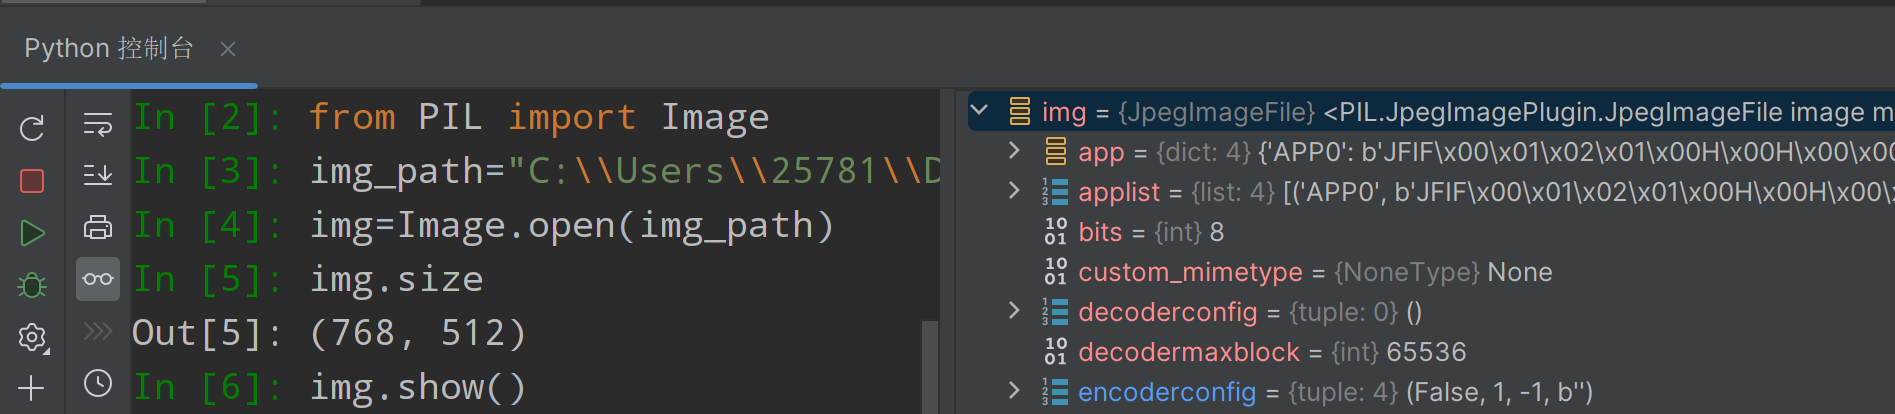
样例(注意路径中改为双斜杠\\防止转义)
③加载数据集

代码如下
from torch.utils.data import Dataset
from PIL import Image
import os

class MyData(Dataset):

    def __init__(self, root_dir, label_dir):
        self.root_dir = root_dir
        self.label_dir = label_dir
        self.path = os.path.join(self.root_dir, self.label_dir)
        self.img_path = os.listdir(self.path)

    def __getitem__(self, idx):
        img_name = self.img_path[idx]
        img_item_path = os.path.join(self.root_dir, self.label_dir, img_name)
        img = Image.open(img_item_path)
        label = self.label_dir
        return img, label

    def __len__(self):
        return len(self.img_path)

root_dir = "dataset/train"
ants_label_dir = "ants"
bees_label_dir = "bees"
ants_dataset = MyData(root_dir, ants_label_dir)
bees_dataset = MyData(root_dir, bees_label_dir)

train_dataset = ants_dataset + bees_dataset

 浙公网安备 33010602011771号