基于Win10极简SonarQube C#代码质量分析
博客有些好些时间未更新了,这几个月的时间里,离开了实习的公司、大学毕了业、来了新公司、转了户口,有点忙,最近总算稍微闲下来了,打算重新拾起博客,坚持写下去。
言归正转,什么是SonarQube ?
SonarQube(曾用名Sonar(声纳))是一个优秀的开源代码分析系统管理系统,支持超过25+种编程语言,对.Net Core当然也是支持的。
最近公司做的项目是用的Framework开发的,久仰SonarQube大名,今天在本地搭建SonarQube之后对项目进行分析,效果惊人。揪出了系统中潜藏的若干Bug,功不可没,所以在这里搭建的方法分享给大家,希望对大家有所帮助。
在网上找一些资料,关于Sonar的介绍在Linux平台下较多,所以我下面的介绍主要是基于Win平台的,其他平台大同小异。
安装Sonar主要有以下几步:
安装JAVA SDK
Sonar是一款基于JAVA开发的工具,安装JAVA SDK的过程在此不再叙述,建议安装好之后配置好JAVA_HOME的环境变量,以下是下载地址。
http://www.oracle.com/technetwork/java/javase/downloads/jdk8-downloads-2133151.html
安装SonarQube
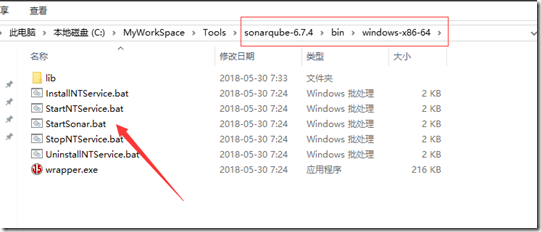
首先到官网下载安装包,值得注意的是,该安装包是不分平台的,下载下来之后,选择Windows的文件夹中StartSonar.bat文件运行即可。
https://www.sonarqube.org/#downloads
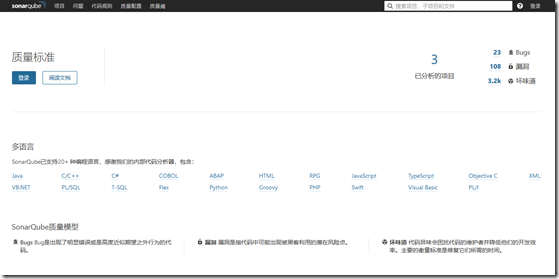
如果java环境安装正常,Sonar应该是能正常启动的,启动后浏览。启动效果如下:
刚刚装好是英文的,我是安装了中文包,如何安装中文包,后面会叙述。
配置Sonar
我们需要对Sonar进行简单配置,使其能连接上MySQL数据库。
打开MySQL数据库,执行以下指令。
CREATE DATABASE sonar CHARACTER SET utf8 COLLATE utf8_general_ci;
CREATE USER 'sonar' IDENTIFIED BY 'sonar';
GRANT ALL ON sonar.* TO 'sonar'@'%' IDENTIFIED BY 'sonar';
GRANT ALL ON sonar.* TO 'sonar'@'localhost' IDENTIFIED BY 'sonar';
FLUSH PRIVILEGES;
该操作是为Sonar创建数据库并添加该数据库的用户,数据库名称是sonar ,用户名是sonar,密码是sonar。
打开sonar.properties将内容替换成如下:
sonar.jdbc.username=sonar
sonar.jdbc.password=sonar
sonar.jdbc.url=jdbc:mysql://localhost:3306/sonar?useUnicode=true&characterEncoding=utf8&rewriteBatchedStatements=true&useConfigs=maxPerformance&useSSL=false
其中sonar.jbc.url是mysql数据库的连接字符串。
重新启动Sonar(关闭运行startsonar.bat控制台,并在任务管理器中关闭所有和java有关的进程,重新运行startsonor.bat),使用管理员账户登录(admin/admin)。
登录之后,安装中文包,如下,安装之后需要点击重新启动,启动之后,Sonar就变成中文的了。
Sonar-Scanner for MSBuild安装与配置
下载并解压SonarQube Scanner for MSBuild,它是C# Framework的分析插件。
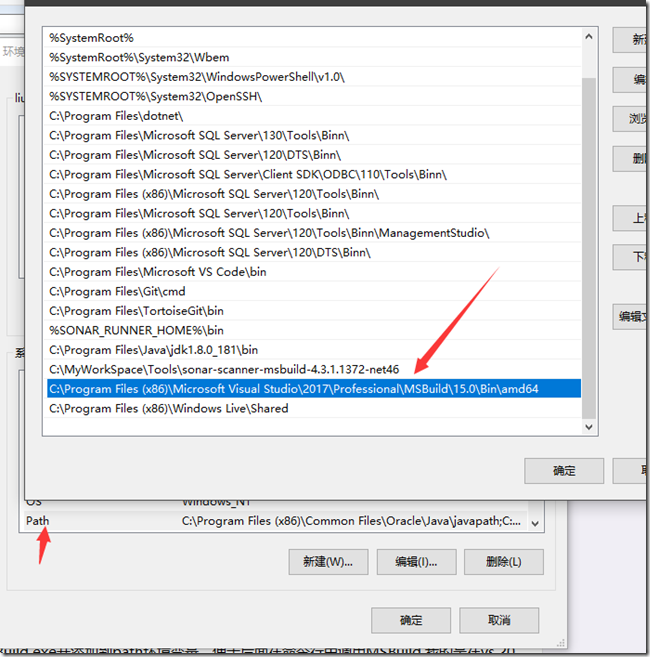
解压之后,设置SonarQube Scanner for MSBuild的环境变量,如我的解压路径是:C:\MyWorkSpace\Tools\sonar-scanner-msbuild-4.3.1.1372-net46,则把该路径添加到path下:
修改SonarQube.Analysis.xml文件
要修改的地方只是关于sonarQube服务器的一些配置,关于服务器URL、USER、PASSWORD等,修改如下:
<?xml version="1.0" encoding="utf-8" ?>
<!--
  This file defines properties which would be understood by the SonarQube Scanner for MSBuild, if not overridden (see below)
  By default the SonarScanner.MSBuild.exe picks-up a file named SonarQube.Analysis.xml in the folder it
  is located (if it exists). It is possible to use another properties file by using the /s:filePath.xml flag

  The overriding strategy of property values is the following:
  - A project-specific property defined in the MSBuild *.*proj file (corresponding to a SonarQube module) can override:
  - A property defined in the command line (/d:propertyName=value) has which can override:
  - A property defined in the SonarQube.Analysis.xml configuration file [this file] which can override:
  - A property defined in the SonarQube User Interface at project level which can override:
  - A property defined in the SonarQube User Interface at global level which can't override anything.

  Note that the following properties cannot be set through an MSBuild project file or an SonarQube.Analysis.xml file:
  sonar.projectName, sonar.projectKey, sonar.projectVersion
  The following flags need to be used to set their value: /n:[SonarQube Project Name] /k:[SonarQube Project Key] /v:[SonarQube Project Version]

-->
<SonarQubeAnalysisProperties  xmlns:xsi="http://www.w3.org/2001/XMLSchema-instance" xmlns:xsd="http://www.w3.org/2001/XMLSchema" xmlns="http://www.sonarsource.com/msbuild/integration/2015/1">


  <Property Name="sonar.host.url">http://localhost:9000</Property>

  <Property Name="sonar.login">admin</Property>
  <Property Name="sonar.password">admin</Property>


  <!-- Required only for versions of SonarQube prior to 5.2 -->

  <Property Name="sonar.jdbc.url">jdbc:mysql://localhost:3306/sonar?useUnicode=true;characterEncoding=utf8;rewriteBatchedStatements=true;useConfigs=maxPerformance;useSSL=false</Property>
  <Property Name="sonar.jdbc.username">sonar</Property>
  <Property Name="sonar.jdbc.password">sonar</Property>


</SonarQubeAnalysisProperties>
接下来,重要的一步,找到你电脑中的MSBuild.exe并添加到path环境变量,便于后面在命令行中调用MSBuild,我的是在vs 2017的安装目录下
C:\Program Files (x86)\Microsoft Visual Studio\2017\Professional\MSBuild\15.0\Bin\amd64
C# 项目分析
CMD进入C#项目所在的根目录,依此执行以下三条命令。
MSBuild.SonarQube.Runner.exe begin /k:"xxh.xzc.api" /n:"xhh.xzc.api" /v:"1.0"
MSBuild.exe /t:Rebuild
MSBuild.SonarQube.Runner.exe end
参数说明:
/key(简写k):对应projectKey即项目的唯一代码,如两套源代码使用同一个projectKey那扫描的结果将混在一起,所以一个项目需要有一个单独的projectKey
/name(简写n):对应projectName即项目的名称,为项目的一个显示的名称,建立使用完整的项目名称
/version(简写v):对应projectVersion即项目的版本,项目在不同的时期版本也是不一样的,如果方便,可以在sonarQube的服务器中查看到不同的版本代码其中问题的变化
三条命令分别是分析的前期准备,MSBuild编译,将报告上传给SonarQube。
查看分析结果
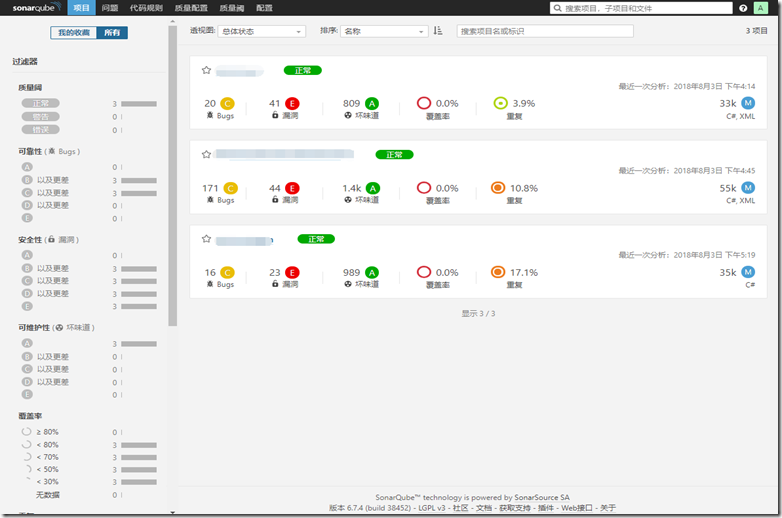
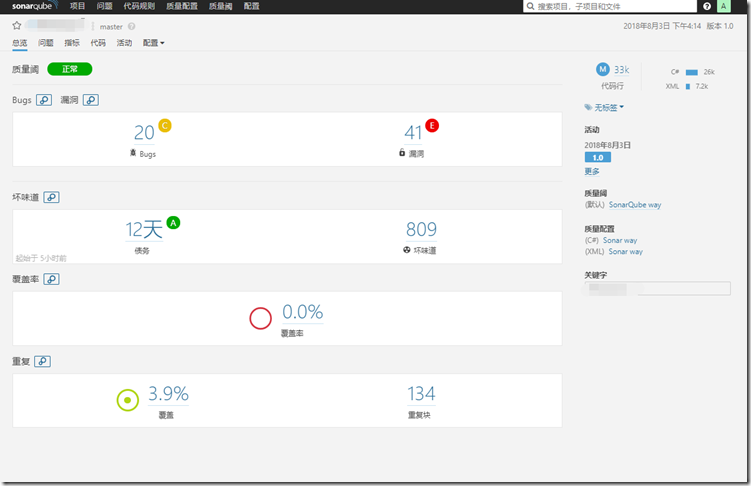
最后,进入http://localhost:9000/projects 查看分析结果吧,惊喜不惊喜?
界面中功能强大,很多认为绝对发现不了的Bug都展现出来了,还可以查看单元测试的覆盖率,相信如果坚持使用该工具,一定会对编码习惯有很大帮助。
快快搭建一个SonarQube看看自己的代码有没有BUG!! ![]()
我的博客即将入驻“云栖社区”,诚邀技术同仁一同入驻。
参考文献:https://docs.sonarqube.org/display/SCAN/Analyzing+with+SonarQube+Scanner+for+MSBuild




 浙公网安备 33010602011771号