
m1芯片Macbook安装tensorflow
结果:运行tensorflow的官方程序
教程
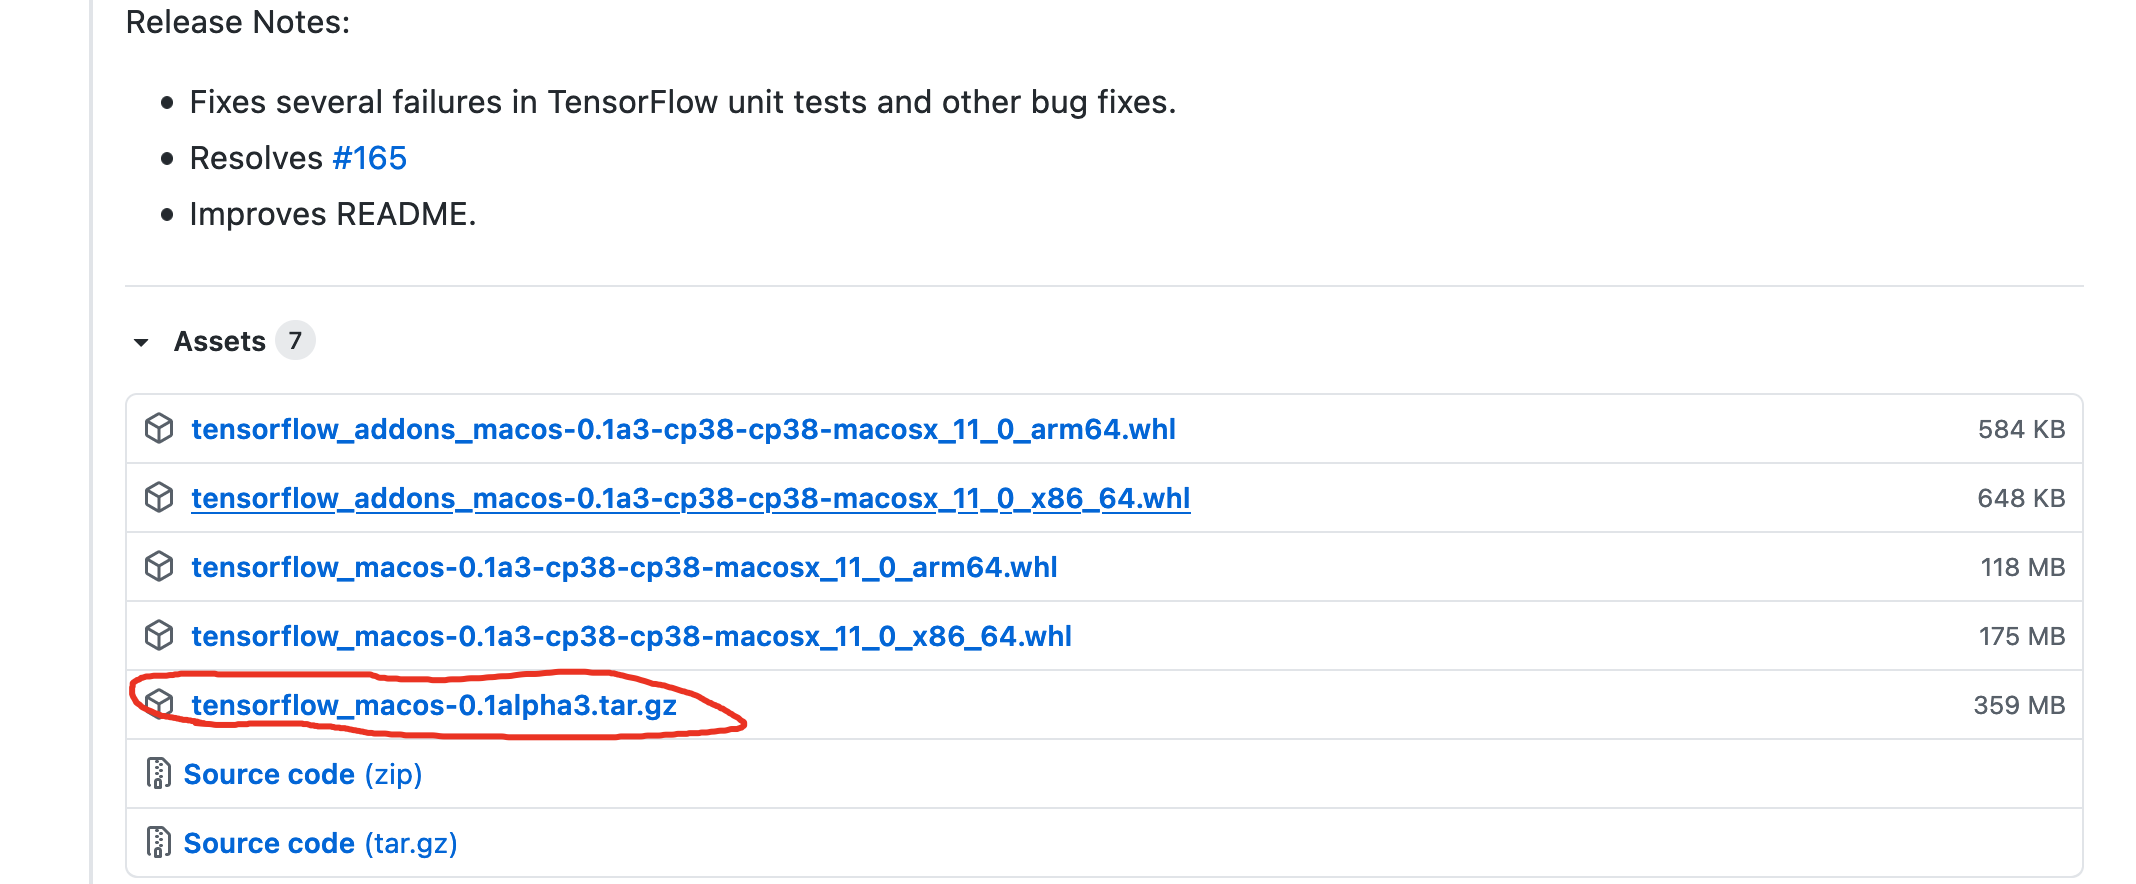
- 下载tensorflow包,地址:https://github.com/apple/tensorflow_macos/releases
![]()
- 解压下载的包,内容如下
![]()
- 安装miniconda。未安装的可以参考这篇文章:https://www.cnblogs.com/Coder-Photographer/p/14320690.html
- 进入命令行,激活环境

conda create --name tf24_gta_cv  # name可以随便取
conda activate tf24_gta_cv  # 激活环境
conda install -y python==3.8.6
conda install -y pandas matplotlib scikit-learn jupyterlab
- 安装,切换到解压tensorflow包的位置
pip install --force pip==20.2.4 wheel setuptools cached-property six # 安装依赖
## 以下名字由于版本问题可能会变,下载后根据自己下的文件调整即可
pip install --upgrade --no-dependencies --force numpy-1.18.5-cp38-cp38-macosx_11_0_arm64.whl
pip install --upgrade --no-dependencies --force grpcio-1.33.2-cp38-cp38-macosx_11_0_arm64.whl
pip install --upgrade --no-dependencies --force h5py-2.10.0-cp38-cp38-macosx_11_0_arm64.whl tensorflow_addons_macos-0.1a3-cp38-cp38-macosx_11_0_arm64.whl
pip install absl-py astunparse flatbuffers gast google_pasta keras_preprocessing opt_einsum protobuf tensorflow_estimator termcolor typing_extensions wrapt wheel tensorboard typeguard
pip install --upgrade --force --no-dependencies tensorflow_macos-0.1a3-cp38-cp38-macosx_11_0_arm64.whl
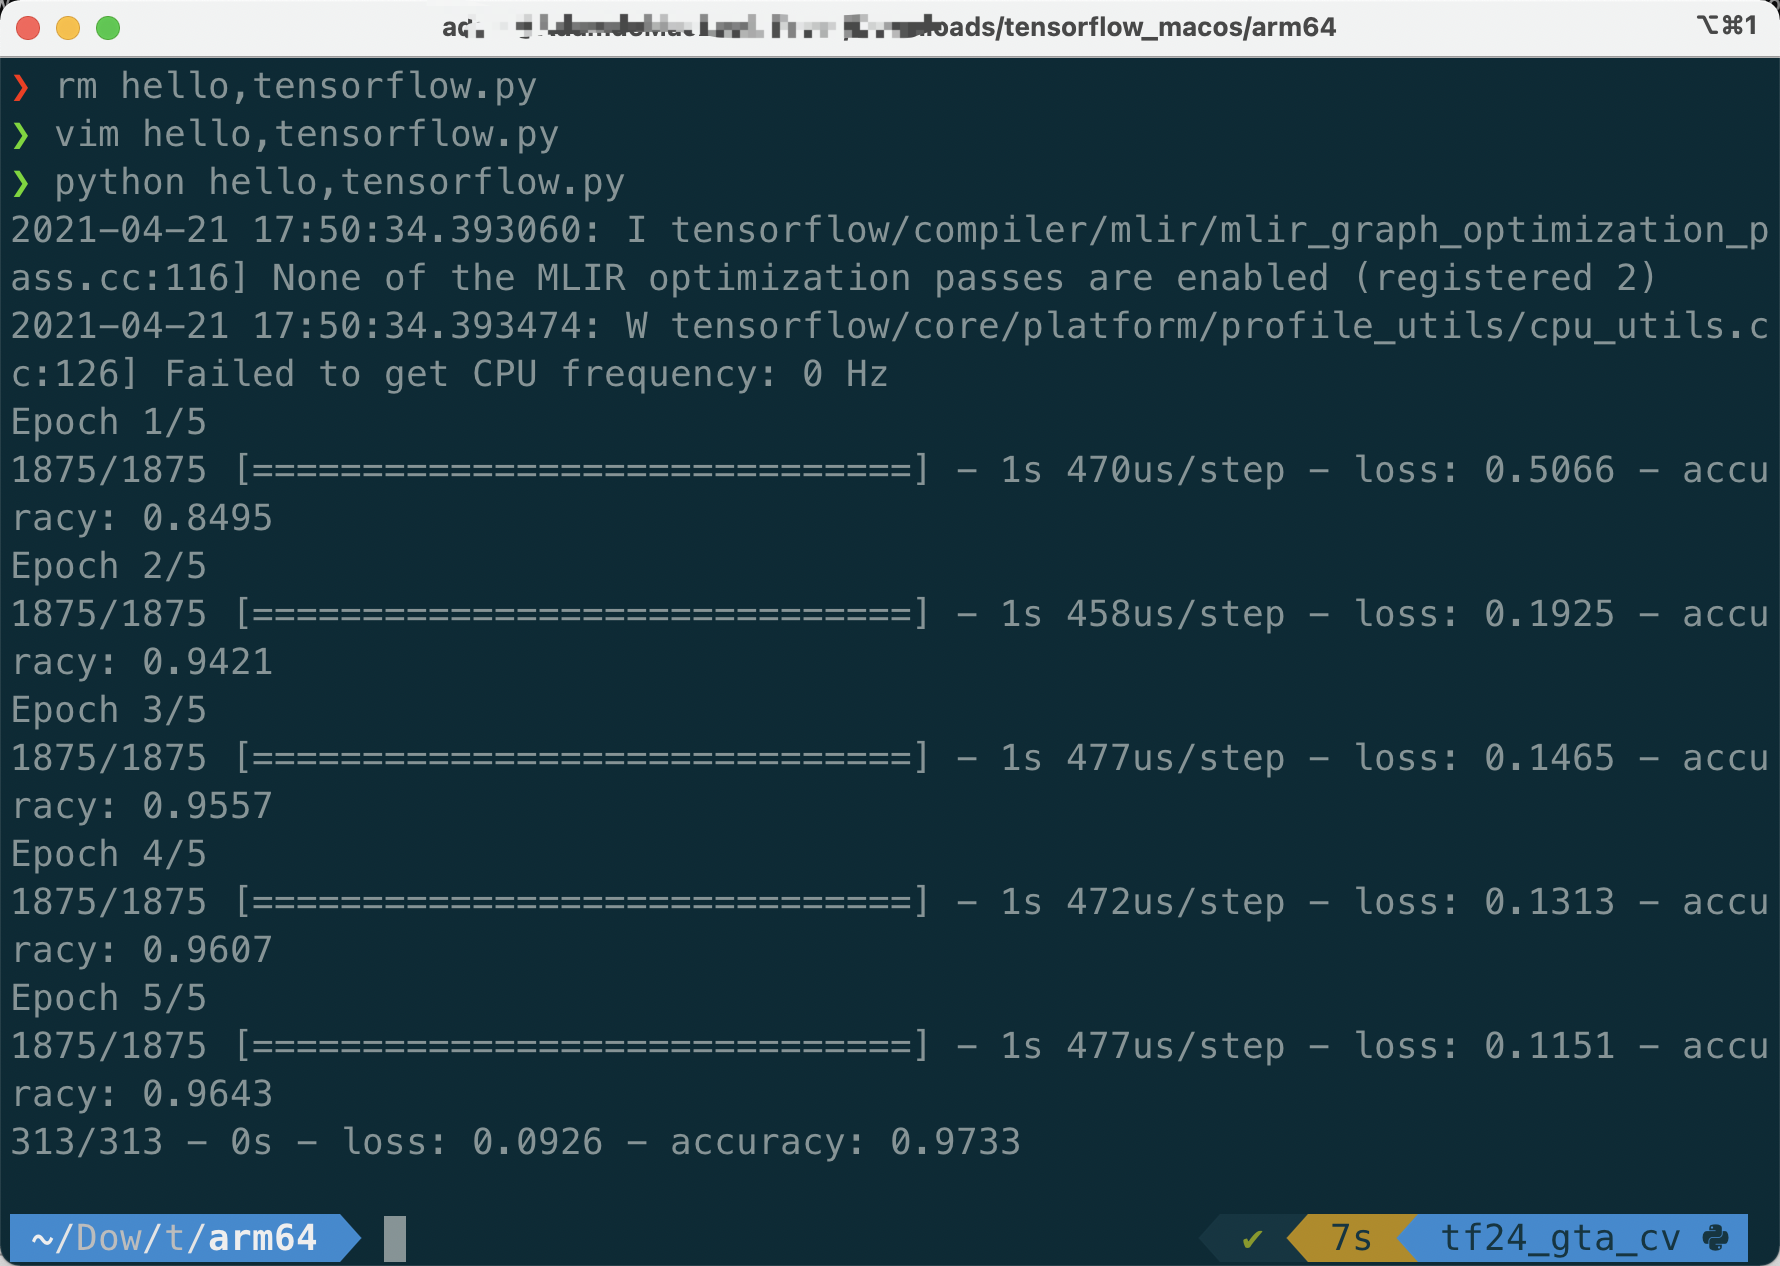
- 测试程序,用Google官方的教程,新建
hello,tensorflow.py的文件,内容如下
# 安装 TensorFlow

import tensorflow as tf


mnist = tf.keras.datasets.mnist

(x_train, y_train), (x_test, y_test) = mnist.load_data()
x_train, x_test = x_train / 255.0, x_test / 255.0

model = tf.keras.models.Sequential([
  tf.keras.layers.Flatten(input_shape=(28, 28)),
  tf.keras.layers.Dense(128, activation='relu'),
  tf.keras.layers.Dropout(0.2),
  tf.keras.layers.Dense(10, activation='softmax')
])

model.compile(optimizer='adam',
              loss='sparse_categorical_crossentropy',
              metrics=['accuracy'])
model.fit(x_train, y_train, epochs=5)

model.evaluate(x_test,  y_test, verbose=2)
-
运行
python hello,tensorflow.py -
总结
我是一路坐下来都挺顺利的,部分东西下载慢的时候可以尝试加速器

 浙公网安备 33010602011771号