代码已放到码云
https://gitee.com/photographer_adam/Based-on-image-processing-and-tensorflow-to-realize-GTA5-vehicle-automatic-driving
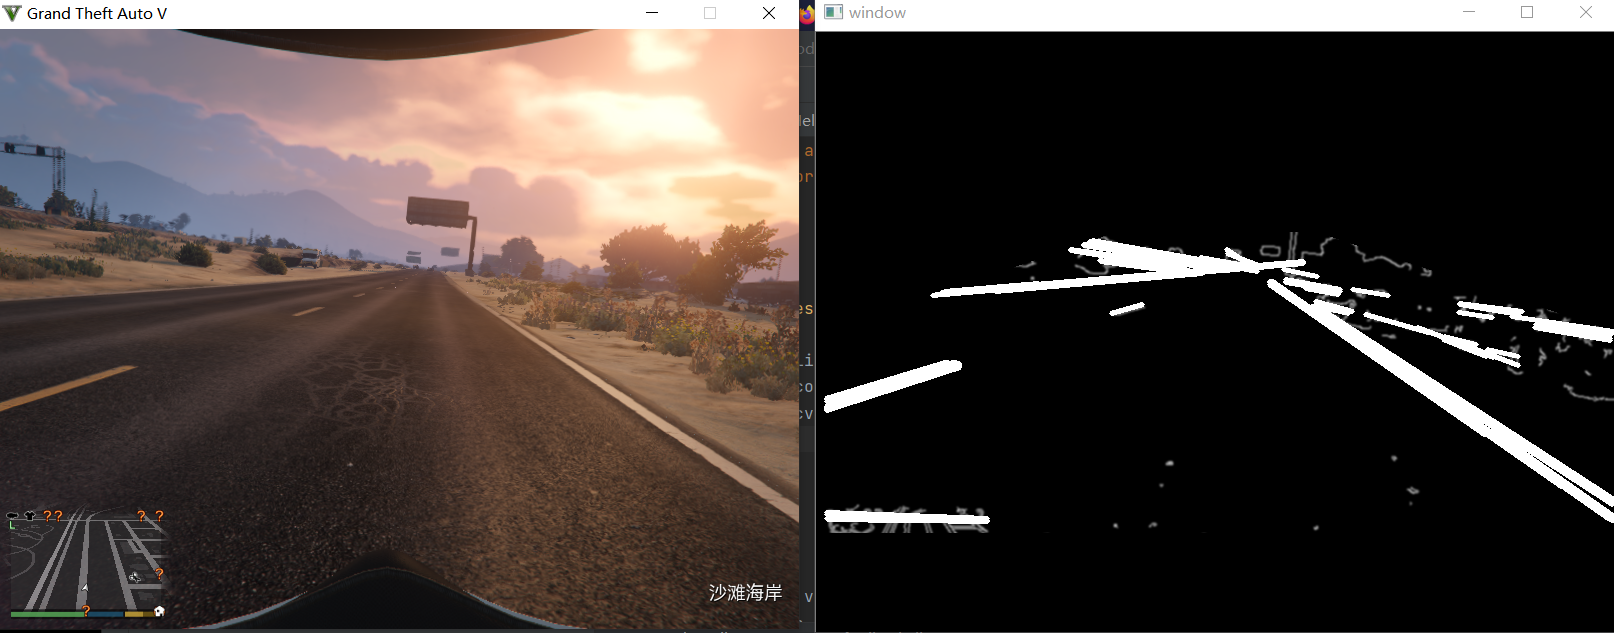
实现效果
![]()
代码部分
画线函数
注:
- lines的数据为 [[[x1,y1, x2,y2]]] 数据包含在lines[0]的数组中,故选择数据的时候需要用
coords = line[0]
- 小学二年级学过两点确定一条直线,给cv2.line()函数传入两组x,y即代表一条直线
- color=[r,g,b]全为255即代表白色
- thickness是线的厚度。
- 使用try()except()是因为画线是实时画线的,如果某一帧没获取的line,会报错,故使用try()except()对错误跳过
def draw_lines(img, lines):
    try:
        for line in lines:
            coords = line[0]
            cv2.line(img=img, pt1=(coords[0], coords[1]),
                     pt2=(coords[2], coords[3]), color=[255, 255, 255], thickness=3
                     )
    except:
        pass
调用画线函数并给图像增加高斯模糊
def convert_To_gray(image):
    # to gray
    gray_img = cv2.cvtColor(image, cv2.COLOR_BGR2GRAY)
    # canny
    gray_img = cv2.Canny(gray_img, threshold1=100, threshold2=200)
    # 高斯模糊
    gray_img = cv2.GaussianBlur(gray_img, ksize=(5,5), sigmaX=0)
    # mask img 只取红色区域的数据
    vertices = np.array([[10, 500], [10, 300], [300, 200], [500, 200], [800, 300], [800, 500]])
    gray_img = roi(gray_img, [vertices])
    # 划线
    lines = cv2.HoughLinesP(gray_img, rho=1, theta=np.pi / 180, threshold=180, minLineLength=30, maxLineGap=10)
    draw_lines(gray_img, lines)
    return gray_img

 浙公网安备 33010602011771号