单片机学习(九)定时器扫描按钮和数码管与PWM的使用
一、使用定时器扫描按钮和数码管
1. 使用定时器进行扫描的缘由
之前扫描按钮和数码管都是需要通过CPU主循环进行的,使用这种方式有着很大的弊端,(1)首先是会占用CPU的资源,在扫描按钮和数码管时会浪费一定的时间,(2)其次是我们的按钮检测是通过松手检测进行的,当我们按下按钮还没有松开时,程序即会进入长时间的while循环中,无法完成其他的操作,必须要松手后才能释放CPU资源完成其他的功能。因此使用定时器代替CPU进行扫描和检测是非常必要的。
2. 定时器扫描独立按钮
原来的独立按钮相关代码:
// Button.c
unsigned int ButtonKey() {
    unsigned int res = 0;
    if(P3_1 == 0)       {res = 1;deley(20);while (P3_1 ==0);deley(20);}
    else if (P3_0 == 0) {res = 2;deley(20);while (P3_0 ==0);deley(20);}
    else if (P3_2 == 0) {res = 3;deley(20);while (P3_2 ==0);deley(20);}
    else if (P3_3 == 0) {res = 4;deley(20);while (P3_3 ==0);deley(20);}
    return res;
}
可以发现我们之前需要使用deley(20)进行扭动消抖,然后需要使用while循环进行等待松手,最后再使用deley(20)进行松手消抖,而在这等待松手的过程中,其他的器件如数码管等都无法正常运行了,造成很大的不便。
然后我们现在的想法是:使用计时器每隔20ms获取一次当前按钮所在寄存器bit的状态,如下图所示

当发现当前电平为1,而上一次电平为0时,则判断按钮按动松手,再进行其他相应的操作。
现在我们先去掉这些deley和while:
unsigned int Button_GetState() {
    unsigned int res = 0;
    if(P3_1 == 0)       { res = 1; }
    else if (P3_0 == 0) { res = 2; }
    else if (P3_2 == 0) { res = 3; }
    else if (P3_3 == 0) { res = 4; }
    return res;
}
然后定义一个Loop函数供外部定时器调用,在main.c中它是这样的:
void Timer0_Routine() interrupt 1 {
    static unsigned int T0Count;
    TL0 = 0x18;
    TH0 = 0xFC;
    T0Count++;
    if (T0Count >= 20) {
        T0Count = 0;
        Button_Loop();	// <--在这里不断调用Button_Loop()函数
    }
}
即我们使用定时器每隔20ms就调用一次独立按钮模块的Button_Loop()函数,而在这个函数中我们通过当前电平和上一次电平的关系来判断是哪个按钮按下并松手(即key.released):
void Button_Loop() {
    static unsigned char nowKey, lastKey;
    unsigned char i = 0;
    lastKey = nowKey;
    nowKey = Button_GetState();
    for(i=1;i<=4;i++) {
        // 判断按下松手,如果是则更新currentKey
        if(nowKey == 0 && lastKey == i) {
            currentKey = i;
            return;
        }
    }
}
然后我们还需要编写获取当前松手的key的函数:
unsigned char currentKey;
unsigned char Button_GetKey() {
    unsigned char tmp;
    tmp = currentKey;
    currentKey = 0;
    return tmp;
}
这里使用tmp中间变量是为了方便给currentKey重新置零。
我们可以使用LED进行相应的测试:
void main() {
    unsigned char key;
    Timer0_Init();
    while (1) {
        key = Button_GetKey();
        if(key) {
            if(key == 1) { P2_0 = ~P2_0; }
            if(key == 2) { P2_1 = ~P2_1; }
        }
    }
}
测试结果是我们点击第一个和第二个按钮可以分别控制第一个和第二个LED灯的亮和灭。
最后为了方便客户端(main.c)调用,为独立按键模块添加定时器调用函数Button_Routine():
void Button_Routine() {
    static unsigned int btn_Count;
    btn_Count++;
    if (btn_Count >= 20) {
        btn_Count = 0;
        Button_Loop();
    }
}
然后在main.c中的定时器程序只需要简单调用即可:
void Timer0_Routine() interrupt 1 {
    TL0 = 0x18;
    TH0 = 0xFC;
    Button_Routine(); // <--
}
3. 定时器扫描数码管
原来的数码管核心代码:
// 段码
u8 code smgduan[16]={
    0x3f, 0x06, 0x5b, 0x4f, 0x66, 0x6d, 0x7d, 0x07,
    0x7f, 0x6f, 0x77, 0x7c, 0x39, 0x5e, 0x79, 0x71
};
// 位选(位使能)
void enableIndexLED(u8 index) {
    P2 = P2 & ~(0x07 << 2);
    P2 = P2 | (0x7 - index)<<2;
}

void displayOneNum(u8 index, u8 num) {
    // 位选
    enableIndexLED(index);
    // 段选
    P0 = smgduan[num];
    // 延时
    deley(2);
    // 段清零
    P0 = 0x00;
}
然后我们调换一下各个操作的顺序,并移除掉deley,就得到了展示单个数码管的函数:
void Nixie_DisplayOnePos(u8 index, u8 duanValue) {
    // 段清零
    P0 = 0x00;
    // 位选
    Nixie_enableIndexLED(index);
    // 段选
    P0 = duanValue;
}
然后我们需要做的和按钮的检测一样,每隔一段时间调用一次相关的函数,我们这里设计每调用一次就展示其中的一位:例如第一次展示第一位数字,第二次展示第二位数字...以此类推。这样我们就可以实现定时器扫描数码管了。
而至于每位应该展示什么样的内容,我们使用一个8个元素的数组进行存储:
#define NOT_DISPLAY 0
// 用于缓存显示的内容
static u16 Nixie_Buf[8] = {NOT_DISPLAY, NOT_DISPLAY, NOT_DISPLAY, NOT_DISPLAY,
                           NOT_DISPLAY, NOT_DISPLAY, NOT_DISPLAY, NOT_DISPLAY};
然后在循环调用的函数中将缓存中的内容展示出来:
void Nixie_Loop() {
    static u8 curIndex = 0;
    Nixie_DisplayOnePos(curIndex, Nixie_Buf[curIndex]);

    curIndex++;
    if (curIndex >= 8) {
        curIndex = 0;
    }
}
与独立按键模块同理,我们设置生命周期函数方便中断程序的调用:
void Nixie_Routine() {
    static unsigned int nixie_Count;
    nixie_Count++;
    if (nixie_Count >= 2) {
        nixie_Count = 0;
        Nixie_Loop(); // <--每隔2个单位时间调用一次,当前单位时间为1ms
    }
}
而当我们希望修改显示的内容,我们修改Nixie_Buf缓存数组中的内容即可,故我们对外暴露几个函数方便外部使用:
// 直接使用段码设置Buffer中的元素
void Nixie_SetBufWithDuan(u8 index, u8 duan) {
    Nixie_Buf[index] = duan;
}
// 置空某元素
void Nixie_SetBlank(u8 index) {
    Nixie_SetBufWithDuan(index, NOT_DISPLAY);
}
// 设置显示为某数字(即设置某元素的值为数字对应的段码)
void Nixie_SetBufWithNum(u8 index, u8 num) {
    Nixie_SetBufWithDuan(index, smgduan[num]);
}
// 展示多位的数字
void Nixie_ShowNum(u16 num) {
    u8 i = 7;
    if (num == 0) {
        Nixie_SetBufWithNum(i, num);
        i--;
    }
    while (num) {
        Nixie_SetBufWithNum(i, num % 10);
        num /= 10;
        i--;
    }
    // 清空前面的内容
    i++;
    while (1) {
        i--;
        Nixie_SetBlank(i);
        if (i == 0)
            break;
    }
}
main.c中进行测试:
void main() {
    unsigned int cnt = 0;
    Timer0_Init();
    while(1) {
        Nixie_ShowNum(cnt);
        defaultDeley();
        cnt++;
    }
}

void Timer0_Routine() interrupt 1 {
    TL0 = 0x18;
    TH0 = 0xFC;
    Key_Routine();
    Nixie_Routine();
}
运行结果:数码管展示的数字从0开始不断递增。
二、PWM的使用
1. PWM简介
- PWM (Pulse Width Modulation)即脉冲宽度调制,在具有惯性的系统中,可以通过对一系列脉冲的宽度进行调制,来等效地获得所需要的模拟参量,常应用于电机控速、开关电源等领域
- PWM重要参数:
- 频率=1/Ts
- 占空比= Ton/Ts
- 精度=占空比变化步距

例如我们希望电机使用相对最大功率50%的功率进行旋转,则我们可以设置 TON=TOFF达到该效果,其他的功率也是一样的原理。
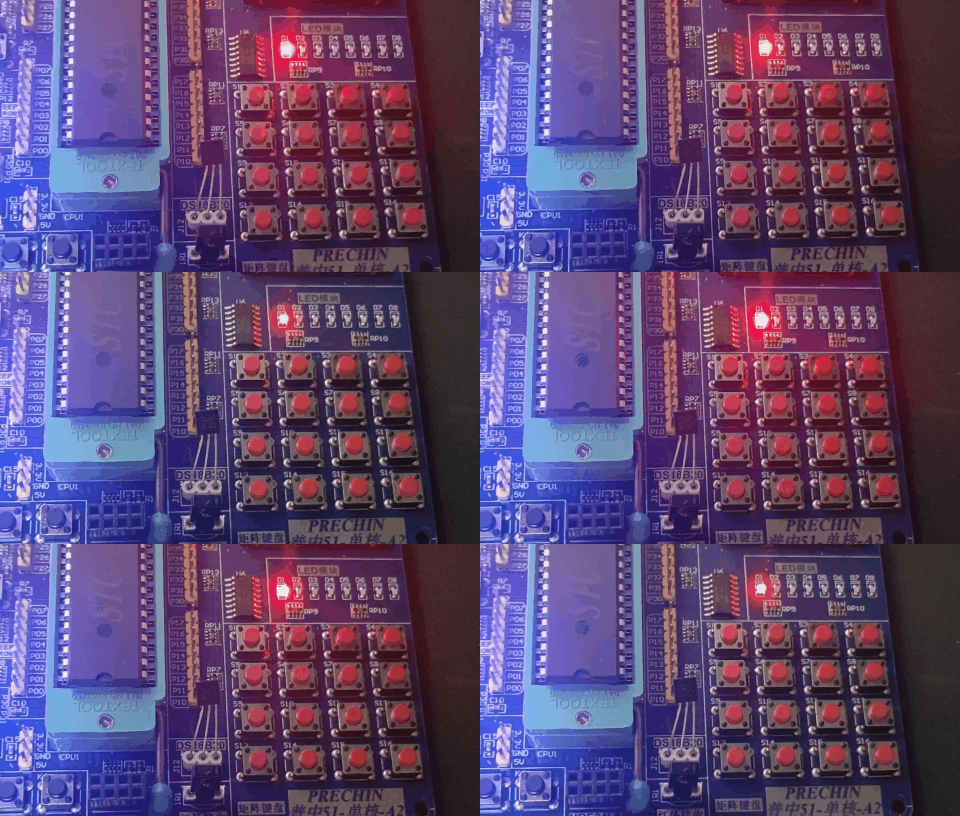
2. LED呼吸灯
按照我们上面关于PWM的介绍,若我们希望LED以一半的亮度工作,我们可以编写如下代码:
sbit LED = P2^0;

void main() {
    while (1) {
        LED = 0;
        LED = 1;
    }
}
若我们增长LED灭的时间:
void main() {
    while (1) {
        LED = 0;
        LED = 1;
        LED = 1;
        LED = 1;
        LED = 1;
        LED = 1;
        LED = 1;
        LED = 1;
    }
}
此时我们会发现LED的亮度变暗了许多
这验证了我们可以通过改变PWM占空比来控制LED的亮度。
实现一
按照这个原理,我们可以这样实现呼吸灯:
sbit LED = P2 ^ 0;

void LED_light(int brightness) {
    unsigned char times;
    for (times = 0; times < 10; times++) {
        LED = 0;
        deley(brightness);
        LED = 1;
        deley(100 - brightness);
    }
}

void main() {
    int brightness = 0;
    while (1) {
        for (brightness = 0; brightness <= 100; brightness++) {
            LED_light(brightness);
        }
        for (brightness = 100; brightness >= 0; brightness--) {
            LED_light(brightness);
        }
    }
}
运行效果:

实现二
我们还可以使用定时器来实现PWM
原理图如下:

计数值随着时间的推移进行变化,即按照上图中的先匀速增加到最大值,然后再返回到最小值继续开始递增。然后通过判断计数值和比较值的关系来输出0或1,最后我们只需要设置比较值的大小即可轻松设置占空比了。
先进行定时器的设置,这里选取100μs作为定时长度:

然后我们在main.c中不断切换占空比的值即可实现呼吸灯效果了:
unsigned char counter=0, compare;

void main() {
    Timer0_Init();
    while(1) {
        // 不断修改比较值切换占空比
        for(compare = 0; compare <= 100; compare++) {
            deley(500);
        }
        for(compare = 100; compare != 255; compare--) {
            deley(500);
        }
    }
}

void Timer0_Routine() interrupt 1 {
    TL0 = 0x9C;	//设置定时初值
    TH0 = 0xFF;	//设置定时初值

    counter++;	  //计数器自增
    counter%=100; //达到最大时清零
    if(counter < compare) {	//计数器小于比较值输出0
        LED = 0;
    }
    else {			//计数器大于等于比较值输出1
        LED = 1;
    }
}
3. 按钮控制LED亮度和电机转速
按照上面的LED呼吸灯实现二的原理,加入独立按键模块和LED数码管模块,我们很容易就可以实现对LED亮度调整的程序:
void main() {
    unsigned char key;
    Timer0_Init();
    Nixie_SetNum(0, 0);
    while (1) {
        key = Key();
        if (key) {
            Nixie_SetNum(0, key);
            if (key == 1) {
                compare = 20;
            }
            if (key == 2) {
                compare = 50;
            }
            if (key == 3) {
                compare = 100;
            }
        }
    }
}

void Timer0_Routine() interrupt 1 {
    TL0 = 0x9C;//设置定时初值
    TH0 = 0xFF;//设置定时初值

    Key_Routine();
    Nixie_Routine();
    counter++;
    counter %= 100;
    if (counter < compare) {
        LED = 0;
    } else {
        LED = 1;
    }
}
同理,我们可以对电机进行调速:
sbit Motor = P1 ^ 0;

unsigned char counter = 0, compare;

void main() {
    unsigned char key, speed = 0;
    Timer0_Init();
    Nixie_SetNum(0, speed);
    while (1) {
        key = Key();
        if (key) {
            if (key == 1) {
                speed++;
                speed%=4;
                Nixie_SetNum(0, speed);
                if(speed == 0) {compare = 0; }
                if(speed == 1) { compare = 50; }
                if(speed == 2) { compare = 70; }
                if(speed == 3) { compare = 100; }
            }
        }
    }
}

void Timer0_Routine() interrupt 1 {
    TL0 = 0x9C;//设置定时初值
    TH0 = 0xFF;//设置定时初值

    Key_Routine();
    Nixie_Routine();
    counter++;
    counter %= 100;
    if (counter < compare) {
        Motor = 1;
    } else {
        Motor = 0;
    }
}
tips:电机连接在
P10口和GND


 浙公网安备 33010602011771号