Asp.net Core 系列之--4.事务、日志及错误处理
ChuanGoing 2019-11-17
这篇原本想把事务处理、日志处理、错误处理、授权与鉴权一并介绍完的,授权和鉴权我想结合自定义权限来介绍,全部放到这里篇幅可能太长,因此权限部分将会在下篇来介绍。先说下我接下来的打算把,下篇将介绍权限控制,结合Oauth2.0和OpenId(OIDC)以及自定义权限来介绍;完了后会结合之前所介绍的基础来实现一个简单的电商网站,当然是利用领域驱动设计来实现。我的这个系列的主题就是领域驱动设计,实现简单电商网站时将会深入的讲解下领域的划分原则及领域服务的场景,中间可能会尝试部分业务实现事件驱动。
本篇学习曲线:
1.日志记录
2.错误处理
3.事务处理
日志记录
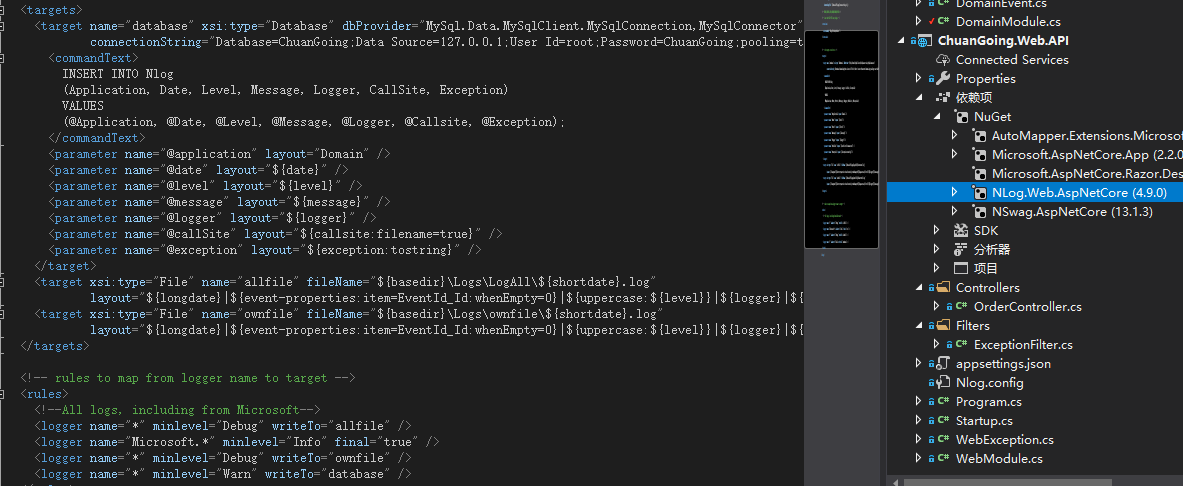
NLog是一个记录日志组件,和log4net一样被广泛使用,它可以将日志保存到文本文件、CSV、控制台、VS调试窗口、数据库等。在之前例子中的WebApi项目中添加NLog.Web.AspNetCore的Nuget包,并添加如下配置:

简单介绍下配置信息,“targets”配置每个输出配置,我这里有3个输出:database、allfile、ownfile,分别表示输出到数据库和对应路径的日志文件下。
"rules"规则配置了4条:
1.将Debug以上级别(含)信息输出到allfile
2.忽略Microsoft.*开头的信息(对应的输出没有配置到任何文件),此配置一般忽略即可
3.将Debug以上级别(含)信息输出到ownfile(注意这里配置和allfile一样,一般配置级别高点的日志信息)
4.将Warn以上级别(含)信息输出到数据库
完了后,在Program.cs Main方法里面注册NLog:
var logger = NLogBuilder.ConfigureNLog($"Nlog.config").GetCurrentClassLogger();
            try
            {
                CreateWebHostBuilder(args).Build().Run();
            }
            catch (Exception ex)
            {
                logger.Error(ex, "Stopped program because of exception");
                throw ex;
            }
            finally
            {
                NLog.LogManager.Shutdown();
            }
注意不要忘了启用NLog组件使之生效

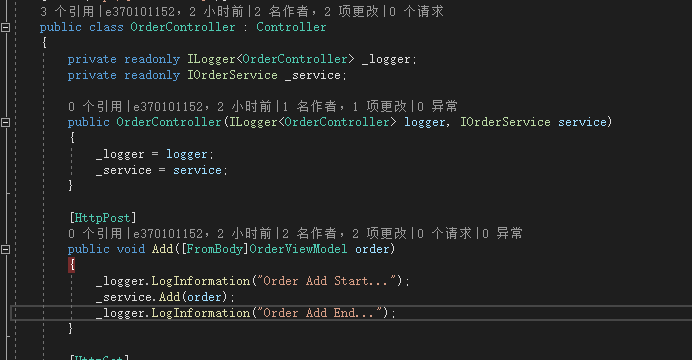
在OrderController的Add方法中加入以下代码:

用postman简单测试下,我们可以看到执行目录中多出来了日志信息

错误处理
这里一般我们关心的错误大概有两类:
1.内部错误,即通过框架(Mvc)管道准确的传入到内部系统中并发生错误的此类信息
2.框架(Mvc)执行管道的某些中间件时发生的错误或被中间件禁止继续访问的请求
因此,定义如下3个类:

public class InnerException : Exception
    {
        /// <summary>
        /// 内部错误代码
        /// </summary>
        public int? ErrorCode { get; }

        public InnerException(int errorCode) : base()
        {
            ErrorCode = errorCode;
        }

        public InnerException(int errorCode, string message) : base(message)
        {
            ErrorCode = errorCode;
        }

        public InnerException(int code, string message, Exception exception) : base(message, exception)
        {
            ErrorCode = code;
        }
    }

public class MessageCodes
    {
        #region 公用

        /// <summary>
        /// 成功
        /// </summary>
        public const int Success = 20101000;
        /// <summary>
        /// 警告
        /// </summary>
        public const int Warning = 20102000;
        /// <summary>
        /// 错误
        /// </summary>
        public const int Error = 20103000;
        /// <summary>
        /// 数据验证错误
        /// </summary>
        public const int DataValidationError = 20104000;
        /// <summary>
        /// 数据不存在
        /// </summary>
        public const int DataNotFound = 20105000;
        /// <summary>
        /// 非法的数据状态
        /// </summary>
        public const int IllegalState = 20106000;
        /// <summary>
        /// 参数无效
        /// </summary>
        public const int InvalidParams = 20107000;
        /// <summary>
        /// 输入非法
        /// </summary>
        public const int IllegalInput = 20108000;
        /// <summary>
        /// 鉴权成功
        /// </summary>
        public const int AuthSuccess = 20109000;

        #endregion

    }

 public class WebException: InnerException
    {
        public HttpStatusCode HttpStatus { get; set; }

        public HttpRequest Request { get; private set; }

        public WebException(HttpStatusCode httpStatus, int errorCode, string message)
             : base(errorCode, message)
        {
            HttpStatus = httpStatus;
        }

        public WebException(HttpStatusCode httpStatus, int errorCode, string message, HttpRequest request)
            : this(httpStatus, errorCode, message)
        {
            Request = request;
        }

        public WebException(int errorCode, string message)
            : base(errorCode, message)
        {
            HttpStatus = HttpStatusCode.BadRequest;
        }
    }
通过Aop,很方便就可以实现错误信息的处理:

public class ExceptionFilter : IExceptionFilter
    {
        private readonly ILogger<ExceptionFilter> _logger;

        public ExceptionFilter(ILogger<ExceptionFilter> logger)
        {
            _logger = logger;
        }

        public void OnException(ExceptionContext context)
        {
            _logger.LogError(context.Exception, context.Exception.Message);

            #region Ioc/automapper等中间件对错误信息进行了包装,需要解包

            //web错误:验证/鉴权等
            var webException = GetException<Base.Exceptions.WebException>(context.Exception);
            if (webException != null)
            {
                context.Result = new JsonResult(new
                {
                    ErrorCode = webException.ErrorCode ?? MessageCodes.Error,
                    webException.Message
                })
                {
                    StatusCode = (int)webException.HttpStatus
                };
                return;
            }
            //内部错误
            var exception = GetException<InnerException>(context.Exception);
            if (exception != null)
            {
                context.Result = new JsonResult(new
                {
                    ErrorCode = exception.ErrorCode ?? MessageCodes.Error,
                    exception.Message
                })
                {
                    StatusCode = (int)HttpStatusCode.InternalServerError
                };
                return;
            }

            #endregion
        }

        private TException GetException<TException>(Exception exception)
          where TException : Exception
        {
            if (exception == null)
            {
                return null;
            }
            if (exception is TException tException)
            {
                return tException;
            }
            else
            {
                return GetException<TException>(exception.InnerException);
            }
        }
    }
同时,Startup.cs的ConfigureServices中注册一下:
services.AddMvc(mvcOptions =>
                {
                    mvcOptions.Filters.Add<ExceptionFilter>();
                })
即完成了错误信息并且错误信息会写入相应配置的输出中。
事务处理
UnitOfWork又称工作单元,为了保证数据操作完整性,我们将处理数据的的操作统一放在一个事务中,我们这里利用UnitOfWork来实现事务处理。
首先定义IUnitOfWork及UnitOfWork实现:

 public interface IUnitOfWork
    {
        void Begin(IsolationLevel level = IsolationLevel.Unspecified);
        void SaveChanges();
        void Failed();
    }

public class UnitOfWork : IUnitOfWork
    {
        private ITransactionRepository _repository;

        public UnitOfWork(ITransactionRepository repository)
        {
            _repository = repository;
        }

        public virtual void Begin(IsolationLevel level = IsolationLevel.Unspecified)
        {
            _repository.BeginTransaction(level);
        }

        public virtual void SaveChanges()
        {
            _repository.Commit();
        }

        public virtual void Failed()
        {
            _repository.Rollback();
        }
    }
其中,UnitOfWork依赖于ITransactionRepository的实现:

public interface ITransactionRepository
    {
        /// <summary>
        /// 打开事务
        /// </summary>
        /// <param name="level"></param>
        void BeginTransaction(IsolationLevel level = IsolationLevel.Unspecified);
        /// <summary>
        /// 提交事务
        /// </summary>
        void Commit();
        /// <summary>
        /// 事务回滚
        /// </summary>
        void Rollback();
    }
利用DapperRepository继承ITransactionRepository并实现:

public virtual void BeginTransaction(IsolationLevel level = IsolationLevel.Unspecified)
        {
            DbContext.BeginTransaction(level);
        }

        public virtual void Commit()
        {
            DbContext.Commit();
        }

        public virtual void Rollback()
        {
            DbContext.RollBack();
        }
基本功能实现后,如何使用呢?这里还是需要利用Aop:

public class UnitOfWorkAttribute : AbstractInterceptorAttribute
    {
        public override Task Invoke(AspectContext context, AspectDelegate next)
        {
            if (context.Implementation is IApplicationService applicationService)
            {
                var uow = applicationService.UnitOfWork;
                uow.Begin();
                var aspectDelegate = next(context);
                if (aspectDelegate.Exception != null)
                {
                    uow.Failed();
                    throw aspectDelegate.Exception;
                }
                else
                {
                    uow.SaveChanges();
                    return aspectDelegate;
                }
            }
            else
            {
                return next(context);
            }
        }
    }
因此,我们还需要在Application项目中添加如下代码:

 public class ServiceBase<TEntity, TPrimaryKey> : IApplicationService
        where TEntity : class, IEntity<TPrimaryKey>
    {
        protected IMapper Mapper { get; private set; }
        public virtual IUnitOfWork UnitOfWork { get; private set; }

        public ServiceBase(IComponentContext container, ICommandRepository<TEntity, TPrimaryKey> repository)
        {
            Mapper = container.Resolve<IMapper>();
            UnitOfWork = container.Resolve<IUnitOfWork>(new TypedParameter(typeof(ITransactionRepository), repository));
        }
    }
Application中的每个服务去继承上面的ServiceBase,因此每个Application服务都具有了事务处理能力
 public interface IOrderService : IScopeInstance
    {
        [UnitOfWork]
        void Add(OrderViewModel order);
        OrderViewResult Get(string sn);
    }

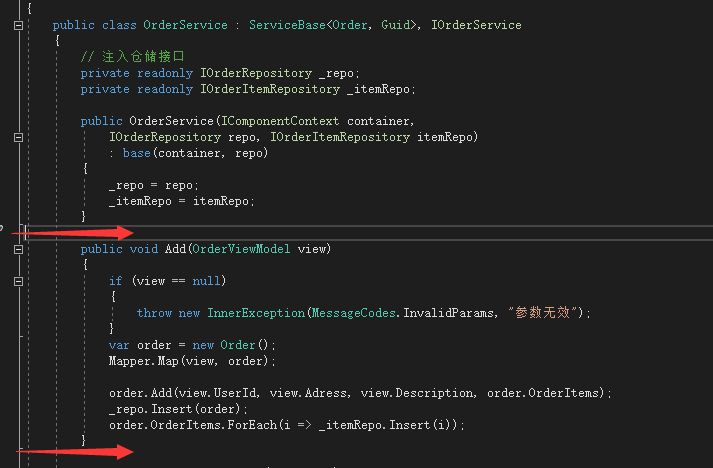
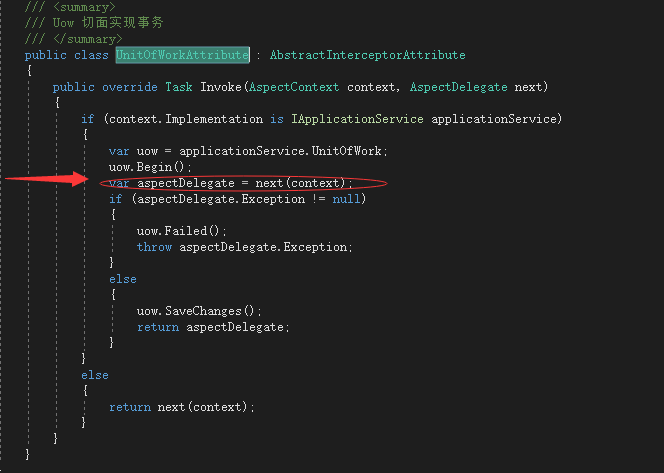
程序运行时,Add方法前后形成切面,如下图所示,next(context)这里执行的就是Add方法,执行前开启事务,执行后提交

利用Aop特性切面实现事务的无感注入(Asp.net Core 系列之--1.事件驱动初探:简单事件总线实现(SimpleEventBus)Ioc/DI小节中引入了AspectCore动态代理),底层还是依赖IDbConnection的事务相关接口,完整的事务处理大概就是这样了。
详细代码在Github的https://github.com/ChuanGoing/Start.git 的Domain分支可以找到。


【推荐】国内首个AI IDE,深度理解中文开发场景,立即下载体验Trae
【推荐】编程新体验,更懂你的AI,立即体验豆包MarsCode编程助手
【推荐】抖音旗下AI助手豆包,你的智能百科全书,全免费不限次数
【推荐】轻量又高性能的 SSH 工具 IShell:AI 加持,快人一步
· 10年+ .NET Coder 心语,封装的思维:从隐藏、稳定开始理解其本质意义
· .NET Core 中如何实现缓存的预热?
· 从 HTTP 原因短语缺失研究 HTTP/2 和 HTTP/3 的设计差异
· AI与.NET技术实操系列:向量存储与相似性搜索在 .NET 中的实现
· 基于Microsoft.Extensions.AI核心库实现RAG应用
· TypeScript + Deepseek 打造卜卦网站:技术与玄学的结合
· 阿里巴巴 QwQ-32B真的超越了 DeepSeek R-1吗?
· 【译】Visual Studio 中新的强大生产力特性
· 10年+ .NET Coder 心语 ── 封装的思维:从隐藏、稳定开始理解其本质意义
· 【设计模式】告别冗长if-else语句:使用策略模式优化代码结构