Vue2.x笔记:组件通信

一、插槽 slot
插槽(slot)是一种Vue中组件通信的方式,主要用于父组件向子组件传递自定义内容。
有三种插槽:
- 默认插槽:最基本的插槽,没有任何标识,每个子组件只能定义一个
- 具名插槽:具有name属性的默认插槽,每个子组件可以定义多个
- 作用域插槽:子组件提供数据,由父组件决定其渲染方式
1. 默认插槽
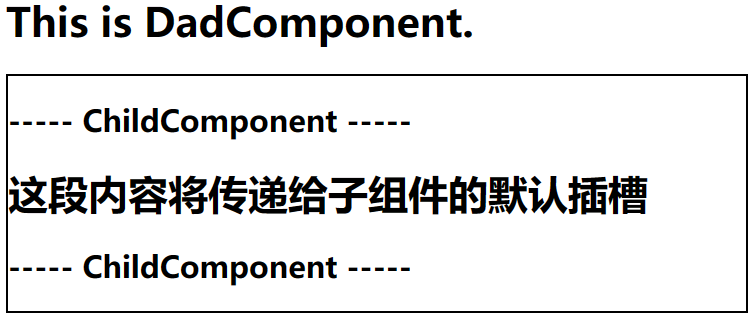
默认插槽在子组件中通过 slot 标签来定义,父组件在使用子组件时,直接在子组件标签中定义需要传递给子组件的自定义内容。如果父组件没有传递任何内容给子组件,将显示子组件 slot 标签中的内容。
注意:由于默认插槽没有任何标识,因此每个子组件只能定义一个默认插槽。
实例:
子组件ChildComponent.vue
<template>
  <div>
    <h2>----- ChildComponent -----</h2>

    <!-- 通过slot标签定义了一个默认插槽,如果父组件没有传递内容给子组件,将显示slot标签之间的默认内容 -->
    <slot>如果父组件没有传递内容,将显示此默认文本</slot>

    <h2>----- ChildComponent -----</h2>
  </div>
</template>

<script>
  export default {
    name: 'ChildComponent'
  }
</script>

<style>
</style>
父组件DadComponent.vue
<template>
  <div>
    <h1>This is DadComponent.</h1>

    <child-component class='child'>
      <h1>这段内容将传递给子组件的默认插槽</h1>
    </child-component>
  </div>
</template>

<script>
  import ChildComponent from './ChildComponent.vue'
  export default {
    name: 'DadComponent',
    components: {
      ChildComponent
    }
  }
</script>

<style>
  /* 给子组件加上边框,便于观察 */
  .child {
    border-style: solid;
    border-color: black;
    border-width: 2px;
  }
</style>
页面效果如下:
2. 具名插槽
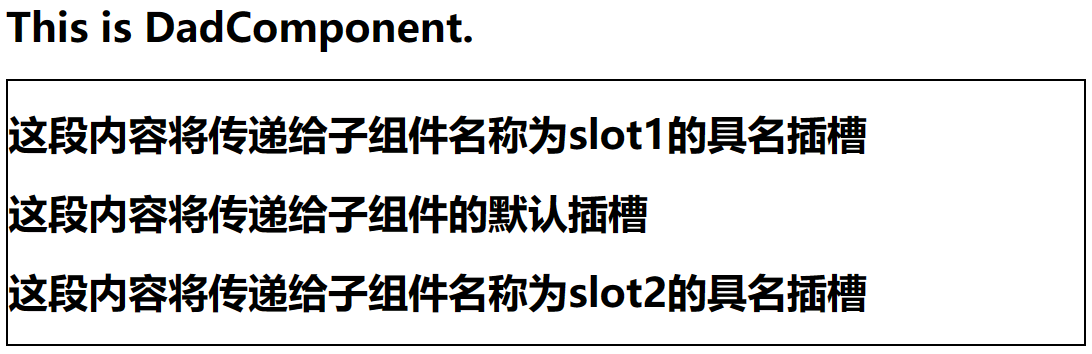
通过给 slot 标签添加 name 属性,使子组件可以定义多个具有名称标识的插槽,这类插槽被称为具名插槽。在父组件向子组件传递内容时,也需要指定所传递的目标插槽。
实例:
子组件ChildComponent.vue
<template>
  <div>
    <slot name='slot1'></slot> <!-- 名称为slot1的具名插槽 -->
    <slot></slot> <!-- 这是一个默认插槽 -->
    <slot name='slot2'></slot> <!-- 名称为slot2的具名插槽 -->
  </div>
</template>

<script>
  export default {
    name: 'ChildComponent'
  }
</script>

<style>
</style>
父组件DadComponent.vue
<template>
  <div>
    <h1>This is DadComponent.</h1>
    <child-component class='child'>
      <h1>这段内容将传递给子组件的默认插槽</h1>
      <h1 slot="slot1">这段内容将传递给子组件名称为slot1的具名插槽</h1>
      <h1 slot="slot2">这段内容将传递给子组件名称为slot2的具名插槽</h1>
    </child-component>
  </div>
</template>

<script>
  import ChildComponent from './ChildComponent.vue'
  export default {
    name: 'DadComponent',
    components: {
      ChildComponent
    }
  }
</script>

<style>
  .child {
    border-style: solid;
    border-color: black;
    border-width: 2px;
  }
</style>
传递的顺序不重要,只要没有slot属性,就是传递给默认插槽
页面显示效果如下:
3. 作用域插槽
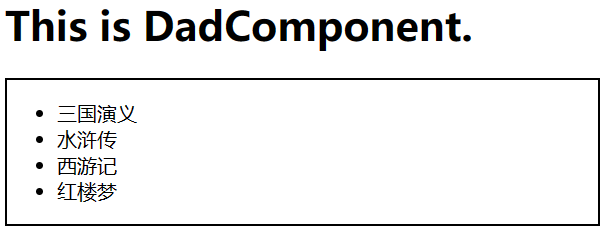
作用域插槽是一种特殊的插槽。默认插槽和具名插槽数据在父组件,在使用子组件时将数据传递给子组件;而作用域插槽的数据在子组件,只不过由父组件来决定如何渲染子组件的数据。
在子组件中,将数据绑定到插槽上,然后在父组件中,通过 scope 或 slot-scope 属性接收数据。
作用域插槽也可以有
name属性
实例:
子组件ChildComponent.vue
<template>
  <div>
    <slot v-bind:books="books"></slot>
  </div>
</template>

<script>
  export default {
    name: 'ChildComponent',
    data() {
      return {
        books: ['三国演义', '水浒传', '西游记', '红楼梦']
      }
    }
  }
</script>

<style>
</style>
父组件DadComponent.vue
<template>
  <div>
    <h1>This is DadComponent.</h1>
    <child-component class='child'>
      <!-- 要接收作用域插槽必须使用template标签 -->
      <!-- 使用scope或slot-scope接收子组件通过插槽传递的数据 -->
     <template slot-scope="{books}">
        <ul>
          <li v-for="(book, index) in books" :key="index">{{book}}</li>
        </ul>
      </template>
    </child-component>
  </div>
</template>

<script>
  import ChildComponent from './ChildComponent.vue'
  export default {
    name: 'DadComponent',
    components: {
      ChildComponent
    }
  }
</script>

<style>
  .child {
    border-style: solid;
    border-color: black;
    border-width: 2px;
  }
</style>
页面效果如下:
二、props
Props 是“properties”的缩写,用来实现组件的父子间通信,它允许父组件向子组件传递数据。
1. props的声明与传值
在子组件中声明 props ,然后在父组件中通过 v-bind 绑定属性传值,或直接属性传值。
props的声明有数组式和对象式两种声明方式。
数组式声明:
<!-- ChildComponent.vue -->
<template>
  <div>
    <p>Title: {{ title }}</p>
    <p>Author: {{ author }}</p>
    <p>Price: {{ price }}</p>
  </div>
</template>

<script>
  export default {
    name: 'ChildComponent',
    // 数组形式声明要从父组件接收的属性
    props: [
      'title',
      'author',
      'price'
    ]
  }
</script>

<style>
</style>
对象式声明
以对象形式声明props,这种方式可以同时定义类型、默认值等验证规则
<!-- ChildComponent.vue -->
<template>
  <div>
    <p>Title: {{ title }}</p>
    <p>Author: {{ author }}</p>
    <p>Price: {{ price }}</p>
  </div>
</template>

<script>
  export default {
    name: 'ChildComponent',
    // 对象形式声明要从父组件接收的属性
    props: {
      title: String,  // title必须传入一个字符串
      author: {
        type: String,
        default: 'Unknown', // 默认值为Unknown
      },
      price: {
        type: Number, // 数字类型
        required: true  // 必须传递price属性
      }
    }
  }
</script>

<style>
</style>
如果父组件传递的值类型不匹配,Vue会在控制台输出警告信息,指出哪个prop的值类型错误
Type可选值有String, Number, Boolean, Array, Object, Function, 自定义构造函数等
父组件传值:
<!-- DadComponent.vue-->
<template>
<div>
<!-- 通过v-bind将data中定义的数据传递给子组件的props,或直接作为属性传递 -->
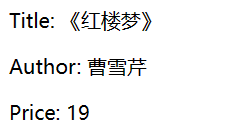
<child-component :title='book_title' author='曹雪芹' :price='book_price'></child-component>
</div>
</template>
<script>
import ChildComponent from './ChildComponent.vue'
export default {
name: 'DadComponent',
components: {
ChildComponent
},
data() {
return {
book_title: '《红楼梦》',
book_price: 19
}
}
}
</script>
<style>
</style>
页面显示效果如下:
注意:静态字符串字面量可以直接作为属性传入,如果需要传递的是父组件中的变量值或者表达式计算结果,则必须使用v-bind(或其简写 :)来动态绑定数据
注意:如果
props中定义的属性恰好和data中的某个变量同名(尽量不要这么做),则props里的优先级更高
注意:
Props是单向数据流,只能由父组件传递到子组件,子组件不能直接修改props的值。(如果想修改,可以在data中定义一个变量,复制props的值,然后修改data变量)
2. 特殊属性: this.$attr
特殊属性this.$attr允许子组件访问所有未被其自身props识别和处理的来自父组件的属性绑定。
子组件ChildComponent.vue
<template>
  <div>
    <!-- 通过this.$attrs访问未经props声明的属性 -->
    <p>Title: {{ this.$attrs.title }}</p>
    <p>Author: {{ this.$attrs.author }}</p>
    <p>Price: {{ this.$attrs.price }}</p>
  </div>
</template>

<script>
  export default {
    name: 'ChildComponent',
  }
</script>

<style>
</style>
父组件传值方式不变,依然能够获得同样的效果
三、自定义事件
1. 绑定自定义事件
绑定自定义事件步骤:
- 子组件通过
this.$emit('自定义事件名', '要传递的数据')将数据传递给自定义事件 - 父组件在使用子组件时通过
v-on绑定自定义事件,并传入一个方法,该方法接收一个参数,即子组件传递过来的数据
实例:
子组件ChildComponent.vue
<template>
  <div>
    <!-- 这个按钮绑定了一个点击事件,点击按钮,执行方法triggerCustomEvent -->
    <button @click='triggerCustomEvent'>Click it</button>
  </div>
</template>

<script>
  export default {
    name: 'ChildComponent',
    methods: {
      triggerCustomEvent() {
        // 触发名为custom-event的自定义事件
        this.$emit('custom-event', '这条文本将通过自定义事件传递')
      }
    }

  }
</script>

<style>
</style>
父组件ChildComponent.vue
<template>
  <div>
    <!-- 监听自定义事件custom-event -->
    <child-component @custom-event="handleCustomEvent"></child-component>
  </div>
</template>

<script>
  import ChildComponent from './ChildComponent.vue'
  export default {
    name: 'DadComponent',
    components: {
      ChildComponent
    },
    methods: {
      handleCustomEvent(data) {
        // data即是子组件通过自定义事件传递给父组件的数据
        console.log(data)
      }
    }
  }
</script>

<style>
</style>
另一种绑定自定义事件的方式:
子组件依然通过this.$emit传递数据给自定义事件,父组件监听自定义事件的方式发生了改变
父组件ChildComponent.vue
<template>
  <div>
    <child-component ref='childComponent'></child-component>
  </div>
</template>

<script>
  import ChildComponent from './ChildComponent.vue'
  export default {
    name: 'DadComponent',
    components: {
      ChildComponent
    },
    methods: {
      handleCustomEvent(data) {
        console.log(data)
      }
    },
    mounted() {
      // $on监听当前实例上的事件,并将数据传递给handleCustomEvent方法
      this.$refs.childComponent.$on('custom-event', this.handleCustomEvent)
    }
  }
</script>

<style>
</style>
这一种方式更加灵活,比如可以加一个定时器
mounted() {
  setTimeout(()=>{
    this.$refs.childComponent.$on('custom-event', this.handleCustomEvent)
  }, 3000)
}
让自定义事件只触发一次
可以使用.once修饰符进行限制
<!-- DadComponent.vue -->
<template>
  <div>
    <child-component @custom-event.once="handleCustomEvent"></child-component>
  </div>
</template>

<script>
  import ChildComponent from './ChildComponent.vue'
  export default {
    name: 'DadComponent',
    components: {
      ChildComponent
    },
    methods: {
      handleCustomEvent(data) {
        // data即是子组件通过自定义事件传递给父组件的数据
        console.log(data)
      }
    }
  }
</script>

<style>
</style>
或者使用$once
<!-- DadComponent.vue -->
<template>
  <div>
    <child-component ref='childComponent'></child-component>
  </div>
</template>

<script>
  export default {
    // 其他代码

    mounted() {
      this.$refs.childComponent.$once('custom-event', this.handleCustomEvent)
    }
  }
</script>
2. 解绑自定义事件
this.$off 方法用于移除事件监听器。当组件实例注册了一个或多个自定义事件的监听函数时,可以通过调用 $off 来取消对这些事件的监听。
有以下几种用法:
- 移除单个事件的所有事件监听器:
this.$off('eventName') - 移除多个事件的所有事件监听器:
this.$off('eventName1', 'eventName2') - 移除所有事件的所有事件监听器:
this.$off()
通常在以下几种常见下使用this.$off来移除事件监听器
组件销毁时清理资源
// 在组件内部的生命周期钩子中移除事件监听器
beforeDestroy() {
  this.$off('customEvent');
  // 或者移除特定的回调函数
  this.$off('anotherEvent', this.someCallback);
}

mounted() {
  this.$on('customEvent', this.handleCustomEvent);
  this.$on('anotherEvent', this.someCallback);
}

methods: {
  handleCustomEvent(data) {
    // 处理自定义事件逻辑...
  },
  someCallback() {
    // 其他处理逻辑...
  }
}
临时添加的事件监听器并希望在某个条件满足时移除它
data() {
  return {
    isListening: false,
    temporaryListener: null
  };
},
methods: {
  startListening() {
    this.isListening = true;
    this.temporaryListener = () => {
      console.log('临时事件触发');
      this.stopListening();
    };
    this.$on('temporaryEvent', this.temporaryListener);
  },
  stopListening() {
    this.isListening = false;
    this.$off('temporaryEvent', this.temporaryListener);
  }
}
四、Vuex
1. Vuex概念
Vuex是什么?
Vuex是一个用于Vue.js应用程序的状态管理库,专门设计用于管理Vue.js应用中的状态管理,尤其是处理组件之间共享的状态(数据)。它是一种组件间的通信的方式,且适用于任意组件间的通信
Vuex其实就是一个为vue.js设计的数据仓库,把各个组件公用的数据放到一个仓库里面进行统一的管理,这样既使得非父子组件间的数据共享变得简单明了,也让程序变得更加可维护(将数据抽离了出来),而且只要仓库里面的数据发生了变化,在其他组件里面数据被引用的地方也会自动更新。
GitHub地址:https://github.com/vuejs/vuex
文档地址:https://vuex.vuejs.org/zh/
状态管理指的是在应用程序中有效地管理和维护应用状态(data、信息)的过程。
为什么要使用Vuex?/使用Vuex有什么好处?
构建大型Vue.js时,随着组件的增多,数据的传递和管理可能变得复杂,Vuex可以帮助开发者更好地组织和管理应用的数据
Vuex核心概念:
- State(状态):一个包含应用层级状态的对象,相当于应用的数据源。即应用中需要共享的数据
- Getter(获取器):用于从状态中派生出一些新的状态,相当于一个全局的计算属性。(对State中的数据进行处理)
- Mutation(突变):包含具体操作数据的方法(Vuex中唯一能修改数据的地方),但是必须是同步的。
- Action(动作):包含一些方法,用于处理异步操作(如数据获取、API调用等),然后提交mutation来修改状态(Action自己不能直接修改数据)
- modules(模块):
2. 安装和引入Vuex
安装Vuex
# 默认安装vuex4版本,只能在vue3项目中使用,在vue2项目中安装会报错
npm install vuex --save

# 在vue2项目中安装vuex3
npm install vuex@3 --save
在项目的src目录下创建一个store目录,然后在其中新建一个index.js
import Vue from 'vue'
import Vuex from 'vuex' // 引入vuex

Vue.use(Vuex)

// 准备state——用于存储数据
const state = {}

// 准备actions——用于响应组件中的动作
const actions = {}

// 准备mutations——用于操作数据
const mutations = {}

// 创建store并暴露
export default new Vuex.Store({
	actions: actions,
	mutations: mutations,
	state: state
})
可以同时创建并暴露
import Vue from 'vue'
import Vuex from 'vuex'

Vue.use(Vuex)

export default new Vuex.Store({
    state: {},
    mutations: {},
    actions: {},
})
最后在src/main.js中引入store,再全局注入一下,这样就可以在任何一个组件里面使用它了
import Vue from 'vue'
import App from './App.vue'
// 引入store
import store from './store/index'

// 关闭Vue的生产提示
Vue.config.productionTip = false

new Vue({
	render: h => h(App),
	// 注册store
	store: store
}).$mount('#app')
3. vuex的基础用法
先看一个简单的案例:
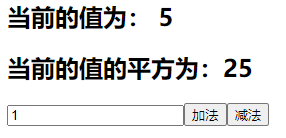
用户在输入框中输入数字,点击【加法】或【减法】,让用户输入的值与已有的值做加减法,显示计算后的结果和它的平方值
vuex代码:
import Vue from 'vue'
import Vuex from 'vuex'

Vue.use(Vuex)

export default new Vuex.Store({
  state: {
    count: 0
  },
  getters: {
    // getter 接受 state 作为其第一个参数
    countSquared(state) {
        return state.count ** 2;
    }
    // ES6写法
    // countSquared: state => state.count ** 2
  },
  mutations: {
    addition(state, value) {
      // 这里使用Number()将值转换为数字,避免js对其进行隐式类型转换成为字符串
      state.count = Number(state.count) + Number(value);
    },
    subtraction(state, value) {
      state.count = Number(state.count) - Number(value);
    }
  },
  actions: {
    // context是store实例上下文对象
    handleAddition(context, value) {
      context.commit('addition', value)
    },
    // 使用了 ES6 的解构语法,直接从参数对象中获取commit方法,和上面的写法是等价的
    handleSubtraction({ commit }, value) {
      commit('subtraction', value)
    }
  }
})
组件代码:
<template>
  <div>
    <!-- 使用$store.state可以直接获取state中的属性 -->
    <h2>当前的值为: {{ $store.state.count }}</h2>
    <h2>当前的值的平方为:{{ $store.getters.countSquared }}</h2>
    <input type="number" v-model="inputNumber">
    <button @click='increase'>加法</button>
    <button @click='decrease'>减法</button>
  </div>
</template>

<script>
  export default {
    name: 'App',
    data() {
      return {
        inputNumber: 0
      }
    },
    methods: {
      increase() {
        // 调用actions方法
        // this.$store.dispatch('actions方法', 传递的数据)
        this.$store.dispatch('handleAddition', this.inputNumber);
      },
      decrease() {
        this.$store.dispatch('handleSubtraction', this.inputNumber);
      }
    }
  }
</script>

<style>
</style>
可以不调用actions,直接调用mutations
<template>
  <div>
    <!-- 使用$store.state可以直接获取state中的属性 -->
    <h2>当前的值为: {{ $store.state.count }}</h2>
    <h2>当前的值的平方为:{{ $store.getters.countSquared }}</h2>

    <input type="number" v-model="inputNumber">
    <button @click='increase'>加法</button>
    <button @click='decrease'>减法</button>
  </div>
</template>

<script>
  export default {
    name: 'App',
    data() {
      return {
        inputNumber: 0
      }
    },
    methods: {
      increase() {
        this.$store.commit('addition', this.inputNumber);
      },
      decrease() {
        this.$store.commit('subtraction', this.inputNumber);
      }
    }
  }
</script>

<style>

</style>
小结:
- 在组件可以通过
this.$store.state来获取state中的属性 - 在组件中通过
this.$store.getters获取getters的属性 - 在方法中,可以通过
this.$store.dispatch()来调用actions中定义的方法 actions的方法不实际处理数据,而是在获得数据后,将数据交给mutations来处理- 不但在vuex中,
actions可以通过commit来将数据提交给mutations,在组件中也可以通过this.$store.commit()来直接调用mutations
既然组件可以直接调用
mutations,为什么还要设计actions?
- mutations只能进行同步操作,而actions可以处理异步操作(如Ajax请求)。
- 让mutations只负责纯粹的状态修改,而actions进行更复杂的逻辑处理,有利于后期的维护。
4. mapState、mapGetters、mapActions和mapMutations
mapState和mapGetters用于将state或mutations中的属性映射到组件的计算属性中,让组件可以像调用自己的属性一样调用它们
mapActions和mapMutations可以将actions或mutations中的方法映射到组件的methods中,让组件可以像调用自己的方法一样调用它们
还是之前的案例,只不过对减法逻辑做了点小改动,不需要传参,每次被调用都将count-1
vuex代码:
import Vue from 'vue'
import Vuex from 'vuex'

Vue.use(Vuex)

export default new Vuex.Store({
  state: {
    count: 0
  },
	getters: {
		countSquared(state) {
			return state.count ** 2;
		}
	},
  mutations: {
    addition(state, value) {
      state.count = Number(state.count) + Number(value);
    },
    subtraction(state) {
      state.count = Number(state.count) - 1;
    }
  },
  actions: {
    handleAddition(context, value) {
      context.commit('addition', value)
    },
    handleSubtraction(context) {
      context.commit('subtraction')
    }
  }
})
组件代码:
<template>
  <div>
    <h2>当前的值为: {{ count }}</h2>
    <h2>当前的值的平方为:{{ countSquared }}</h2>
    <input type="number" v-model="inputNumber">

    <button @click='increase'>加法</button>
	<!-- 像调用本地方法一样调用vuex中的方法 -->
    <button @click='handleSubtraction'>减一</button>
  </div>
</template>

<script>
	// 导入mapState, mapGetters, mapActions
	import { mapState, mapGetters, mapActions } from 'vuex';

  export default {
    name: 'App',
    data() {
      return {
        inputNumber: 0
      }
    },
    computed: {
      ...mapState(['count']),	// 映射 this.count 为 store.state.count
      ...mapGetters(['countSquared'])	// 映射 this.countSquared 为 store.getters.countSquared

      /* 等价的写法
      ...mapState({
        count: 'count'
      }),
      ...mapGetters({
        countSquared: 'countSquared'
      })
      */
    },
    methods: {
	  ...mapActions(['handleAddition', 'handleSubtraction']),

	  // 需要传参的actions方法可以在本地方法中被间接调用传参
	  // 不需要穿着的actions方法通过mapActions声明即可使用
      increase() {
        this.handleAddition(this.inputNumber);
      }
    }
  }
</script>

<style>

</style>
mapMutations的使用方法与mapActions类似
<template>
  <div>
    <h2>当前的值为: {{ count }}</h2>
    <h2>当前的值的平方为:{{ countSquared }}</h2>
    <input type="number" v-model="inputNumber">

    <button @click='increase'>加法</button>
    <!-- 像调用本地方法一样调用vuex中的方法 -->
    <button @click='subtraction'>减一</button>
  </div>
</template>

<script>
  // 导入mapState, mapGetters, mapMutations
  import { mapState, mapGetters, mapMutations } from 'vuex';

  export default {
    name: 'App',
    data() {
      return {
        inputNumber: 0
      }
    },
    computed: {
      ...mapState(['count']),	// 映射 this.count 为 store.state.count
      ...mapGetters(['countSquared'])	// 映射 this.countSquared 为 store.getters.countSquared
    },
    methods: {
      ...mapMutations(['addition', 'subtraction']),

      increase() {
        this.addition(this.inputNumber);
      }
    }
  }
</script>

<style>
</style>
5. Vuex模块化编码
在大型项目中,可以根据不同的功能模块对vuex进行划分,每个模块都包含它自己的 state、getters、mutations 和 actions,使代码更好维护。
比如之前的案例的vuex代码,可以将其划分为一个counter模块
import Vue from 'vue'
import Vuex from 'vuex'

Vue.use(Vuex)

// counter模块
const counter = {
  state: {
    count: 0
  },
  getters: {
    countSquared(state) {
      return state.count ** 2;
    }
  },
  mutations: {
    addition(state, value) {
      state.count = Number(state.count) + Number(value);
    },
    subtraction(state) {
      state.count = Number(state.count) - 1;
    }
  },
  actions: {
    handleAddition(context, value) {
      context.commit('addition', value)
    },
    handleSubtraction(context) {
      context.commit('subtraction')
    }
  }
}

export default new Vuex.Store({
  state: {},
  getters: {},
  actions: {},
  mutations: {},
  modules: {
    counter // 将counter模块注册到全局store中
  }
})
也可以在src/store目录下创建一个modules目录,然后在其中创建一个counter.js文件
目录结构如下:
src
 |- store
       |- index.js
       |- modules
               |- counter.js
counter.js
export default {
  state: {
    count: 0
  },
  getters: {
    countSquared(state) {
      return state.count ** 2;
    }
  },
  mutations: {
    addition(state, value) {
      state.count = Number(state.count) + Number(value);
    },
    subtraction(state) {
      state.count = Number(state.count) - 1;
    }
  },
  actions: {
    handleAddition(context, value) {
      context.commit('addition', value)
    },
    handleSubtraction(context) {
      context.commit('subtraction')
    }
  }
}
index.js
import Vue from 'vue'
import Vuex from 'vuex'

// 导入counter模块
import counter from './modules/counter.js'

Vue.use(Vuex)

export default new Vuex.Store({
  state: {},
  getters: {},
  actions: {},
  mutations: {},
  modules: {
    counter // 将counter模块注册到全局store中
  }
})
在组件中使用
<template>
  <div>
    <!-- 各模块的状态是分开定义的,外部访问需要指定模块名 -->
    <h2>当前的值为: {{ $store.state.counter.count }}</h2>
    <!-- getter 都会被注册到全局的 getters 对象上,外部访问不需要指定模块名 -->
    <h2>当前的值的平方为:{{ $store.getters.countSquared }}</h2>
    <input type="number" v-model="inputNumber">

    <button @click='increase'>加法</button>
    <button @click='subtraction'>减一</button>
  </div>
</template>

<script>

export default {
  name: 'App',
  data() {
    return {
      inputNumber: 0
    }
  },
  methods: {
    increase() {
      // 调用actions也不用指定模块名
      this.$store.dispatch('handleAddition', this.inputNumber)
    },
    subtraction() {
      // 调用mutations也不需要指定模块名
      this.$store.commit('subtraction');
    }
  }
}
</script>

<style>
</style>
或者:
<template>
  <div>
    <h2>当前的值为: {{ counter.count }}</h2>
    <h2>当前的值的平方为:{{ countSquared }}</h2>
    <input type="number" v-model="inputNumber">

    <button @click='increase'>加法</button>
    <button @click='subtraction'>减一</button>
  </div>
</template>

<script>
import { mapState, mapGetters, mapActions, mapMutations } from 'vuex';

export default {
  name: 'App',
  data() {
    return {
      inputNumber: 0
    }
  },
  computed: {
    ...mapState(['counter']),
    ...mapGetters(['countSquared'])
  },
  methods: {
    ...mapActions(['handleAddition', 'handleSubtraction']),
    ...mapMutations(['addition', 'subtraction']),

    increase() {
      this.handleAddition(this.inputNumber);
    }
  }
}
</script>

<style>
</style>
在实际开发中,为了避免不同模块之间的命名冲突问题,可以开启模块的命名空间,之后在页面中引入getter、actions、mutations时,都需要加上所属的模块名。
将counter.js开启命名空间
export default {
  namespaced: true, // 开启命名空间
  state: {
    count: 0
  },
  getters: {
    countSquared(state) {
      return state.count ** 2;
    }
  },
  mutations: {
    addition(state, value) {
      state.count = Number(state.count) + Number(value);
    },
    subtraction(state) {
      state.count = Number(state.count) - 1;
    }
  },
  actions: {
    handleAddition(context, value) {
      context.commit('addition', value)
    },
    handleSubtraction(context) {
      context.commit('subtraction')
    }
  }
}
组件引用他们的方式也要发生改变:
<template>
  <div>
    <h2>当前的值为: {{ $store.state.counter.count }}</h2>
    <!-- 注意不能用$store.getters.counter.countSquared -->
    <h2>当前的值的平方为:{{ $store.getters['counter/countSquared'] }}</h2>
    <input type="number" v-model="inputNumber">

    <button @click='increase'>加法</button>
    <button @click='subtraction'>减一</button>
  </div>
</template>

<script>

export default {
  name: 'App',
  data() {
    return {
      inputNumber: 0
    }
  },
  methods: {
    increase() {
      this.$store.dispatch('counter/handleAddition', this.inputNumber)
    },
    subtraction() {
      this.$store.commit('counter/subtraction');
    }
  }
}
</script>

<style>
</style>
或者
<template>
  <div>
    <h2>当前的值为: {{ count }}</h2>
    <h2>当前的值的平方为:{{ countSquared }}</h2>
    <input type="number" v-model="inputNumber">

    <button @click='increase'>加法</button>
    <button @click='subtraction'>减一</button>
  </div>
</template>

<script>
import { mapState, mapGetters, mapActions, mapMutations } from 'vuex';

export default {
  name: 'App',
  data() {
    return {
      inputNumber: 0
    }
  },
  computed: {
    // mapState, mapGetters, mapActions, mapMutations的第一个参数指定模块名
    ...mapState('counter', ['count']),
    ...mapGetters('counter', ['countSquared'])
  },
  methods: {
    ...mapActions('counter', ['handleAddition', 'handleSubtraction']),
    ...mapMutations('counter', ['addition', 'subtraction']),

    increase() {
      this.handleAddition(this.inputNumber);
    }
  }
}
</script>

<style>
</style>
小结:
- 在没有开启命名空间的情况下,访问模块的
state,需要指定模块名,而访问getters、actions、mutations都不需要指定模块名 - 开启命名空间后访问
state、getters、actions、mutations都需要指定模块名
五、全局事件总线
全局事件总线是一种模式,可以实现任意组件之间通信。
使用步骤:
- 在main.js中创建全局事件总线:
export const eventBus = new Vue(); - 要发送消息的组件通过
this.$root.$emit绑定自定义事件 - 要接收消息的组件通过
this.$root.$on监听相应的自定义事件
因为这里全局事件总线是在根实例上创建的,所以通过
this.$root来访问根实例属性
示例:
main.js
import Vue from 'vue'
import App from './App.vue'

// 创建全局事件总线
export const eventBus = new Vue();

Vue.config.productionTip = false

new Vue({
  render: h => h(App),
}).$mount('#app')
ComponentA.vue
<template>
  <div>
    <h2>ComponentA</h2>
    <button @click="sendMessage">发送消息给ComponentB</button>
  </div>
</template>

<script>
  export default {
    name: 'ComponentA',
    methods: {
      sendMessage() {
        // 绑定一个自定义事件send_msg,发送一个消息: Hello
        this.$root.$emit('send_msg', 'Hello!')
      }
    }
  }
</script>

<style>
</style>
ComponentB.vue
<template>
  <div>
    <h2>ComponentB</h2>
    <p>{{ message }}</p>
  </div>
</template>

<script>
  export default {
    name: 'ComponentB',
    data() {
      return {
        message: ''
      }
    },
    mounted() {
      // 监听来自ComponentA的事件send_msg
      this.$root.$on('send_msg', value => {
        this.message = value;
      });
    }
  }
</script>

<style>
</style>
还存在另一种创建全局事件总线的方式:
main.js
import Vue from 'vue'
import App from './App.vue'

Vue.config.productionTip = false

new Vue({
  render: h => h(App),
  beforeCreate() {
    Vue.prototype.$bus = this  //安装全局事件总线
  }
}).$mount('#app')
ComponentA.vue
<template>
  <div>
    <h2>ComponentA</h2>
    <button @click="sendMessage">发送消息给ComponentB</button>
  </div>
</template>

<script>
  export default {
    name: 'ComponentA',
    methods: {
      sendMessage() {
        // 绑定一个自定义事件send_msg,发送一个消息: Hello
        this.$bus.$emit('send_msg', 'Hello!')
      }
    }
  }
</script>

<style>
</style>
ComponentB.vue
<template>
  <div>
    <h2>ComponentB</h2>
    <p>{{ message }}</p>
  </div>
</template>

<script>
  export default {
    name: 'ComponentB',
    data() {
      return {
        message: ''
      }
    },
    mounted() {
      // 监听来自ComponentA的事件send_msg
      this.$bus.$on('send_msg', value => {
        this.message = value;
      });
    },
    beforeDestroy() {
      // 解绑send_msg事件
      this.$bus.$off("send_msg");
    }
  }
</script>

<style>
</style>
两种方式都是常见的创建全局事件总线的方式,可根据需要选用
六、消息订阅与发布 pubsub-js
pubsub-js是一个简单而轻量级的 JavaScript 发布-订阅库,用于在应用程序中实现发布-订阅模式。它提供了一种简单的方式来管理事件的订阅和发布,可以实现任意组件间通信
github地址:https://github.com/mroderick/PubSubJS
安装:
npm install pubsub-js --save
使用示例:
ComponentA.vue
<template>
  <div>
    <h2>ComponentA</h2>
    <button @click="sendMessage">发送消息给ComponentB</button>
  </div>
</template>

<script>
  // 引入pubsub-js
  import pub from 'pubsub-js';

  export default {
    name: 'ComponentA',
    methods: {
      sendMessage() {
        // 发送一个名为send_msg的消息,并携带数据'Hello'
        pub.publish('send_msg', 'Hello');
      }
    }
  }
</script>

<style>
</style>
ComponentB.vue
<template>
  <div>
    <h2>ComponentB</h2>
    <p>{{ message }}</p>
  </div>
</template>

<script>
  // 引入pubsub-js
  import pub from 'pubsub-js';

  export default {
    name: 'ComponentB',
    data() {
      return {
        message: ''
      }
    },
    mounted() {
      // topic是发布的事件名称,即send_msg,第二个参数才是传递的数据
      pub.subscribe('send_msg', (topic, value) => {
        this.message = value;
      })
    }
  }
</script>

<style>
</style>
除了publish发布事件,subscribe订阅事件,还有
pub.unsubscribe('eventName');取消对某事件的订阅pub.subscribeOnce('eventName', data);一次性订阅。订阅一个事件,但只会在事件第一次被发布时触发一次。

 浙公网安备 33010602011771号