
第一个SpringBoot
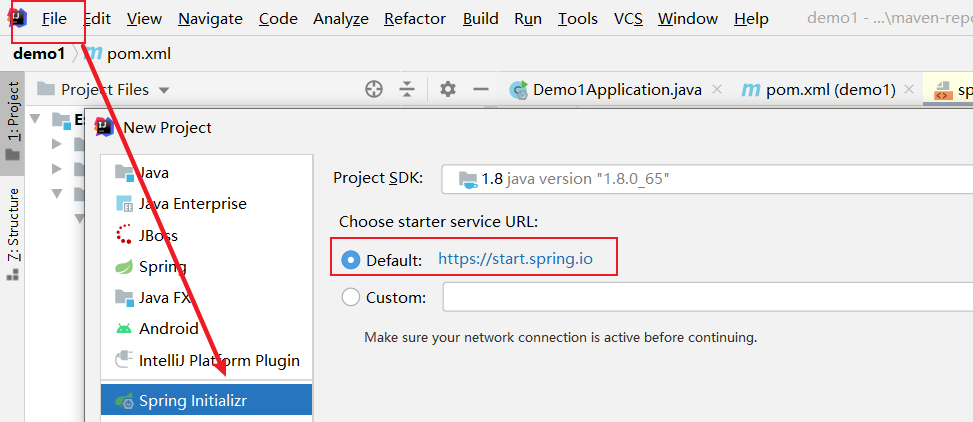
1.新建项目
file->new project->Spring Initializr。右侧默认是spring的官网。next 添加Spring Web依赖。项目就创建成功了!
2.看一下默认项目结果以及有什么东西
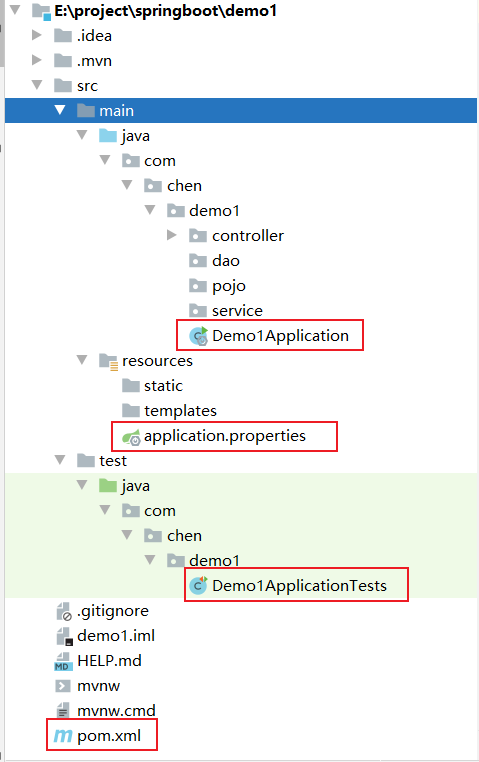
3.说明
1.pom.xml 说明是一个maven项目


<?xml version="1.0" encoding="UTF-8"?>
<project xmlns="http://maven.apache.org/POM/4.0.0" xmlns:xsi="http://www.w3.org/2001/XMLSchema-instance"
         xsi:schemaLocation="http://maven.apache.org/POM/4.0.0 https://maven.apache.org/xsd/maven-4.0.0.xsd">
    <modelVersion>4.0.0</modelVersion>
    <!--父项目-->
    <parent>
        <groupId>org.springframework.boot</groupId>
        <artifactId>spring-boot-starter-parent</artifactId>
        <version>2.6.2</version>
        <relativePath/> <!-- lookup parent from repository -->
    </parent>
    <groupId>com.chen</groupId>
    <artifactId>demo1</artifactId>
    <version>0.0.1-SNAPSHOT</version>
    <name>demo1</name>
    <description>Demo project for Spring Boot</description>
    <properties>
        <java.version>1.8</java.version>
    </properties>
    <dependencies>
        <!--web项目依赖:tomcat dispatherServlet.xml ... -->
        <dependency>
            <groupId>org.springframework.boot</groupId>
            <artifactId>spring-boot-starter-web</artifactId>
        </dependency>
        <!--单元测试-->
        <dependency>
            <groupId>org.springframework.boot</groupId>
            <artifactId>spring-boot-starter-test</artifactId>
            <scope>test</scope>
        </dependency>
    </dependencies>
    <!--打jar包插件-->
    <build>
        <plugins>
            <plugin>
                <groupId>org.springframework.boot</groupId>
                <artifactId>spring-boot-maven-plugin</artifactId>
            </plugin>
        </plugins>
    </build>

</project>
其中parent说明有一个父依赖
dependencies中的依赖 全部是spring-boot-starter-xxx格式
spring-boot-starter-web:web场景启动器,tomcat等。。。
spring-boot-starter-test:单元测试
spring-boot-maven-plugin:打包插件
2.Demo1Application :springboot项目的主程序。暂时不要动他
3.配置文件以及测试单元代码
4.实现一个http接口
1.我们在主程序的同级目录下建我们需要的包:pojo dao controller service
因为springboot自动装配原则,会扫描主程序同级目录下的东西(后面学习吧)
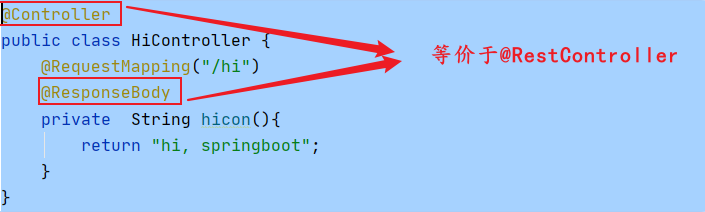
2.controller下新建第一个springboot代码
package com.chen.demo1.controller;

import org.springframework.web.bind.annotation.RequestMapping;
import org.springframework.web.bind.annotation.RestController;
//自动装配原则
@RestController
public class HelloController {
    //请求地址:http://localhost:8080/hello
    @RequestMapping("/hello")
    public String showHello(){
        //调用业务,接收返回前端参数
        return "hello springboot";
    }
}
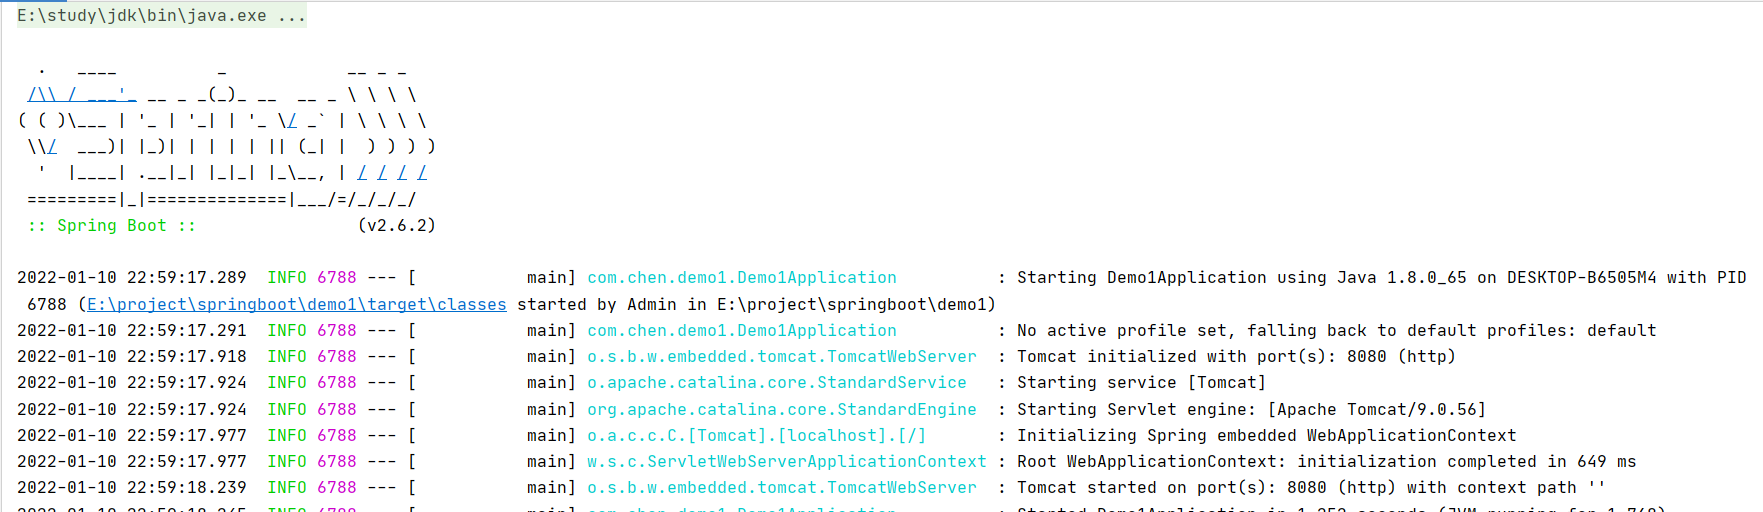
3.运行并请求http://localhost:8080/hello。查询控制台信息

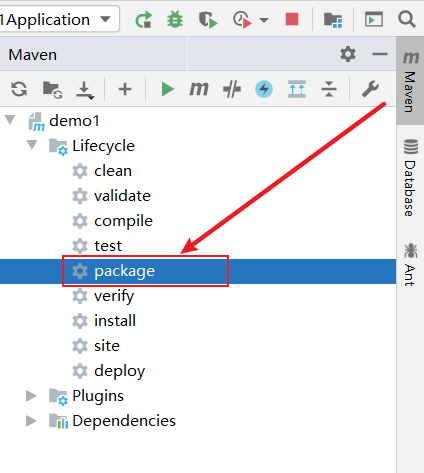
5.将开发好的web接口打包。idea右侧,maven ->双击package即可。成功后我们右侧项目结构target下就要我们生成的jar包了
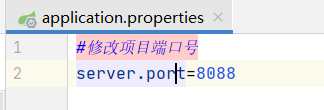
6.修改应用端口号
配置文件application.properties文件中新加端口号即可:server.port=8088

 浙公网安备 33010602011771号