keepalived配置
环境
Centos7
主 mon01 192.168.6.143
备 mon02 192.168.6.144
VIP 192.168.6.103
安装keepalived
yum install -y keepalived
修改配置
主机(mon01)修改配置文件
vim /etc/keepalived/keepalived.conf
! Configuration File for keepalived

global_defs {
   notification_email {
     acassen@firewall.loc
     failover@firewall.loc
     sysadmin@firewall.loc
   }
   notification_email_from Alexandre.Cassen@firewall.loc
   smtp_server 192.168.200.1
   smtp_connect_timeout 30
   router_id LVS_DEVEL
   vrrp_skip_check_adv_addr
   vrrp_strict
   vrrp_garp_interval 0
   vrrp_gna_interval 0
}

vrrp_instance VI_1 {
    state MASTER  #标示状态为MASTER
    interface ens33  #网卡
    virtual_router_id 51
    priority 100  #master权重高于backup
    advert_int 1
    mcast_src_ip 192.168.6.143  #实体服务器的IP
    authentication {
        auth_type PASS
        auth_pass 123456
    }
    virtual_ipaddress {
        192.168.6.103  #虚拟IP
    }
}
备机(mon02)修改配置文件
! Configuration File for keepalived

global_defs {
   notification_email {
     acassen@firewall.loc
     failover@firewall.loc
     sysadmin@firewall.loc
   }
   notification_email_from Alexandre.Cassen@firewall.loc
   smtp_server 192.168.200.1
   smtp_connect_timeout 30
   router_id LVS_DEVEL
   vrrp_skip_check_adv_addr
   vrrp_strict
   vrrp_garp_interval 0
   vrrp_gna_interval 0
}

vrrp_instance VI_1 {
    state BACKUP  #标识状态为backup
    interface ens33
    virtual_router_id 51
    priority 90
    advert_int 1
    mcast_src_ip 192.168.6.144
    authentication {
        auth_type PASS
        auth_pass 123456
    }
    virtual_ipaddress {
        192.168.6.103
    }
}
启动
systemctl start keepalived
systemctl enable keepalived
查看
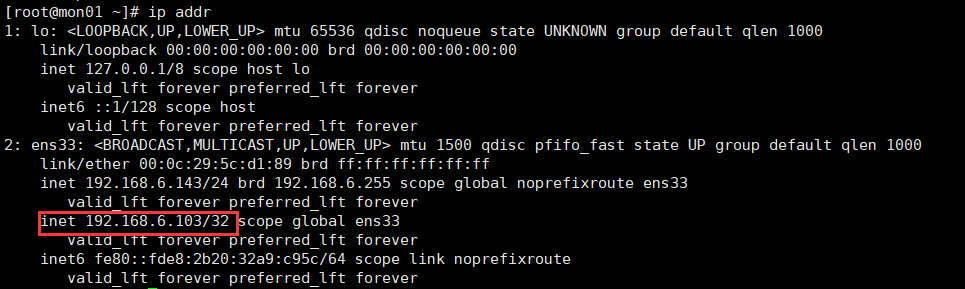
主机mon01上
ip addr
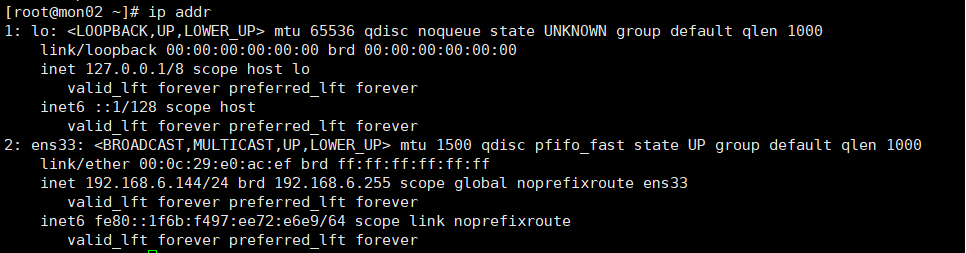
备机mon02上

 浙公网安备 33010602011771号