Spring的校验(Validator)
使用Spring校验的大体流程:
最首先要有配置文件xml的支持(spring_validate.xml).(当然在web.xml中要有对该xml的体现)
 1 <beans xmlns="http://www.springframework.org/schema/beans"
 2     xmlns:xsi="http://www.w3.org/2001/XMLSchema-instance" xmlns:p="http://www.springframework.org/schema/p"
 3     xmlns:context="http://www.springframework.org/schema/context"
 4     xmlns:mvc="http://www.springframework.org/schema/mvc"
 5     xsi:schemaLocation="
 6 http://www.springframework.org/schema/beans
 7 http://www.springframework.org/schema/beans/spring-beans-4.0.xsd
 8 http://www.springframework.org/schema/context
 9 http://www.springframework.org/schema/context/spring-context-4.0.xsd
10 http://www.springframework.org/schema/mvc
11 http://www.springframework.org/schema/mvc/spring-mvc-4.0.xsd
12 ">
13
14     <bean id="validator"
15         class="org.springframework.validation.beanvalidation.LocalValidatorFactoryBean">
16         <property name="providerClass" value="org.hibernate.validator.HibernateValidator" />
17         <!-- 如果不加默认到 使用classpath下的 ValidationMessages.properties -->
18         <property name="validationMessageSource" ref="messageSource" />
19     </bean>
20
21
22
23     <bean id="messageSource"
24         class="org.springframework.context.support.ReloadableResourceBundleMessageSource">
25         <!-- 以发布到服务器的路径为准 -->
26         <property name="basename" value="classpath:messages" />
27         <property name="fileEncodings" value="utf-8" />
28         <property name="cacheSeconds" value="120" />
29     </bean>
30
31     <bean id="webBindingInitializer"
32         class="org.springframework.web.bind.support.ConfigurableWebBindingInitializer">
33
34         <property name="conversionService">
35             <bean
36                 class="org.springframework.format.support.FormattingConversionServiceFactoryBean">
37             </bean>
38
39         </property>
40         <property name="validator" ref="validator" />
41     </bean>
42
43 </beans>
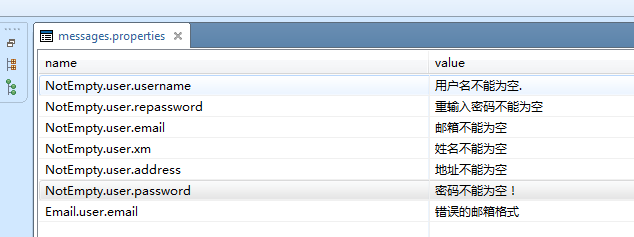
然后就是这个东西登场了:messages.properties.


然后在model层里相应的地方也要有相应的体现
 1 public class User{
 2
 3     @NotEmpty
 4     private String username;
 5     @NotEmpty
 6     private String password;
 7     @NotEmpty
 8     private String repassword;
 9
10     @NotEmpty
11     @Email
12     private String email;
13     @NotEmpty
14     private String xm;
15 }
再然后是control层里的调用:
1 public String xx(@Valid User user,
2         BindingResult result, Map map ){
3
4         if(result.hasErrors()){
5             return "xx.ftl";
6         }
7 }
最后是在JSP页面了(个人用的是ftl)
首先要有这两句话:Spring的组件
1 <#assign spring=JspTaglibs["http://www.springframework.org/tags"]/>
2 <#assign form=JspTaglibs["http://www.springframework.org/tags/form"] />
然后在对应的input下都要有所体现
1 用户名:<input type="text" name="username" id="username">
2<@form.errors path="username"/>
3 密码:<input type="text" name="password" id="password">
4<@form.errors path="password"/>
在最后注意form表单要这样写。其中commandName是那个的实体类名的小写。
1 <@form.form commandName="user" action="" method="post" name="" id="">
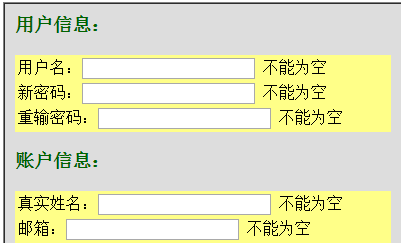
显示的效果是这样:


本帖纯属个人的学习和理解,如有错误请各位大神指正。


