关于OpenCV的stitching使用
配置环境:VS2010+OpenCV2.4.9
为了使用OpenCV实现图像拼接头痛了好长时间,一直都没时间做,今天下定决心去实现基本的图像拼接。
首先,看一看使用OpenCV进行拼接的方法
基本都是用Stitcher类中的stitch方法。下面是网上的代码,同时也是opencv\samples\cpp\stitching.cpp的代码。
#include <iostream>
#include <fstream>
#include "opencv2/highgui/highgui.hpp"
#include "opencv2/stitching/stitcher.hpp"

using namespace std;
using namespace cv;

bool try_use_gpu = false;
vector<Mat> imgs;
string result_name = "result.jpg";

void printUsage();
int parseCmdArgs(int argc, char** argv);

int main(int argc, char* argv[])
{
    int retval = parseCmdArgs(argc, argv);
    if (retval) return -1;

    Mat pano;
    Stitcher stitcher = Stitcher::createDefault(try_use_gpu);
    Stitcher::Status status = stitcher.stitch(imgs, pano);

    if (status != Stitcher::OK)
    {
        cout << "Can't stitch images, error code = " << int(status) << endl;
        return -1;
    }

    imwrite(result_name, pano);
    return 0;
}


void printUsage()
{
    cout <<
        "Rotation model images stitcher.\n\n"
        "stitching img1 img2 [...imgN]\n\n"
        "Flags:\n"
        "  --try_use_gpu (yes|no)\n"
        "      Try to use GPU. The default value is 'no'. All default values\n"
        "      are for CPU mode.\n"
        "  --output <result_img>\n"
        "      The default is 'result.jpg'.\n";
}


int parseCmdArgs(int argc, char** argv)
{
    if (argc == 1)
    {
        printUsage();
        return -1;
    }
    for (int i = 1; i < argc; ++i)
    {
        if (string(argv[i]) == "--help" || string(argv[i]) == "/?")
        {
            printUsage();
            return -1;
        }
        else if (string(argv[i]) == "--try_use_gpu")
        {
            if (string(argv[i + 1]) == "no")
                try_use_gpu = false;
            else if (string(argv[i + 1]) == "yes")
                try_use_gpu = true;
            else
            {
                cout << "Bad --try_use_gpu flag value\n";
                return -1;
            }
            i++;
        }
        else if (string(argv[i]) == "--output")
        {
            result_name = argv[i + 1];
            i++;
        }
        else
        {
            Mat img = imread(argv[i]);
            if (img.empty())
            {
                cout << "Can't read image '" << argv[i] << "'\n";
                return -1;
            }
            imgs.push_back(img);
        }
    }
    return 0;
}
感觉这个说的比较繁琐,我就改写成了下面的代码
#include <iostream>
#include <fstream>
#include <opencv2/core/core.hpp>
#include "opencv2/highgui/highgui.hpp"
#include "opencv2/stitching/stitcher.hpp"
#include<Windows.h>

using namespace std;
using namespace cv;

bool try_use_gpu = false;
vector<Mat> imgs;
string result_name = "result.jpg";

int main()
{
	Mat img1=imread("1.jpg");
	Mat img2=imread("2.jpg");
	imgs.push_back(img1);
	imgs.push_back(img2);
	Mat pano;
	Stitcher stitcher = Stitcher::createDefault(try_use_gpu);
	Stitcher::Status status = stitcher.stitch(imgs, pano);
	if (status != Stitcher::OK)
	{
		cout << "Can't stitch images, error code = " << status << endl;
		return -1;
	}
	namedWindow(result_name);
	imshow(result_name,pano);
	imwrite(result_name,pano);
	waitKey();
	return 0;
}
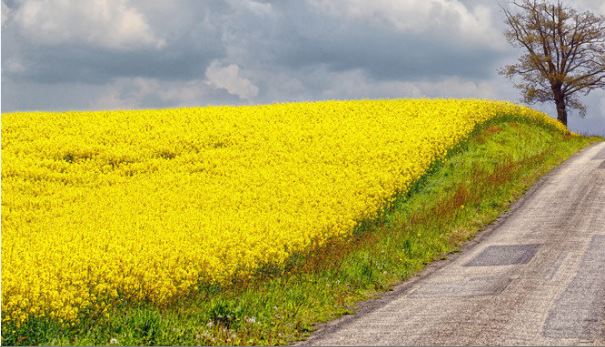
下面看一下原图和效果图,(以四张原图为例,分为左上,右上,左下,右下)


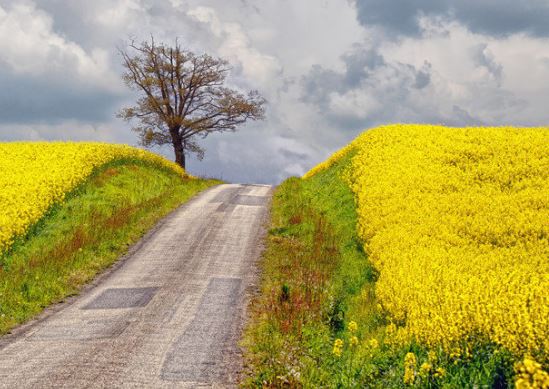
效果图如下:

可以发现代码中最关键的两句就是:
Stitcher stitcher = Stitcher::createDefault(try_use_gpu);
Stitcher::Status status = stitcher.stitch(imgs, pano);
Stitcher是OpenCV的一个类,下面看一下这个类的源代码:
class CV_EXPORTS Stitcher
{
public:
    enum { ORIG_RESOL = -1 };
    enum Status { OK, ERR_NEED_MORE_IMGS };

    // Creates stitcher with default parameters
    static Stitcher createDefault(bool try_use_gpu = false);

    Status estimateTransform(InputArray images);
    Status estimateTransform(InputArray images, const std::vector<std::vector<Rect> > &rois);

    Status composePanorama(OutputArray pano);
    Status composePanorama(InputArray images, OutputArray pano);

    Status stitch(InputArray images, OutputArray pano);
    Status stitch(InputArray images, const std::vector<std::vector<Rect> > &rois, OutputArray pano);

    double registrationResol() const { return registr_resol_; }
    void setRegistrationResol(double resol_mpx) { registr_resol_ = resol_mpx; }

    double seamEstimationResol() const { return seam_est_resol_; }
    void setSeamEstimationResol(double resol_mpx) { seam_est_resol_ = resol_mpx; }

    double compositingResol() const { return compose_resol_; }
    void setCompositingResol(double resol_mpx) { compose_resol_ = resol_mpx; }

    double panoConfidenceThresh() const { return conf_thresh_; }
    void setPanoConfidenceThresh(double conf_thresh) { conf_thresh_ = conf_thresh; }

    bool waveCorrection() const { return do_wave_correct_; }
    void setWaveCorrection(bool flag) { do_wave_correct_ = flag; }

    detail::WaveCorrectKind waveCorrectKind() const { return wave_correct_kind_; }
    void setWaveCorrectKind(detail::WaveCorrectKind kind) { wave_correct_kind_ = kind; }

    Ptr<detail::FeaturesFinder> featuresFinder() { return features_finder_; }
    const Ptr<detail::FeaturesFinder> featuresFinder() const { return features_finder_; }
    void setFeaturesFinder(Ptr<detail::FeaturesFinder> features_finder)
        { features_finder_ = features_finder; }

    Ptr<detail::FeaturesMatcher> featuresMatcher() { return features_matcher_; }
    const Ptr<detail::FeaturesMatcher> featuresMatcher() const { return features_matcher_; }
    void setFeaturesMatcher(Ptr<detail::FeaturesMatcher> features_matcher)
        { features_matcher_ = features_matcher; }

    const cv::Mat& matchingMask() const { return matching_mask_; }
    void setMatchingMask(const cv::Mat &mask)
    {
        CV_Assert(mask.type() == CV_8U && mask.cols == mask.rows);
        matching_mask_ = mask.clone();
    }

    Ptr<detail::BundleAdjusterBase> bundleAdjuster() { return bundle_adjuster_; }
    const Ptr<detail::BundleAdjusterBase> bundleAdjuster() const { return bundle_adjuster_; }
    void setBundleAdjuster(Ptr<detail::BundleAdjusterBase> bundle_adjuster)
        { bundle_adjuster_ = bundle_adjuster; }

    Ptr<WarperCreator> warper() { return warper_; }
    const Ptr<WarperCreator> warper() const { return warper_; }
    void setWarper(Ptr<WarperCreator> warper) { warper_ = warper; }

    Ptr<detail::ExposureCompensator> exposureCompensator() { return exposure_comp_; }
    const Ptr<detail::ExposureCompensator> exposureCompensator() const { return exposure_comp_; }
    void setExposureCompensator(Ptr<detail::ExposureCompensator> exposure_comp)
        { exposure_comp_ = exposure_comp; }

    Ptr<detail::SeamFinder> seamFinder() { return seam_finder_; }
    const Ptr<detail::SeamFinder> seamFinder() const { return seam_finder_; }
    void setSeamFinder(Ptr<detail::SeamFinder> seam_finder) { seam_finder_ = seam_finder; }

    Ptr<detail::Blender> blender() { return blender_; }
    const Ptr<detail::Blender> blender() const { return blender_; }
    void setBlender(Ptr<detail::Blender> blender) { blender_ = blender; }

private:
    /* hidden */
};
可以看到Stitcher大致有这些成员函数:createDefault,estimateTransform,composePanorama,stitch等等。
Stitcher stitcher = Stitcher::createDefault(try_use_gpu);这句话表示使用默认参数创建Stitcher类的对象stitcher,try_use_gpu表示是否打开GPU,默认不打开,即try_use_gpu=false;下面是这个函数的原型:
C++: Stitcher Stitcher::createDefault(bool try_use_gpu=false)
参数:Flag indicating whether GPU should be used whenever it’s possible.
return:Stitcher class instance.(即创建了一个对象)
Stitcher::Status status = stitcher.stitch(imgs, pano);这句话表示:try to stitch the given images
C++: Status Stitcher::stitch(InputArray images, OutputArray pano)
C++: Status Stitcher::stitch(InputArray images, const std::vector<std::vector<Rect>>& rois, OutputArray pano)
参数:images – Input images.
    rois – Region of interest rectangles.(感兴趣区)
      pano – Final pano.
return:Status code.(数据成员中枚举数组的一项)
Stitcher::estimateTransform和Stitcher::composePanorama的使用为高级使用,需要清楚Stitching pipeline的过程。
下面贴出pipeline:

可以看出这个过程很复杂,需要涉及到很多的算法,比如:特征点的提取、特征点匹配、图像融合等等。这些过程OpenCV都为我们封装在Stitcher类中,不在此细述。
总结
虽然用OpenCV中的Stitcher类实现了基本的拼接,但是有一个最大的问题是,运行的效率是极低的,就这个代码中,拼接3张图片差不多用了一分钟,这在需要做实时拼接的时候是根本不可能使用的,所以后面需要做的工作任然是弄清楚Stitching pipeline的详细过程,进一步优化代码,提高拼接运行效率。
下面贴出参考资料:
http://docs.opencv.org/2.4.2/modules/stitching/doc/high_level.html
下面贴出源代码和OpenCV中的stiching.cpp和stitching_detailed.cpp的下载地址:

 浙公网安备 33010602011771号