
Unreal入门,通过蓝图自定义Pawn视角跟随鼠标
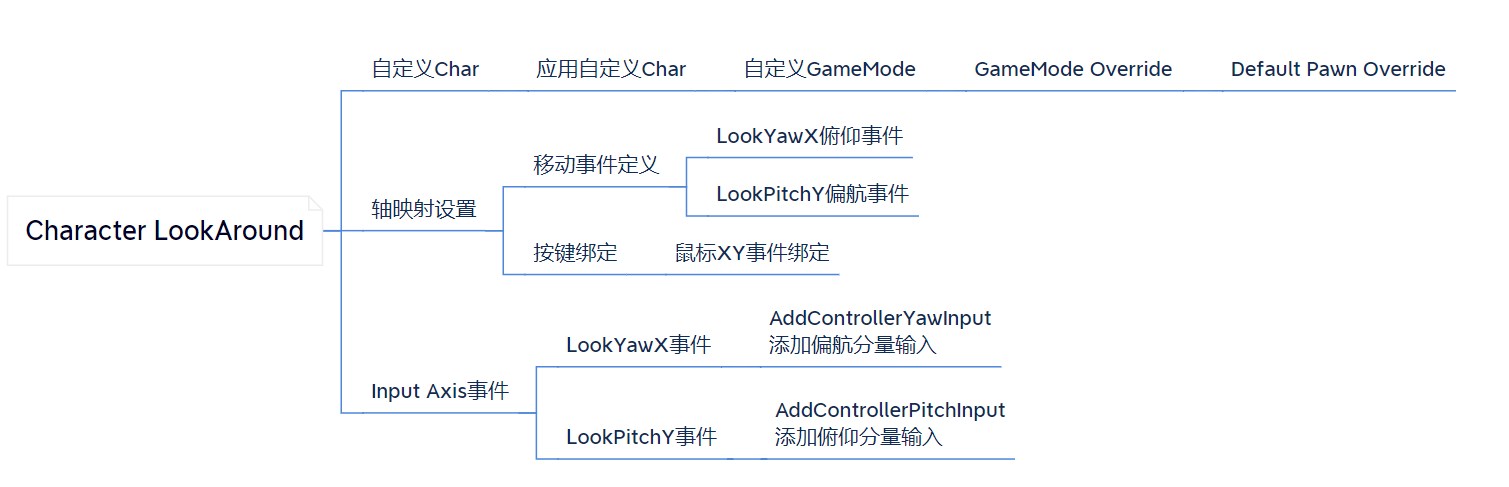
1. 最简单的实现是利用Character的CharacterMovementComponent组件来实现,只用添加输入即可
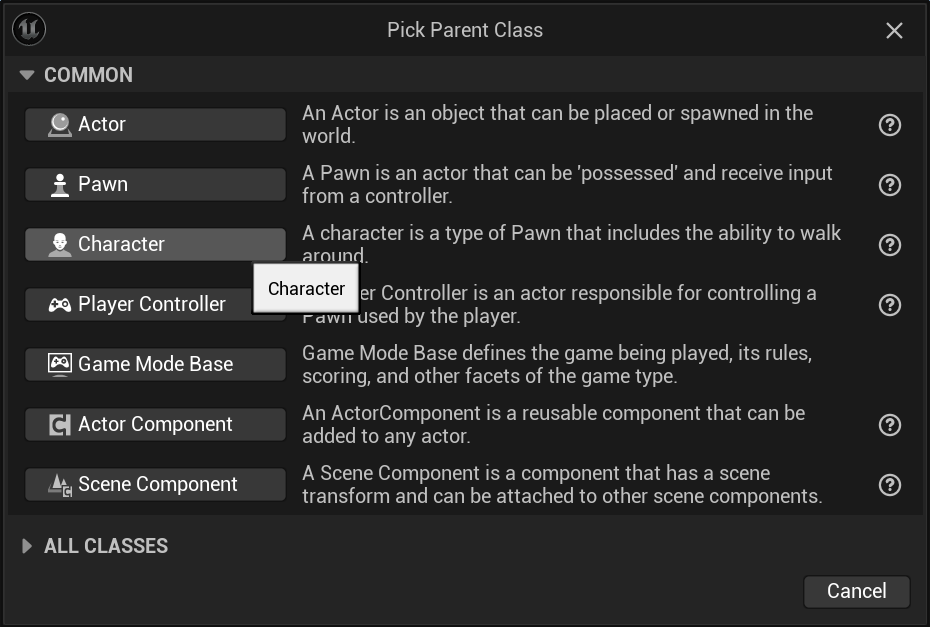
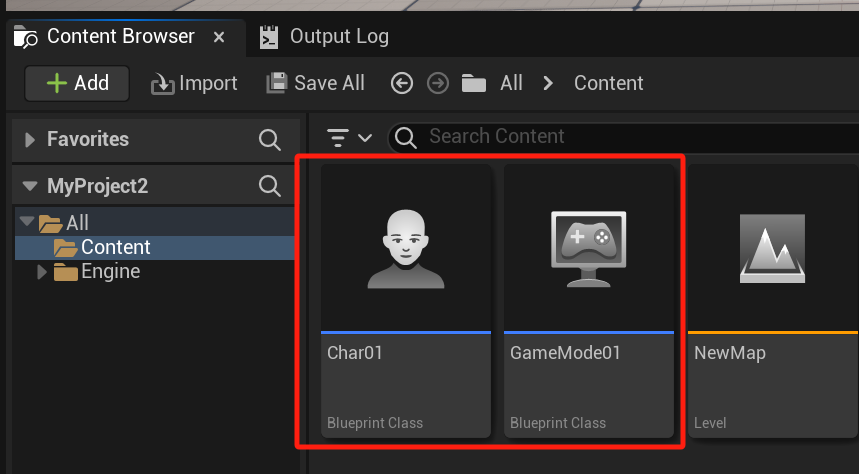
1.1 新建基于Character的Pawn
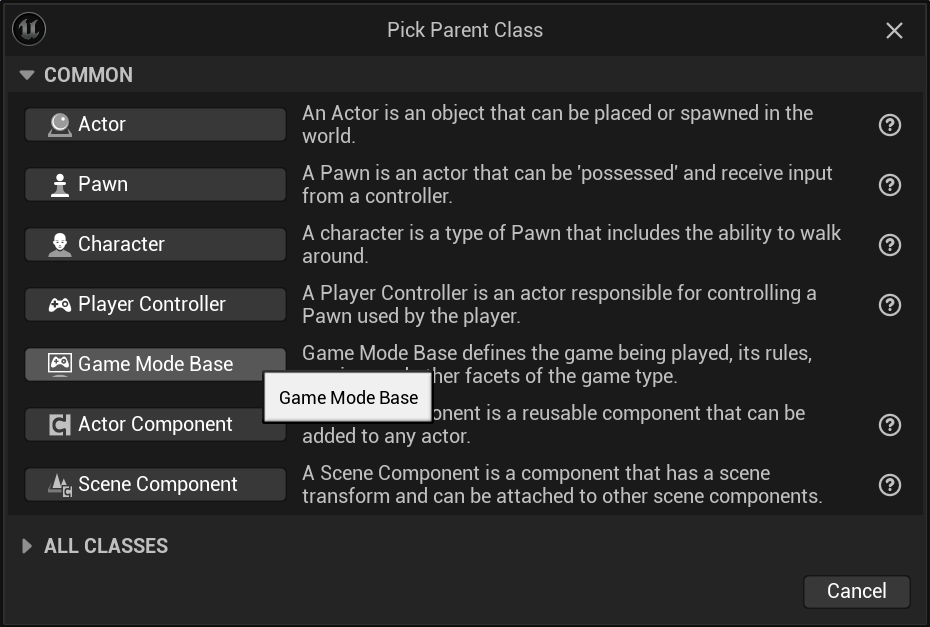
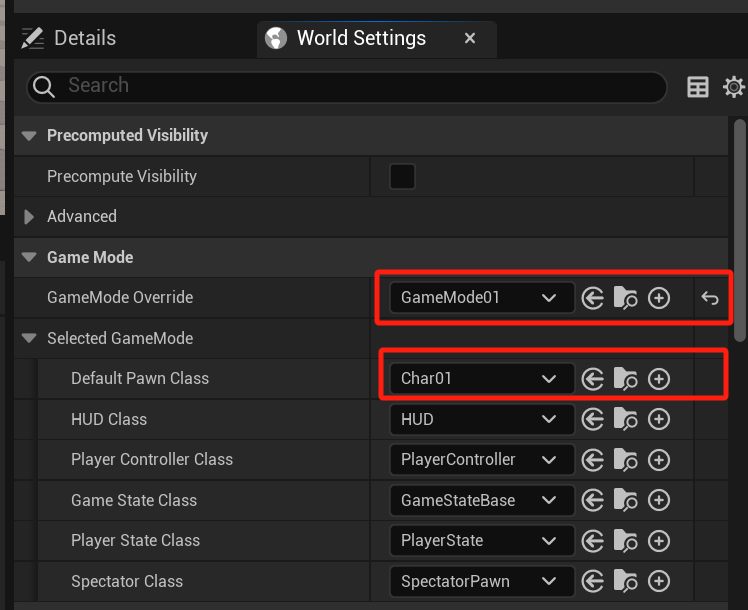
1.2 新建GameMode
1.3 设置默认Pawn
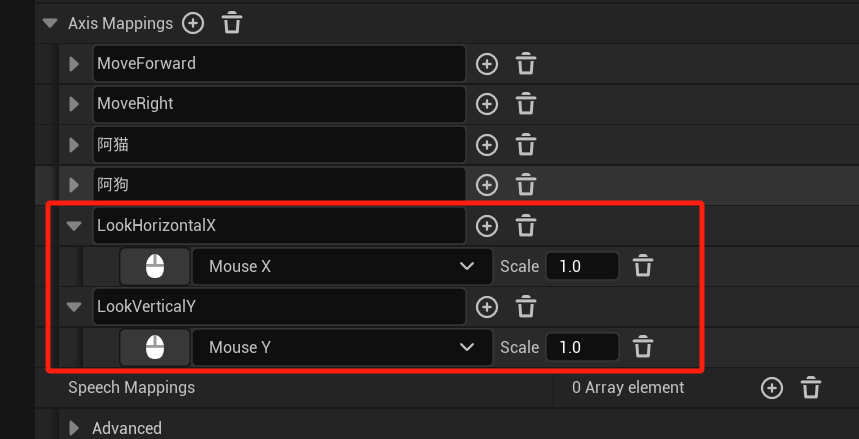
1.4 添加对应鼠标XY的轴映射LookHorizontalX和LookVerticalY,名字随便取,自己开心就好,注意这里不需要定义负值
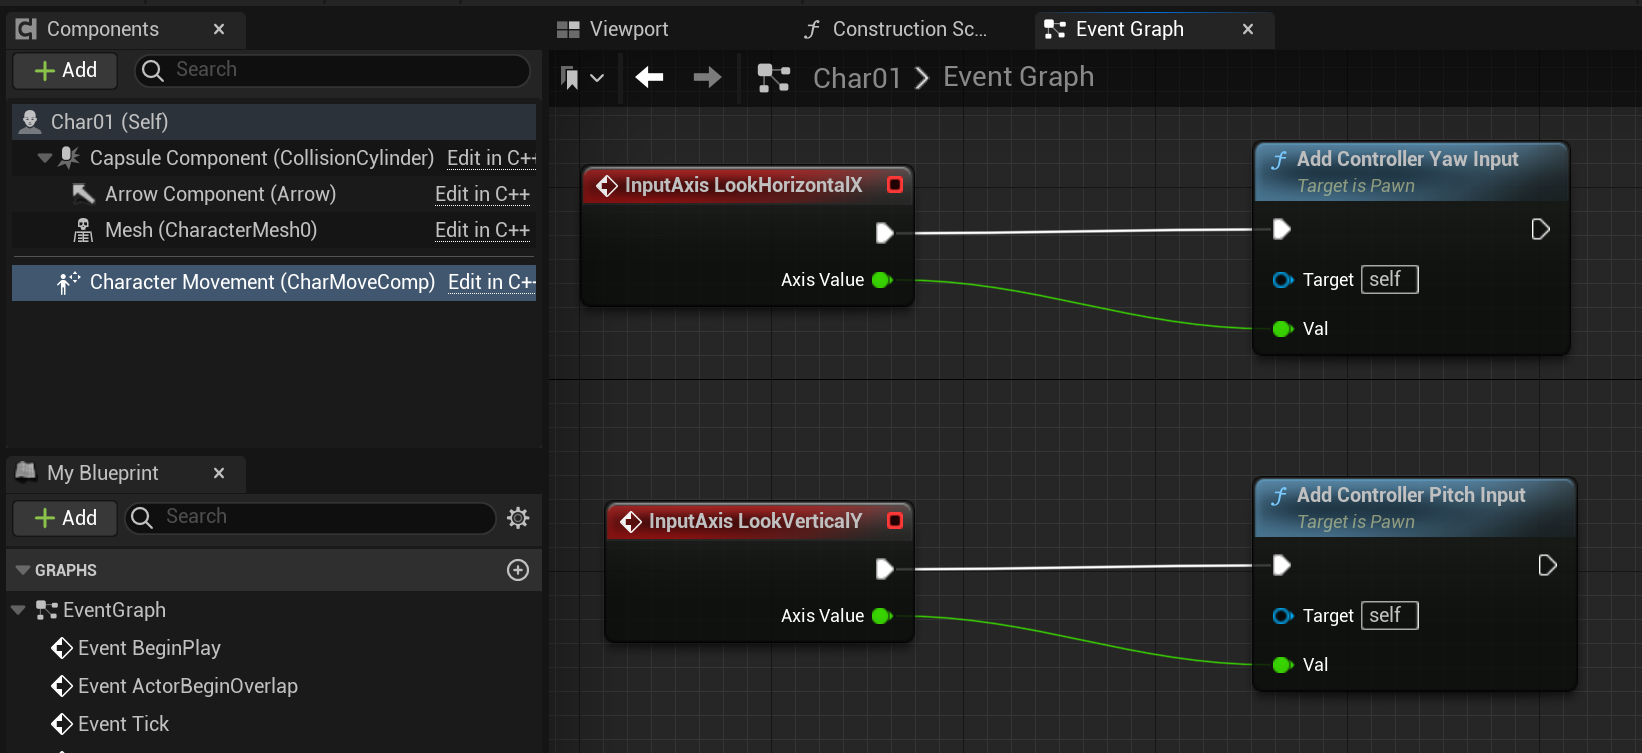
1.5 添加轴映射事件,并分别连线到AddControllerYawInput和AddControllerPitchInput
1.6 测试

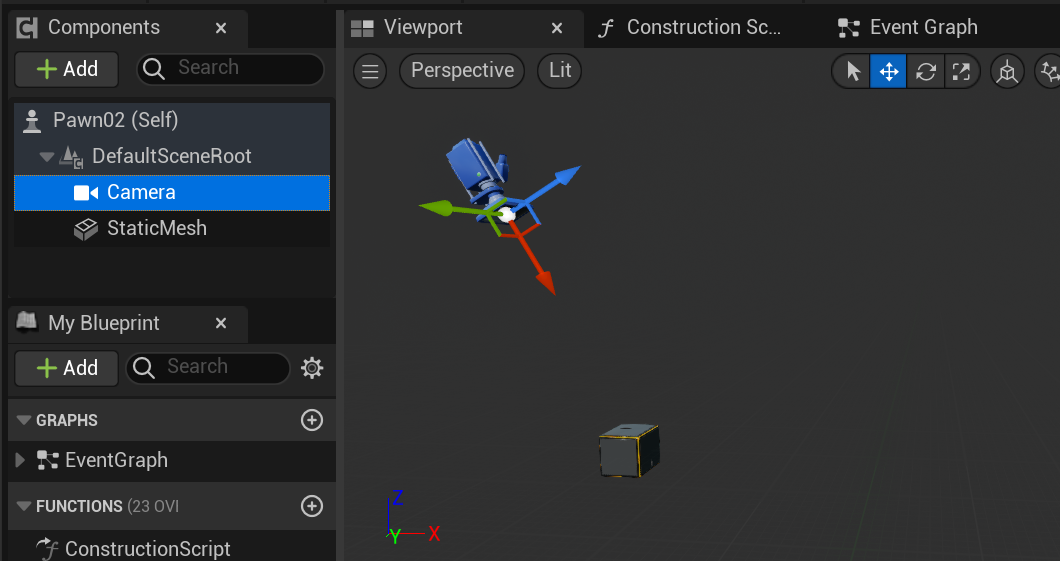
2. 自定义Pawn视角跟随鼠标,需要自定义相机和旋转事件处理

2.1 定义并设置默认Pawn
2.2 定义并设置鼠标轴映射绑定,同上
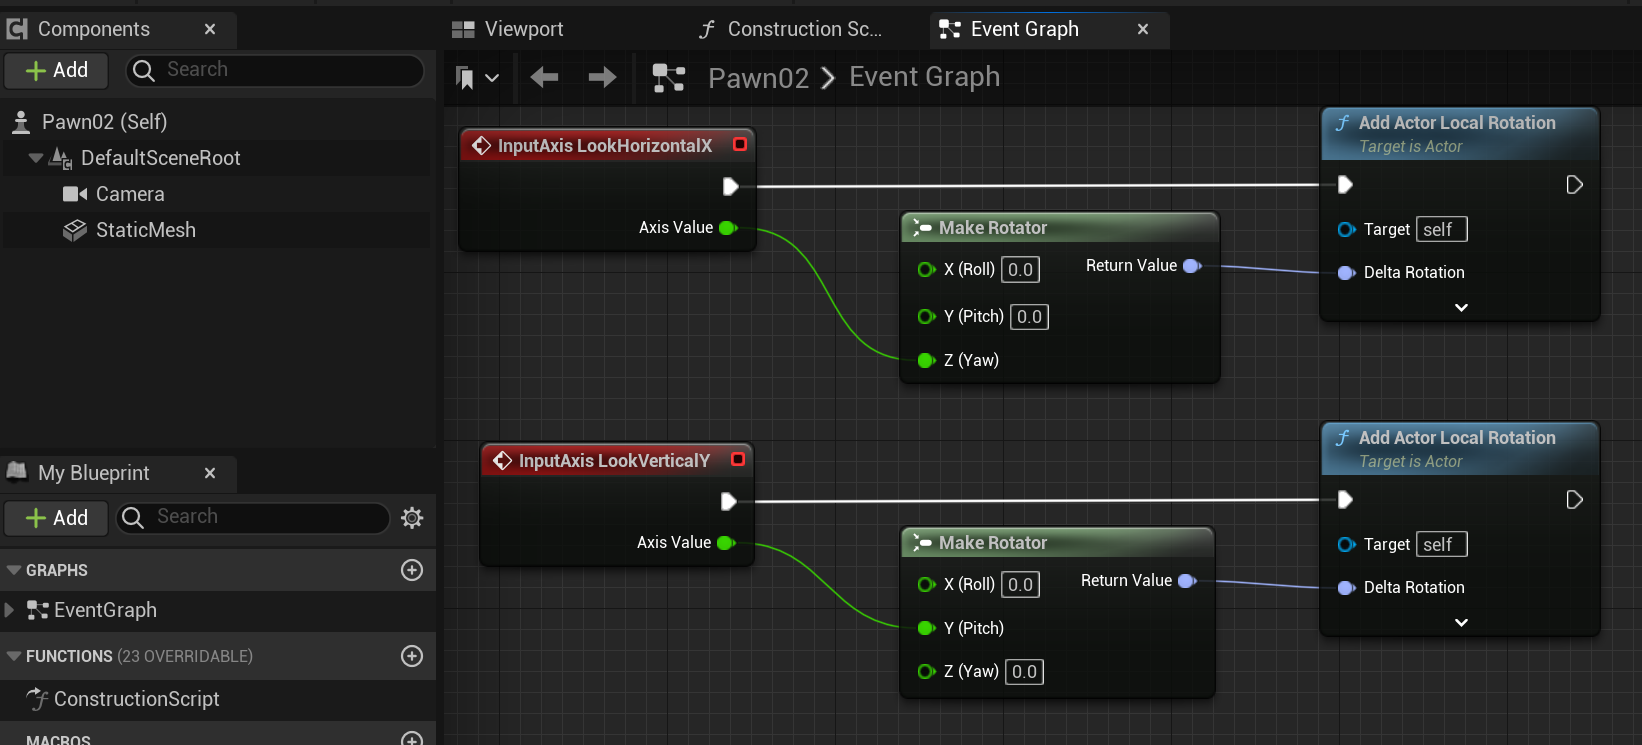
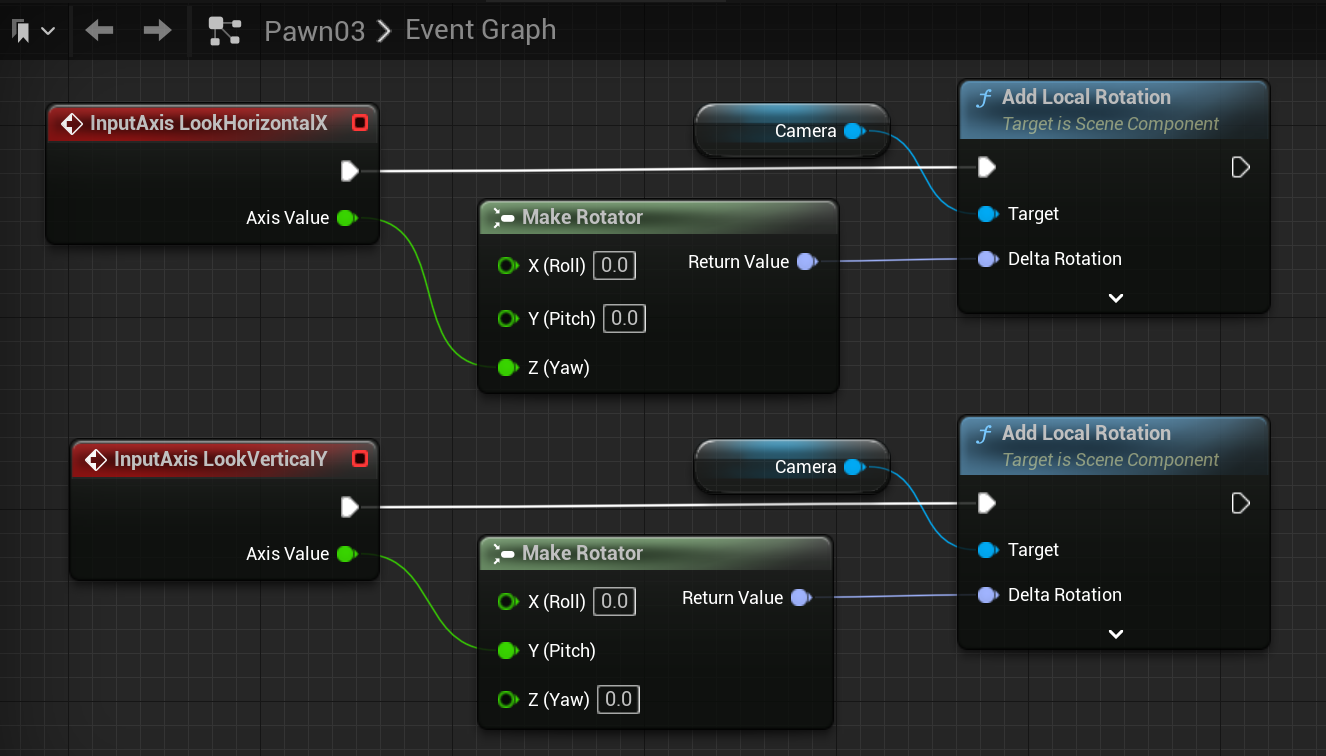
2.3 应用旋转分量实现跟随鼠标视角
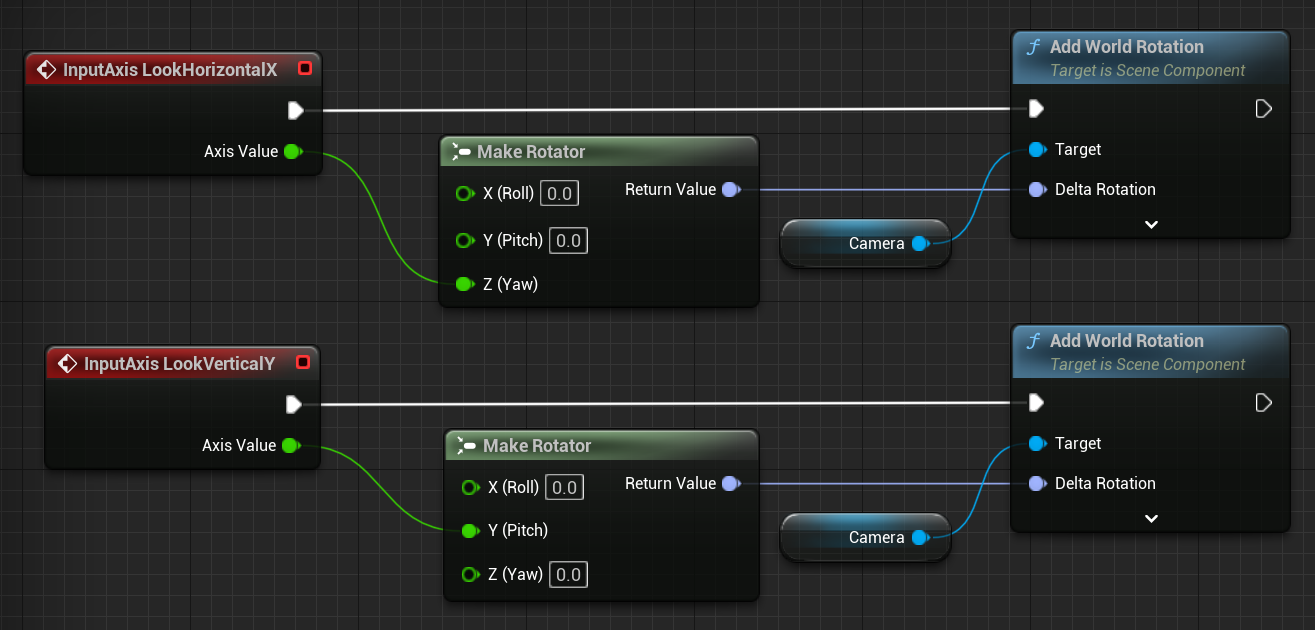
2.4 也可以只旋转相机
2.4 也可以用AddActorLocalRotation来旋转相机
参考
https://docs.unrealengine.com/4.26/en-US/BlueprintAPI/Pawn/Input/AddControllerPitchInput/
https://docs.unrealengine.com/4.26/en-US/BlueprintAPI/Pawn/Input/AddControllerYawInput/
https://docs.unrealengine.com/4.26/en-US/BlueprintAPI/Utilities/Transformation/AddActorLocalRotation/
https://docs.unrealengine.com/5.0/zh-CN/quick-start-guide-to-player-controlled-cameras-in-unreal-engine-cpp/

 浙公网安备 33010602011771号