
scrapy中selenium的应用 + ai识别文章类型,文章关键词应用
引入
- 在通过scrapy框架进行某些网站数据爬取的时候,往往会碰到页面动态数据加载的情况发生,如果直接使用scrapy对其url发请求,是绝对获取不到那部分动态加载出来的数据值。但是通过观察我们会发现,通过浏览器进行url请求发送则会加载出对应的动态加载出的数据。那么如果我们想要在scrapy也获取动态加载出的数据,则必须使用selenium创建浏览器对象,然后通过该浏览器对象进行请求发送,获取动态加载的数据值。
今日详情
1.案例分析:
- 需求:爬取网易新闻的国内、国际、军事、航空板块下的新闻数据
- 需求分析:当点击国内超链进入国内对应的页面时,会发现当前页面展示的新闻数据是被动态加载出来的,如果直接通过程序对url进行请求,是获取不到动态加载出的新闻数据的。则就需要我们使用selenium实例化一个浏览器对象,在该对象中进行url的请求,获取动态加载的新闻数据。

当引擎将国内板块url对应的请求提交给下载器后,下载器进行网页数据的下载,然后将下载到的页面数据,封装到response中,提交给引擎,引擎将response在转交给Spiders。Spiders接受到的response对象中存储的页面数据里是没有动态加载的新闻数据的。要想获取动态加载的新闻数据,则需要在下载中间件中对下载器提交给引擎的response响应对象进行拦截,切对其内部存储的页面数据进行篡改,修改成携带了动态加载出的新闻数据,然后将被篡改的response对象最终交给Spiders进行解析操作。
3.selenium在scrapy中的使用流程:
- 重写爬虫文件的构造方法,在该方法中使用selenium实例化一个浏览器对象(因为浏览器对象只需要被实例化一次)
- 重写爬虫文件的closed(self,spider)方法,在其内部关闭浏览器对象。该方法是在爬虫结束时被调用
- 重写下载中间件的process_response方法,让该方法对响应对象进行拦截,并篡改response中存储的页面数据
- 在配置文件中开启下载中间件
代码实现:
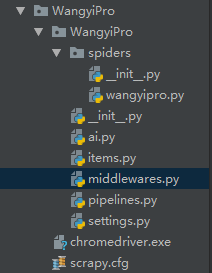
爬虫文件中


# -*- coding: utf-8 -*-
import scrapy
from ..items import WangyiproItem
from selenium import webdriver
from selenium.webdriver import ChromeOptions
class WangyiproSpider(scrapy.Spider):
    option = ChromeOptions()
    option.add_experimental_option('excludeSwitches', ['enable-automation'])
    bro = webdriver.Chrome(executable_path=r'E:\学习相关\python全栈17期课程及笔记\爬虫相关\Scrapy\WangyiPro\chromedriver.exe',
                           options=option)
    name = 'wangyipro'
    # allowed_domains = ['www.i.com']
    start_urls = ['https://news.163.com/']
    head_url_lst = []
    def content_parse(self,response):
        item = response.meta["item"]
        content_list = response.xpath('//div[@id="endText"]//text()').extract()
        item['content'] = ''.join(content_list)
        yield item

    def parse_detail(self,response):
        div_list = response.xpath('//div[@class="ndi_main"]/div')
        for div in div_list:
            item = WangyiproItem()
            title = div.xpath('./div/div[1]/h3/a/text()').extract_first()
            detail_url = div.xpath('./div/div[1]/h3/a/@href').extract_first()
            item["title"]= title
            yield scrapy.Request(url=detail_url, callback=self.content_parse, meta={'item': item})

    def parse(self, response):
        li_list = response.xpath('//div[@class="ns_area list"]/ul/li')
        li_index = [3, 4, 6, 7]
        for index in li_index:
            li = li_list[index]
            head_url = li.xpath("./a/@href").extract_first()
            self.head_url_lst.append(head_url)
            yield scrapy.Request(url=head_url, callback=self.parse_detail)

    ##关闭selenium
    def closed(self,spider):
        self.bro.quit()
items.py中
# -*- coding: utf-8 -*-

# Define here the models for your scraped items
#
# See documentation in:
# https://doc.scrapy.org/en/latest/topics/items.html

import scrapy


class WangyiproItem(scrapy.Item):
    # define the fields for your item here like:
    # name = scrapy.Field()
    title = scrapy.Field()
    content = scrapy.Field()
middlewares.py中
# -*- coding: utf-8 -*-

# Define here the models for your spider middleware
#
# See documentation in:
# https://doc.scrapy.org/en/latest/topics/spider-middleware.html

from scrapy import signals
from scrapy.http import HtmlResponse
import time

class WangyiproDownloaderMiddleware(object):
    def process_response(self, request, response, spider):
        #指定修改的URL
        head_url_lst = spider.head_url_lst
        bro = spider.bro
        if request.url in head_url_lst:
            bro.get(request.url)
            time.sleep(2)
            js = "window.scrollTo(0,document.body.scrollHeight)"
            ##滚轮下移一次
            bro.execute_script(js)
            time.sleep(2)
            page_text = bro.page_source
            #返回新的响应对象,将原始的响应对象进行替换,根据指定的请求返回响应数据
            return HtmlResponse(url=bro.current_url,body=page_text,encoding="utf-8",request=request)
        return response
pipelines.py中
# -*- coding: utf-8 -*-

# Define your item pipelines here
#
# Don't forget to add your pipeline to the ITEM_PIPELINES setting
# See: https://doc.scrapy.org/en/latest/topics/item-pipeline.html
import pymysql
from aip import AipNlp
class WangyiproPipeline(object):
    conn = None
    cursor = None
    """ 你的 APPID AK SK """
    APP_ID = '16204893'
    API_KEY = 'nRc0OOUxDB35NA5L9ElBGsYM'
    SECRET_KEY = 'FDPslNtmzEGeB5fI0RfKVthd0gGDlCmG'
    client = AipNlp(APP_ID, API_KEY, SECRET_KEY)
    ##调用人工智能ai生成关键词
    def keyword(self,title, content):
        keyword = self.client.keyword(title, content)
        tag_list = []
        for k in keyword["items"]:
            tag_list.append(k["tag"])
        return tag_list

    ##调用人工智能ai生成文章类型
    def topic(self,title, content):
        topic = self.client.topic(title, content)
        score_list = []
        for k in topic["item"]:
            for i in topic["item"][k]:
                score_list.append(i["score"])
        score_list.sort()
        height_score = score_list[-1]
        for k in topic["item"]:
            for i in topic["item"][k]:
                if i["score"] == height_score:
                    tag = i["tag"]
                    return tag

    def open_spider(self,spider):
        self.conn = pymysql.Connect(host="127.0.0.1",port=3306,user="root",password ="",db ="wangyi")
        print(self.conn)

    def process_item(self, item, spider):
        self.cursor = self.conn.cursor()
        title = item['title']
        content = item['content']
        word = self.keyword(title,content)
        top = self.topic(title,content)
        try:
            self.cursor.execute('insert into wangyi values ("%s","%s","%s","%s")'%(title, content,word,top))
            self.conn.commit()
        except Exception as e:
            print(e)
            self.conn.rollback()
        return item

    def close_spider(self,spider):
        self.cursor.close()
        self.conn.close()
setting.py中 以下都需要解注释
DOWNLOADER_MIDDLEWARES = {
   'WangyiPro.middlewares.WangyiproDownloaderMiddleware': 543,
}


ITEM_PIPELINES = {
   'WangyiPro.pipelines.WangyiproPipeline': 300,
}
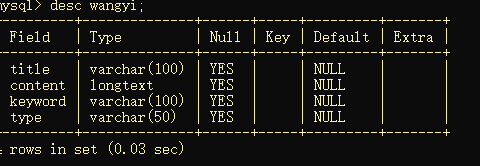
数据库的存储:数据结构:

 浙公网安备 33010602011771号