

IDEA搭建SpringMVC简单接口框架(Maven项目)
源码路径:https://github.com/winn-hu/interface
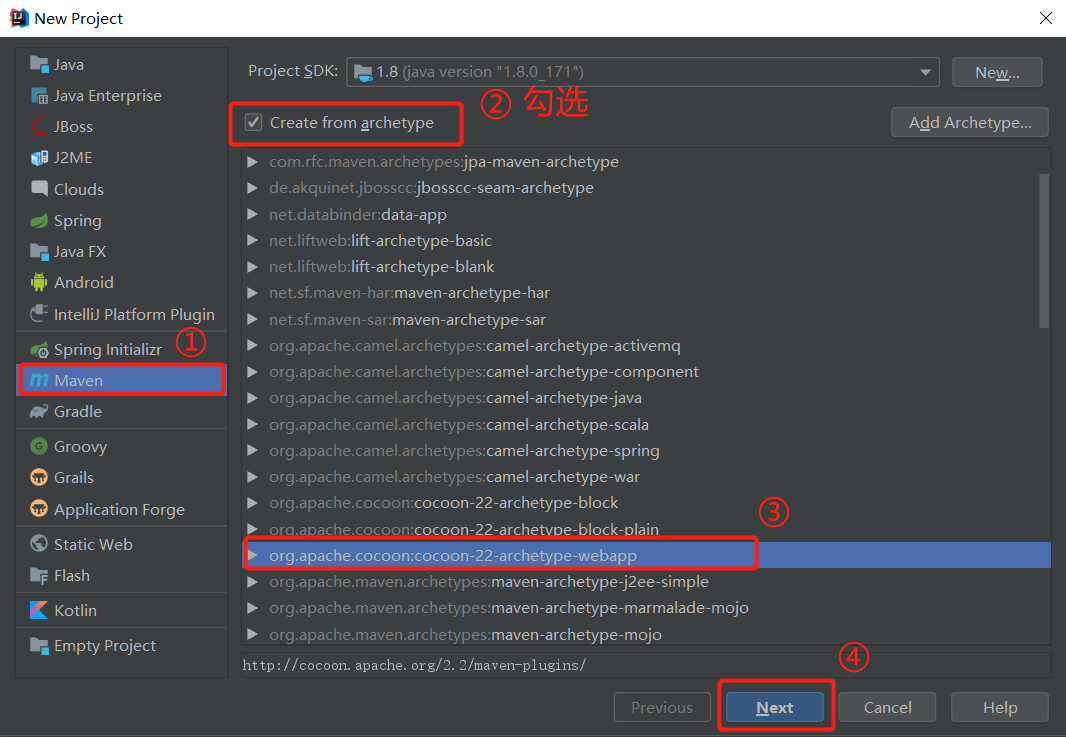
1, 新建项目,选择Maven,如图一次选择,最后点击Next
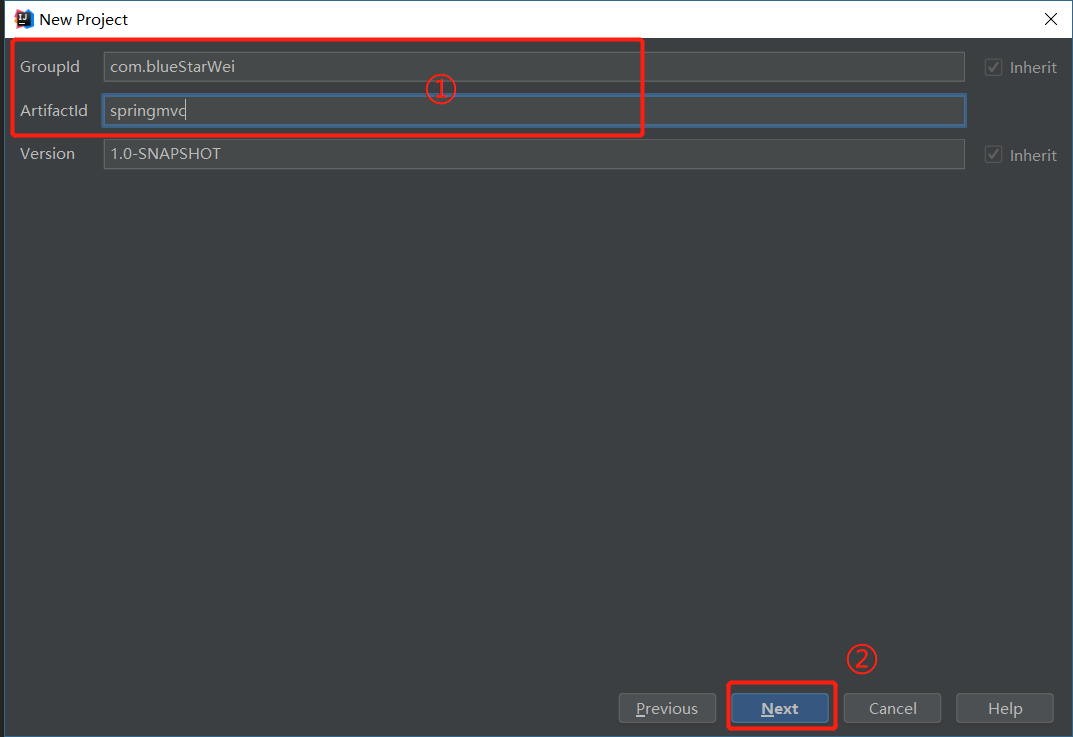
2, 输入GroupId和ArtifactId,点击Next
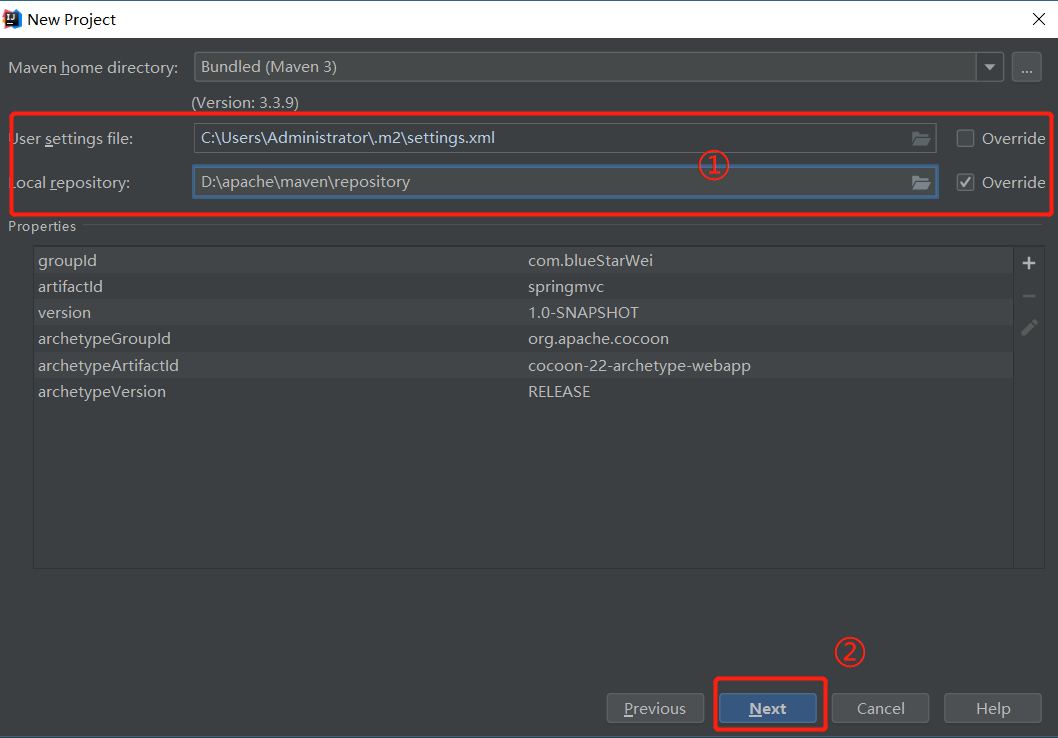
3,根据需要选择自定义maven配置,点击Next。(①可以直接跳过)
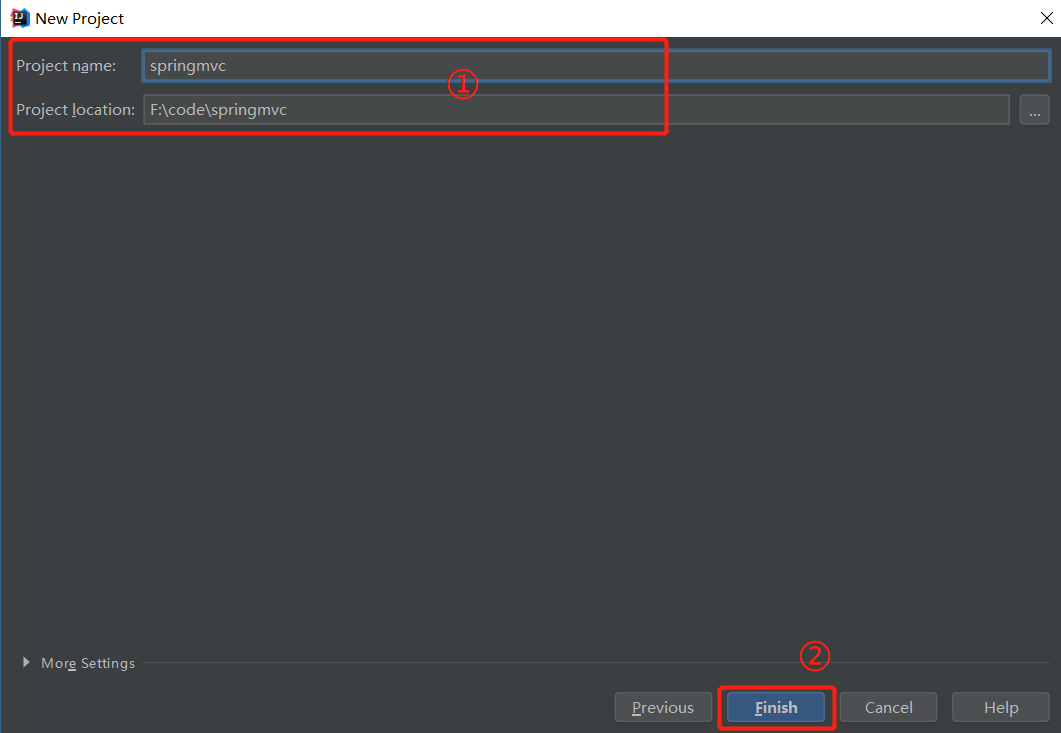
4,根据需要修改项目名称(一般不用修改),点击Finish。(①可以直接跳过)
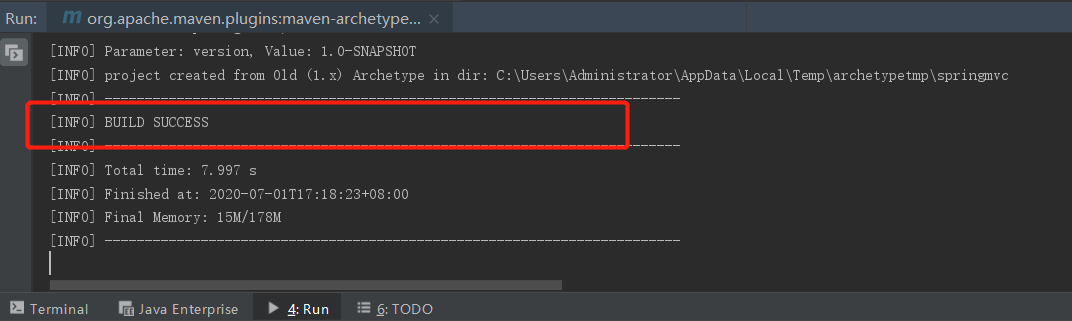
5,当控制台输出BUILD SUCCESS后,项目创建成功。
6,修改pom.xml,添加依赖包
1 2 3 4 5 6 7 | <dependencies> <dependency> <groupId>org.springframework</groupId> <artifactId>spring-webmvc</artifactId> <version>4.3.5.RELEASE</version> </dependency></dependencies> |
7,创建index.jsp【用于启动项目项目时,默认展示页面】

8,创建接口类(Controller)
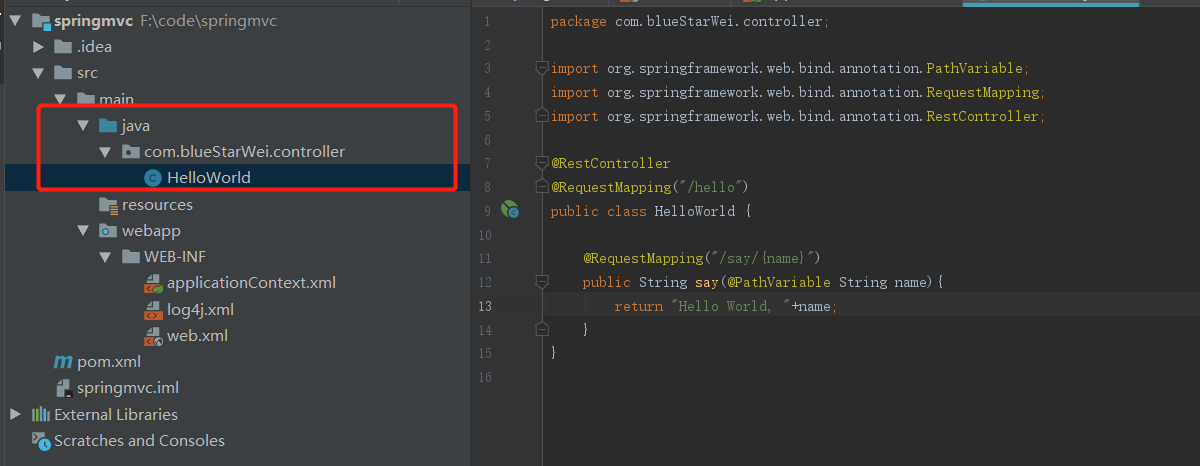
1 2 3 4 5 6 7 8 9 10 11 12 13 14 15 16 17 18 | package com.blueStarWei.controller;import org.springframework.web.bind.annotation.PathVariable;import org.springframework.web.bind.annotation.RequestMapping;import org.springframework.web.bind.annotation.RestController;@RestController@RequestMapping("/hello")public class HelloWorld { @RequestMapping("/say/{name}") public String say(@PathVariable String name){ return "Hello World, "+name; }} |
9,配置applicationContext.xml
1 2 3 4 5 6 7 8 9 10 11 12 13 14 15 16 17 18 19 | <?xml version="1.0" encoding="UTF-8"?><beans xmlns="http://www.springframework.org/schema/beans" xmlns:xsi="http://www.w3.org/2001/XMLSchema-instance" xmlns:context="http://www.springframework.org/schema/context" xsi:schemaLocation="http://www.springframework.org/schema/beans http://www.springframework.org/schema/beans/spring-beans-2.0.xsd http://www.springframework.org/schema/context http://www.springframework.org/schema/context/spring-context.xsd"> <context:component-scan base-package="com.blueStarWei.*" /> <bean id="viewResolver" class="org.springframework.web.servlet.view.InternalResourceViewResolver"> <property name="prefix" value="/WEB-INF/jsp/" /> <property name="suffix" value=".jsp"/> </bean></beans> |
10,配置web.xml
1 2 3 4 5 6 7 8 9 10 11 12 13 14 15 16 17 18 19 20 21 | <?xml version="1.0" encoding="UTF-8"?><web-app version="2.4" xmlns="http://java.sun.com/xml/ns/j2ee" xmlns:xsi="http://www.w3.org/2001/XMLSchema-instance" xsi:schemaLocation="http://java.sun.com/xml/ns/j2ee http://java.sun.com/xml/ns/j2ee/web-app_2_4.xsd"> <!-- DispatcherServlet默认使用WebApplicationContext作为上下文, Spring默认配置文件为“/WEB-INF/[servlet名字]-servlet.xml” --> <servlet> <servlet-name>springmvc</servlet-name> <servlet-class>org.springframework.web.servlet.DispatcherServlet</servlet-class> <load-on-startup>1</load-on-startup> </servlet> <servlet-mapping> <servlet-name>springmvc</servlet-name> <url-pattern>/</url-pattern> </servlet-mapping></web-app> |
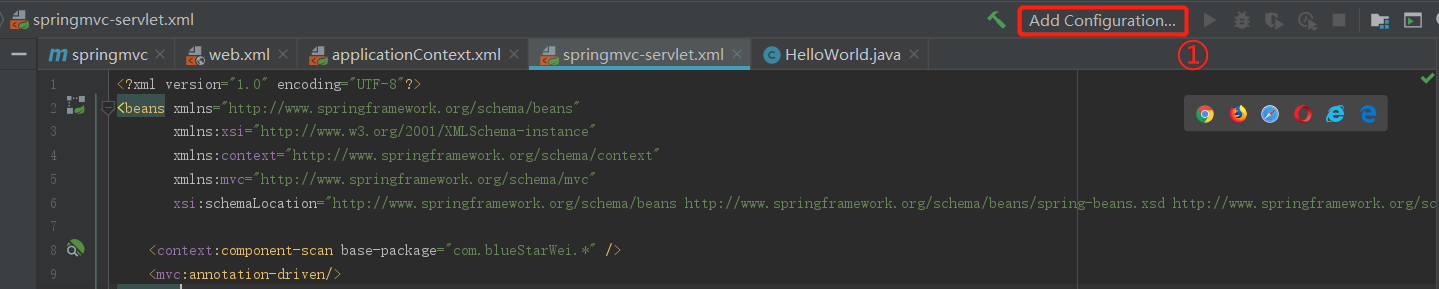
11,创建springmvc-servlet.xml
1 2 3 4 5 6 7 8 9 10 11 | <?xml version="1.0" encoding="UTF-8"?><beans xmlns="http://www.springframework.org/schema/beans" xmlns:xsi="http://www.w3.org/2001/XMLSchema-instance" xmlns:context="http://www.springframework.org/schema/context" xmlns:mvc="http://www.springframework.org/schema/mvc" xsi:schemaLocation="http://www.springframework.org/schema/beans http://www.springframework.org/schema/beans/spring-beans.xsd http://www.springframework.org/schema/context http://www.springframework.org/schema/context/spring-context.xsd http://www.springframework.org/schema/mvc http://www.springframework.org/schema/mvc/spring-mvc.xsd"> <context:component-scan base-package="com.blueStarWei.*" /> <mvc:annotation-driven/></beans> |
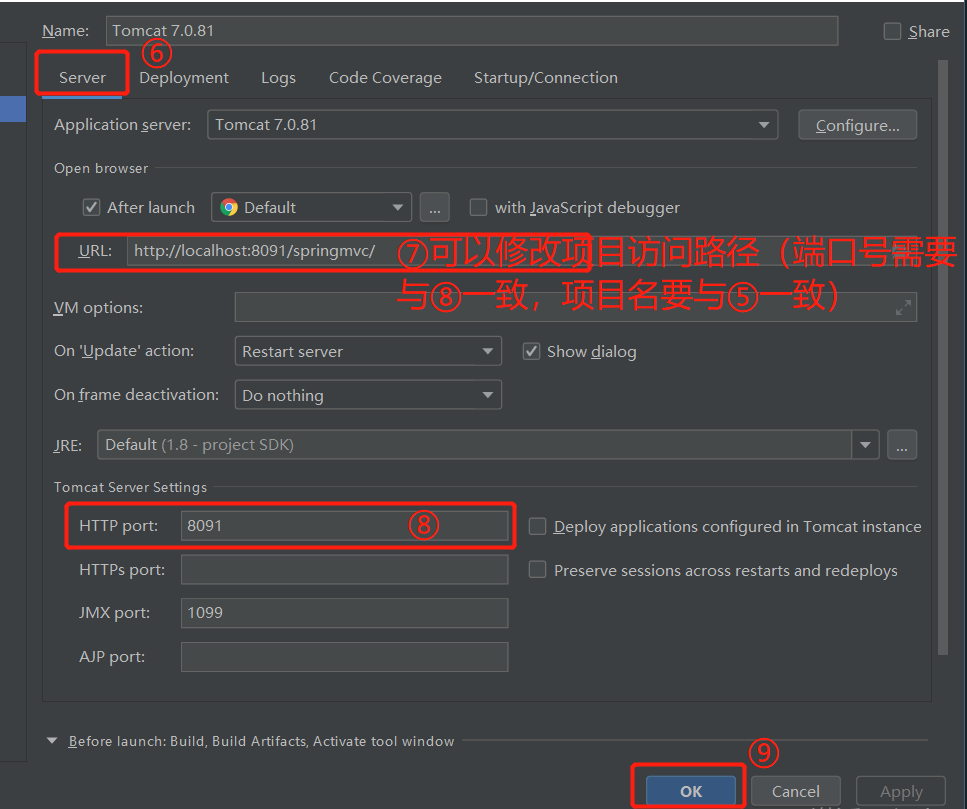
12, 配置tomcat.(⑦和⑧可以跳过)


13,项目配置完成,可以启动服务器,(使用浏览器活postman等)进行访问。
更多内容,请访问:http://www.cnblogs.com/BlueStarWei


【推荐】国内首个AI IDE,深度理解中文开发场景,立即下载体验Trae
【推荐】编程新体验,更懂你的AI,立即体验豆包MarsCode编程助手
【推荐】抖音旗下AI助手豆包,你的智能百科全书,全免费不限次数
【推荐】轻量又高性能的 SSH 工具 IShell:AI 加持,快人一步
· 开发者必知的日志记录最佳实践
· SQL Server 2025 AI相关能力初探
· Linux系列:如何用 C#调用 C方法造成内存泄露
· AI与.NET技术实操系列(二):开始使用ML.NET
· 记一次.NET内存居高不下排查解决与启示
· Manus重磅发布:全球首款通用AI代理技术深度解析与实战指南
· 被坑几百块钱后,我竟然真的恢复了删除的微信聊天记录!
· 没有Manus邀请码?试试免邀请码的MGX或者开源的OpenManus吧
· 园子的第一款AI主题卫衣上架——"HELLO! HOW CAN I ASSIST YOU TODAY
· 【自荐】一款简洁、开源的在线白板工具 Drawnix