数据库连接池与SQL工具类
数据库连接池与SQL工具类
1.数据库连接池
-
依赖包
- pymysql
- dbutils
-
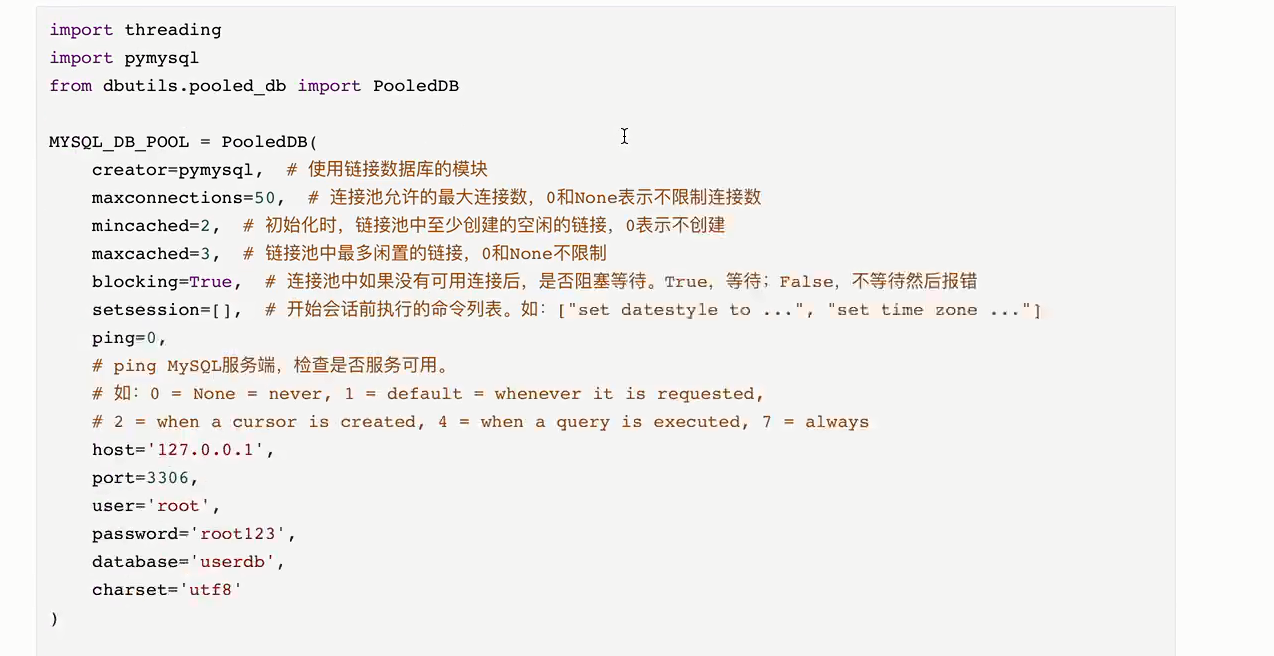
# -*- coding: utf-8 -*- ''' @Time : 2021/11/19 16:45 @Author : ziqingbaojian @File : MySql.py ''' # 依赖第三发包:pymysql,dbutils import pymysql from dbutils.pooled_db import PooledDB MYSQL_DB_POOL=PooledDB( creator=pymysql, maxconnections=50, mincached=2, maxcached=3, blocking=True, setsession=[], ping=0, host='127.0.0.1', port=3306, user='root', password='1234567', database='testlearn', charset='utf8' ) -
源码解释
-
-
使用连接池

-
使用多线程进行测试
# 使用连接池
def task():
    # 连接池获取连接
    conn=MYSQL_DB_POOL.connection()
    cursor=conn.cursor()
    cursor.execute("select * from student where sname='逻辑'")
    result=cursor.fetchall()
    print(result)
    conn.close()#将连接还给连接池
# task()

'''使用多线程进行测试'''
def run():
    for i in range(10):
        t=threading.Thread(target=task)
        t.start()

if __name__ == '__main__':
    # 开启10个线程进行测试
    run()
2.SQL工具类
2.1 单利模式的方式实现
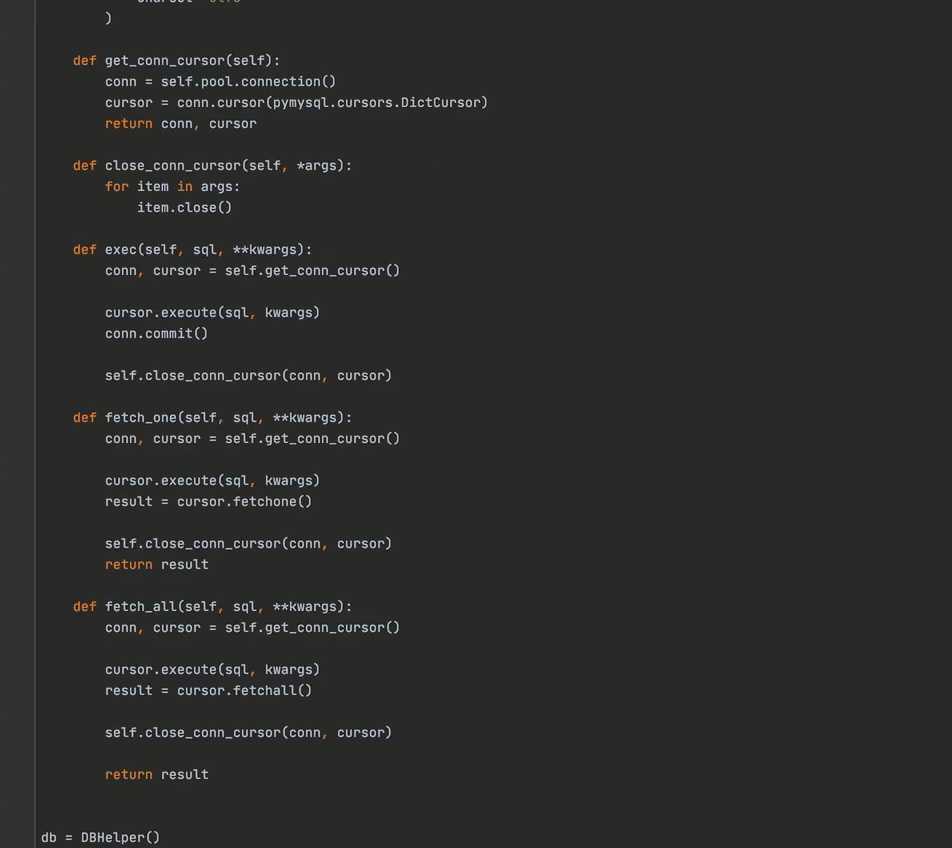
- 注意:本单利模式并未封装异常处理的功能,各位可以根据情况在封装中添加,也可以在使用时直接将对象进行异常的检测处理;
-
# -*- coding: utf-8 -*- ''' @Time : 2021/11/19 17:11 @Author : ziqingbaojian @File : db.py ''' import pymysql from dbutils.pooled_db import PooledDB class DBHelper(object): def __init__(self): self.pool=PooledDB( creator=pymysql, maxconnections=50, mincached=2, maxcached=3, blocking=True, setsession=[], ping=0, host='127.0.0.1', port=3306, user='root', password='1234567', database='testlearn', charset='utf8' ) def get_conn_cursor(self): conn=self.pool.connection() cursor=conn.cursor(pymysql.cursors.DictCursor) return conn,cursor def get_conn_cursor_nodict(self): conn=self.pool.connection()#向连接池中请求连接 cursor=conn.cursor()#不写入字典的 参数 return conn,cursor def close_conn_cursor(self,*args): for item in args: item.close() # 由于插入,删除,修改的语句一样因此,不在分开编写,增加简洁程度; def exec(self,sql,**kwargs): # 获取连接与游标 conn,cursor=self.get_conn_cursor() cursor.execute(sql,kwargs) conn.commit()# 提交事务,只有增删改才需要提交事务,可能与对应的排它锁有关系 self.close_conn_cursor(conn,cursor) def fetch_one(self,sql,**kwargs): conn,cursor=self.get_conn_cursor() cursor.execute(sql,kwargs) result =cursor.fetchone() self.close_conn_cursor() return result def fetch_all(self,sql,**kwargs): conn,cursor=self.get_conn_cursor() cursor.execute(sql,kwargs) reusult=cursor.fetchall() return reusult def fetch_one_nodict(self,sql,**kwargs): conn,cursor=self.get_conn_cursor_nodict() cursor.execute(sql, kwargs) result = cursor.fetchone() self.close_conn_cursor() return result def fetch_all_nodict(self,sql,**kwargs): conn,cursor=self.get_conn_cursor() cursor.execute(sql, kwargs) reusult = cursor.fetchall() return reusult db=DBHelper() -
补充:什么是单利模式
- 单例模式(Singleton Pattern)是一种常用的软件设计模式,该模式的主要目的是确保某一个类只有一个实例存在。当你希望在整个系统中,某个类只能出现一个实例时,单例对象就能派上用场。
-
实现单利模式的方式
- Python 的模块就是天然的单例模式,因为模块在第一次导入时,会生成
.pyc文件,当第二次导入时,就会直接加载.pyc文件,而不会再次执行模块代码。因此,我们只需把相关的函数和数据定义在一个模块中,就可以获得一个单例对象了。如果我们真的想要一个单例类,可以像上述类一样,使用时直接导入文件中的对象,这个对象就是单利模式的对象
- Python 的模块就是天然的单例模式,因为模块在第一次导入时,会生成
-
使用
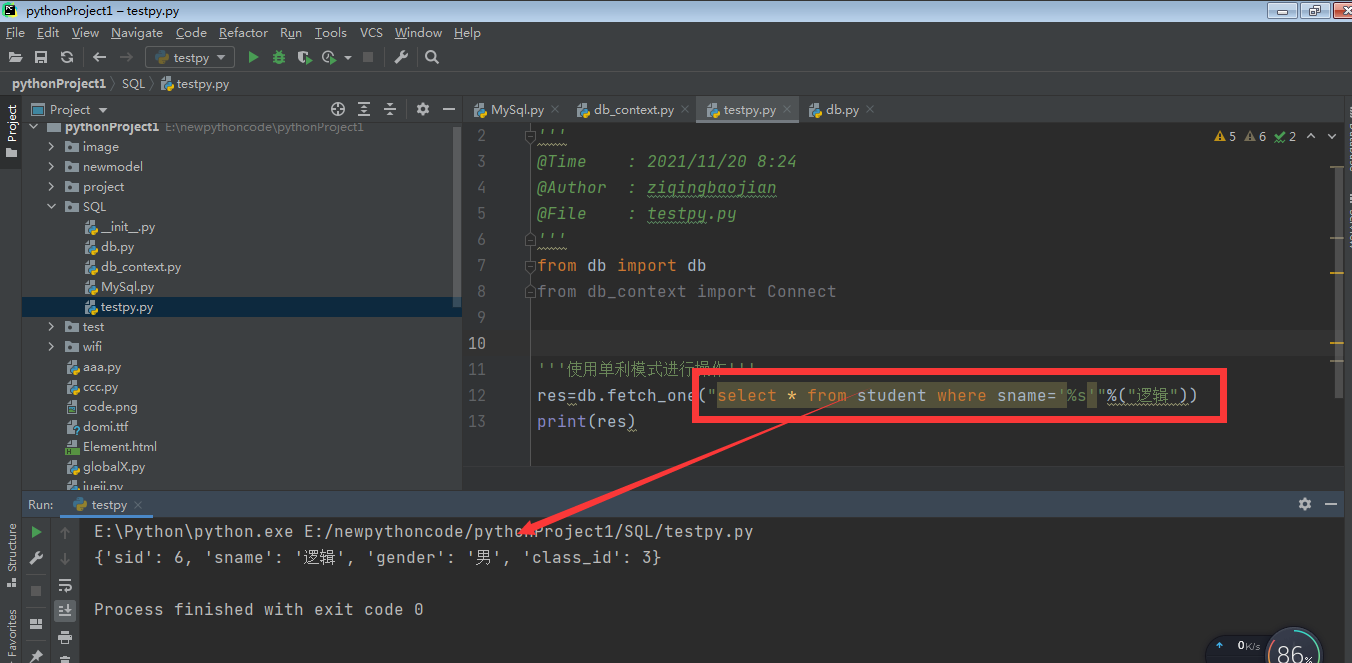
# -*- coding: utf-8 -*- ''' @Time : 2021/11/20 8:24 @Author : ziqingbaojian @File : testpy.py ''' from db import db '''使用单利模式进行操作''' res=db.fetch_one("select * from student where sname=%(name)s",name="逻辑") print(res) '''''' # 补充字符串格式化 v1="啊哈哈哈哈%(name)s"%{"name":"zqbj"} -
单利模式使用效果
-
补充:Python其他实现单利模式的方法
-
参考文献:
https://blog.csdn.net/weixin_44239343/article/details/89376796 -
1.使用装饰器
def Singleton(cls): _instance = {} def _singleton(*args, **kargs): if cls not in _instance: _instance[cls] = cls(*args, **kargs) return _instance[cls] return _singleton @Singleton class A(object): a = 1 def __init__(self, x=0): self.x = x a1 = A(2) a2 = A(3) -
基于__new__方法实现(推荐使用,方便)
当我们实例化一个对象时,是先执行了类的__new__方法(我们没写时,默认调用object.new),实例化对象;然后再执行类的__init__方法,对这个对象进行初始化,所有我们可以基于这个,实现单例模式
import threading class Singleton(object): _instance_lock = threading.Lock() def __init__(self): pass def __new__(cls, *args, **kwargs): if not hasattr(Singleton, "_instance"): with Singleton._instance_lock: if not hasattr(Singleton, "_instance"): Singleton._instance = object.__new__(cls) return Singleton._instance -
还可以基于类或者metaclass方式实现,此处不在逐个详细解释,请参考参考文献深度学习;
-
2.2上下文管理
-
让类支持with 语句的格式,进行使用
with 获取连接() as obj: # 执行语句 -
代码
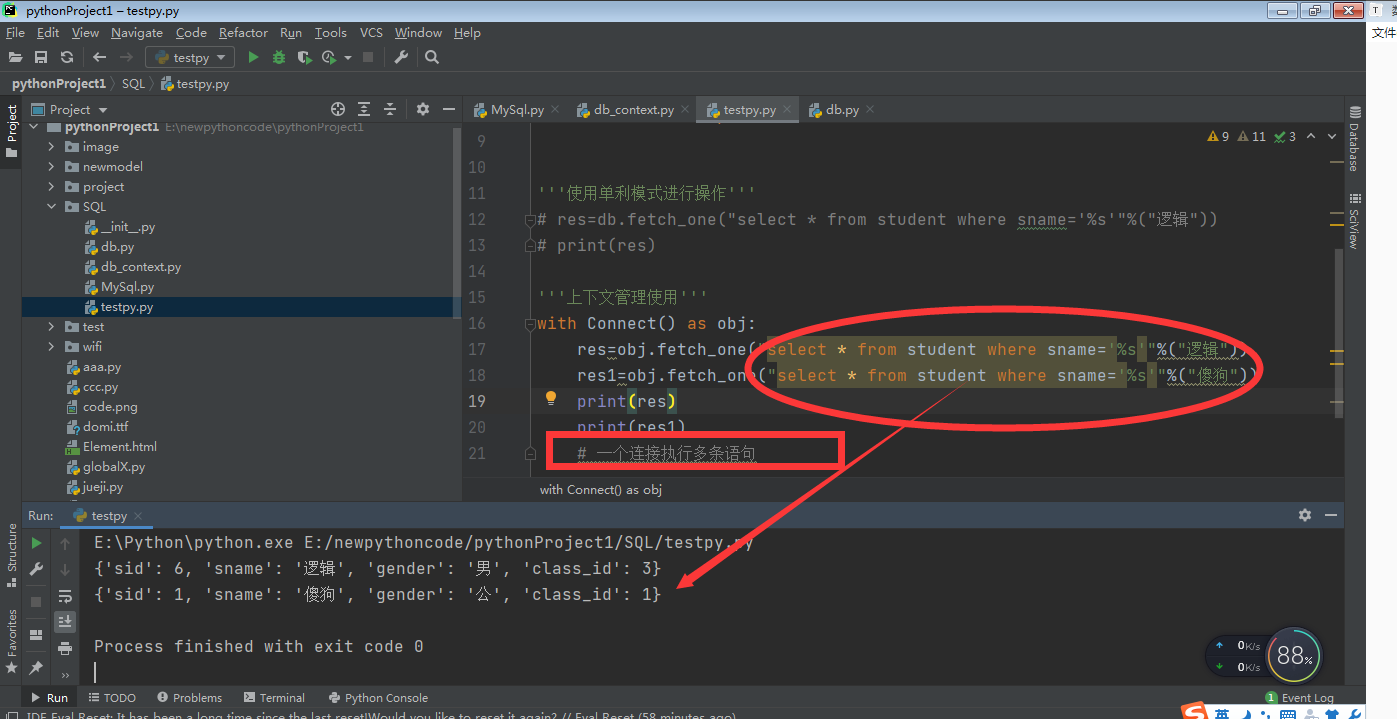
# -*- coding: utf-8 -*- ''' @Time : 2021/11/20 8:07 @Author : ziqingbaojian @File : db_context.py ''' import pymysql from dbutils.pooled_db import PooledDB POOL=PooledDB( creator=pymysql, maxconnections=50, mincached=2, maxcached=3, blocking=True, setsession=[], ping=0, host='127.0.0.1', port=3306, user='XXXXX', password='XXXXXX', database='testlearn', charset='utf8' ) class Connect(object): def __init__(self): self.conn=conn=POOL.connection()#获取连接 self.cursor=conn.cursor(pymysql.cursors.DictCursor)#字典游标,此处不在创键非字典游标,本人使用非字典游标较少,如有需要时可以将字典单参数删除即可 def __enter__(self): return self def __exit__(self, exc_type, exc_val, exc_tb): self.cursor.close() self.conn.close()#通常都是先关游标再关闭连接,此处是将连接归还连接池 def exec(self,sql,**kwargs): self.cursor.execute(sql,kwargs) self.conn.commit() def fetch_one(self,sql,**kwargs): self.cursor.execute(sql,kwargs) result=self.cursor.fetchone() return result def fetch_all(self,sql,**kwargs): self.cursor.execute(sql,kwargs) result=self.cursor.fetchall() return result -
使用效果
-
-
补充上下文管理器
-
参考文献:
https://www.cnblogs.com/wongbingming/p/10519553.html -
基本语法
with EXPR as VAR:
    BLOCK
上下文表达式:with open('test.txt') as f: 上下文管理器:open('test.txt') f 不是上下文管理器,应该是资源对象。 -
编写上下文管理器
要自己实现这样一个上下文管理,要先知道上下文管理协议。
简单点说,就是在一个类里,实现了
__enter__和__exit__的方法,这个类的实例就是一个上下文管理器。例如上述的类就采取了这种方式;
在编写代码时,可以将资源的连接或者获取放在
__enter__中,而将资源的关闭写在__exit__中。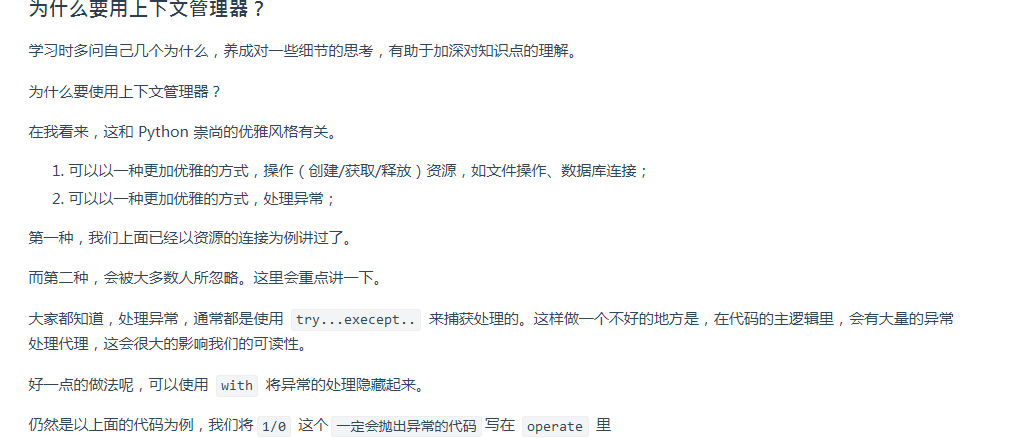
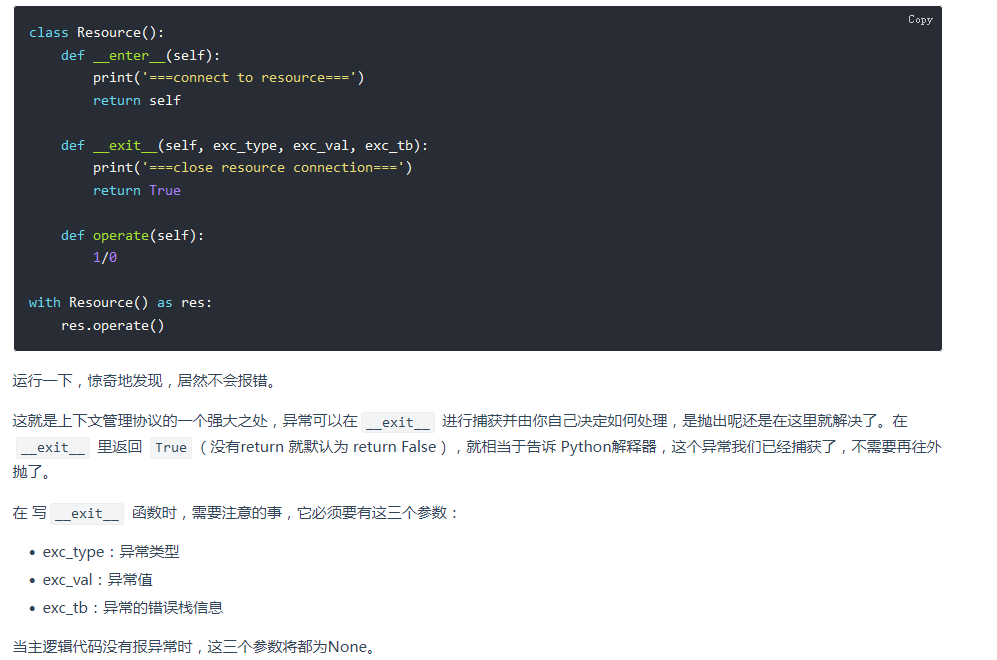
在 写
__exit__函数时,需要注意的事,它必须要有这三个参数:- exc_type:异常类型
- exc_val:异常值
- exc_tb:异常的错误栈信息
当主逻辑代码没有报异常时,这三个参数将都为None。
-
理解并使用 contextlib#
在上面的例子中,我们只是为了构建一个上下文管理器,却写了一个类。如果只是要实现一个简单的功能,写一个类未免有点过于繁杂。这时候,我们就想,如果只写一个函数就可以实现上下文管理器就好了。
这个点Python早就想到了。它给我们提供了一个装饰器,你只要按照它的代码协议来实现函数内容,就可以将这个函数对象变成一个上下文管理器。
我们按照 contextlib 的协议来自己实现一个打开文件(with open)的上下文管理器。
import contextlib

@contextlib.contextmanager
def open_func(file_name):
    # __enter__方法
    print('open file:', file_name, 'in __enter__')
    file_handler = open(file_name, 'r')

    # 【重点】:yield
    yield file_handler

    # __exit__方法
    print('close file:', file_name, 'in __exit__')
    file_handler.close()
    return

with open_func('/Users/MING/mytest.txt') as file_in:
    for line in file_in:
        print(line)
在被装饰函数里,必须是一个生成器(带有yield),而yield之前的代码,就相当于
__enter__里的内容。yield 之后的代码,就相当于__exit__里的内容。上面这段代码只能实现上下文管理器的第一个目的(管理资源),并不能实现第二个目的(处理异常)。
如果要处理异常,可以改成下面这个样子。
import contextlib @contextlib.contextmanager def open_func(file_name): # __enter__方法 print('open file:', file_name, 'in __enter__') file_handler = open(file_name, 'r') try: yield file_handler except Exception as exc: # deal with exception print('the exception was thrown') finally: print('close file:', file_name, 'in __exit__') file_handler.close() return with open_func('/Users/MING/mytest.txt') as file_in: for line in file_in: 1/0 print(line) -
复制知识点的参考文献较多,主要是为了解释编写的数据库使用的工具类中的知识点;
-
- 手敲不易,转载请指明出处


 浙公网安备 33010602011771号