FastDFS + Nginx
普通的存储方式,图片存储过于分散
- 图片存储过于分散
- 图片多的服务器压力比较大,可能影响其他功能
- 存储到项目路径中,重启会丢失。存储到外部文件中,IO操作性能低
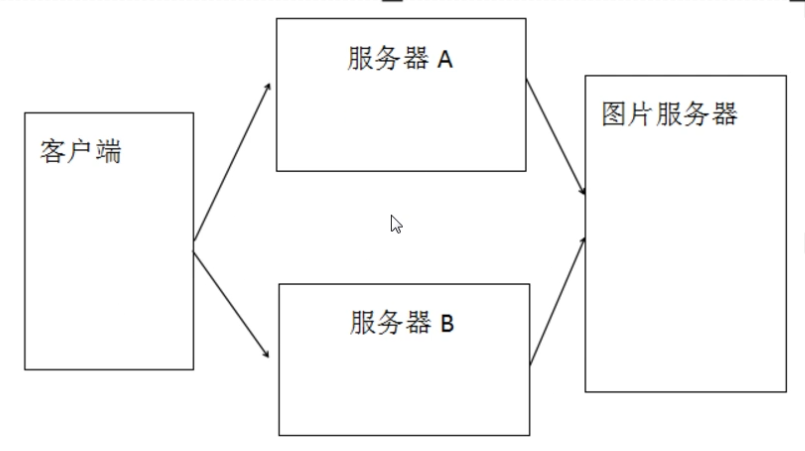
搭建图片服务器
分布式文件系统概述
通用分布式文件系统

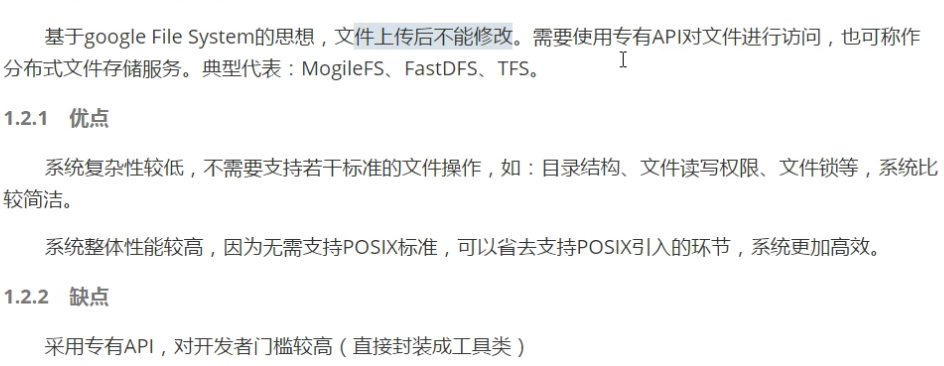
专用分布式文件系统
Google FS 体系结构
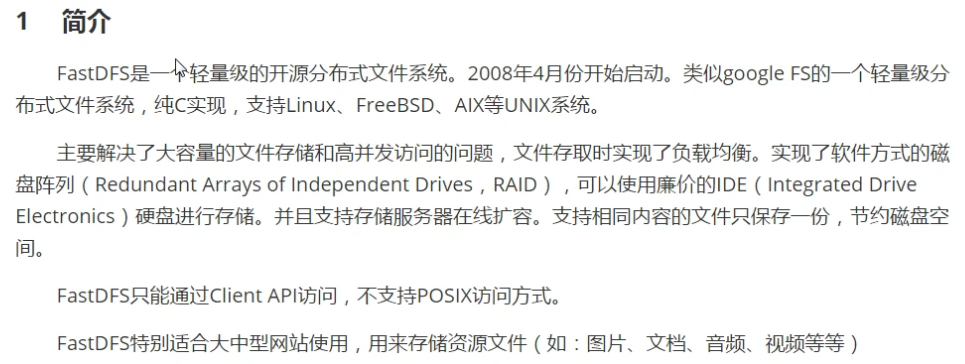
FastDFS简介
架构图
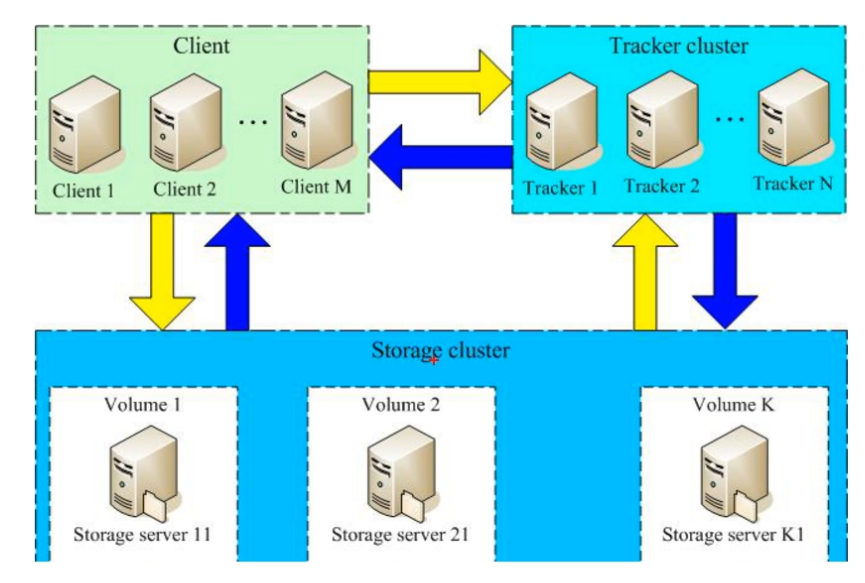
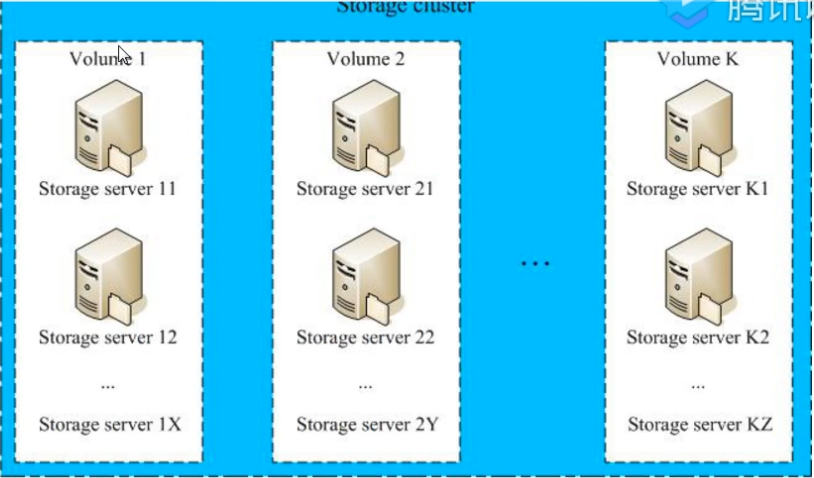
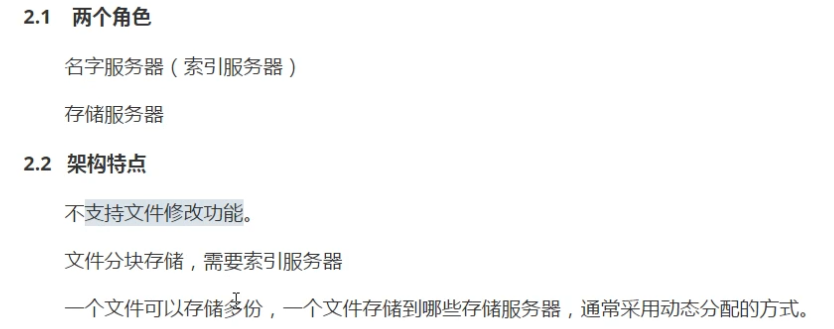
角色
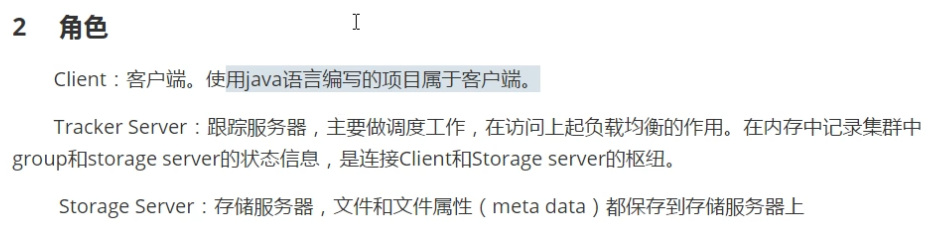
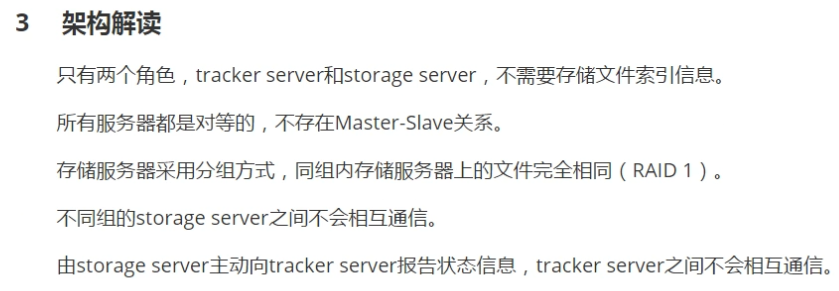
架构解读
FastDFS安装
安装C依赖
yum install -y make cmake gcc gcc-c++
安装C的一个库,我这边直接GitHub下载
cd /usr/local/tmp
git clone https://github.com/happyfish100/libfastcommon.git
编译并安装
cd libfastcommon-master
./make.sh
./make.sh install
默认的固定安装位置

- /usr/lib64
- /usr/lib
- /usr/include/fastcommon
创建软链接
ln -s /usr/lib64/libfastcommon.so /usr/local/lib/libfastcommon.so
ln -s /usr/local/lib64/libfdfsclient.so /usr/local/lib/libfdfsclient.so
上传并解压FastDFS主程序
git clone https://github.com/happyfish100/fastdfs.git
编译并安装
cd fastdfs
./make.sh
./make.sh install
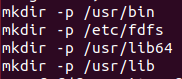
- /usr/bin 可执行文件所在的位置
- /etc/fdfs 配置文件所在的位置
- /usr/bin 主程序代码所在位置
- /usr/include/fastdfs 包含一些插件所在的位置
配置tracker
复制配置文件
cd /etc/fdfs
cp tracker.conf.sample tracker.conf
创建数据目录
创建防止tracker数据的目录
mkdir -p /usr/local/fastdfs/tracker
修改配置文件,修改tracker.conf设置tracker内容存储目录
base_path=/usr/local/fastdfs/tracker
vim tracker.conf
默认端口 22122 不需要修改
启动服务
service fdfs_trackerd start
启动成功后,配置文件base_path指向的目录出现FastDFS服务相关数据目录(data目录,logs目录)
查看服务运行状态
service fdfs_trackerd status
如果显示 is running 表示正常运行
关闭防火墙
service iptables stop
chkconfig iptables off
配置Storage
storage可以和tracker不在同一台服务器中,示例中把storage和tracker安装在同一台服务器
复制配置文件
进入到/etc/fdfs,把storage配置文件复制一份
cd /etc/fdfs
cp storage.conf.sample storage.conf
创建目录
把base用于存储基础数据和日志,store用于存储上传数据
mkdir -p /usr/local/fastdfs/storage/base
mkdir -p /usr/local/fastdfs/storage/store
修改配置文件
storage.conf配置文件用于描述存储服务的行为,需要进行下述修改
vim /etc/fdsf/storage.conf
配置内容如下
base_path=/usr/local/fastdfs/storage/base
store_path0=/usr/local/fastdfs/storage/store
tracker_server=tracker 服务IP:22122
- base_path,基础路径
- store_path0,
- base_path和store_path可以使用同一目录
- tracker_server 跟踪服务器位置,就是跟踪服务器的IP和端口
启动服务
service fdfs_storaged start
启动成功后,配置文件base_path指向的目录中出现FastDFS服务相关数据目录(data目录,logs目录库)
配置文件中的store_path0指向的目录同样出现了FastDFS存储相关数据目录(data目录)
其中$store_path0/data 目录中默认创建若干子孙目录(两层一共256*256),用于存储具体文件数据
Storage服务器启动比较慢,第一次启动的时候,需要创建256*256个目录
查看启动状态
service fdfs_storaged status
文件上传流程
时序图
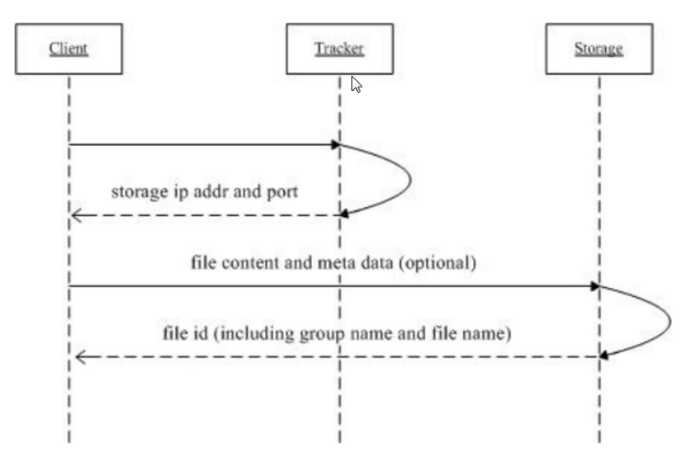
流程说明
- 客户端访问Tracker
- Tracker返回Storage的ip和端口
- 客户端直接访问Storage,把文件内容和元数据发送过去
- Storage返回文件存储id,包含了组名和文件名

Fastdfs-java-client
添加依赖,官方地址:https://mvnrepository.com/artifact/cn.bestwu/fastdfs-client-java
<!-- https://mvnrepository.com/artifact/cn.bestwu/fastdfs-client-java -->
<dependency>
    <groupId>cn.bestwu</groupId>
    <artifactId>fastdfs-client-java</artifactId>
    <version>1.27</version>
</dependency>
编写配置文件
fdfs_client.conf,修改成自己的tracker服务器ip
connect_timeout = 10
network_timeout = 30
charset = UTF-8
http.tracker_http_port = 8080
tracker_server = 192.168.93.10:22122
导入工具类
在com.utils.FastDFSClient下粘贴配置工具类
/**
 * FastDFS分布式文件系统操作客户端.
 */
public class FastDFSClient {

    private static final String CONF_FILENAME = Thread.currentThread().getContextClassLoader().getResource("").getPath() + "fdfs_client.conf";

    private static StorageClient storageClient = null;

    /**
     * 只加载一次.
     */
    static {
        try {
            ClientGlobal.init(CONF_FILENAME);
            TrackerClient trackerClient = new TrackerClient(ClientGlobal.g_tracker_group);
            TrackerServer trackerServer = trackerClient.getConnection();
            StorageServer storageServer = trackerClient.getStoreStorage(trackerServer);
            storageClient = new StorageClient(trackerServer, storageServer);
        } catch (Exception e) {
            e.printStackTrace();
        }
    }

    /**
     *
     * @param inputStream
     *    上传的文件输入流
     * @param fileName
     *    上传的文件原始名
     * @return
     */
    public static String[] uploadFile(InputStream inputStream, String fileName) {
        try {
            // 文件的元数据
            NameValuePair[] meta_list = new NameValuePair[2];
            // 第一组元数据,文件的原始名称
            meta_list[0] = new NameValuePair("file name", fileName);
            // 第二组元数据
            meta_list[1] = new NameValuePair("file length", inputStream.available()+"");
            // 准备字节数组
            byte[] file_buff = null;
            if (inputStream != null) {
                // 查看文件的长度
                int len = inputStream.available();
                // 创建对应长度的字节数组
                file_buff = new byte[len];
                // 将输入流中的字节内容,读到字节数组中。
                inputStream.read(file_buff);
            }
            // 上传文件。参数含义:要上传的文件的内容(使用字节数组传递),上传的文件的类型(扩展名),元数据
            String[] fileids = storageClient.upload_file(file_buff, getFileExt(fileName), meta_list);
            return fileids;
        } catch (Exception ex) {
            ex.printStackTrace();
            return null;
        }
    }

    /**
     *
     * @param file
     *            文件
     * @param fileName
     *            文件名
     * @return 返回Null则为失败
     */
    public static String[] uploadFile(File file, String fileName) {
        FileInputStream fis = null;
        try {
            NameValuePair[] meta_list = null; // new NameValuePair[0];
            fis = new FileInputStream(file);
            byte[] file_buff = null;
            if (fis != null) {
                int len = fis.available();
                file_buff = new byte[len];
                fis.read(file_buff);
            }

            String[] fileids = storageClient.upload_file(file_buff, getFileExt(fileName), meta_list);
            return fileids;
        } catch (Exception ex) {
            return null;
        }finally{
            if (fis != null){
                try {
                    fis.close();
                } catch (IOException e) {
                    e.printStackTrace();
                }
            }
        }
    }

    /**
     * 根据组名和远程文件名来删除一个文件
     *
     * @param groupName
     *            例如 "group1" 如果不指定该值,默认为group1
     * @param remoteFileName
     *            例如"M00/00/00/wKgxgk5HbLvfP86RAAAAChd9X1Y736.jpg"
     * @return 0为成功,非0为失败,具体为错误代码
     */
    public static int deleteFile(String groupName, String remoteFileName) {
        try {
            int result = storageClient.delete_file(groupName == null ? "group1" : groupName, remoteFileName);
            return result;
        } catch (Exception ex) {
            return 0;
        }
    }

    /**
     * 修改一个已经存在的文件
     *
     * @param oldGroupName
     *            旧的组名
     * @param oldFileName
     *            旧的文件名
     * @param file
     *            新文件
     * @param fileName
     *            新文件名
     * @return 返回空则为失败
     */
    public static String[] modifyFile(String oldGroupName, String oldFileName, File file, String fileName) {
        String[] fileids = null;
        try {
            // 先上传
            fileids = uploadFile(file, fileName);
            if (fileids == null) {
                return null;
            }
            // 再删除
            int delResult = deleteFile(oldGroupName, oldFileName);
            if (delResult != 0) {
                return null;
            }
        } catch (Exception ex) {
            return null;
        }
        return fileids;
    }

    /**
     * 文件下载
     *
     * @param groupName 卷名
     * @param remoteFileName 文件名
     * @return 返回一个流
     */
    public static InputStream downloadFile(String groupName, String remoteFileName) {
        try {
            byte[] bytes = storageClient.download_file(groupName, remoteFileName);
            InputStream inputStream = new ByteArrayInputStream(bytes);
            return inputStream;
        } catch (Exception ex) {
            return null;
        }
    }

    public static NameValuePair[] getMetaDate(String groupName, String remoteFileName){
        try{
            NameValuePair[] nvp = storageClient.get_metadata(groupName, remoteFileName);
            return nvp;
        }catch(Exception ex){
            ex.printStackTrace();
            return null;
        }
    }

    /**
     * 获取文件后缀名(不带点).
     *
     * @return 如:"jpg" or "".
     */
    private static String getFileExt(String fileName) {
        if (StringUtils.isBlank(fileName) || !fileName.contains(".")) {
            return "";
        } else {
            return fileName.substring(fileName.lastIndexOf(".") + 1); // 不带最后的点
        }
    }
}
Nginx
代理方式
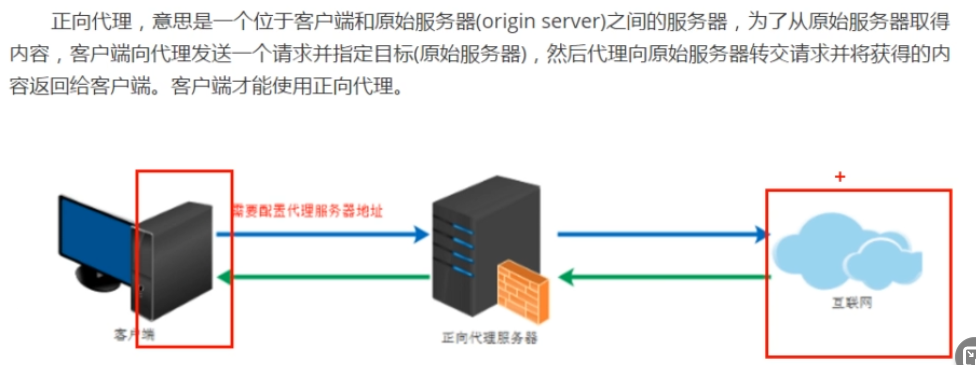
正向代理
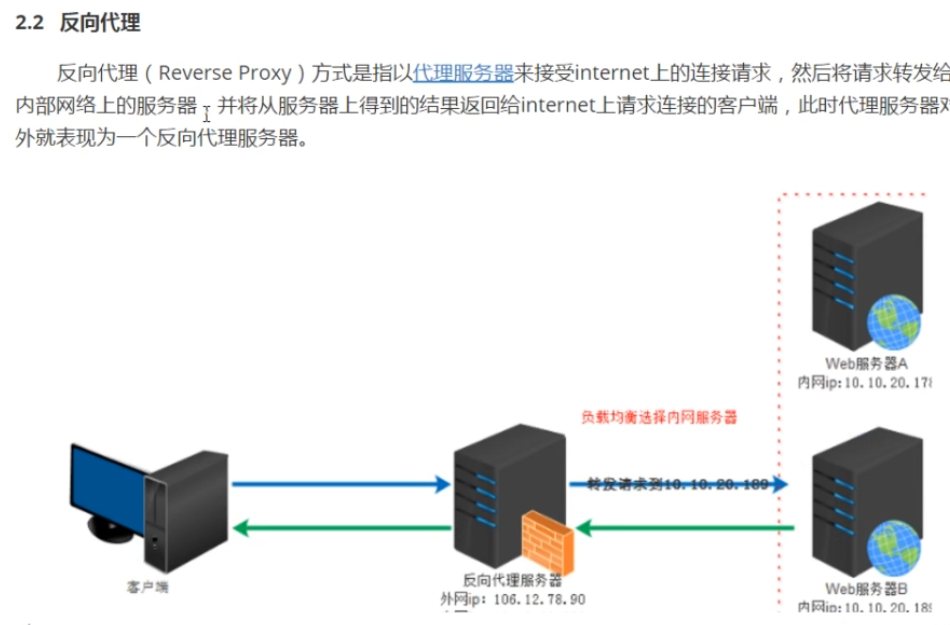
反向代理
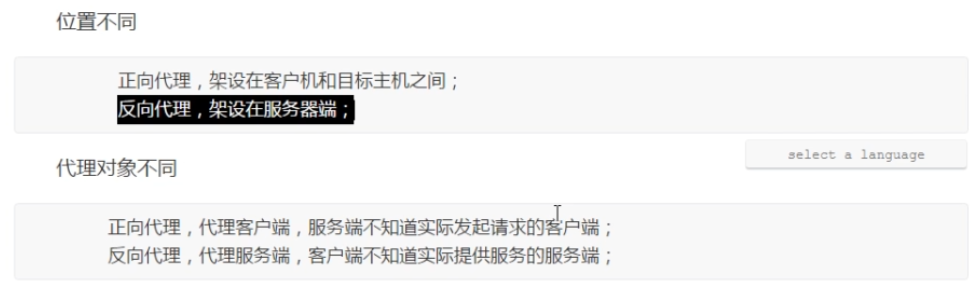
二者区别
Nginx作用
HTTP协议代理

搭建虚拟主机

负载均衡

Nginx安装
下载fastdfs-nginx-module到/usr/local/tmp中
cd /usr/local/tmp
git clone https://github.com/happyfish100/fastdfs-nginx-module
修改配置文件
cd fastdfs-nginx-module/src
vim config
修改第四行路径,参数用于配置安装nginx中的FastDFS组件的时候,在什么位置查找FastDFS核心代码
git clone https://github.com/nginx/nginx.git
安装ngin依赖
yum install -y gcc gcc-c++ make automake autoconf libtool pcre pcre-devel zlib zlib-devel openssl openssl-devel
创建临时目录
mkdir -p /var/temp/nginx
修改配置文件参数
./configure \
--prefix=/usr/local/nginx \
--pid-path=/var/run/nginx/nginx.pid \
--lock-path=/var/lock/nginx.lock \
--error-log-path=/var/log/nginx/error.log \
--http-log-path=/var/log/nginx/access.log \
--with-http_gzip_static_module \
--http-client-body-temp-path=/var/temp/nginx/client \
--http-proxy-temp-path=/var/temp/nginx/proxy \
--http-fastcgi-temp-path=/var/temp/nginx/fastcgi \
--http-uwsgi-temp-path=/var/temp/nginx/uwsgi \
--http-scgi-temp-path=/var/temp/nginx/scgi \
--add-module=/usr/local/tmp/fastdfs-nginx-module/src
修改权限为777
chmod 777 nginx -R
编译和安装
cd nginx
make
make install
配置fastdfs-nginx-module模块配置文件
复制 fastdfs-nginx-module/src/mod_fastdfs.conf 配置文件到/etc/fdfs目录中
cp /usr/local/tmp/fastdfs-nginx-module/src/mod_fastdfs.conf /etc/fdfs/
修改 mod_fastdfs.conf
cd /etc/fdfs
vim mod_fastdfs.conf
文件内容修改
connect_timeout=10
tracker_server=192.168.93.10:22122 // 自己的ip和port
url_have_group_name=true
store_path0=/usr/local/fastdfs/storage/store // 自己的目录
提供FastDFS需要的HTTP配置文件
cp /usr/local/tmp/FastDFS/conf/http.conf /etc/fdfs/
cp /usr/local/tmp/FastDFS/conf/mime.types /etc/fdfs/
创建网络访问存储服务的软链接
ln -s /usr/local/fastdfs/storage/store/data/ /usr/local/fastdfs/storage/store/data/M00
进入nginx安装目录,修改配置文件
cd/ usr/local/nginx/conf
vim nginx.conf
修改两处
用户
user root;
单个group的配置
location /M00 {
      ngx_fastdfs_module;
}
多个group的配置
在server_name下面修改
location ~/group([0-9]/M00){
    ngx_fastdfs_module;
}
启动nginx
进入目录,然后
cd /usr/local/nginx/sbin
./nginx
关闭nginx
./nginx -s quit
睁开眼,书在面前 闭上眼,书在心里

 浙公网安备 33010602011771号