北京地铁线路规划系统——总结
项目概况
Github项目源代码地址:https://github.com/NewWesternCEO/beijing_subway/
web端直接访问地址:http://54.162.90.89:8010
该项目在Python3.6环境下开发
若不通过web端进行访问,在下载源码后运行 app.py 代码即可
代码的运行需要先安装好Flask库与numpy库,可以在以下方式中二选一进行安装
-
Numpy库可以通过
pip install Numpy进行安装
Flask库可以通过pip install Flask进行安装 -
在虚拟环境下建议使用
pip install -r requirements.txt命令从requirements.txt文件中自动安装所有所需库
数据流分析
由于该工程所需要处理的数据较少,且数据处理过程为实时处理,因此不采用数据库进行存储。

文件结构与存储结构
文件结构
└── SubwayApp
│ └── pycache
│ └── static //项目资源
│ │ └── css
│ │ └── images
│ │ └── js
│ │—— subway.txt //存储的站点信息
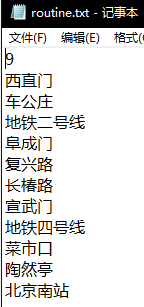
│ │—— routine.txt //存储的规划结果
│ │—— names.txt //站点编码对应的名称
│ │—— app.py //Flask 程序
│ │—— manager.py
│ │—— requirements.txt //程序运行所需要的环境
│ │—— subwayFunction.py //必要的业务逻辑模块(dijsktra算法等)
存储结构
在对线路的观察中发现北京市地铁线路的命名并不完全按数字来进行,存在特有的命名,导致不适宜直接在程序中进行处理。

因此首先对各条线路进行编码,将编码后的线路信息存放在names.txt文件中。编码后的结果为
1 地铁一号线
2 地铁二号线
3 地铁八通线
...
17 地铁昌平线
18 地铁亦庄线
19 地铁燕房线
20 西郊线
21 S1线
22 机场线
业务逻辑实现(subwayFunction.py)
全局声明
import numpy as np

ERROR = -1
inf = 1e+8
数据预处理
数据预处理主要通过 ```readData()```、```readNames()```、```initGraph()```几个功能模块来实现。 其具体功能为: * ```readData()``` 读取目录下的subway.txt文件,返回站点个数、线路数组、以字典的形式存储了不同线路所在的站点(若一个站点为换乘站,即属于多个线路,则在字典中它的键值对数量大于1),同时初始化了collect数组 * ```readNames()``` 读取目录下的names.txt文件,返回一个存储了编码后的线路与线路名称键值对的字典 * ```initGraph()``` 根据subway.txt文件构建一个无向图,相邻站点之间的距离均置为1具体实现:
readData()
'''读取地铁站点信息'''
def readData(path):
    file = open(path, 'r', encoding='GB2312')

    N = 0
    lineNum = []
    lineDict = {}
    nodes = []
    collected = []
    for each in file:
        # print(each)
        node, line = each.split(' ')
        if not node in nodes:
            N += 1
            nodes.append(node)
            collected.append(False)

        # 将线路分门别类
        line = eval(line)
        if not line in lineNum:
            lineDict[line] = []
            lineNum.append(line)
        lineDict[line].append(node)

    print('\n共有 %d 个站点' % N)
    file.close()

    return N, nodes, collected, lineNum, lineDict
readNames()
def readNames(path):
    file = open(path, 'r', encoding='GB2312')
    names = {}
    for each in file:
        line, name = each.split(' ')
        name = name.replace('\n', '')
        names[eval(line)] = name

    return names
initGraph()
'''初始化'''
def initGraph(path, N, nodes):
    graph = np.ones([N, N]) * inf #不可达
    preIdx = 0 #Idx表示结点编号
    preLine = ERROR
    file = open(path, 'r', encoding='GB2312')
    for each in file:
        node, line = each.split(' ')

        if preLine == ERROR:
            preLine = eval(line)

        curIdx = nodes.index(node)
        if curIdx != preIdx and preLine == eval(line):
            graph[preIdx][curIdx] = graph[curIdx][preIdx] = 1

        preIdx = curIdx
        preLine = eval(line)

    return graph
dijkstra算法
典型的dijkstra算法实现,包含findNextMin()、Dijkstra()两个模块。
其思想及具体实现可以参考此处:最短路径:Dijkstra算法
具体实现:
dijkstra
'''Dijkstra算法'''
def findNextMin(graph, dist, collected, N):
    minNode, minDist = ERROR, inf

    for i in range(0, N):
        if dist[i] < minDist and collected[i] == False:
            minDist = dist[i]
            minNode = i

    if minDist < inf:
        return minNode
    else:
        return ERROR


def Dijkstra(nodes, startNode, graph, collected, N, lineDict):
    startIdx = nodes.index(startNode)
    #endIdx = nodes.index(endNode)
    collected[startIdx] = True
    dist = np.ones(N) * inf
    path = np.ones(N)

    for i in range(0, N):
        dist[i] = graph[startIdx][i]
        if dist[i] < inf:
            path[i] = startIdx
        else:
            path[i] = ERROR

    while True:
        nextNodeIdx = findNextMin(graph=graph, dist=dist, collected=collected, N=N)

        lines1 = getLine(nextNodeIdx, lineDict)

        if nextNodeIdx == ERROR:
            break
        collected[nextNodeIdx] = True

        for i in range(0, N):
            if collected[i] == False and graph[nextNodeIdx][i] < inf:

                if dist[nextNodeIdx] + graph[nextNodeIdx][i] < dist[i]:
                    dist[i] = dist[nextNodeIdx] + graph[nextNodeIdx][i]
                    path[i] = nextNodeIdx

    return dist, path
输出文件
输出文件通过 getLine()、output()两个模块来实现。
其具体功能为:
getLine()输入一个站点,返回一个列表,包含该站点所在的所有线路output()根据要求进行输出,并将最终结果写入routine.txt文件中。为便于调试,同时在控制台中进行输出。
对于线路换乘的处理分成了四种情况,造成代码非常冗余且不宜阅读,是可以改进的方向
'''获取站点所在的线路号'''
def getLine(node, lineDict):
    lines = []
    for key in lineDict.keys():
        if node in lineDict[key]:
            lines.append(key)

    return lines


'''整理结果并输出文件'''
def output(nodes, startLine, endNode, path, lineDict, names):
    listOut = []
    outputPath = r'./routine.txt'
    outputFile = open(outputPath, 'w')
    tracePath = []
    tracePath.append(nodes.index(endNode))
    pos = int(path[nodes.index(endNode)])
    while pos != ERROR:
        tracePath.append(pos)
        pos = int(path[pos])

    tracePath.reverse()
    curLine = []
    # curLine.append(eval(startLine)
    curLine.append(startLine)
    temp = startLine
    first = True
    print(len(tracePath))
    listOut.append(str(len(tracePath)))
    outputFile.write(str(len(tracePath)))
    outputFile.write('\r\n')
    for each in tracePath:

        if first == False:
            lines = getLine(nodes[each], lineDict)
            if len(curLine) == 1:
                if len(lines) == 1:
                    if lines[0] != curLine[0]:
                        curLine[0] = lines[0]
                        name = names[curLine[0]]
                        print(name)
                        listOut.append(name)
                        outputFile.write(name)
                        outputFile.write('\r\n')
                        temp = curLine[0]
                elif len(lines) >= 2:
                    curLine = lines
            elif len(curLine) >= 2:
                if len(lines) == 1:
                    if lines[0] != temp:
                        curLine = []
                        curLine.append(lines[0])
                        name = names[curLine[0]]
                        print(name)
                        listOut.append(name)
                        outputFile.write(name)
                        outputFile.write('\r\n')
                        temp = curLine[0]

                elif len(lines) >= 2:
                    newLine = list(set(curLine).intersection(lines))[0]
                    if newLine != temp:
                        curLine = []
                        curLine.append(newLine)
                        name = names[curLine[0]]
                        print(name)
                        listOut.append(name)
                        outputFile.write(name)
                        outputFile.write('\r\n')
                        temp = curLine[0]
                    else:
                        curLine = lines

        print(nodes[each])
        listOut.append(nodes[each])
        outputFile.write(nodes[each])
        outputFile.write('\r\n')
        first = False

    outputFile.close()
    return listOut
异常处理
用户给予的输入信息在web的限制下已经变得非常有限。
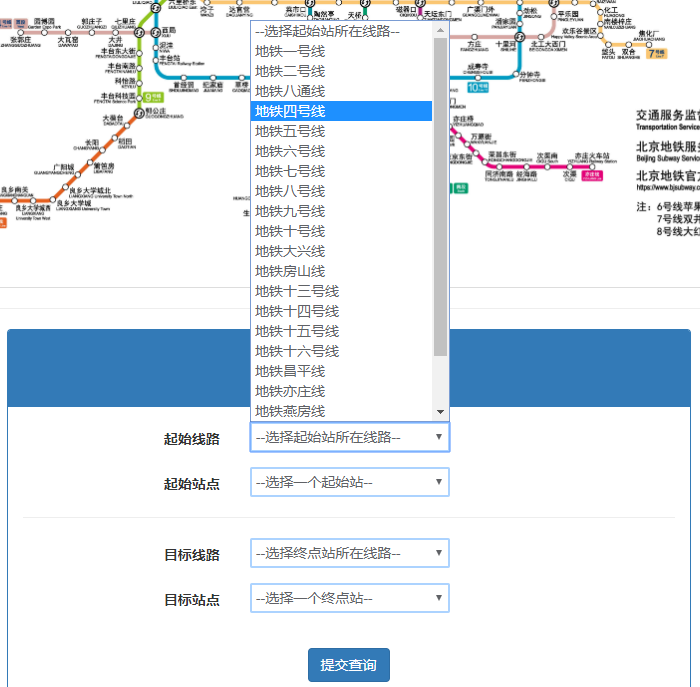
因此可以在调用业务函数之前通过判断来处理异常,在通过所有检查的情况下才将请求交给后台处理。
if startNode == endNode:
        flash('出发站与终点站不能相同')
        startNode = "error"
    elif startLine == '' or not eval(startLine) in lineNum:
        flash("请选择正确的出发线路")
        startNode = "error"
    elif endLine == '' or not eval(endLine) in lineNum:
        flash("请选择正确的终点线路")
        startNode = "error"
    elif not startNode in lineDict[eval(startLine)]:
        flash("请选择正确的出发站")
        startNode = "error"
    elif not endNode in lineDict[eval(endLine)]:
        flash("请选择正确的终点站")
        startNode = "error"
    else:
        return redirect(url_for('loadResult'))
在用户尝试提交非法的请求时,会产生如下的提示:


前端搭建
通过Flask与Bootstrap结合的方式搭建web页面。
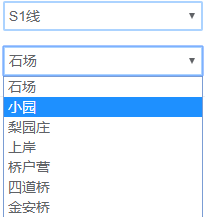
Flask实现对前后端信息的传递与路由的转发Bootstrap实现html5中样式的调用JavaScript实现对线路的监听,从而动态加载某个线路所对应的站点信息
JS具体实现
<script type="text/javascript">
    //1、用户选哪条线
    var startLine = document.getElementById("startLine");
    var endLine = document.getElementById("endLine");
    //2、定位到对应的线路集合
    var startNode = document.getElementById("startNode");
    var endNode = document.getElementById("endNode");
    //动态-改进
    var nodes = {{ lineDict|tojson }}
        $(".lineDict").html(nodes)


    //3、动态的添加标签
    function showStart() {
        startNode.innerHTML = "--选择一个起始站--";
        var line = startLine.value
        for (var i in nodes[line]) {
            startNode.innerHTML += "<option>" + nodes[line][i] + "</option>";
        }
    }

    function showEnd() {
        endNode.innerHTML = "--选择一个起始站--";
        var line = endLine.value
        for (var i in nodes[line]) {
            endNode.innerHTML += "<option>" + nodes[line][i] + "</option>";
        }
    }
</script>
随后将页面挂载到 AWS 的 EC2 实例上。
具体的挂载方法可以参考如下两篇博客,虽然博客中使用的是阿里云的服务器,但配置思路与AWS类似。
结果呈现
本地测试
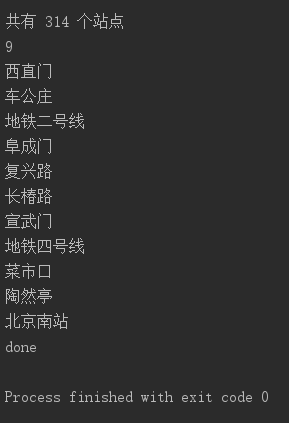
输入
'''sample'''
startNode = '西直门'
endNode = '北京南站'
startLine = 13
运行结果
web端测试
输入
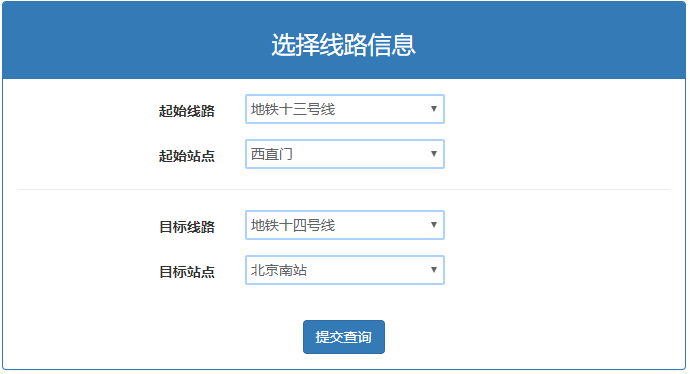
输出
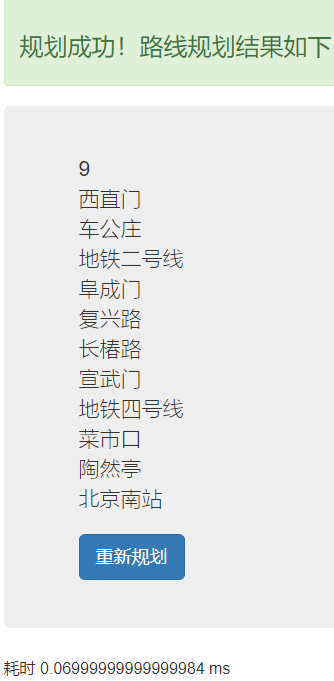
同时在本地也会产生routine.txt文件
