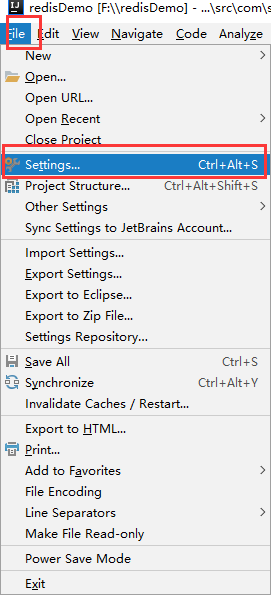
IDEA使用git全流程
一般开发常用命令行操作git,不过IDEA也可以集成git,实现IDEA中写的代码与Github或者gitee联通
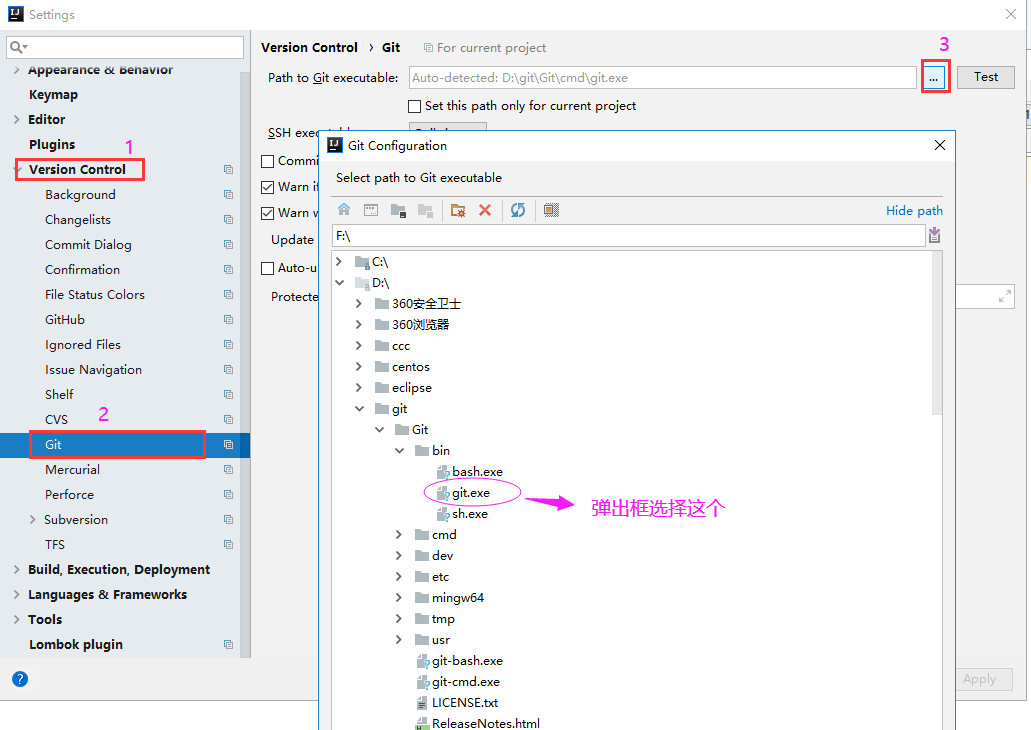
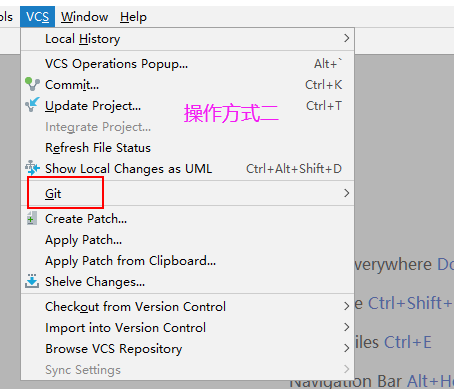
1 在IDEA设置中配置git
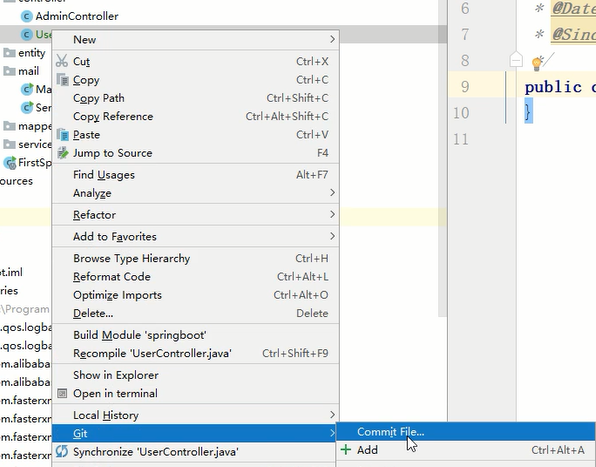
首先打开设置查看IDEA是否已经配置了git软件,如果没有配置就配置上去,配置方式如图
|
|
|
|
|
|
![Settings
Appearance •enav.or
Keymap
Editor
Plugins
Version Control
Backg rou nd
Cha ngelists
Commit Dialog
Confirma tion
File Status Colors
GitHub
Ignored Files
Issue Navigation
Shelf
Mercurial
Perforce
Su bve rsio n
TFS
Build, Execution, Deployment
Languages & Frameworks
Tools
Lombok plugin
Version Control Git
Path to Git executable:
SSH executable:
For current project
D: it\G b i it.exe
Set this path only for current project
Built-in
Commit automatically on cherry-pick
Z] Warn if CRLF line separators are about to be committed
v' Warn when committing in detached HEAD or during rebase
Update method:
Branch default
Test
ALI*Hdgit
Auto-update if push of the current branch was rejected
P rotected b ra nches:
G it Exec u ted Succesm X
Git version is 2.13.0](https://img2020.cnblogs.com/blog/2478192/202110/2478192-20211004232817593-1999775214.png)
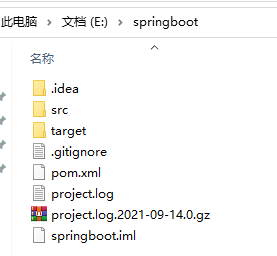
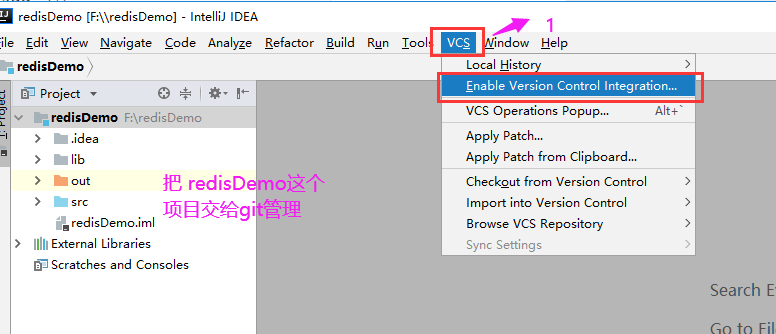
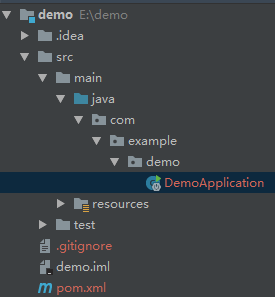
2 把项目交给git管理
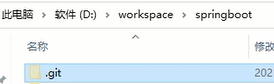
一般创建的项目默认不使用git,需要手动给项目启用git管理,如图查看工程的文件夹,可以发现没有.git这个隐藏文件,这也能说明当前工程尚未纳入git软件管理
|
|
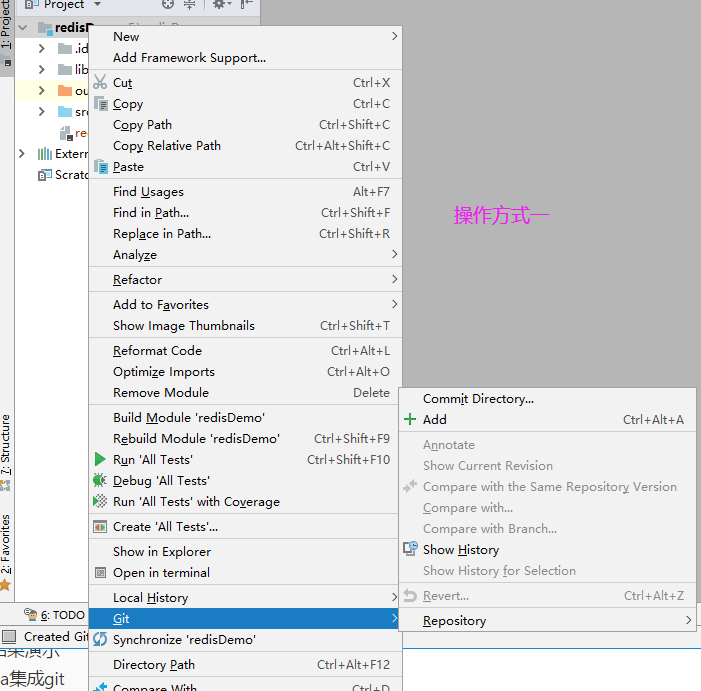
2.1 方式一 鼠标右键生成
在项目的根目录右键"git bash here",然后使用命令 git init 初始化当前文件夹,这样就在文件夹下创建了 .git文件,并且令项目纳入了git管理
|
|
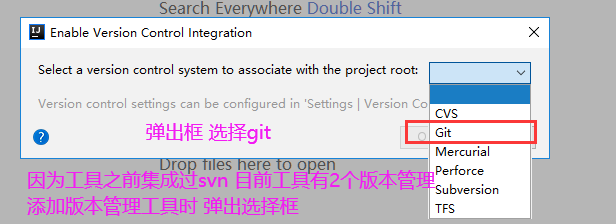
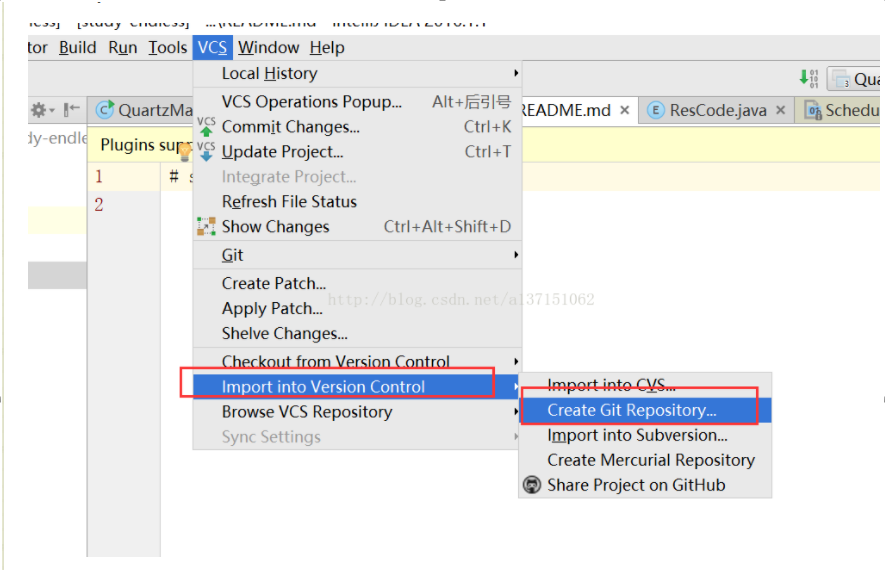
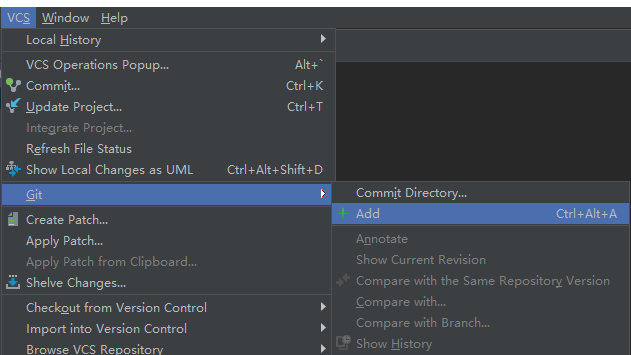
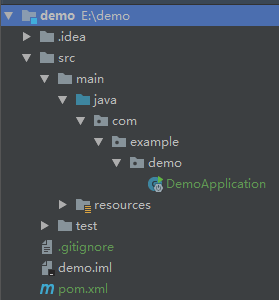
2.2 方式二 IDEA生成
如果IDEA已经在设置中配置好了git软件,那么照着下图来做,就能将当前工程交给git管理,这也会在项目的根目录创建.git隐藏文件
|
|
|
|
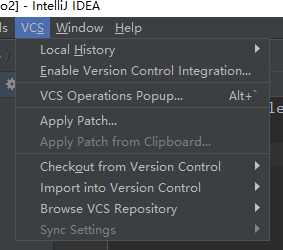
3 取消项目的git管理
每次项目提交到本地仓库时,都会生成一个版本文件,这些版本文件其实就存在项目的.git文件中,如果希望解除git对项目的控制
3.1 方式一 直接删除 .git文件
简单粗暴,只需要把项目中的 .git 隐藏文件删除,这个项目就不再受到git管理,但是之前的版本文件也都会跟着被删除
并且会存在一个问题,IDEA的VCS菜单不会变为默认状态,并且GIT的相关操作全都会变成“不可使用”状态
|
|
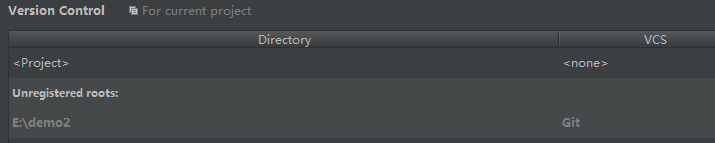
同时IDEA的版本控制界面会报红
|
|

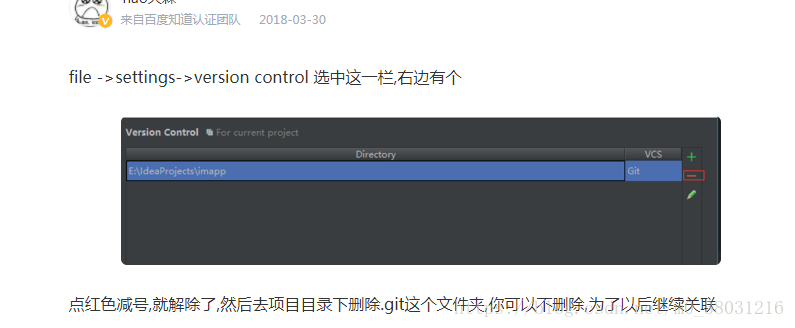
3.2 方式二 在IDEA的版本控制中解除
idea解除git项目_m0_38031216的博客-CSDN博客_idea断开git
按图操作就能解除了,此时 .git文件依然存在,可以随时关联回去
|
|
并且IDEA的VCS菜单会变回默认状态
|
|
此时IDEA的版本控制界面如图,可以随时关联回去
|
|
4 将取消的项目重新纳入git的管理
根据取消git对项目的管理方式的不同,需要不同的操作
4.1 情况一 直接删除git
4.1.1 方式一 命令行模式重建 .git
此时可以在工程的根目录使用命令 git init,重建一个.git文件 即可将工程重新纳入git管理
4.1.2 方式二 未解除版本控制报红 IDEA重建 .git
如果未解决IDEA的版本控制界面报红,那么VCS不会变回默认状态,此时如图,让IDEA重建一个.git文件即可
4.1.3 方式三 已解除版本控制报红 IDEA重建 .git
如果已经将IDEA的版本控制界面中报红的条目删除,那么VCS已经回到初始状态,直接使用IDEA的VCS提供的按钮重建一个.git文件即可
4.2 情况二 只是在IDEA的版本控制界面取消关联
此时直接在版本控制界面重新关联即可
5 常规操作
将项目交给git管理后,就可以进行git相关的操作了,常规操作和SVN一样
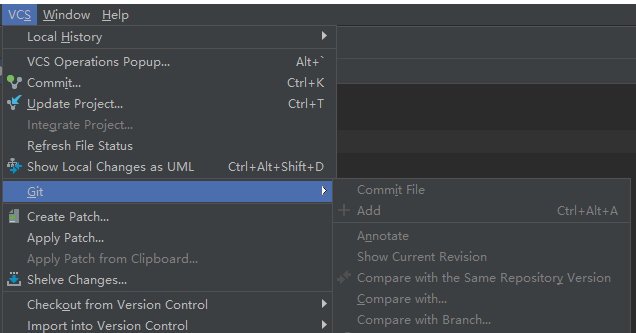
5.1 三种操作git的按钮
|
|
|
|
|
|

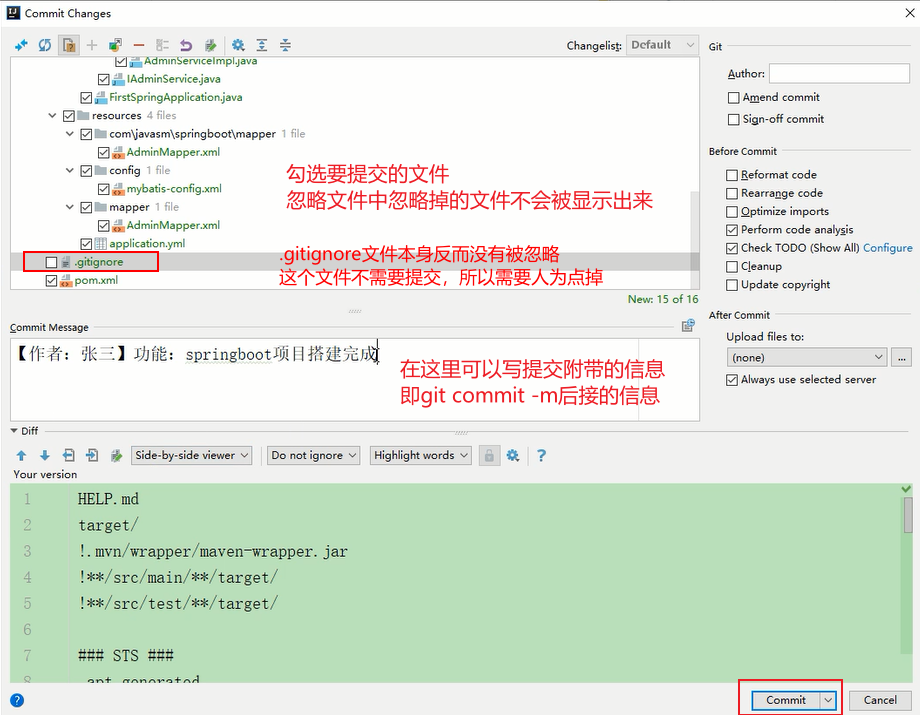
5.2 提交工作区文件到暂存区
将项目交给git管理后,所有文件都会放在工作区,此时颜色为红色
|
|
选中需要提交的文件,如果要提交所有文件,则选择当前模块,按图点击,即可把文件提交到暂存区
|
|
提交到暂存区的文件为绿色
|
|
5.3 提交暂存区文件到本地仓库
如图操作即可把暂存区文件提交到本地仓库
|
|
注意 许多文件已经因为.gitignore文件中的配置被忽略,但是.gitignore文件本身反而没有被忽略,这个文件不需要提交,所以需要人为点掉
|
|
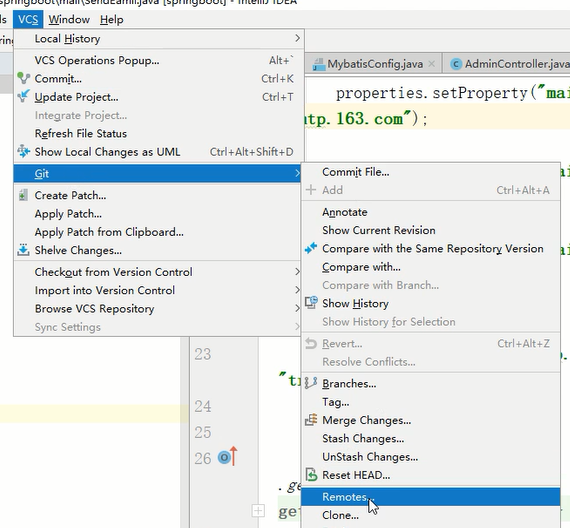
5.4 将本地仓库提交到远程仓库
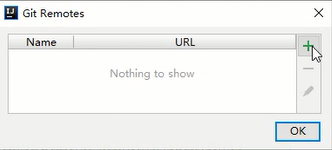
5.4.1 建立关系
首先要将本地仓库和远程仓库建立关系
|
|
|
|
|
|
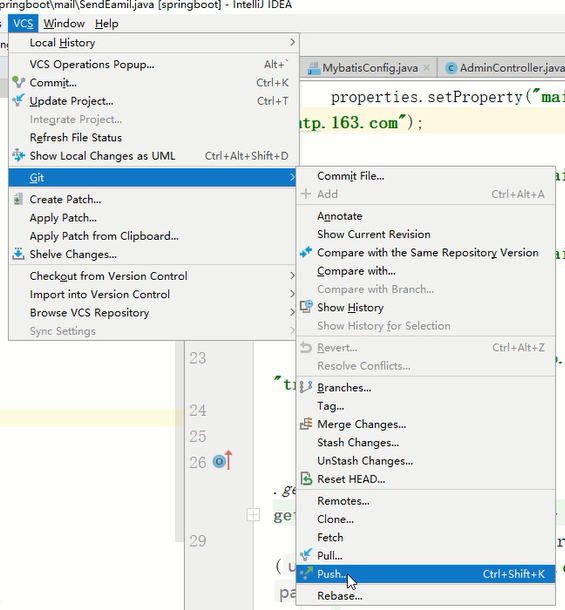
5.4.2 从本地仓库提交到远程仓库
然后将本地仓库的代码传给远程仓库
|
|
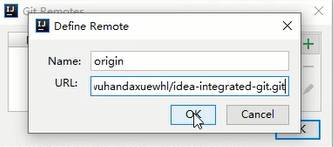
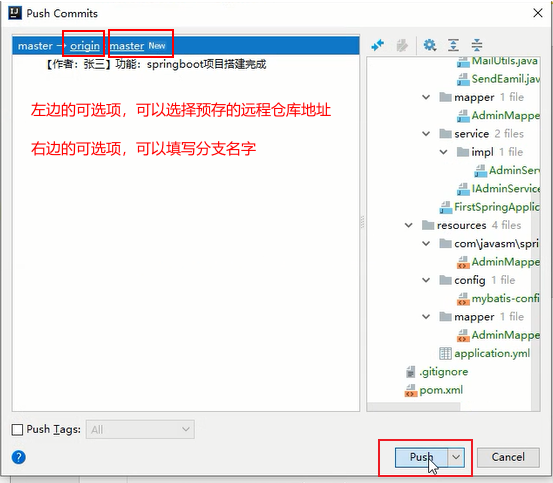
如图,可以调整push时的远程仓库地址以及分支
|
|
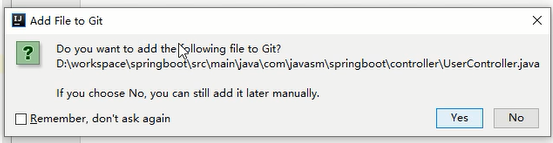
5.4.3 自动将新增文件提交到暂存区
继续新增文件,此时会提示是否要将新增的文件从工作区添加到暂存区,一般都是yes
选择yes后,就免除了再手动将文件从工作区提交到暂存区的步骤
|
|
5.4.4 从暂存区同时提交到本地仓库与远程仓库
将单个新增的文件提交到本地仓库时,可以选择同时提交到本地仓库和远程仓库
|
|
|
|
5.4.5 http与ssh提交方式说明
如果使用命令行,以http方式连接时,每次都要输入项目拥有者的账号密码,然后才能提交
但是基于IDEA+windows凭据,电脑会自动把我们输入的账号密码保存下来,就能实现http方式只需要一次输入,后续所有提交都能直接进行
电脑提供的“windows凭据”
|
|

如果使用ssh方式,那么无论是IDEA还是命令行模式,都可以实现直接提交
5.5 从远程仓库拉取项目到本地 克隆
5.5.1 操作流程
操作按钮如图
|
|
或者如图
|
|
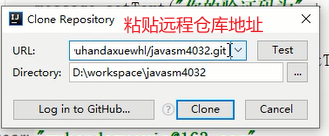
总之点击后,会给出克隆界面,粘贴远程仓库提供的http或者ssh地址
这一步在克隆好项目后,会同时以相同的连接方式(http或ssh)生成一个连接远程仓库的地址,前者在push代码时需要账号密码验证,后者会直接根据当前电脑是否绑定了项目在远程仓库的账号决定是否成功(如果ssh设置了密码,还得输入密码)
|
|
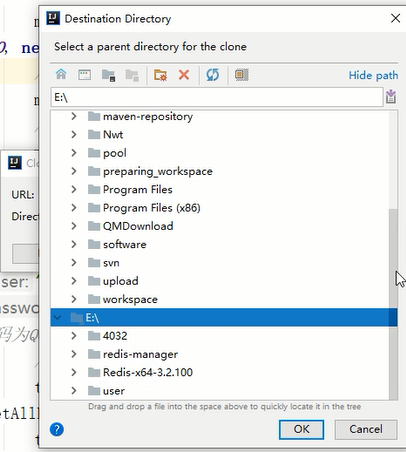
指定项目要存放的目录
|
|
5.5.2 http方式下 首次操作需要输入网站的账号密码
如果当前电脑是第一次连接github或者gitee,根据网站要求,可能要输入你自己在该网站的账号和密码才允许克隆项目——如果没有就得先去注册
|
|
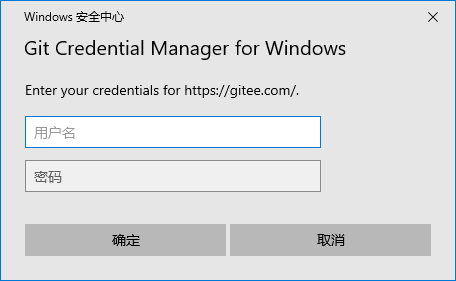
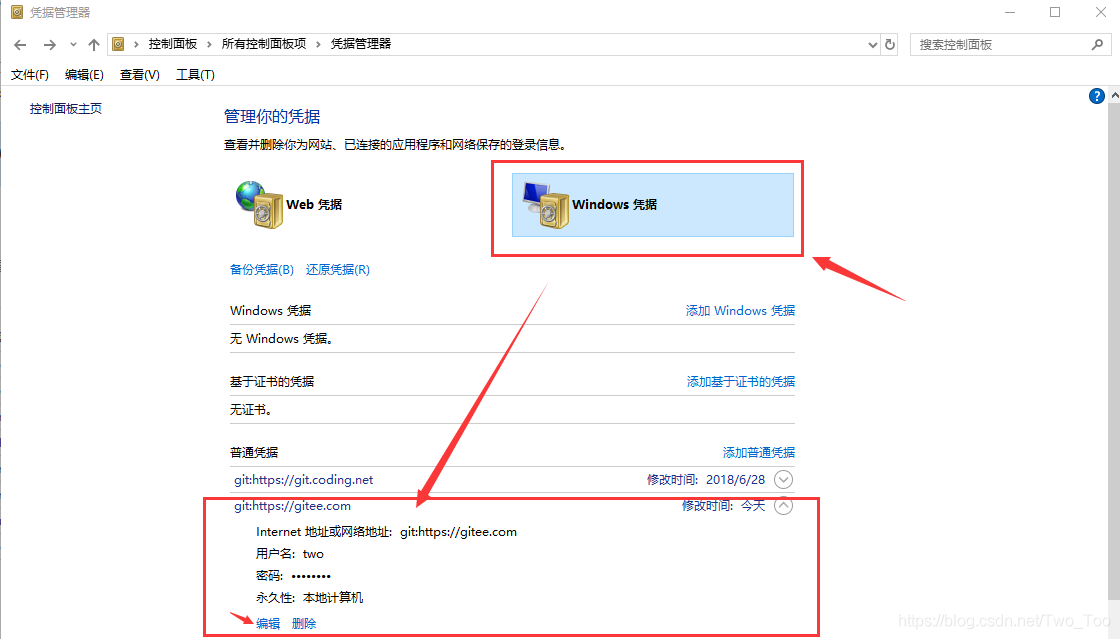
只需要输入一次,输入后电脑就会把相关信息存在“windows凭据”中,下次就不用输入了,如果输错了会反复提示上图的窗口,直到输入正确或者取消操作
gitee码云克隆项目账户密码输入错误解决方法_Two_Too的专栏-CSDN博客
windows凭证图
|
|
5.5.3 ssh方式下 首次操作需要输入网站的账号密码并搭建ssh连接
使用ssh方式,除了输入网站的账号密码,还必须要求当前电脑和输入的账户搭建了SSH连接——本地存私钥,账号上配了对应的公钥,否则会报错
而且不能在IDEA连接,因为git要人工确认这个“陌生的”ssh路线是否真实,这个人工确认的操作必须要到命令行下执行
6 涉及git用户名和邮箱的操作
git修改user.name 和user.email - 何其小静 - 博客园 (cnblogs.com)
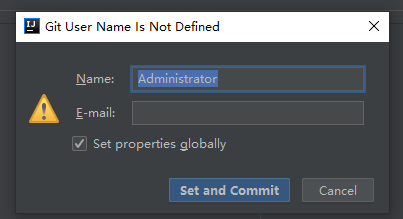
6.1 首次使用git软件需要设置用户名和邮箱 来自IDEA的提示
如果在安装好git软件后,直接到IDEA使用,此时作为首次使用时,git会提示用户,设置一个用户名和邮箱
这里建议使用GitHub的邮箱和用户名,打钩的意思是“设置该配置为全局配置”
|
|
6.2 初始化git的用户名和邮箱 在命令行模式下
如果是刚安装git,然后直接使用git,需要初始化git的账户和邮箱,一般在git的命令行界面输入下面两行代码进行初始化
|
$ git config --global user.name "输入你的用户名" $ git config --global user.email "输入你的邮箱" |
6.3 修改git的用户名和邮箱 在命令行模式下
如果已经不是首次使用,可以在git的命令行界面输入下面两行代码修改账户和邮箱
|
$ git config --global --replace-all user.email "输入你的邮箱" $ git config --global --replace-all user.name "输入你的用户名" |
6.4 查看git的用户名和邮箱 在命令行模式下
输入下面的代码就可以查看到当前设置的用户名和邮箱
|
$ git config --list |
本文作者:夏·舍
本文链接:https://www.cnblogs.com/BRSblackshoot/p/15367634.html
版权声明:本作品采用知识共享署名-非商业性使用-禁止演绎 2.5 中国大陆许可协议进行许可。


【推荐】国内首个AI IDE,深度理解中文开发场景,立即下载体验Trae
【推荐】编程新体验,更懂你的AI,立即体验豆包MarsCode编程助手
【推荐】抖音旗下AI助手豆包,你的智能百科全书,全免费不限次数
【推荐】轻量又高性能的 SSH 工具 IShell:AI 加持,快人一步