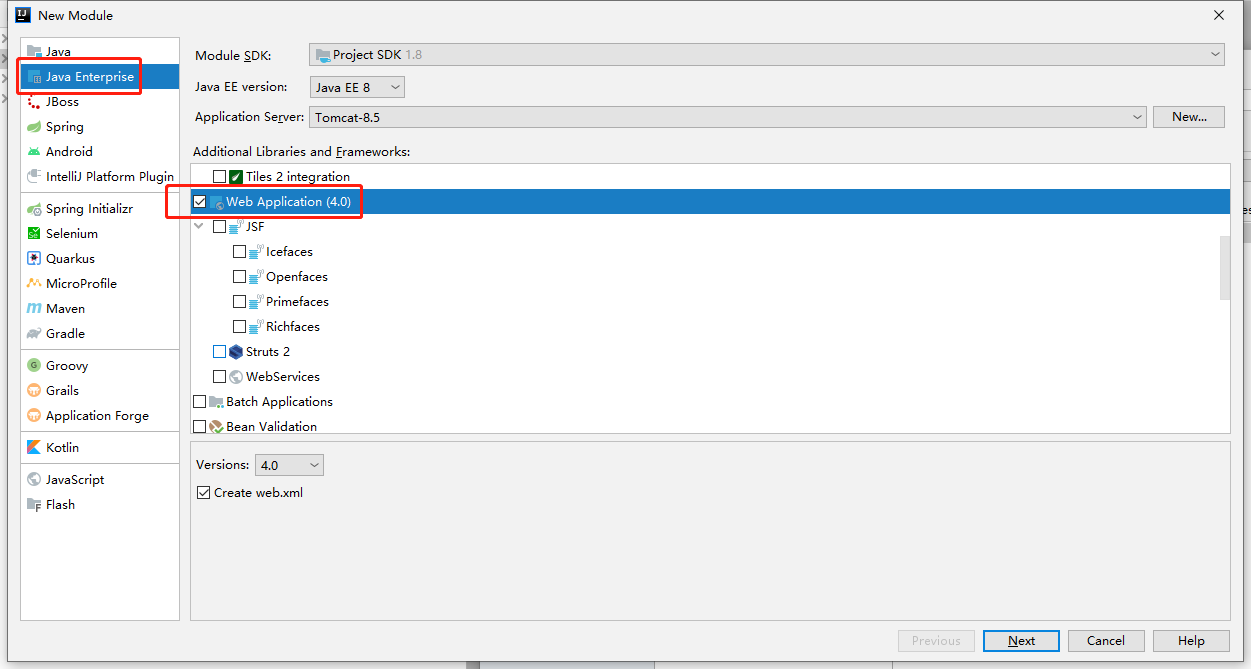
- 添加配置文件
springmvc.xml,配置内容如下:
<?xml version="1.0" encoding="UTF-8"?>
<beans xmlns="http://www.springframework.org/schema/beans"
       xmlns:xsi="http://www.w3.org/2001/XMLSchema-instance"
       xmlns:context="http://www.springframework.org/schema/context"
       xmlns:mvc="http://www.springframework.org/schema/mvc"
       xmlns:aop="http://www.springframework.org/schema/aop"
       xmlns:tx="http://www.springframework.org/schema/tx"
       xsi:schemaLocation="http://www.springframework.org/schema/beans
        http://www.springframework.org/schema/beans/spring-beans.xsd
        http://www.springframework.org/schema/context
        http://www.springframework.org/schema/context/spring-context.xsd
        http://www.springframework.org/schema/aop
        http://www.springframework.org/schema/aop/spring-aop.xsd
        http://www.springframework.org/schema/mvc
        http://www.springframework.org/schema/mvc/spring-mvc-4.0.xsd
        http://www.springframework.org/schema/tx
        http://www.springframework.org/schema/tx/spring-tx.xsd">
</beans>
- 配置
前端控制器
- SpringMVC 的配置文件的默认加载路径是在
/WEB-INF/${servlet-name}-servlet.xml
- 在
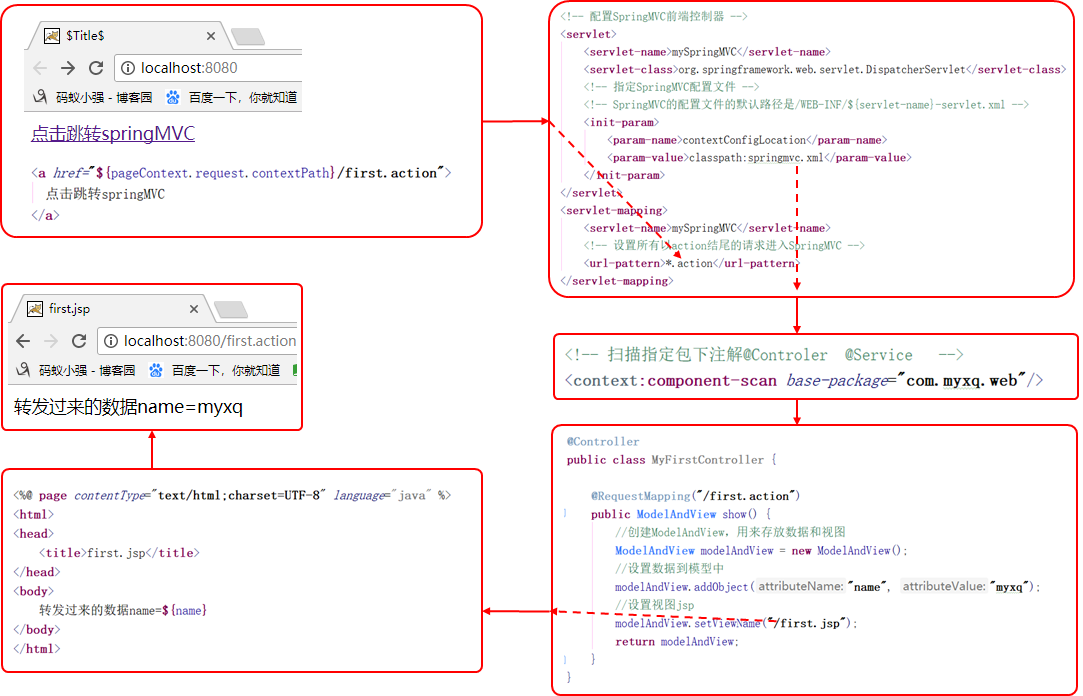
web.xml 当中配置前端控制器,修改 web.xml,内容如下:
<?xml version="1.0" encoding="UTF-8"?>
<web-app xmlns="http://xmlns.jcp.org/xml/ns/javaee"
         xmlns:xsi="http://www.w3.org/2001/XMLSchema-instance"
         xsi:schemaLocation="http://xmlns.jcp.org/xml/ns/javaee http://xmlns.jcp.org/xml/ns/javaee/web-app_4_0.xsd"
         version="4.0">
    <servlet>
        <servlet-name>mySpringMVC</servlet-name>
        <servlet-class>org.springframework.web.servlet.DispatcherServlet</servlet-class>
        <init-param>
            <param-name>contextConfigLocation</param-name>
            <param-value>classpath:springmvc.xml</param-value>
        </init-param>
    </servlet>
    <servlet-mapping>
        <servlet-name>mySpringMVC</servlet-name>
        <!-- 设置所有以 .action 结尾的请求进入SpringMVC前端控制器 -->
        <url-pattern>*.action</url-pattern>
    </servlet-mapping>
</web-app>
SpringMVC中url-patten的取值
| 值 |
作用 |
| /* |
拦截所有 jsp、js、png、css 真的全部拦截,不建议使用 |
| .action、.do |
拦截以 do、action 结尾的请求 |
| / |
拦截所有,不包括 jsp 包含 .js、.png、.css,建议使用 |
- 创建控制器,至于放在哪里你随意,是在
src 包下即可
/**
 * @author: BNTang
 **/
@Controller
public class MyFirstController {

    @RequestMapping("/first.action")
    public ModelAndView show(){
        ModelAndView modelAndView = new ModelAndView();

        modelAndView.addObject("name", "BNTang");
        modelAndView.setViewName("/first.jsp");

        return modelAndView;
    }
}
- 以上主要是创建了一个
ModelAndView 用来存放数据和视图
- 创建好了之后添加了一条数据
- 设置了一个要转发的 jsp 视图页面
- 然后在
springmvc.xml 核心配置文件当中开启控制器扫描
- 也就是扫描指定包下的注解,注解包含如:@Controller、@Service、等等…
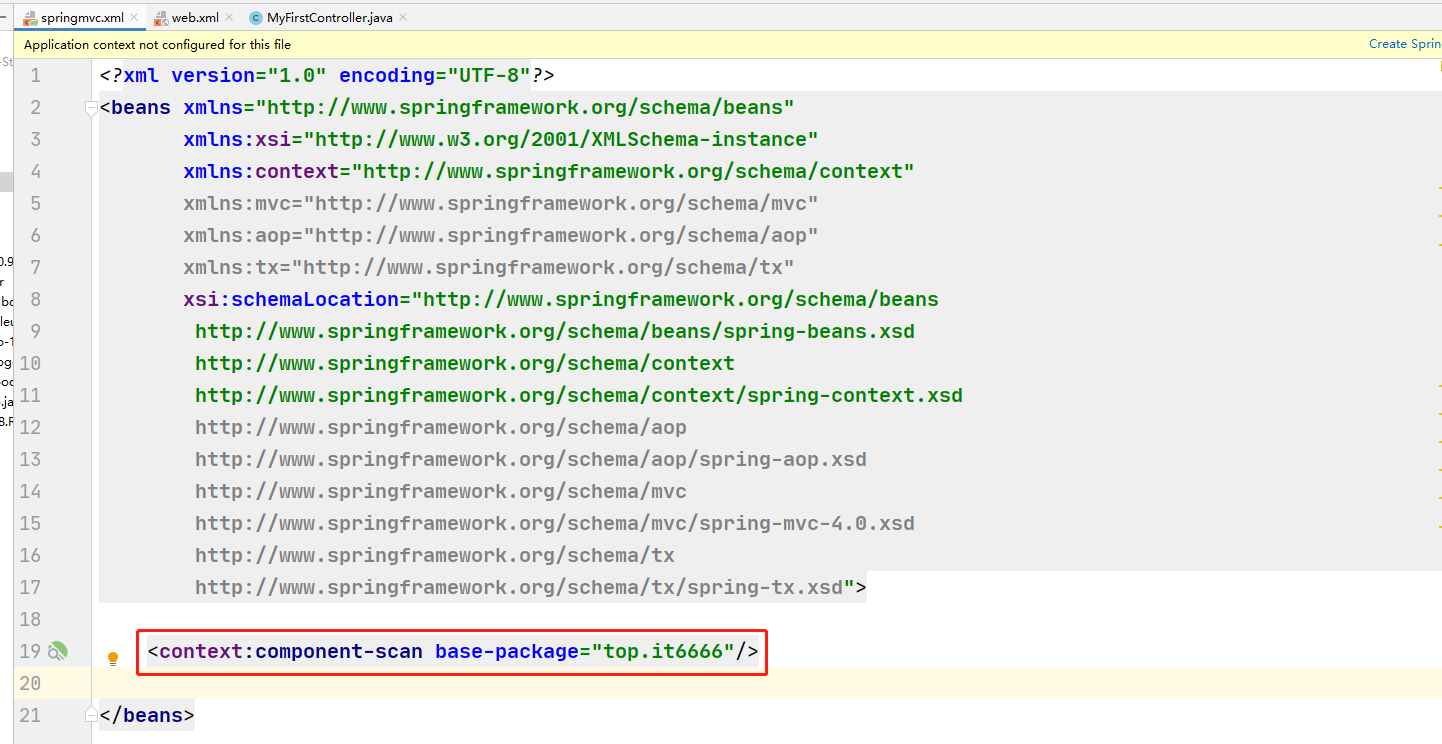
<context:component-scan base-package="top.it6666"/>
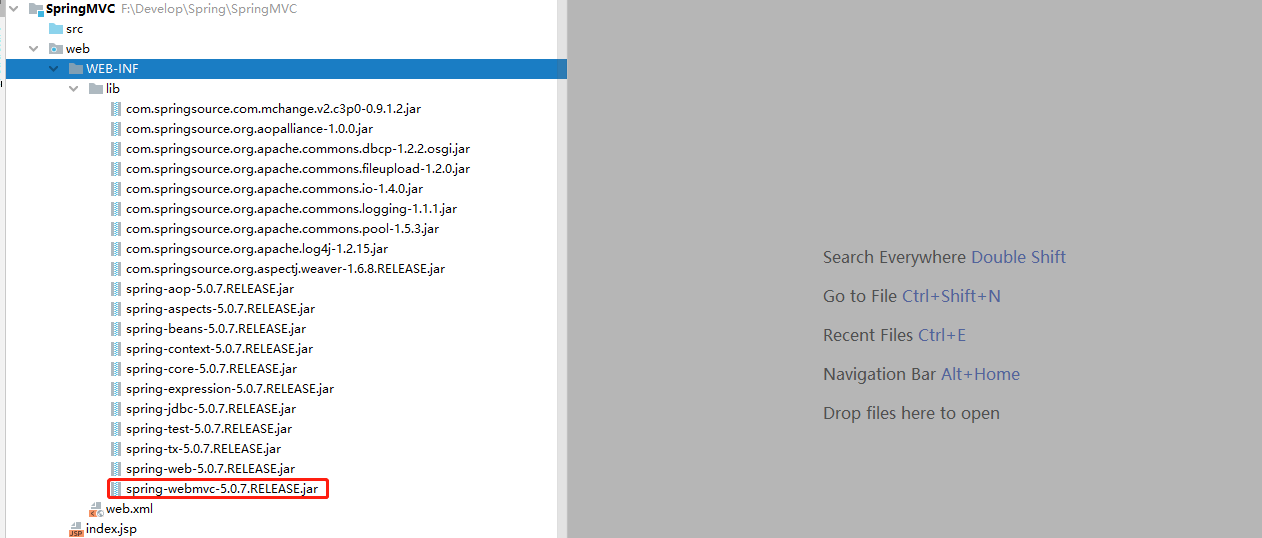
- 在web 目录中创建一个
first.jsp,内容如下:
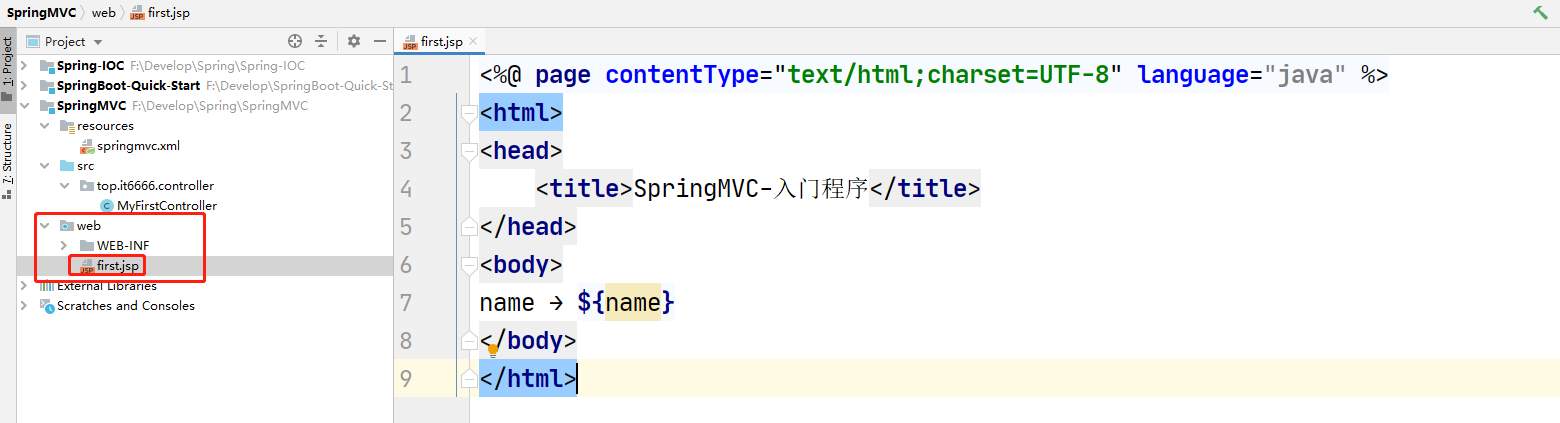
<%@ page contentType="text/html;charset=UTF-8" language="java" %>
<html>
<head>
    <title>SpringMVC-入门程序</title>
</head>
<body>
name → ${name}
</body>
</html>
- 在继续创建一个
index.jsp 页面用来发送请求,同样的是在 web 目录中进行创建
<%@ page contentType="text/html;charset=UTF-8" language="java" %>
<html>
<head>
    <title>Hello SpringMVC</title>
</head>
<body>
<a href="${pageContext.request.contextPath}/first.action">发送请求</a>
</body>
</html>
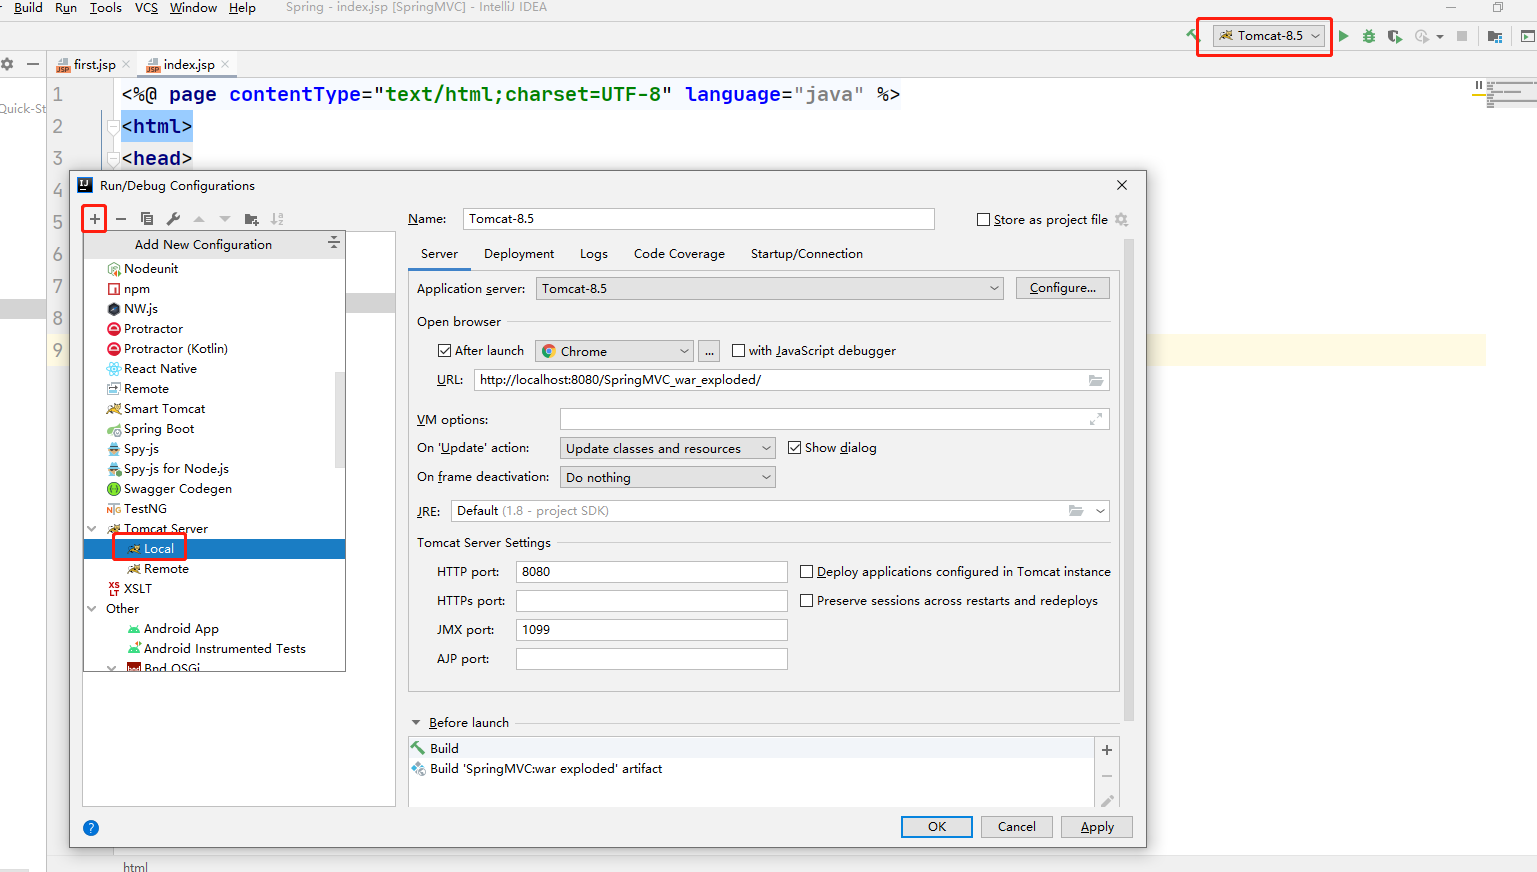
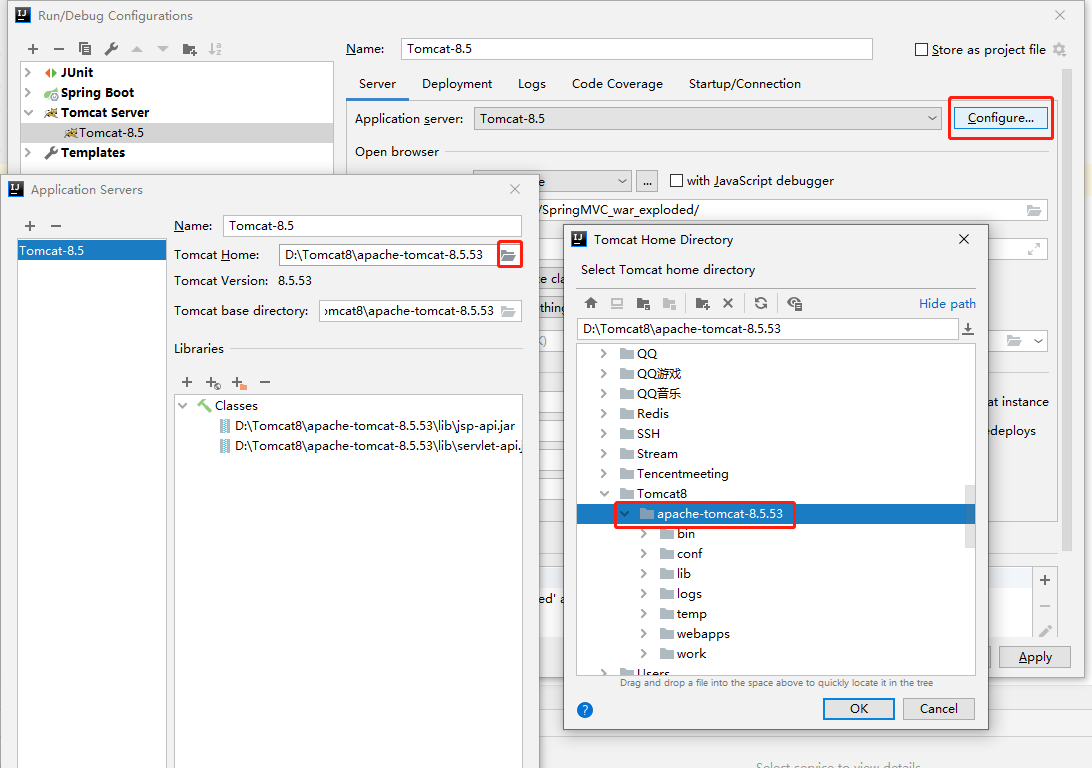
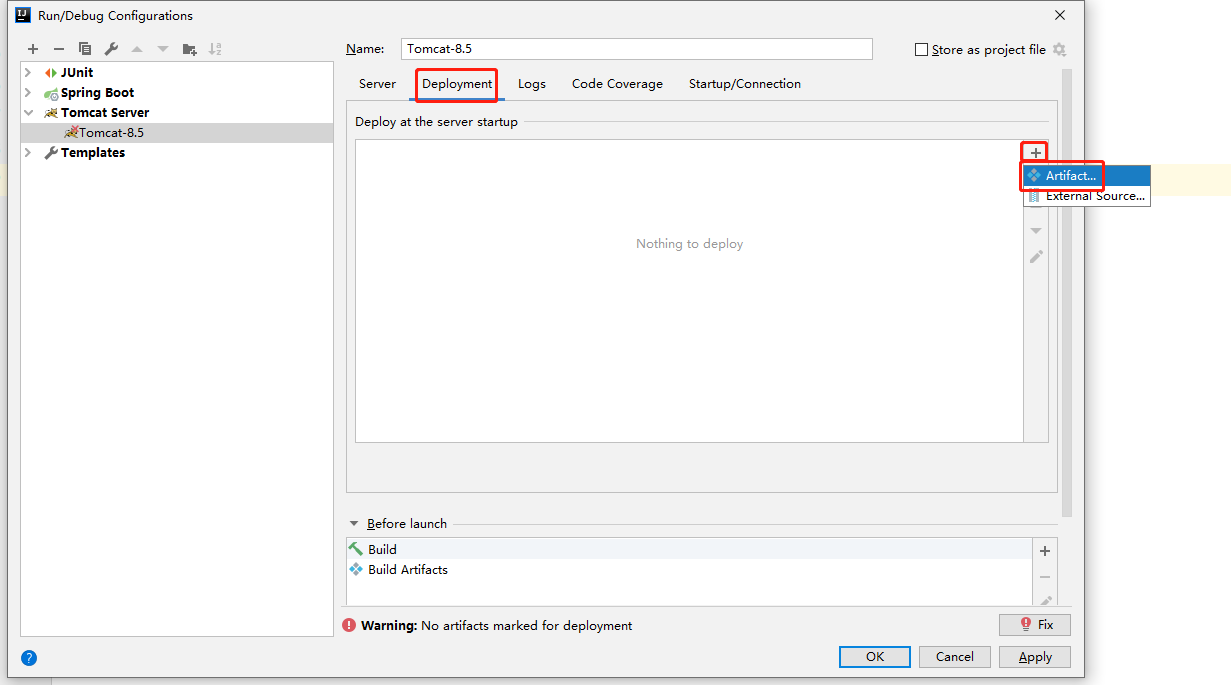
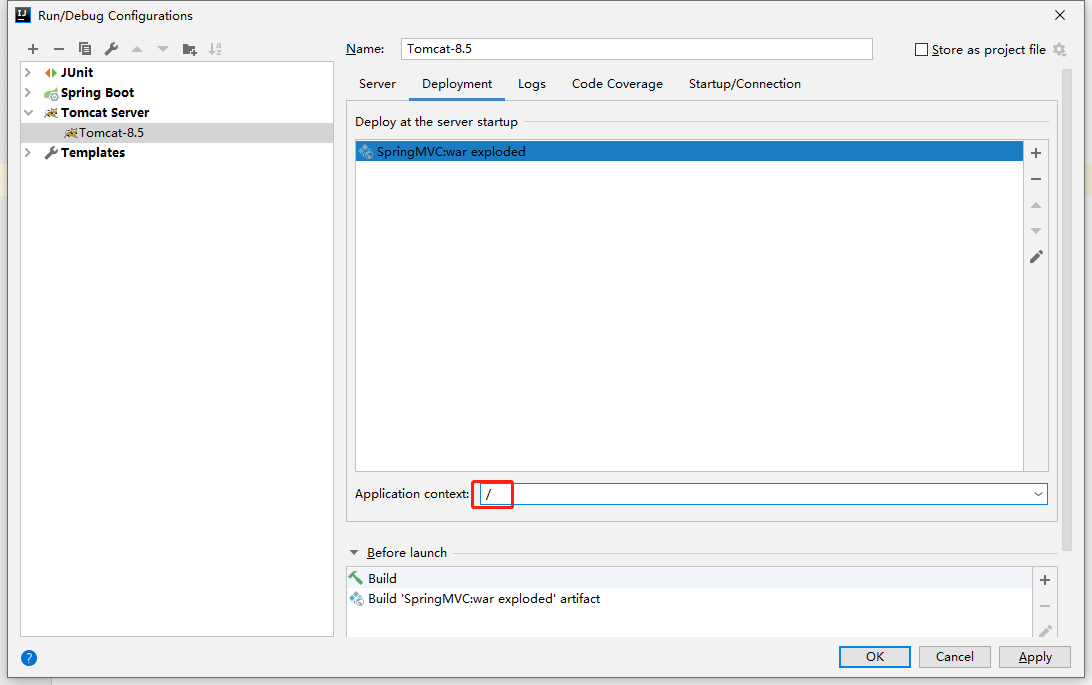
- 启动工程,会自动打开
index.jsp 页面,然后点击发送请求


执行流程

 浙公网安备 33010602011771号