使用IDEA搭建SSM项目
使用IDEA搭建SSM项目
摘要:前几天学习了SSM项目的搭建,但是因为配置过程中出现了问题因此没有搭起来,我最讨厌不确定的事情,因此自己花费了点时间钻研搭建SSM项目的方法,终于习得了SSM项目搭建的方法,接下来我会记录一次我自己搭建SSM项目的过程。
1.概述
SSM项目的搭建实际上是Spring,Spring MVC与MyBatis三个框架的整合,听上去好像有点复杂,但是实际上其原理非常简单,就是在一个项目中先后配置这三个框架并构建相应的层,然后再在xml配置文件中加入三者的监听器,这样三个框架就能被xml配置文件联系在一起,Spring MVC中主要是提供了控制层的Servlet的方便服务,MyBatis中做的事情则主要是关于数据库的操作方便化,Spring则是提供了控制权反转和面向切面编程的功能,让这个项目的耦合度更低,达到了解耦的目的,其思想实际上是穿插在这个项目的各个层级之中的。
SSM项目中分为如下几层:controller层,这层属于Spring MVC架构的管理范围,主要是负责请求的接收与发送,也就是我们的Servlet,里边提供操作简单的传参与转发功能;model层(entity)层,关于这层在Spring MVC和MyBatis两个框架中都有提及,在MyBatis中多被称为entity层,在Spring MVC中多被称为model层,在SSM项目中我们可以二选一,因为两个名字其实是一个东西,该层中存在的内容主要是项目中需要使用到的Java Bean对应的类,也就是Java Bean的定义信息或者说是蓝图;Service层,该层主要被Spring框架管理,该层明显的使用到了IOC的对象生成方法进行解耦,这层主要负责项目中的业务处理,也就是数据的逻辑操作;Dao层,该层也可以被称为mapper层,被MyBatis管辖,两个名字实际上指的是同一个东西,但是在我们配置该层的时候实际上也使用到了Spring提供的IOC思想,并且该层会分为两部分:接口部分和实现部分,实现部分我们通常是使用配置文件实现的,因此两部分通常不会在一起,为了区分,我们通常将配置文件命名为mapper部分,将接口部分命名为dao部分,二者共同组成mapper层或者说是dao层,需要注意的是在mybatis中还存在注解开发,注解开发中的实现和接口位于同一文件中,使用注解开发我们能更清晰的意识到二者属于同一层,但是我们很少使用注解开发吗,因为这样会提升耦合度。
在SSM项目中model层有时可能也被称为java bean,而不认为它是一层,这里并不影响项目搭建,大家怎样理解都可以。
2.项目搭建
2.1.创建一个webapp模板的maven项目
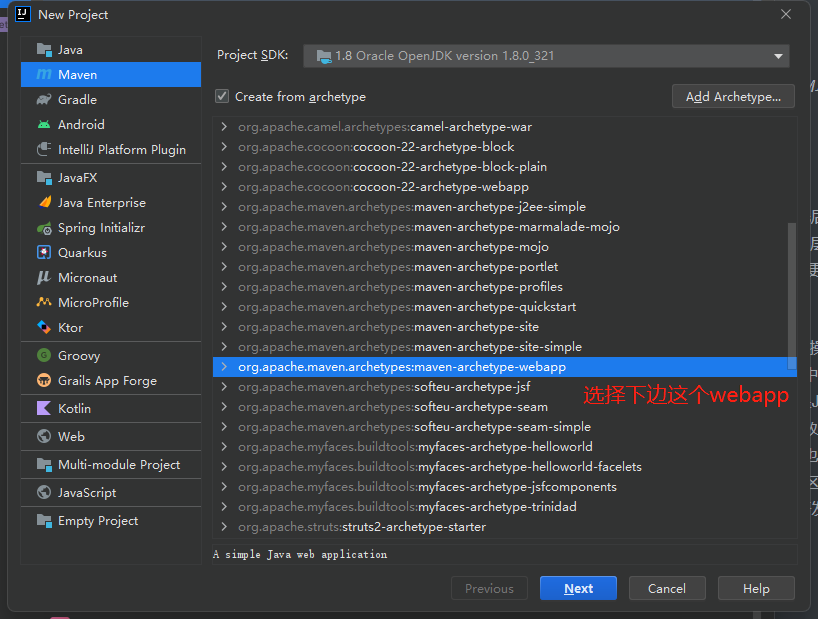
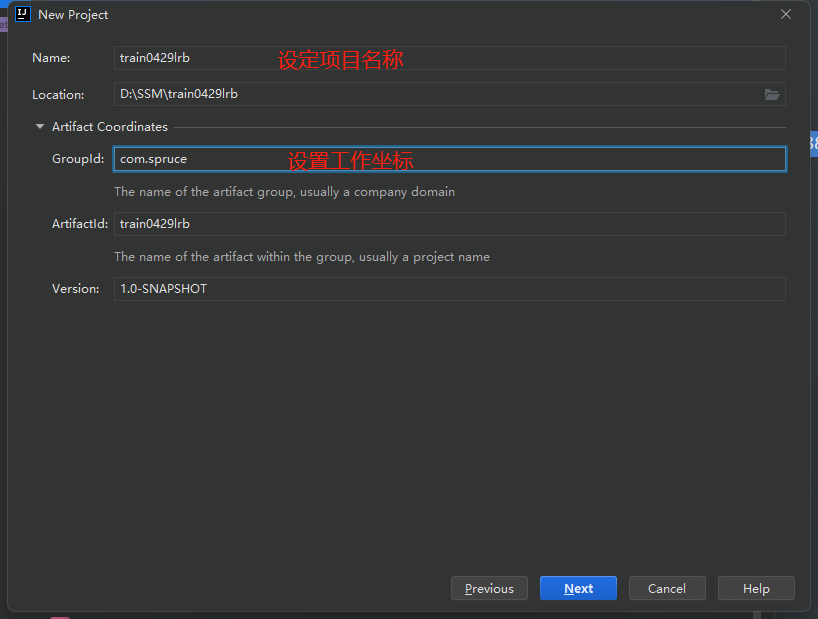
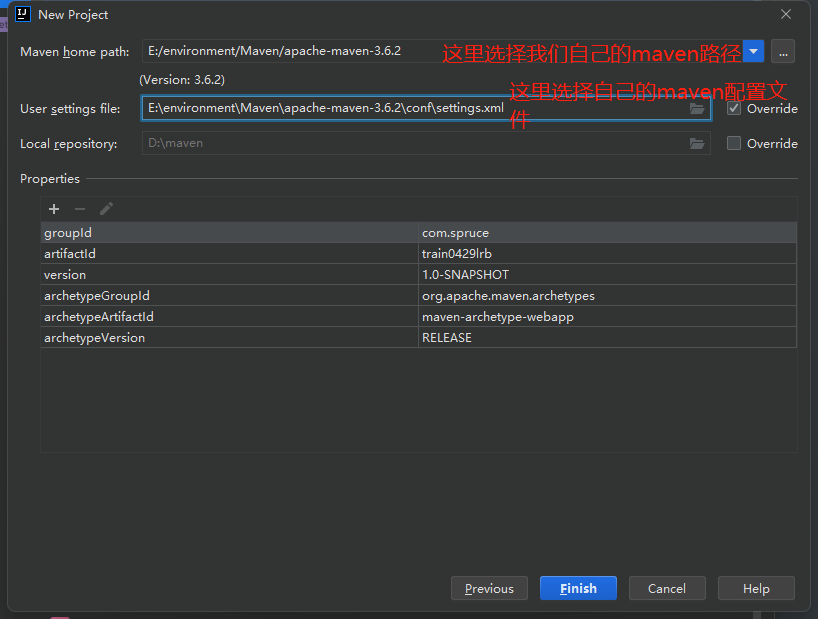
首先我们在IDEA中创建一个webapp模板的maven项目,名字随意,设定好工作坐标以及我们自己的maven路径,下面为步骤图解:
1.选择模板并创建项目
2.设定项目名称并设置工作坐标
3.设置maven路径与配置文件,之后点击finish就配置好了
2.2.导入jar包依赖
之后我们进入项目后,最先显示的就是我们的pom文件,我们接下来需要对pom文件做一些操作:
1.删除用不到的坐标依赖,我们删除掉原有的properties标签、dependencies标签和build标签中的所有内容
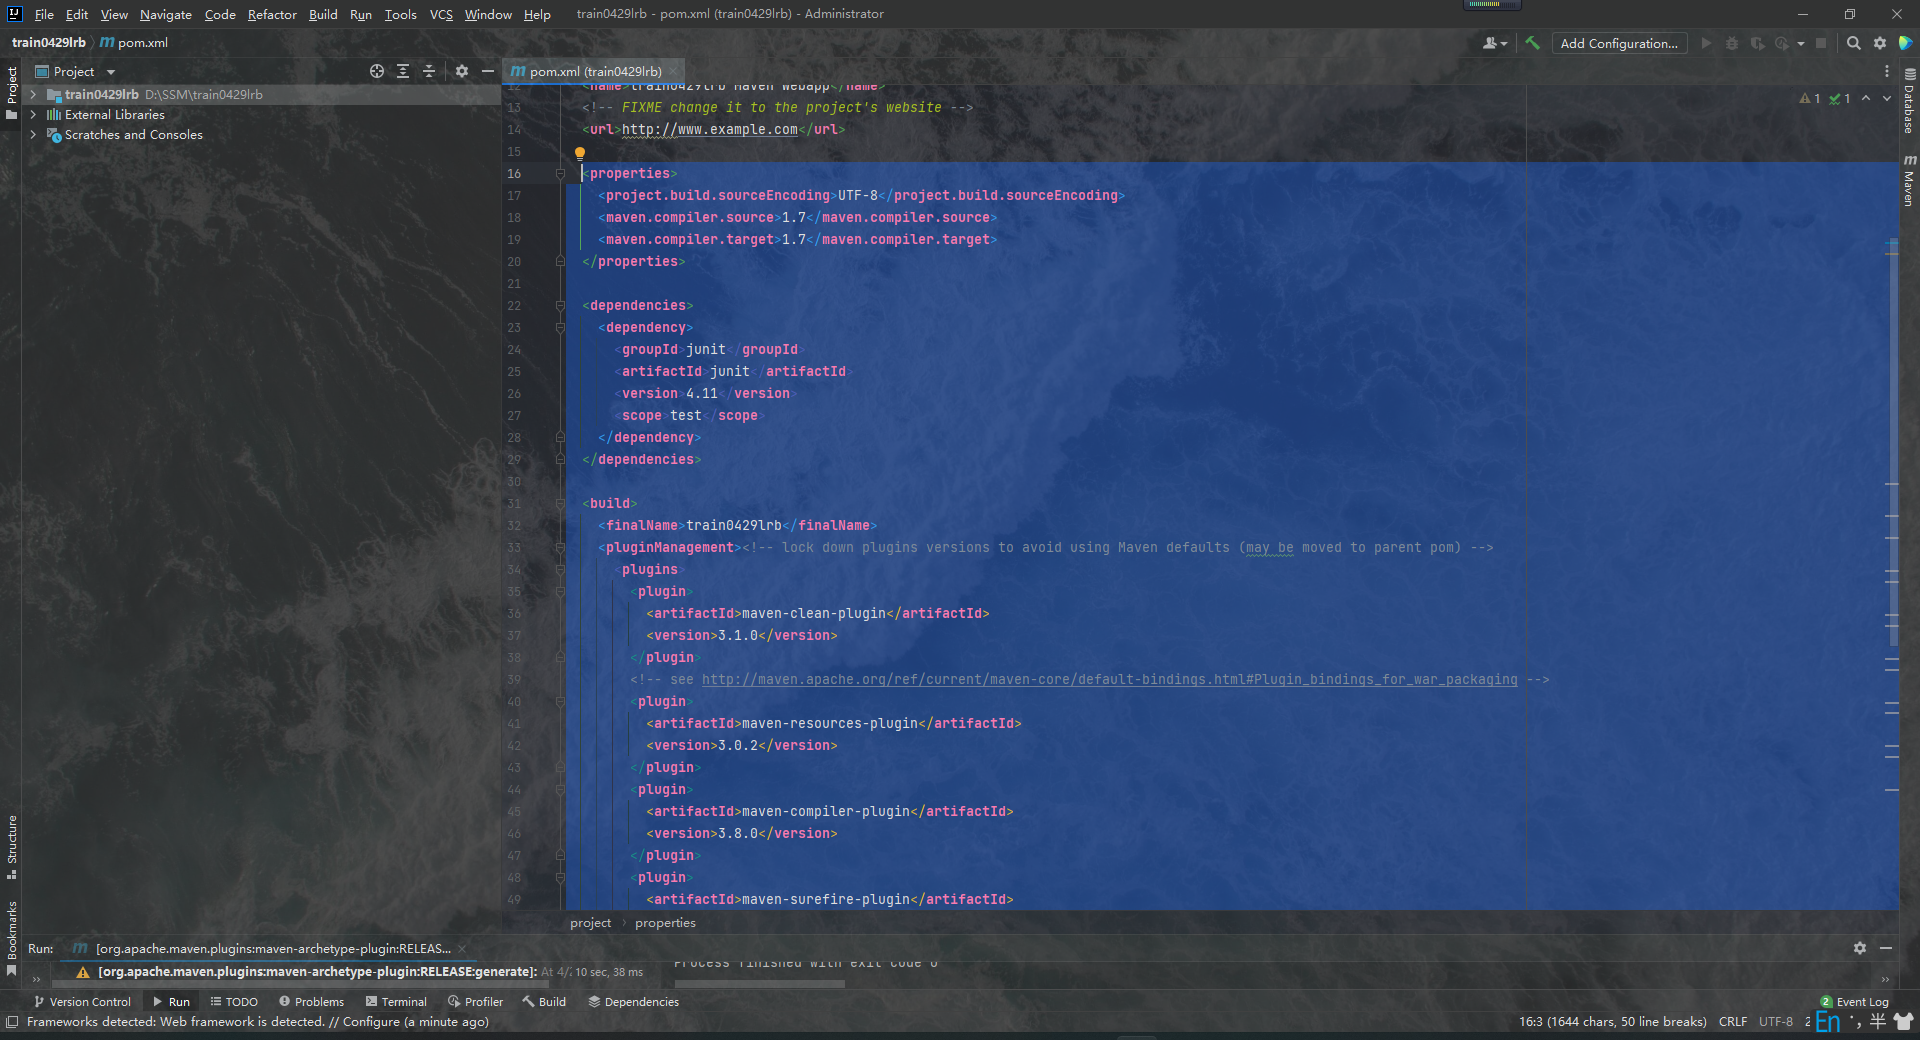
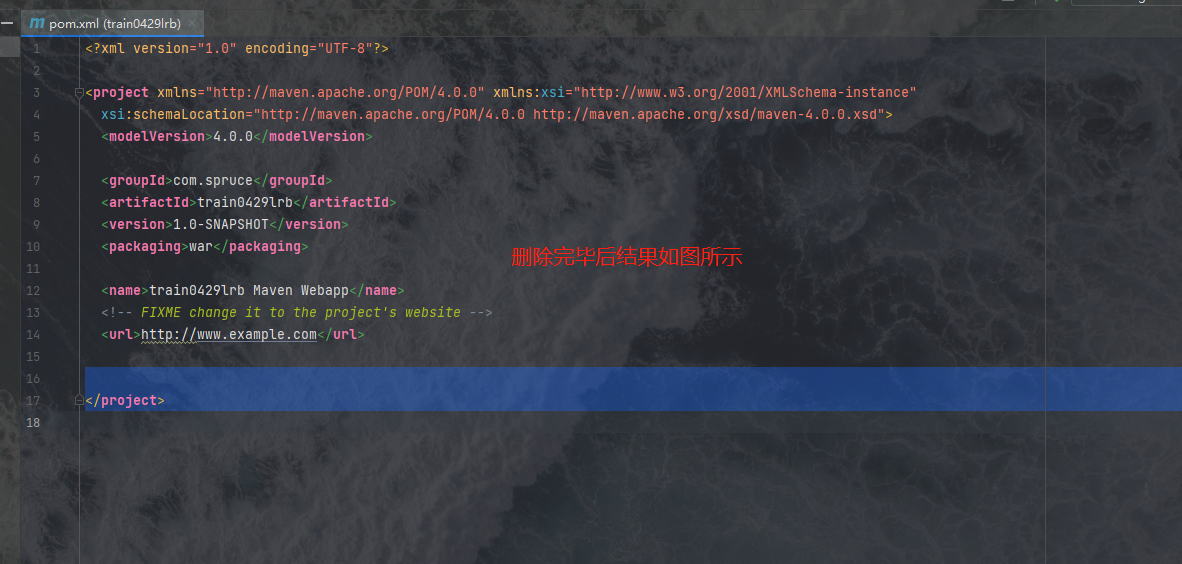
2.导入我们即将用到的坐标依赖
我们导入下面的jar包依赖:
<properties>
  <spring.version>5.0.2.RELEASE</spring.version>
  <slf4j.version>1.6.6</slf4j.version>
  <log4j.version>1.2.12</log4j.version>
  <mysql.version>5.1.6</mysql.version>
  <mybatis.version>3.4.5</mybatis.version>
  <jackson.version>2.9.4</jackson.version>
</properties>
<dependencies>
  <!--spring-->
  <dependency>
    <groupId>org.aspectj</groupId>
    <artifactId>aspectjweaver</artifactId>
    <version>1.6.8</version>
  </dependency>
  <dependency>
    <groupId>org.springframework</groupId>
    <artifactId>spring-aop</artifactId>
    <version>${spring.version}</version>
  </dependency><dependency>
  <groupId>org.springframework</groupId>
  <artifactId>spring-context</artifactId>
  <version>${spring.version}</version>
</dependency>
  <dependency>
    <groupId>org.springframework</groupId>
    <artifactId>spring-web</artifactId>
    <version>${spring.version}</version>
  </dependency>
  <dependency>
    <groupId>org.springframework</groupId>
    <artifactId>spring-webmvc</artifactId>
    <version>${spring.version}</version>
  </dependency>
  <dependency>
    <groupId>org.springframework</groupId>
    <artifactId>spring-test</artifactId>
    <version>${spring.version}</version>
  </dependency>
  <dependency>
    <groupId>org.springframework</groupId>
    <artifactId>spring-tx</artifactId>
    <version>${spring.version}</version>
  </dependency>
  <dependency>
    <groupId>org.springframework</groupId>
    <artifactId>spring-jdbc</artifactId>
    <version>${spring.version}</version>
  </dependency>
  <dependency>
    <groupId>junit</groupId>
    <artifactId>junit</artifactId>
    <version>4.12</version>
    <scope>test</scope>
  </dependency>
  <dependency>
    <groupId>mysql</groupId>
    <artifactId>mysql-connector-java</artifactId>
    <version>${mysql.version}</version>
  </dependency>
  <dependency>
    <groupId>javax.servlet</groupId>
    <artifactId>servlet-api</artifactId>
    <version>2.5</version>
    <scope>provided</scope>
  </dependency>
  <dependency>
    <groupId>javax.servlet.jsp</groupId>
    <artifactId>jsp-api</artifactId>
    <version>2.0</version>
    <scope>provided</scope>
  </dependency>
  <dependency>
    <groupId>jstl</groupId>
    <artifactId>jstl</artifactId>
    <version>1.2</version>
  </dependency>
  <!--log start-->
  <dependency>
    <groupId>log4j</groupId>
    <artifactId>log4j</artifactId>
    <version>${log4j.version}</version>
  </dependency>
  <dependency>
    <groupId>org.slf4j</groupId>
    <artifactId>slf4j-api</artifactId>
    <version>${slf4j.version}</version>
  </dependency>
  <dependency>
    <groupId>org.slf4j</groupId>
    <artifactId>slf4j-log4j12</artifactId>
    <version>${slf4j.version}</version>
  </dependency>
  <!-- log end-->
  <dependency>
    <groupId>org.mybatis</groupId>
    <artifactId>mybatis</artifactId>
    <version>${mybatis.version}</version>
  </dependency>
  <dependency>
    <groupId>org.mybatis</groupId>
    <artifactId>mybatis-spring</artifactId>
    <version>1.3.0</version>
  </dependency>
  <!--连接池-->
  <dependency>
    <groupId>com.alibaba</groupId>
    <artifactId>druid</artifactId>
    <version>1.1.10</version></dependency>
  <dependency>
    <groupId>org.mybatis.generator</groupId>
    <artifactId>mybatis-generator-core</artifactId>
    <version>1.3.5</version>
  </dependency>
  <dependency>
    <groupId>com.fasterxml.jackson.core</groupId>
    <artifactId>jackson-core</artifactId>
    <version>${jackson.version}</version>
  </dependency>
  <dependency>
    <groupId>com.fasterxml.jackson.core</groupId>
    <artifactId>jackson-databind</artifactId>
    <version>${jackson.version}</version>
  </dependency>
  <dependency>
    <groupId>com.github.pagehelper</groupId>
    <artifactId>pagehelper</artifactId>
    <version>5.1.10</version>
  </dependency>
  <dependency>
    <groupId>cn.hutool</groupId>
    <artifactId>hutool-all</artifactId>
    <version>5.2.3</version>
  </dependency>
  <dependency>
      <groupId>org.thymeleaf</groupId>
      <artifactId>thymeleaf-spring4</artifactId>
      <version>3.0.9.RELEASE</version>
  </dependency>
</dependencies>
<build>
  <finalName>ssm</finalName>
  <pluginManagement>
    <plugins>
      <plugin>
        <groupId>org.apache.maven.plugins</groupId>
        <artifactId>maven-compiler-plugin</artifactId>
        <version>3.2</version>
        <configuration>
          <source>1.8</source>
          <target>1.8</target>
          <encoding>UTF-8</encoding>
          <showWarnings>true</showWarnings>
        </configuration>
      </plugin>
    </plugins>
  </pluginManagement>
  <plugins>
    <plugin>
      <groupId>org.mybatis.generator</groupId>
      <artifactId>mybatis-generator-maven-plugin</artifactId>
      <version>1.3.5</version>
      <!--告诉插件,配置文件所在的位置-->
      <configuration>
        <configurationFile>src/main/resources/mbg.xml</configurationFile>
        <verbose>true</verbose>
        <overwrite>true</overwrite>
      </configuration>
    </plugin>
  </plugins>
</build>
导入好之后我们点击更新来进行依赖的导入:
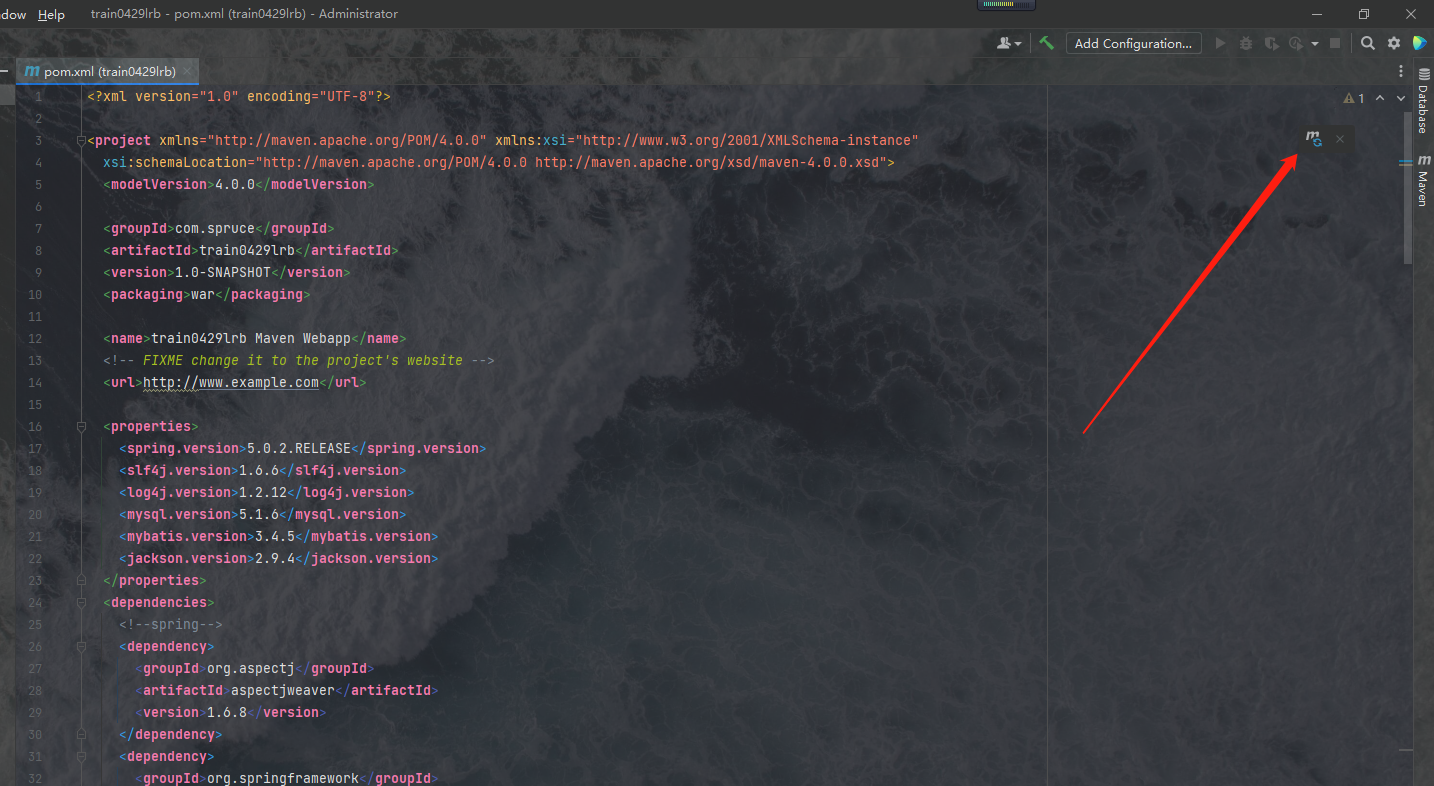
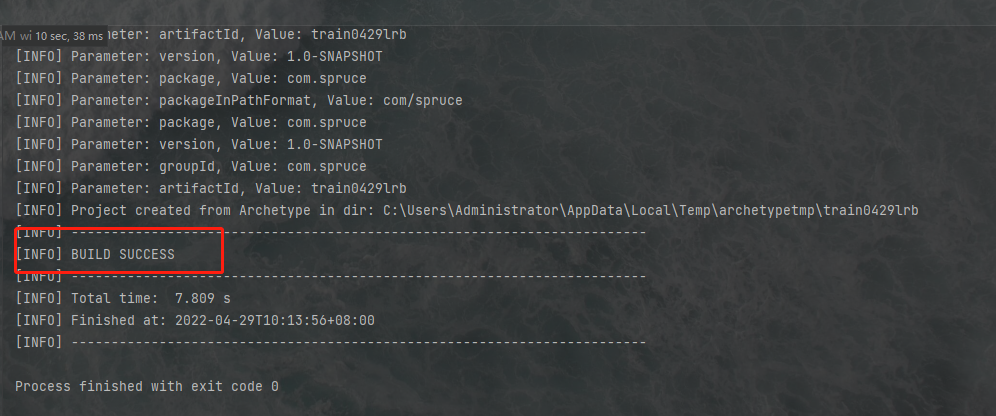
命令行中输出如下信息说明我们已经导入成功了:
2.3.搭建项目基本框架
1.创建我们的Java程序目录与资源目录
我们首先要在项目的main目录下创建两个目录,一个是java目录,一个是resource目录,两个目录都应被设定相应的角色,我们要把java目录设定成java源目录,将资源目录设定为资源目录,如下图所示我们分别创建这两个目录:
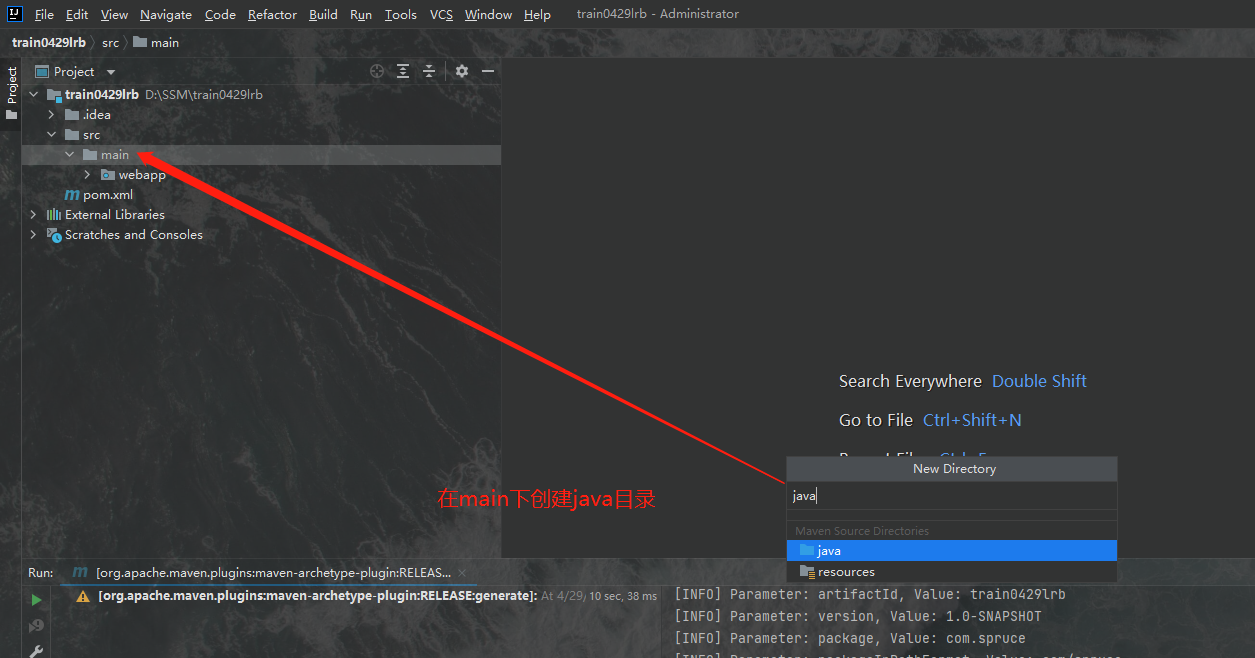
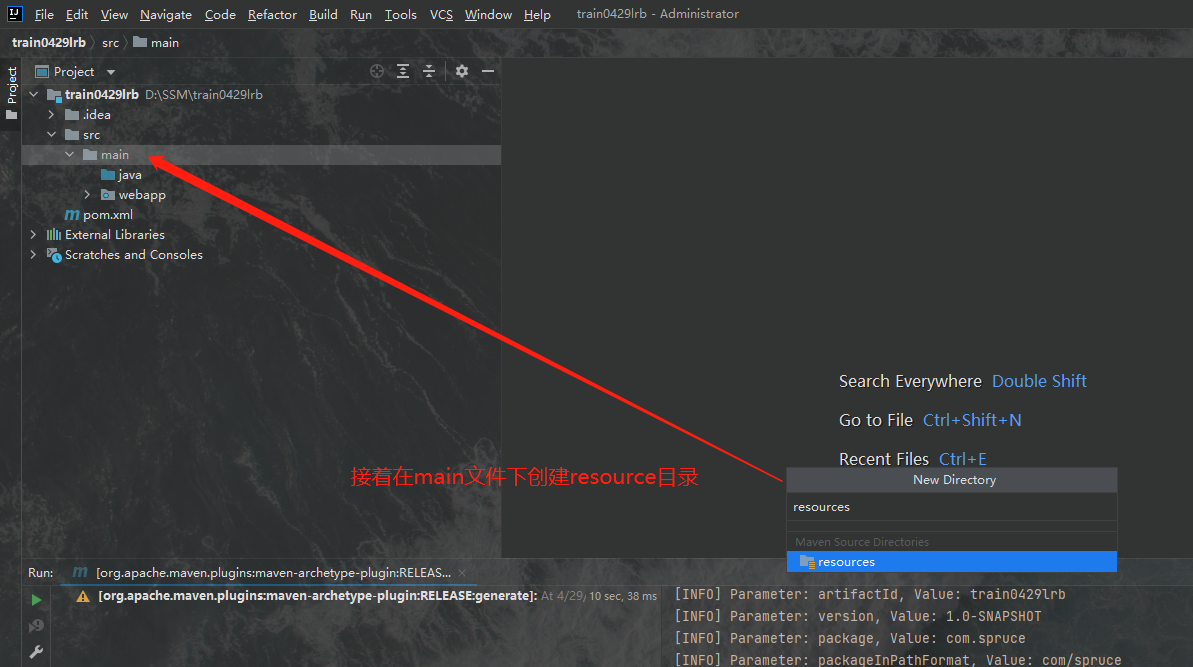
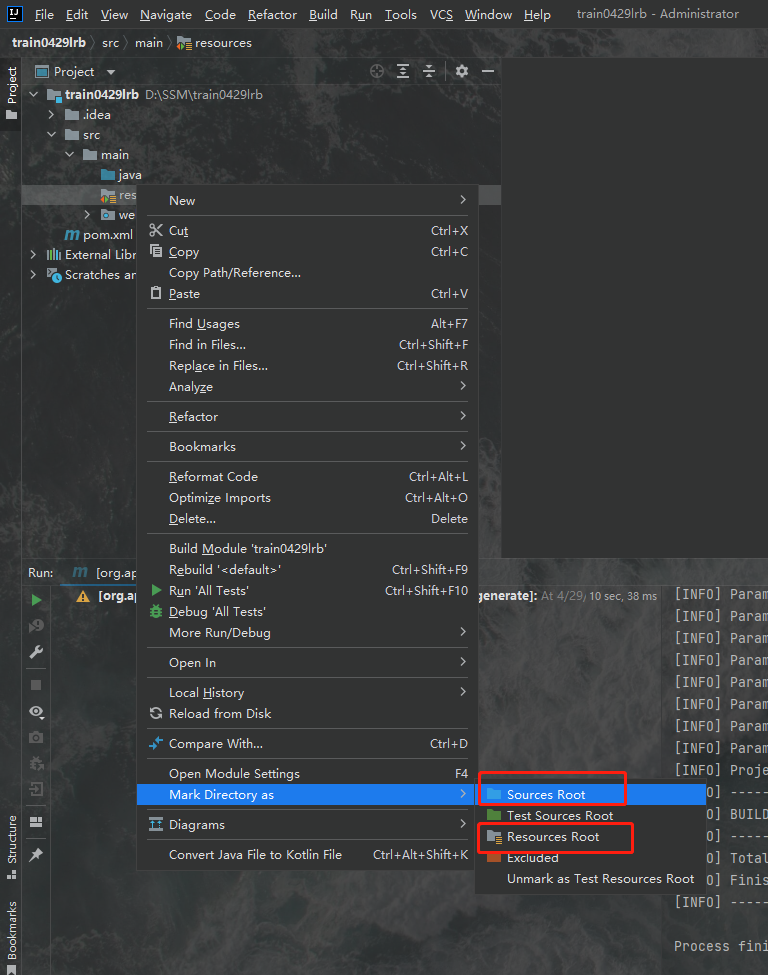
我们创建好目录之后右键单击目录,就会出现一个菜单栏,我们在最下边的Mark Directory as选项中可以看到我们可以设定目录的类型,其中java目录应为最上边的Source Root也就是源根,resource目录应为第三个Resource Root也就是资源根,如图所示:
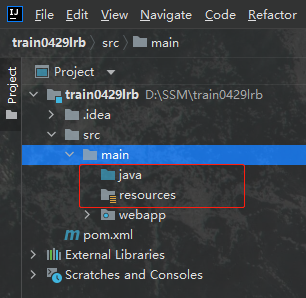
两个目录创建好之后我们便得到了一个这样的目录结构,注意两个目录的类型千万不要设置错,图标要和我一样才行:
2.创建我们的Java工作空间
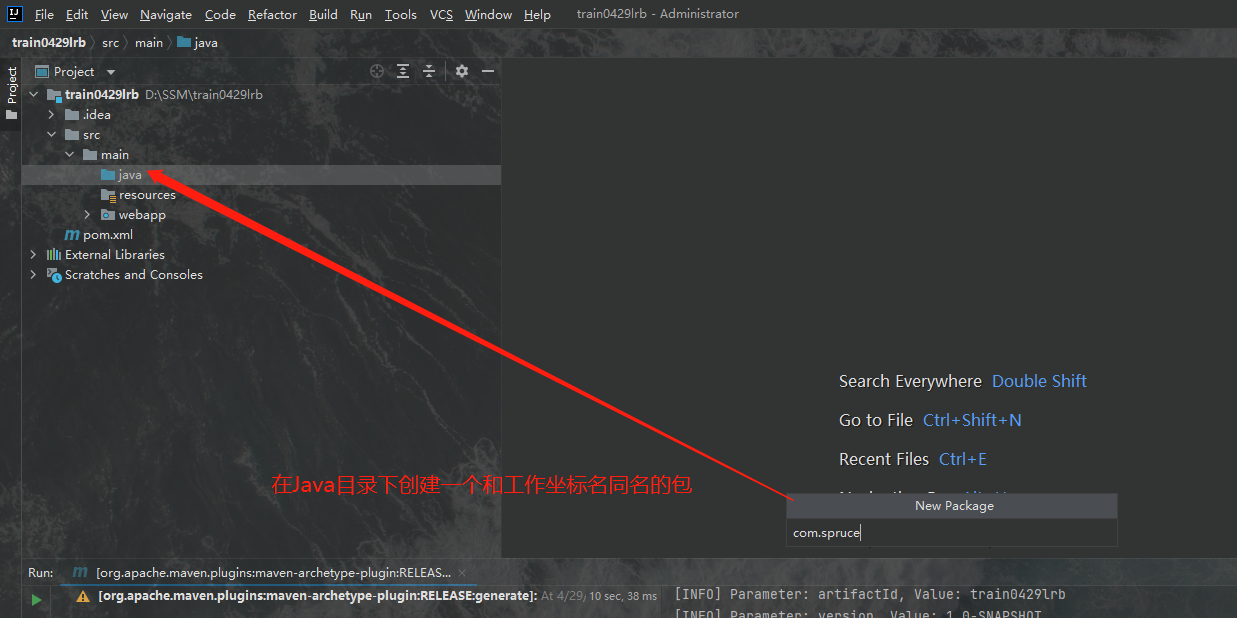
我们显然是不能直接在java目录之下直接写java代码的,我们不能直接将代码写在一个目录之下,而是应该写在有着特定命名格式的包里。尽管包也是目录,但是我们通常认为包与普通的源目录有着本质上的区别,因此我们首先在java目录下创建一个和我们之前定义的工作空间同名的包,这是规范,我们之前定义的工作空间可以去2.1中查看,我定义的坐标名是com.spruce,这个名称通常是公司名或者组名,以后我们参与到实际的开发中之后会有更深入的了解:
3.创建测试区
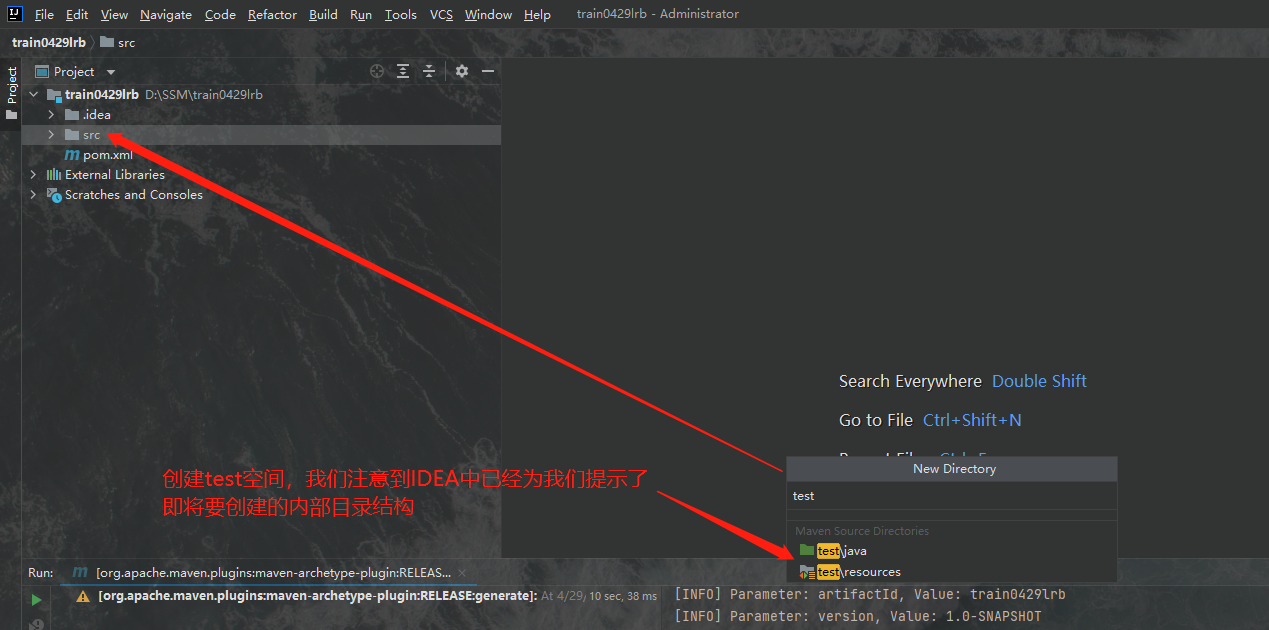
我们不仅仅要创建工作空间,我们还要创建测试空间,测试空间是和main目录同级别的一个目录,我们的主要测试代码都在里边书写,我们接下来在src目录下创建一个名为test的目录,并建立和main目录基本上一致的目录结构,test目录中无需创建webapp目录,只需创建好java目录与resource目录,其中,java目录的类型为Test Source Root也就是测试源根;resource目录的类型我们要定义为Test Resource Root,也就是测试资源根:
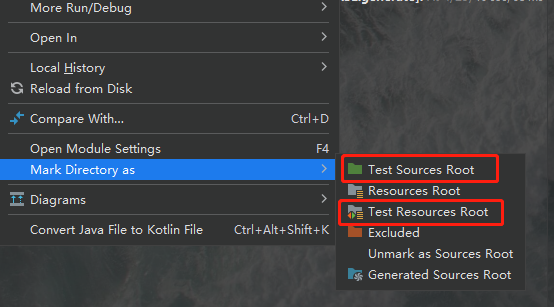
下图中的第一个选项即为测试源根,第三个为测试资源根,他们与源根和资源根的图标是不一样的:
创建好之后的目录结构如图所示:

这样一来这个项目的准备工作就基本完成了,现在就可以进行我们项目的基本搭建了。
2.4.创建项目对应的数据库
每一个SSM项目必然是要连接一个属于自己的数据库的,因此我们要专门为这个项目创建一个自己的数据库,这个数据库在之后的项目开发中必然会用到,而且在做测试的时候我们也会用到这个数据库,因此我们搭建一个和项目同名的数据库,项目名是train0429lrb,因此我们搭建一个和项目同名的数据库:
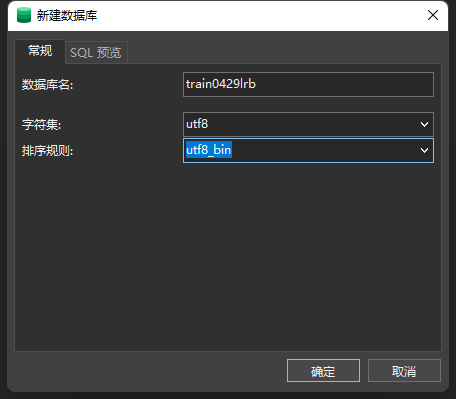
我们使用Navicat创建一个数据库,字符集如图所示,需要注意的是有时我们即使设置了utf-8的格式,编码也是总出问题,而我的电脑不知咋回事一定会出现编码问题,因此在项目搭建过程中我们先忽略这个编码问题,在项目搭建完成后我们再着重解决这个问题。
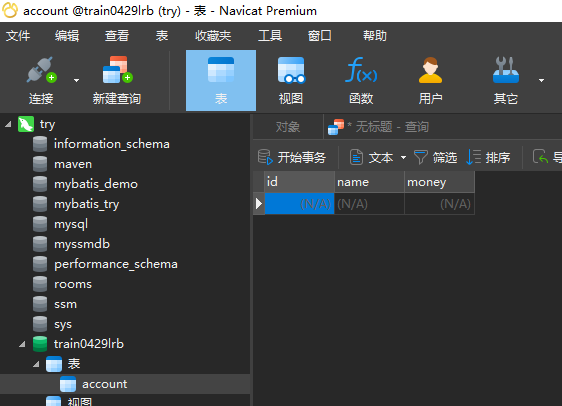
创建好数据库后我们在数据库中创建一个测试用的表,并且往里边放上一些数据,我们使用下面的数据创建表,也可以用Navicat的图形用户界面创建:
create table account(
	id int primary key auto_increment,
	name varchar(20),
	money double
);
创建好之后是这样的:
现在我们往里边插入一点数据:
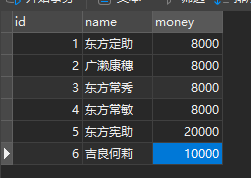
这样一来数据库就搭建好了,接下来我们根据数据库来创建我们的model层。
2.5.创建model层
这里我想提的一点就是实际上每个逻辑层本质上都仅仅是一个包,其意义实际上是我们赋予它的,这里的思想实际上就是约定大于配置,对于这些层我们无需配置什么,而是我们要按照约定在里边些什么,我们在里边写的东西,就是我们赋予其真正含义的过程,我们在一个名为model的包下写Service层的代码,那这个包就是Service层的包。因此我们要是想创建一个层,必须要有代码的具体依托,而我们的代码在SSM项目中很大程度上是依托于数据库书写的,典型的如model层,接下来我们书写model层的代码。
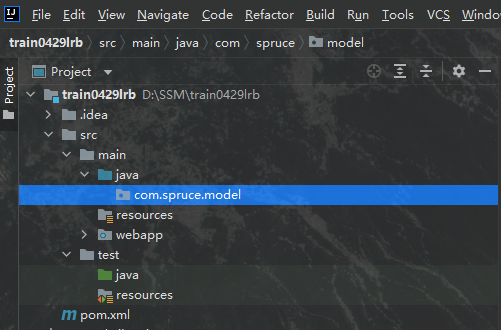
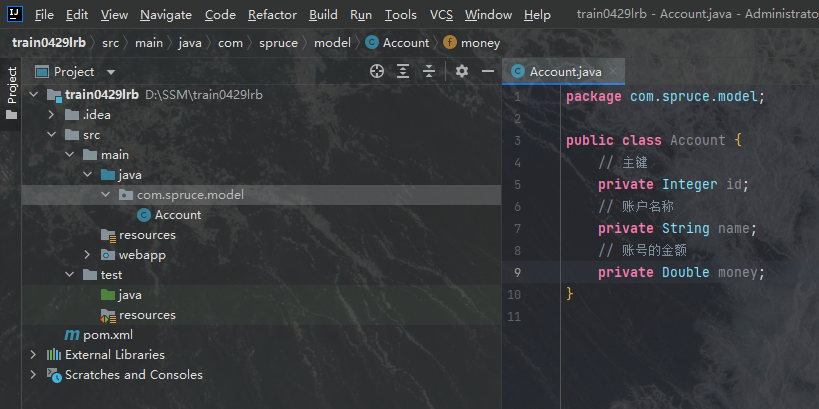
model层代码实际上就是java bean的蓝图,我们当前数据库中存在一个实体为account,因此我们就需要创建一个account的java bean蓝图,也就是Account类,经过上面的构建表我们知道数据库中的account表有三个字段:id[类型为int]、name[类型为varchar]、money[类型为double],因此我们必须创建一个字段名和属性完全与该表一样的类,这个类在哪创建呢?我们首先应该在com.spruce下创建一个新包,名为model,然后今后它就是我们的model层了,之后我们在这个里边创建Account类:
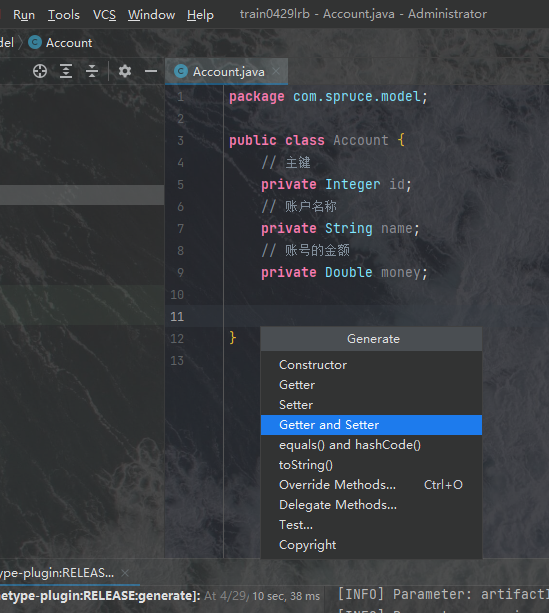
然后我们为其生成getter方法和setter方法,以及toString方法:
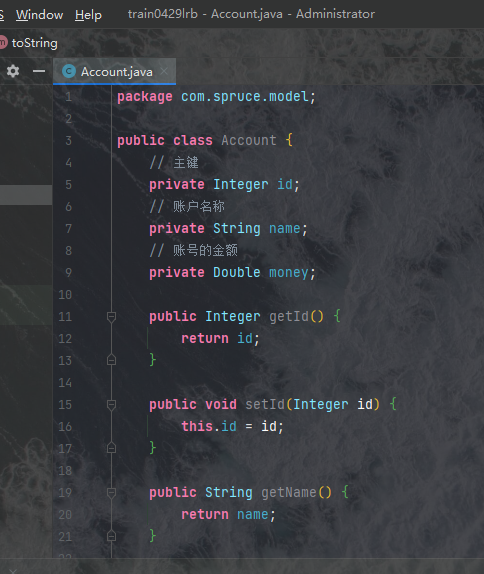
创建好model层之后,我们整体项目就算出现了第一个约定了,根据这个约定,我们就可以配置三个框架以及它们相对应的层了。
2.6.Spring框架的导入以及Service层的创建
1.创建Service层
Service是严格遵循Spring提供的IOC思路书写的,因此我们会将代码分为两部分,其中一部分是接口部分,另一部分是方法体部分,其中接口部分的作用主要是限制我们方法的声明,以及在controller层中提供生成标准bean的服务,首先我们先在com.spruce下创建一个service包:
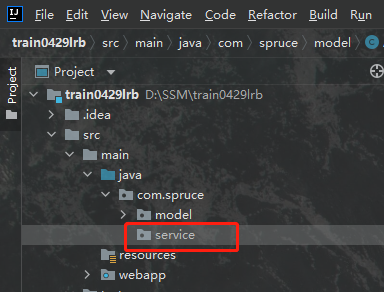
然后我们在其下边创建两个包,具体命名方式无所谓,主要是我们自己能区分就好了,一个包装接口,一个包装service层方法,如下:

然后我们在interf包下创建一个新的接口类,名为AccountService,这里边定义的是Account这个javabean相关的业务操作的各种方法,我们书写其代码如下:
package com.spruce.service.interf;

import com.spruce.model.Account;
import java.util.List;

public interface AccountService {

    //查询所有
    public List<Account> findAll();
}
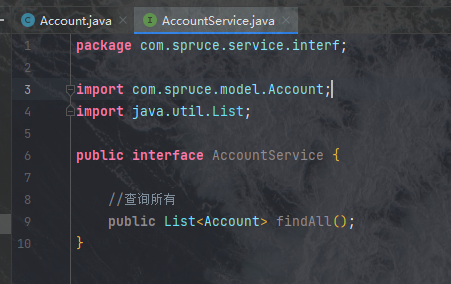
这些代码意味着我们为AccountService的业务方法中定下了一个标准,简而言之就是说我们必须为Account这个实体提供一个查询所有数据库中的信息的方法。有了接口之后,我们就得在impl包中书写接口的实现,否则我们的方法是使用不了的。
之后我们书写接口的实现,我们在impl包中创建一个与刚才的AccountService相对应的AccountServiceImpl类,然后让这个类实现那个接口,如下:
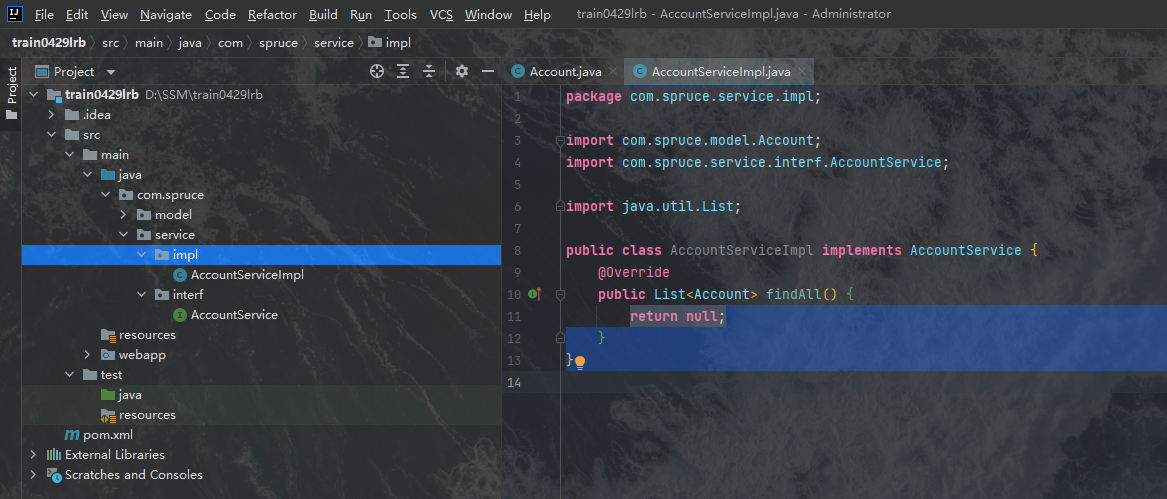
通常情况下,我们在这个方法中是需要使用依赖注入的方式生成一个Dao层对象,然后使用Dao层对象中的那个方法的,但是现在我们还没有创建Dao层对象,因此我们先书写一个假方法,我们使用Spring提供的IOC尝试实例化AccountService类,我们现在里边书写如下方法:
@Override
    public List<Account> findAll() {
        System.out.println("业务层:查询所有");
        return null;
    }
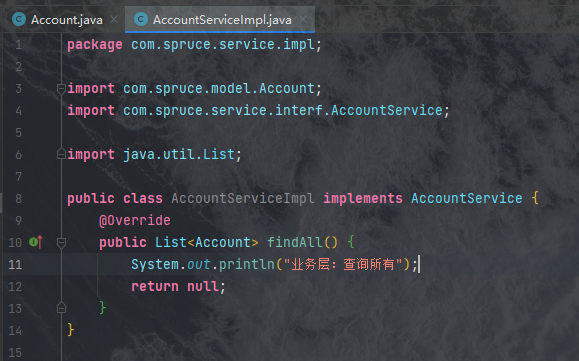
最后也是最终要的一点,我们为这个类加上注解@Service,加上这个注解之后,Spring才会扫描到这个类并承认这个类在Spring中存在的资格,之后才能生产这个类的对象,我们可以简单的记作加上注解之后,就可以使用Spring生成它的对象了,Spring中提供的对象生成许可注解有四种:@Component、@Controller、@Service、@Repository,这四个注解的功能都一样,就是创建对象,我们有时甚至可以混用,但是在SSM中我们尽量不要混用,因为这四个注解是分别面向不同的层的对象生成的,如下所示:
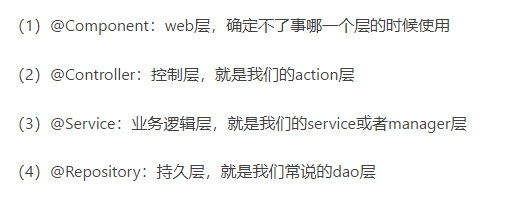
因此我们在这里一定要为我们书写的这个实现类加上@Service注解,如图所示:
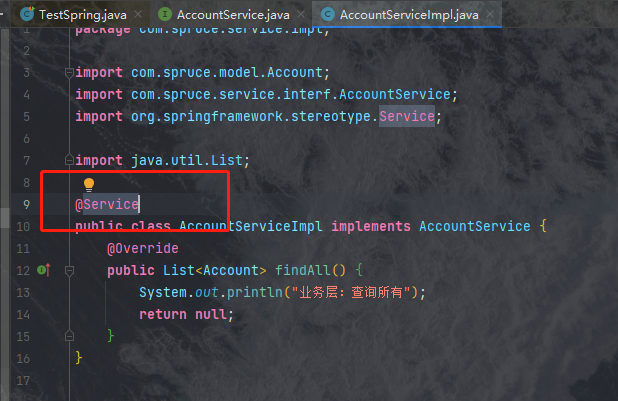
代码如下:
package com.spruce.service.impl;

import com.spruce.model.Account;
import com.spruce.service.interf.AccountService;
import org.springframework.stereotype.Service;

import java.util.List;

@Service
public class AccountServiceImpl implements AccountService {
    @Override
    public List<Account> findAll() {
        System.out.println("业务层:查询所有");
        return null;
    }
}
2.创建Spring配置文件
之后我们来正式配置Spring,我们首先创建配置文件,我们在之前在main中创建好的resource目录下新建一个spring目录,并在里边创建一个spring config类型的xml配置文件:

我们在其内部直接粘贴上如下配置信息:
<?xml version="1.0" encoding="UTF-8"?>
<beans xmlns="http://www.springframework.org/schema/beans"
       xmlns:xsi="http://www.w3.org/2001/XMLSchema-instance"
       xmlns:context="http://www.springframework.org/schema/context"
       xmlns:aop="http://www.springframework.org/schema/aop"
       xmlns:tx="http://www.springframework.org/schema/tx"
       xsi:schemaLocation="http://www.springframework.org/schema/beans
http://www.springframework.org/schema/beans/spring-beans.xsd
http://www.springframework.org/schema/context
http://www.springframework.org/schema/context/spring-context.xsd
http://www.springframework.org/schema/aop
http://www.springframework.org/schema/aop/spring-aop.xsd
http://www.springframework.org/schema/tx
http://www.springframework.org/schema/tx/spring-tx.xsd">
    <!--开启注解扫描,要扫描的是service-->
    <context:component-scan base-package=""/>
</beans>
其中在<context:component-scan base-package=""/>中,我们为base-package添加属性,这个属性是一个包路径,内容是我们所想要让Spring托管的包,我们填入com.spruce,意思是将整个工程中的类都纳入其管理,我们可以根据自己的需求来缩小这个范围:
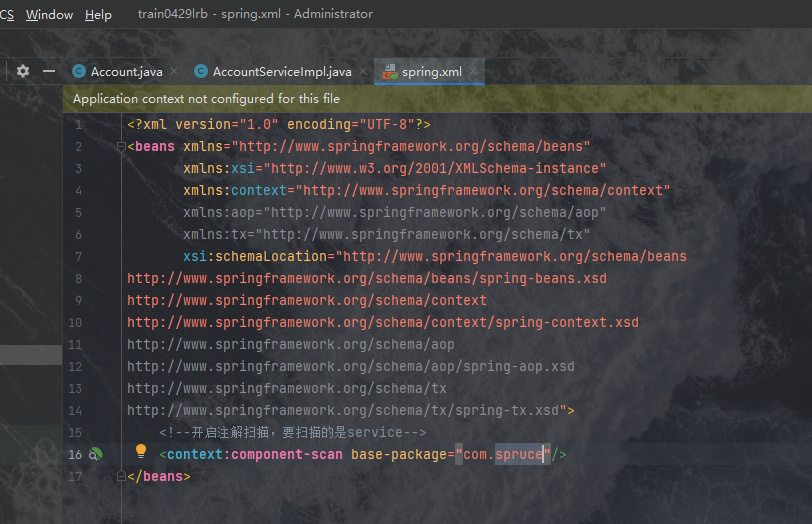
之后我们的Spring就配置好了,是的就是这么简单,接下来我们进行测试。
3.测试Spring
我们使用Spring的目的在于让Spring为我们生成对象,因此我们要测试这个功能,我们在test下的Java中创建一个和工作空间同名的包com.spruce,并在下面创建一个TestSpring类,如下:
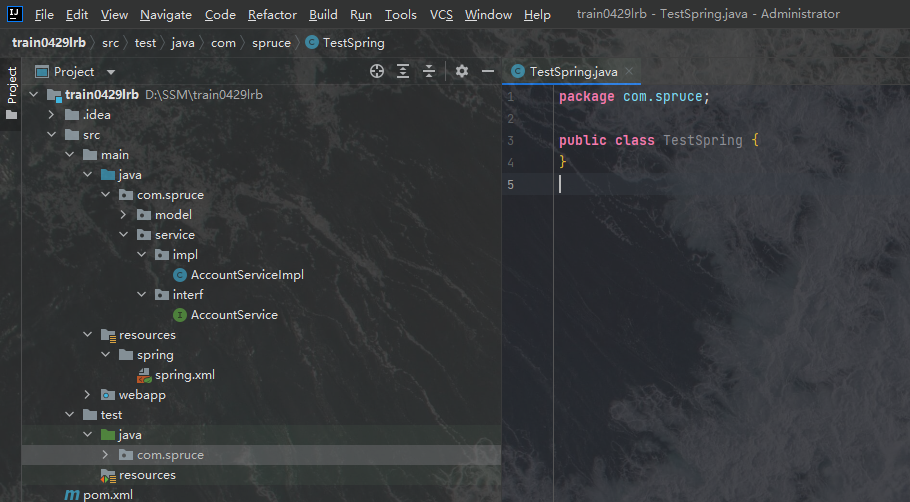
我们在里边放入如下代码:
package com.spruce;

import com.spruce.service.interf.AccountService;
import org.junit.Test;
import org.springframework.context.support.ClassPathXmlApplicationContext;

public class TestSpring {
    @Test
    public void run(){
        ClassPathXmlApplicationContext ac = new ClassPathXmlApplicationContext("classpath:spring/spring.xml");//这里是spring.xml的路径,我们一定要书写对,该路径是以resource为出发点的相对路径,我们的目录结构中spring.xml放在了spring目录下,因此这里应该这样书写
        AccountService service = ac.getBean(AccountService.class);
        service.findAll();
    }
}
这段代码就是测试一下Spring的IOC功能是否能用,我们点击test提供的运行按钮尝试一下:
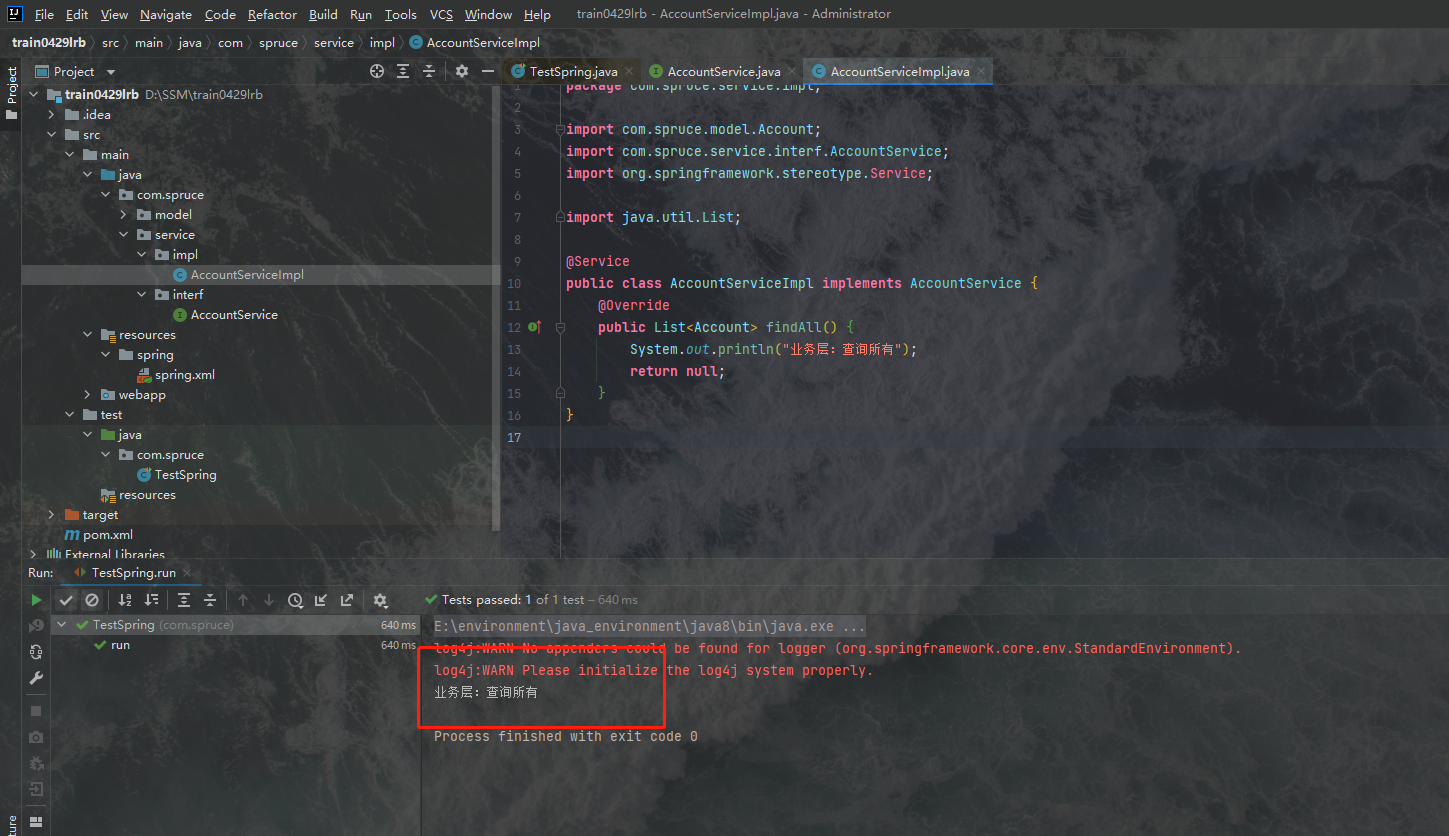
我们书写的假方法运行成功了,这说明类的对象被成功创建了,Spring层搭建成功!
2.7.Spring MVC框架的导入以及controller层的创建
接下来我们开始创建controller层以及导入Spring MVC框架,Spring MVC支持的controller层主要也是使用IOC进行解耦,并且主要功能是实现请求的收发以及页面跳转的,整个项目的逻辑归他控制因此我们叫它控制层,接下来我们首先要配置Spring MVC。
1.Spring MVC框架的导入
关于Spring MVC框架的导入我们可以直接看我之前写的这篇笔记:Spring MVC复习 —— 搭建Spring MVC项目 - 云杉木屋 - 博客园 (cnblogs.com),在这里我们也重复的做一下。
首先我们将webapp中的web.xml配置信息换一下,我们换成这个:
<web-app version="3.0" xmlns="http://java.sun.com/xml/ns/javaee"
         xmlns:xsi="http://www.w3.org/2001/XMLSchema-instance"
         xsi:schemaLocation="http://java.sun.com/xml/ns/javaee
   http://java.sun.com/xml/ns/javaee/web-app_3_0.xsd">

 </web-app>
然后我们在里边插入如下配置信息,配置我们的各种需要的工具:
<!--在web.xml中配置Spring提供的过滤器类 -->
<filter>
    <filter-name>encodingFilter</filter-name>
    <filter-class>org.springframework.web.filter.CharacterEncodingFilter</filter-class>
    <async-supported>true</async-supported>
    <init-param>
        <param-name>encoding</param-name>
        <param-value>UTF-8</param-value>
    </init-param>
</filter>

<filter-mapping>
    <filter-name>encodingFilter</filter-name>
    <url-pattern>/*</url-pattern>
</filter-mapping>
<!--不拦截所有是html的页面请求-->
<servlet-mapping>
    <servlet-name>default</servlet-name>
    <url-pattern>*.html</url-pattern>
</servlet-mapping>

<!--配置前端控制器,对浏览器发送的请求进行统一处理-->
<servlet>
    <servlet-name>dispatcherServlet</servlet-name>
    <servlet-class>org.springframework.web.servlet.DispatcherServlet</servlet-class>
    <!--加载springmvc.xml配置文件的位置和名称,配置的是Spring配置-->
    <init-param>
        <!--contextConfigLocation:上下文配置路径,固定值-->
        <param-name>contextConfigLocation</param-name>
        <!--classpath:类路径,值得是Java和resources文件夹-->
        <!--springmvc.xml:指的是配置文件的名称:需要配置springmvc.xml,在下面-->
        <param-value>classpath:springmvc.xml</param-value>
    </init-param>
    <!--配置启动加载-->
    <load-on-startup>1</load-on-startup>
</servlet>

<servlet-mapping>
    <servlet-name>dispatcherServlet</servlet-name>
    <url-pattern>/</url-pattern>
</servlet-mapping>

<!--开启项目时打开的页面-->
<welcome-file-list>
    <welcome-file>/index.html</welcome-file>
</welcome-file-list>
配置好之后的代码是这样的(直接把下面的代码完全粘贴在web.xml中也行):
<web-app version="3.0" xmlns="http://java.sun.com/xml/ns/javaee"
         xmlns:xsi="http://www.w3.org/2001/XMLSchema-instance"
         xsi:schemaLocation="http://java.sun.com/xml/ns/javaee
   http://java.sun.com/xml/ns/javaee/web-app_3_0.xsd">

  <!--在web.xml中配置Spring提供的过滤器类 -->
  <filter>
    <filter-name>encodingFilter</filter-name>
    <filter-class>org.springframework.web.filter.CharacterEncodingFilter</filter-class>
    <async-supported>true</async-supported>
    <init-param>
      <param-name>encoding</param-name>
      <param-value>UTF-8</param-value>
    </init-param>
  </filter>

  <filter-mapping>
    <filter-name>encodingFilter</filter-name>
    <url-pattern>/*</url-pattern>
  </filter-mapping>
  <!--不拦截所有是html的页面请求-->
  <servlet-mapping>
    <servlet-name>default</servlet-name>
    <url-pattern>*.html</url-pattern>
  </servlet-mapping>

  <!--配置前端控制器,对浏览器发送的请求进行统一处理-->
  <servlet>
    <servlet-name>dispatcherServlet</servlet-name>
    <servlet-class>org.springframework.web.servlet.DispatcherServlet</servlet-class>
    <!--加载springmvc.xml配置文件的位置和名称,配置的是Spring配置-->
    <init-param>
      <!--contextConfigLocation:上下文配置路径,固定值-->
      <param-name>contextConfigLocation</param-name>
      <!--classpath:类路径,值得是Java和resources文件夹-->
      <!--springmvc.xml:指的是配置文件的名称:需要配置springmvc.xml,在下面-->
      <param-value>classpath:springmvc.xml</param-value>
    </init-param>
    <!--配置启动加载-->
    <load-on-startup>1</load-on-startup>
  </servlet>

  <servlet-mapping>
    <servlet-name>dispatcherServlet</servlet-name>
    <url-pattern>/</url-pattern>
  </servlet-mapping>

  <!--开启项目时打开的页面-->
  <welcome-file-list>
    <welcome-file>/index.html</welcome-file>
  </welcome-file-list>

</web-app>
配置好之后我们会发现有个地方标红:
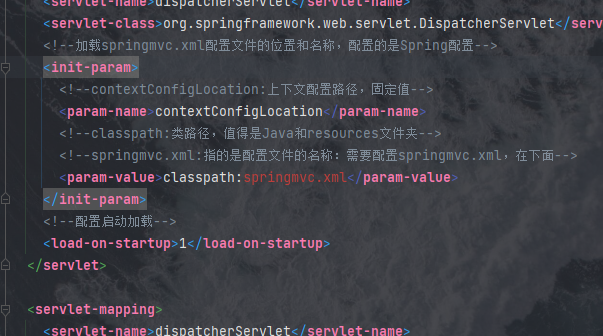
这是springmvc.xml文件的引用路径,加入这个配置信息意在监听Spring MVC的配置文件,以便于将Spring MVC整合进项目,现在我们还没有创建这个配置文件,因此它标红了,现在我们创建它,我们在resource目录下创建一个新的目录,明明为springMVC,然后在其下边创建springmvc.xml配置文件:

我们直接将下面的配置信息粘贴进去:
<?xml version="1.0" encoding="UTF-8"?>
<beans xmlns="http://www.springframework.org/schema/beans"
       xmlns:mvc="http://www.springframework.org/schema/mvc"
       xmlns:context="http://www.springframework.org/schema/context"
       xmlns:xsi="http://www.w3.org/2001/XMLSchema-instance"
       xsi:schemaLocation="
http://www.springframework.org/schema/beans
http://www.springframework.org/schema/beans/spring-beans.xsd
http://www.springframework.org/schema/mvc
http://www.springframework.org/schema/mvc/spring-mvc.xsd
http://www.springframework.org/schema/context
http://www.springframework.org/schema/context/spring-context.xsd">
   <!--配置spring创建容器时要扫描的包-->
<context:component-scan base-package=""/>

<!--处理映射器-->
<bean class="org.springframework.web.servlet.handler.BeanNameUrlHandlerMapping"/>
<!--处理器适配器-->
<bean class="org.springframework.web.servlet.mvc.SimpleControllerHandlerAdapter"/>

<!--配置视图解析器-->
<bean id="viewResolver" class="org.thymeleaf.spring4.view.ThymeleafViewResolver">
    <property name="order" value="1"/>
    <property name="characterEncoding" value="UTF-8"/>
    <property name="templateEngine" ref="templateEngine"/>
</bean>
<!-- templateEngine -->
<bean id="templateEngine" class="org.thymeleaf.spring4.SpringTemplateEngine">
    <property name="templateResolver" ref="templateResolver"/>
</bean>
<bean id="templateResolver" class="org.thymeleaf.spring4.templateresolver.SpringResourceTemplateResolver">
    <property name="prefix" value="/html/" />
    <property name="suffix" value=".html" />
    <property name="templateMode" value="HTML5"/>
</bean>

<!-- 配置spring开启注解mvc的支持  默认就是开启的 ,要想让其他组件(不包含映射器、适配器、处理器)生效就必须需要配置了-->
<mvc:annotation-driven/>
</beans>
其中这里有一个和Spring配置文件中一样的标签<context:component-scan base-package=""/>,我们在此同样要书写我们的com.spruce路径:
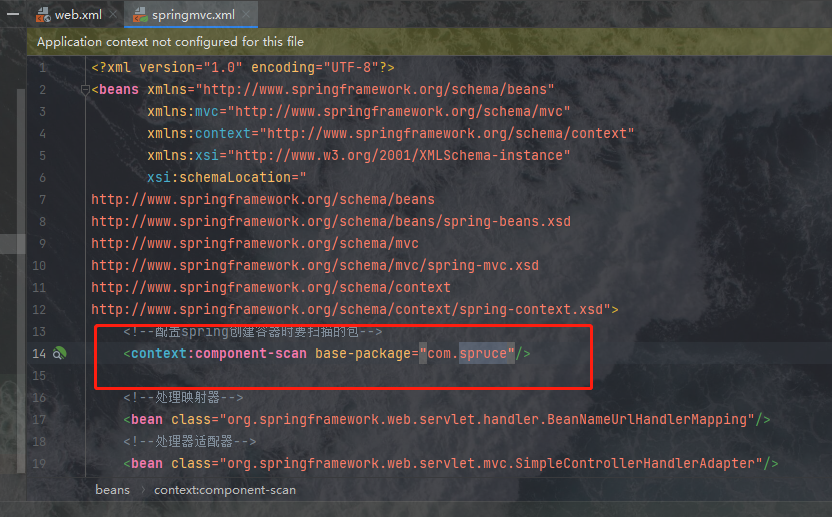
这里根据你的工作空间具体命名确定,只是我的工作空间名称为com.spruce,这里才这样填的。之后Spring MVC就相当于引入了,我们还要搭建相关的层以及目录结构对其进行测试。
2.搭建相关目录结构
在springmvc.xml中有这样一个标签:
<bean id="templateResolver" class="org.thymeleaf.spring4.templateresolver.SpringResourceTemplateResolver">
    <property name="prefix" value="/html/" /> <!--页面跳转时,路径的前缀,可以理解为我们的页面必须放在的目录的名字-->
    <property name="suffix" value=".html" /> <!--页面跳转时,路径的后缀,也就是规定了我们页面文件的类型-->
    <property name="templateMode" value="HTML5"/> <!--我们页面使用到的前端规范,现在都用h5了,所以我们在这里也用h5-->
</bean>
这里边规定的东西是我们项目中的页面信息,在Spring MVC中页面跳转实际上使用到了一个字符串拼接的方式,controller层中的方法返回一个字符,然后根据这里的配置信息进行拼接,然后根据拼接好的字符串进行定位,所以第二三行中都是页面跳转时用到的信息标签,其中第二行是路径的前缀,它意味着我们的controller层中的方法返回了一个字符串之后,在字符串拼接的时候会首先在它前边加上/html/,而第三行中的则是后缀,它意味着会在该字符串的最后加上.html,举个例子,就是说我们的controller层中返回了一个“suc”,我们就会得到一个这样的字符串“/html/suc.html”,这个字符串意味着以webapp目录为起点的绝对定位下的html目录下的suc.html文件。
根据这个信息,我们首先要在webapp目录下创建一个叫html的文件来保存我们的html文件:
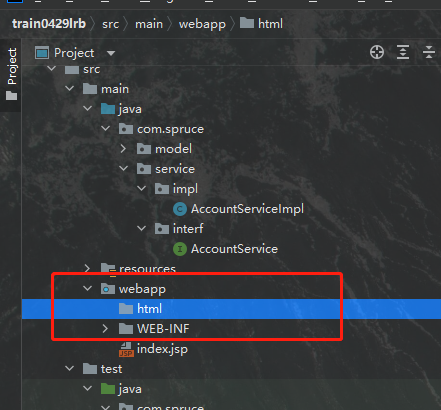
同时web.xml中还配置了欢迎页面:
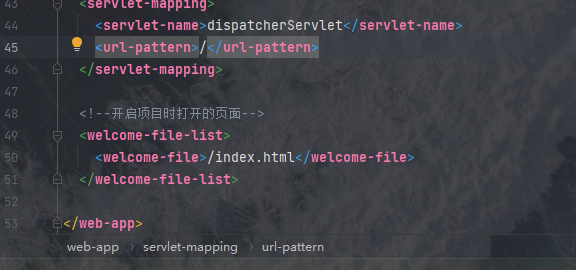
其路径是以webapp为起点的绝对路径:/index.html,我们的项目中没有这个文件,只有一个index.jsp,jsp文件现在已经不常用了,因此我们把它换成index.html文件,并在里边书写上如下的代码:
<!DOCTYPE html>
<html lang="en">
<head>
    <meta charset="UTF-8">
    <title>主页</title>
</head>
<body>
<html>
<head>
    <meta charset="utf-8">
    <title>入门程序</title>
</head>
<body>
<h3>入门</h3><a href="/SSMDemo/hello" >入门程序</a>
</body>
</html>
</body>
</html>
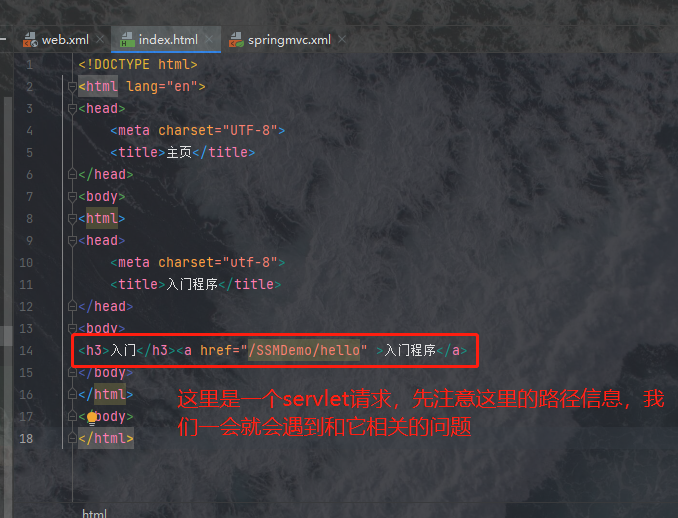
之后我们的页面相关事项基本就处理好了,我们接下来书写controller层。
3.controller层及相关文件配置
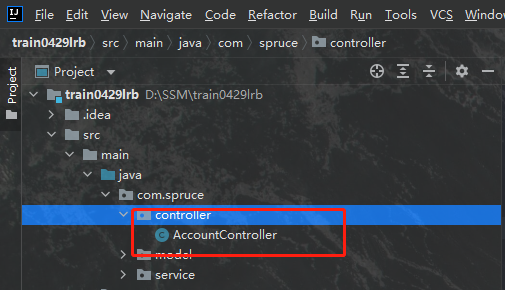
我们首先要在com.spruce下面创建一个名为controller的包:
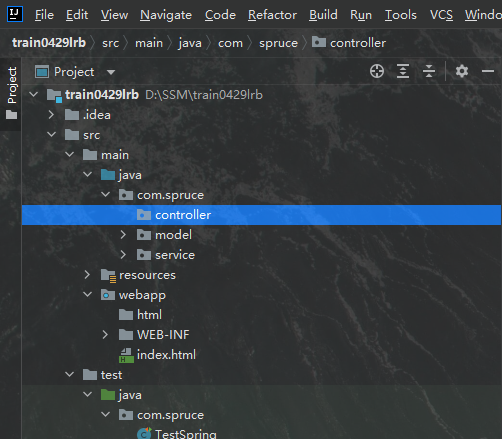
然后我们在这个包里创建我们相关的controller类就行了,我们现在新建一个名为AccountController的类,如图所示:
之后我们将Spring MVC整合到Spring中去,方法为将如下代码粘贴到web.xml文件中去:
<!--配置Spring的监听器-->
<display-name>Archetype Created Web Application</display-name>
<listener>
  <listener-class>org.springframework.web.context.ContextLoaderListener</listener-class>
</listener>
<!--配置加载类路径的配置文件-->
<context-param>
  <param-name>contextConfigLocation</param-name>
  <param-value>classpath:spring.xml</param-value>
</context-param>
粘贴好之后如图所示:
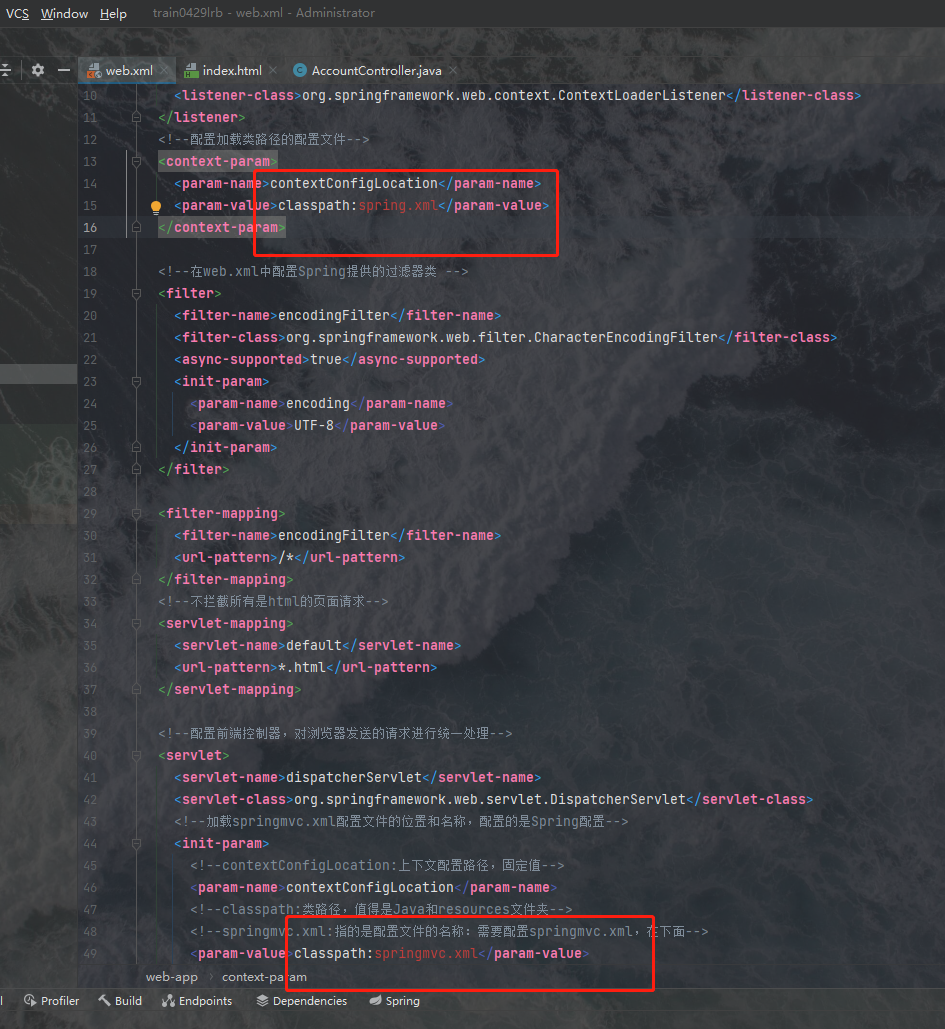
两个报错的地方是因为路径不对,我们改一下路径即可:
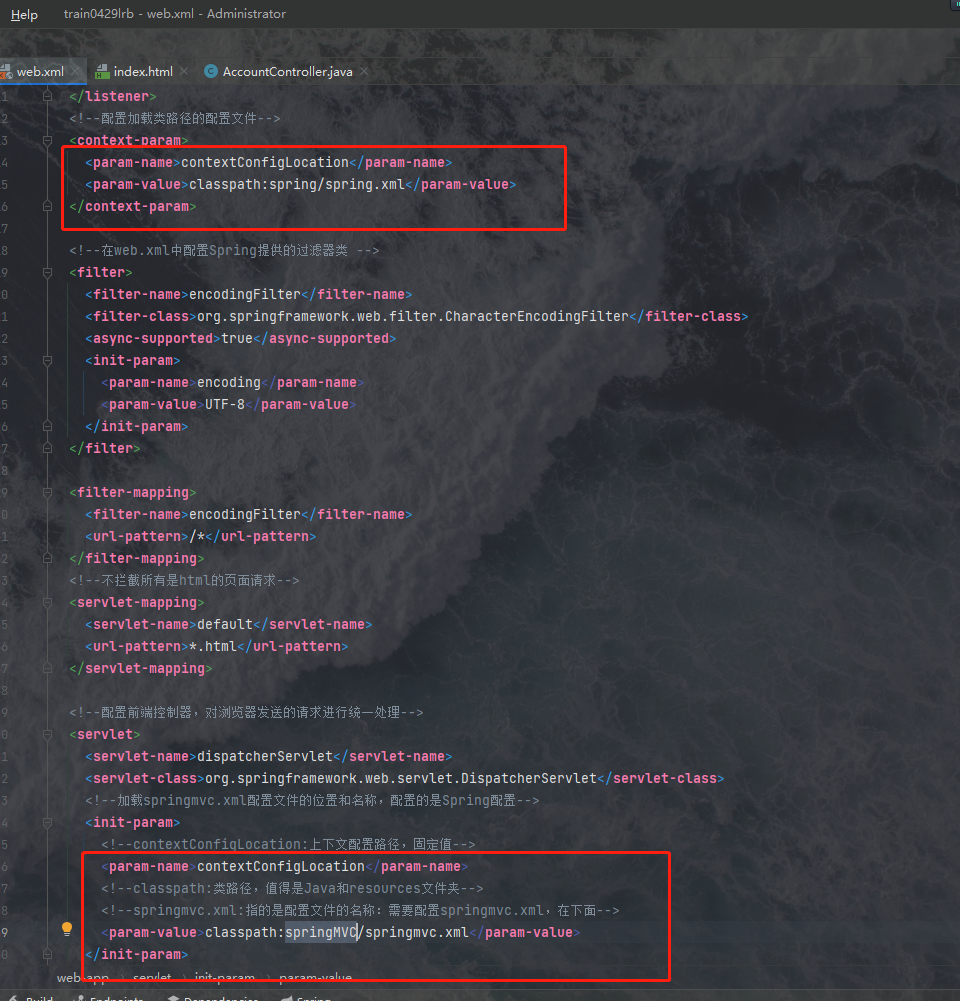
之后我们在AccountController中粘贴如下的代码:
package com.spruce.controller;

import com.spruce.service.interf.AccountService;
import org.springframework.beans.factory.annotation.Autowired;
import org.springframework.stereotype.Controller;
import org.springframework.ui.Model;
import org.springframework.web.bind.annotation.RequestMapping;

@Controller
@RequestMapping("/account")
public class AccountController {

    @Autowired
    private AccountService accountService;
    /**
     * 处理超链接发送出来的请求
     * @param model
     * @return
     */
    @RequestMapping(path = "/hello")
    public String sayHello(Model model){
        System.out.println("入门方法执行了2...");
        // 向模型中添加属性msg与值,可以在html页面中取出并渲染
        model.addAttribute("msg","hello,SpringMVC");
        // 配置了视图解析器后,写法
        return "suc";
    }
}
其中我们在代码的 的上边加入了一个注解@Autowired,这个注解的意思是依赖注入,也就是让spring为其生成一个对象,我们就无需自己生成对象了,在之后我们就可以直接调用这个对象的方法了,这个对象是AccountService接口类型的,在生成对象的时候,Spring会根据Service的接口及实现方式生产一个新对象,新对象是使用多态的方式(实际上二者结构完全一致,因此并没有明显体现多态的含义)生成了一个接口类型的对象,我们只需调用这个对象,就可以规范的使用我们之前定义的方法。我们必须完成上边的整合步骤之后,才能使用这个依赖注入的功能。
上边我们整合配置的目的在于:在controller中能成功的调用service对象中的方法。方法原理是: 在web.xml中配置ContextLoaderListener监听器,该监听器默认加载WEB-INF目录下的applicationContext.xml的配置文件,我们修改全局的路径变量: ,进而让加载的文件变成我们的目标文件,这样一来,在项目启动的时候,就去加载spring.xml的配置文件了,而我们的spring就可以直接在这里使用了。
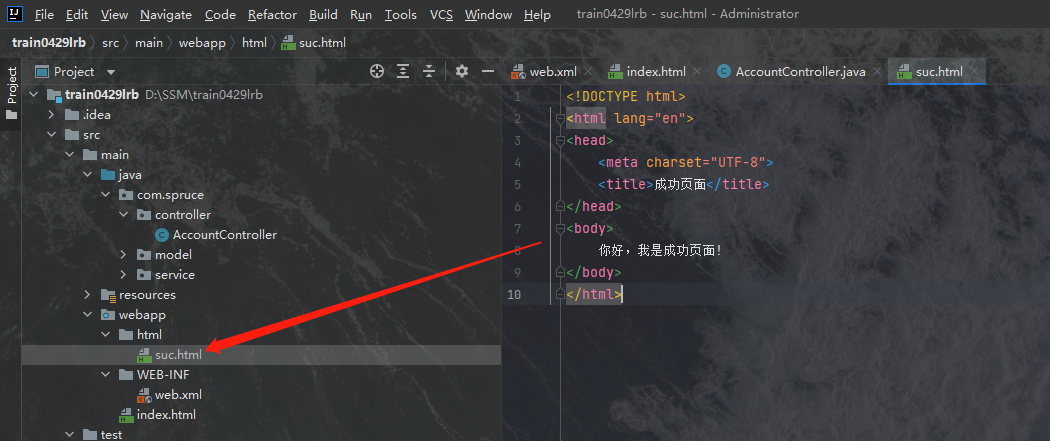
在上面的controller代码中,类上边的@Controller代表该类被Spring托管来产生对象,这个对象的调用则是被Spring MVC申请的,这个对象的调用将使用反射的方式在我们进行Servlet请求的时候隐性的被调用,而@RequestMapping("/account")则是其Servlet请求路径,这是一级路径,里边的方法上的注解@RequestMapping(path = "/hello")是二级路径,它们用来进行精确寻址。而这个方法的返回值"suc",在Spring MVC中被默认解析为一个路径,也就是上边我们提到的文件路径,它返回之后将被拼接成一个完整的路径,用于寻找页面视图。我们在上边配置的是html目录下的html类型文件,因此为了让这个返回有地方可去,我们在html目录下创建一个suc.html,并书写如下代码:
<!DOCTYPE html>
<html lang="en">
<head>
    <meta charset="UTF-8">
    <title>成功页面</title>
</head>
<body>
    你好,我是成功页面!
</body>
</html>
之后关于controller层的东西就基本上创建好了,我们为该项目配置上Tomcat服务器,然后进行测试。
4.配置Tomcat服务器
首先我们点击这里:
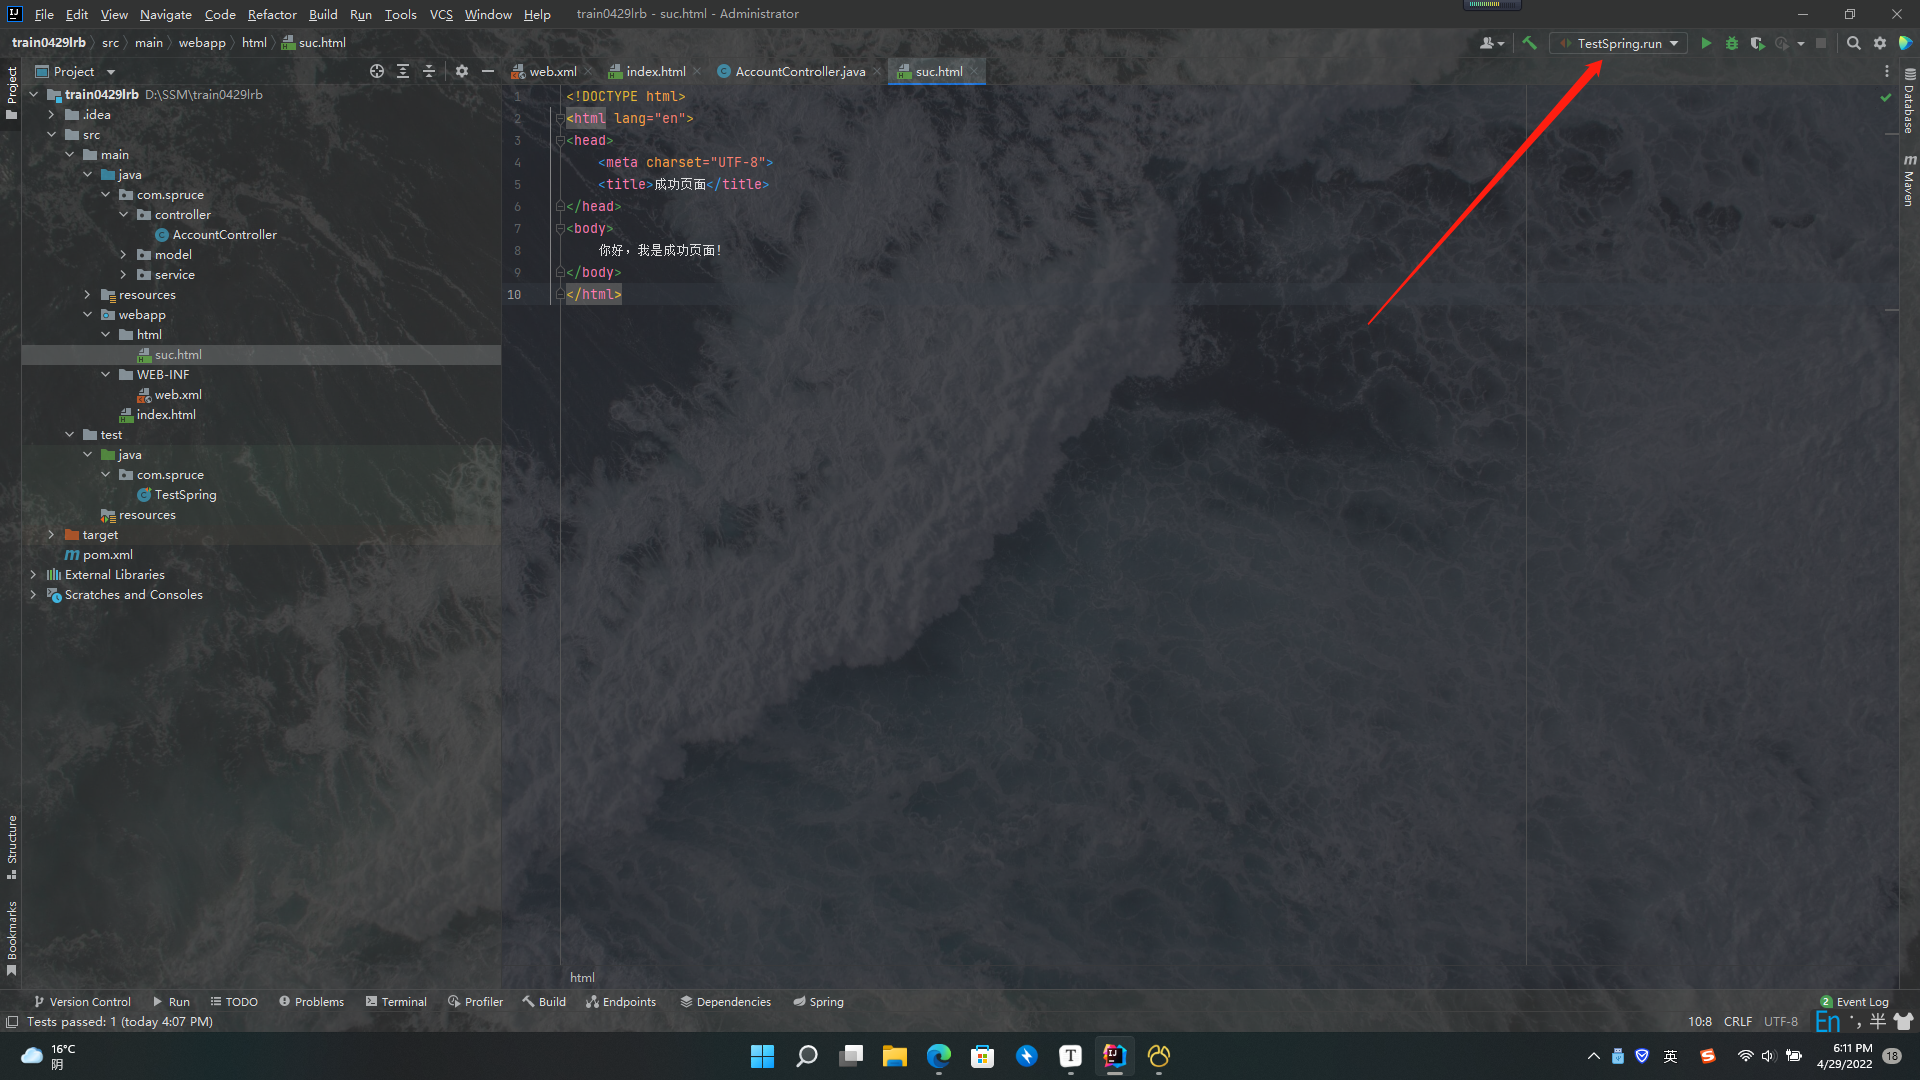
我们点击第一个选项:
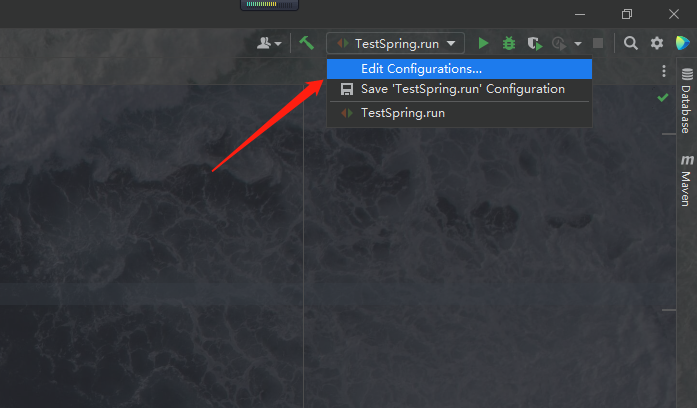
之后就会弹出一个这样的框:
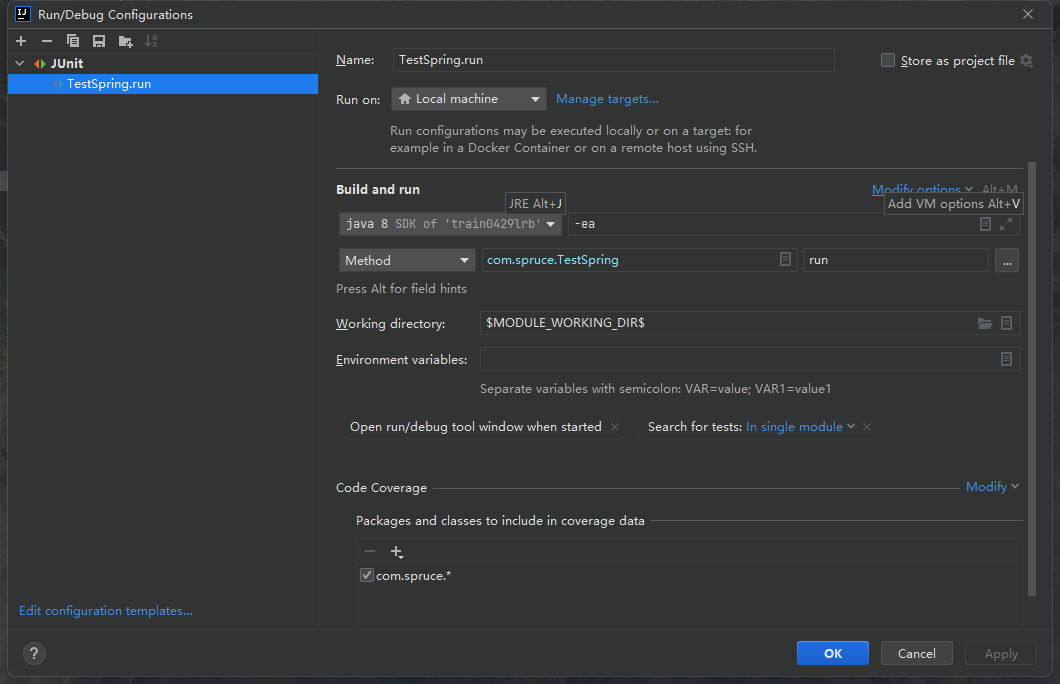
点击加号:
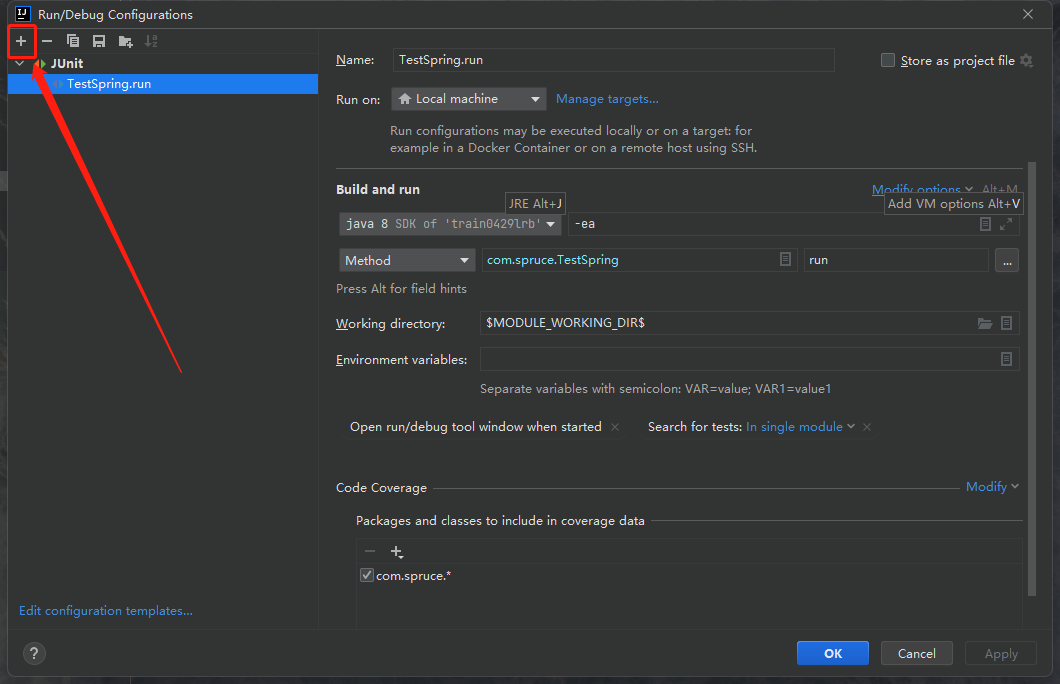
我们选择Tomcat下的local:
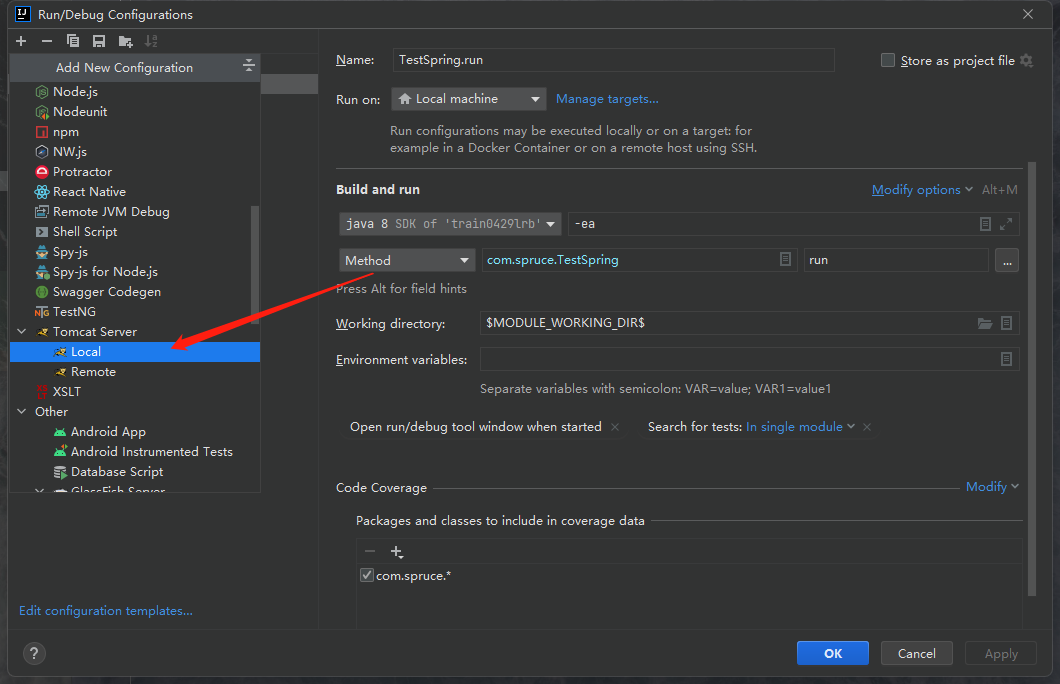
之后就会进入如下界面:
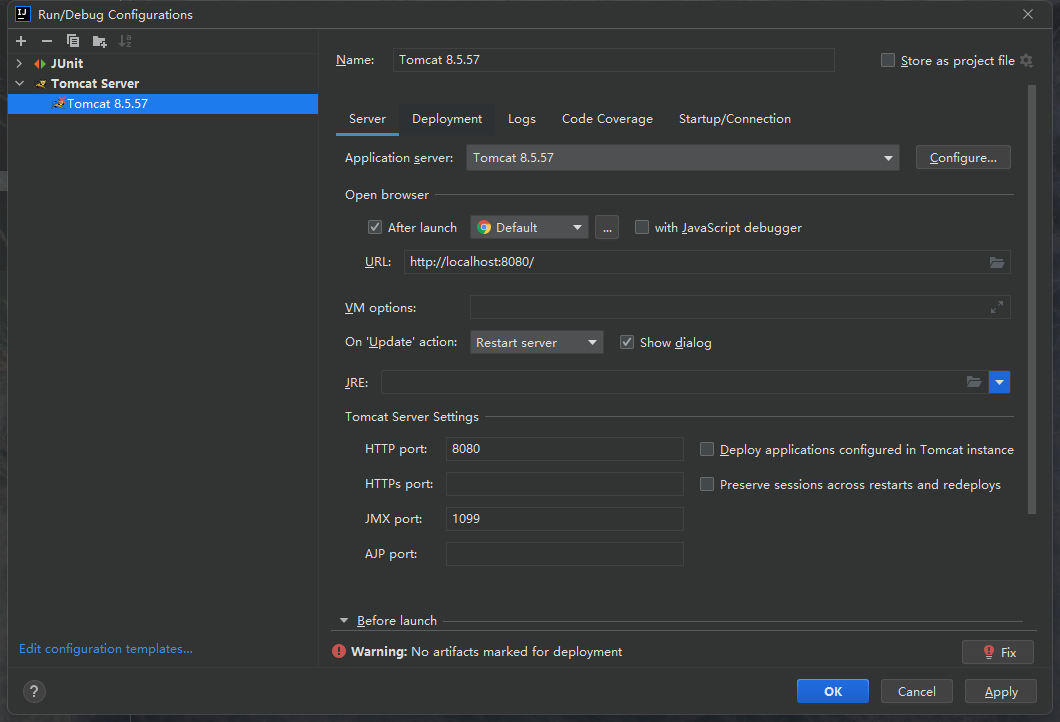
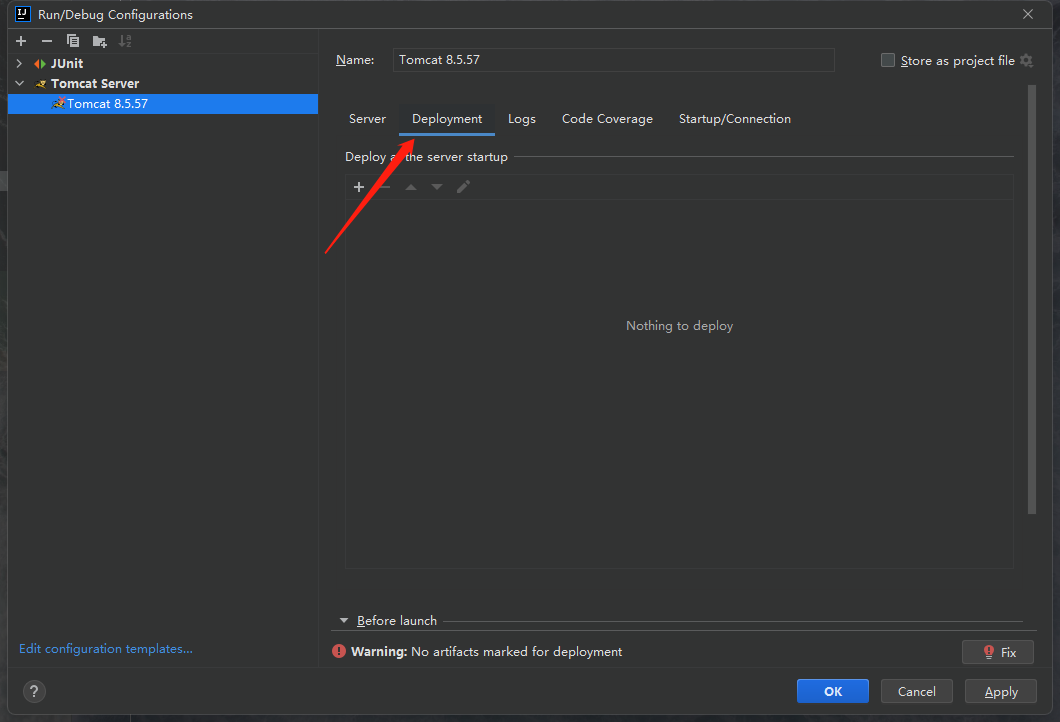
点击Deployment按钮之后,我们就会进入下面的选项:
点击下图中箭头指向的加号:
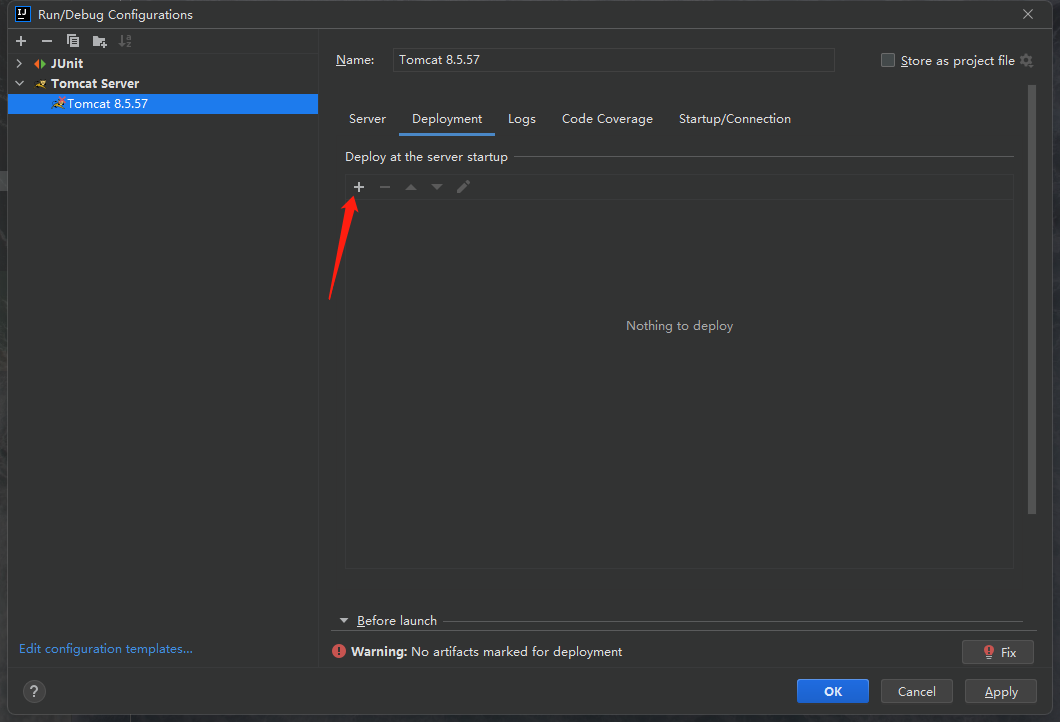
点击第一个选项:
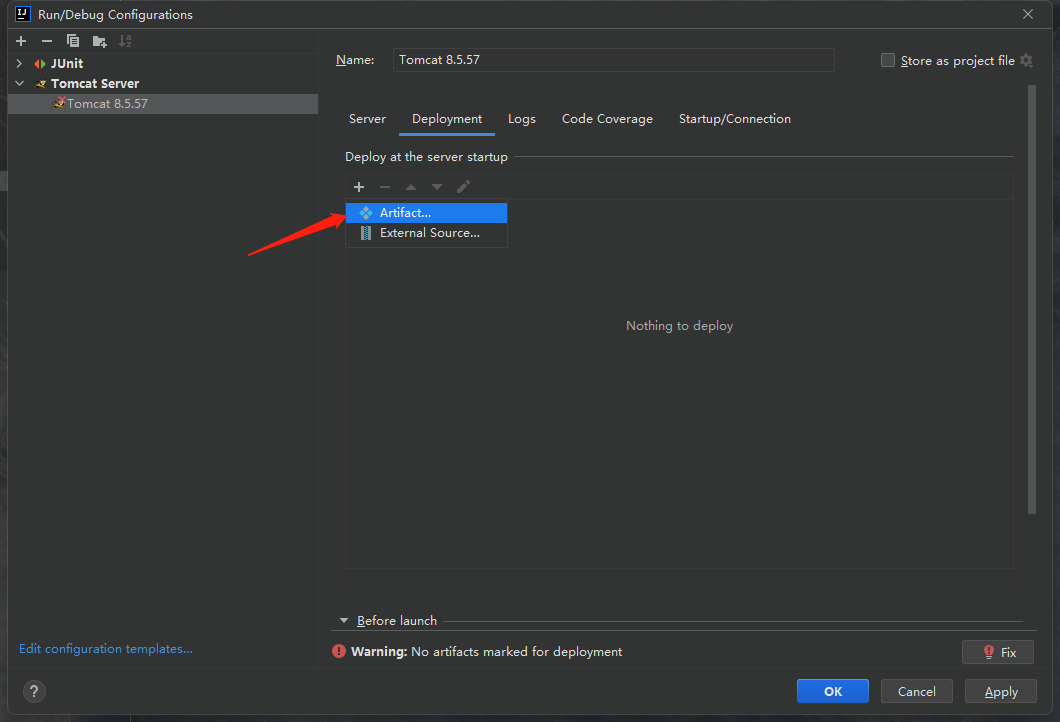
选择第二个选项:
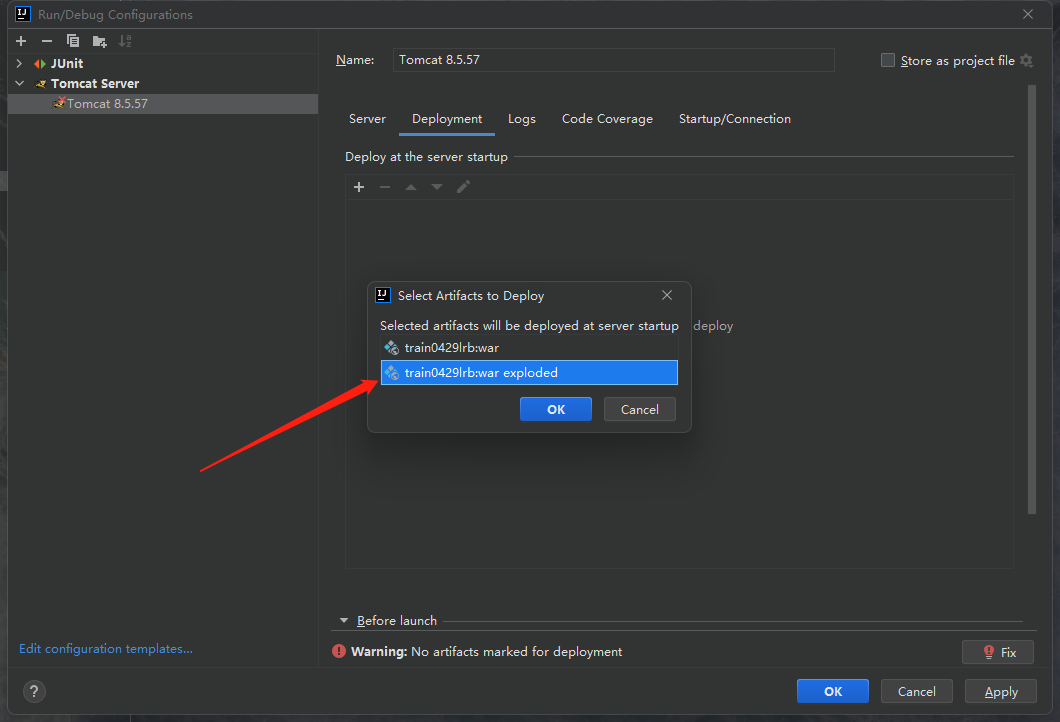
报错就会消失并出现如下的栏目:
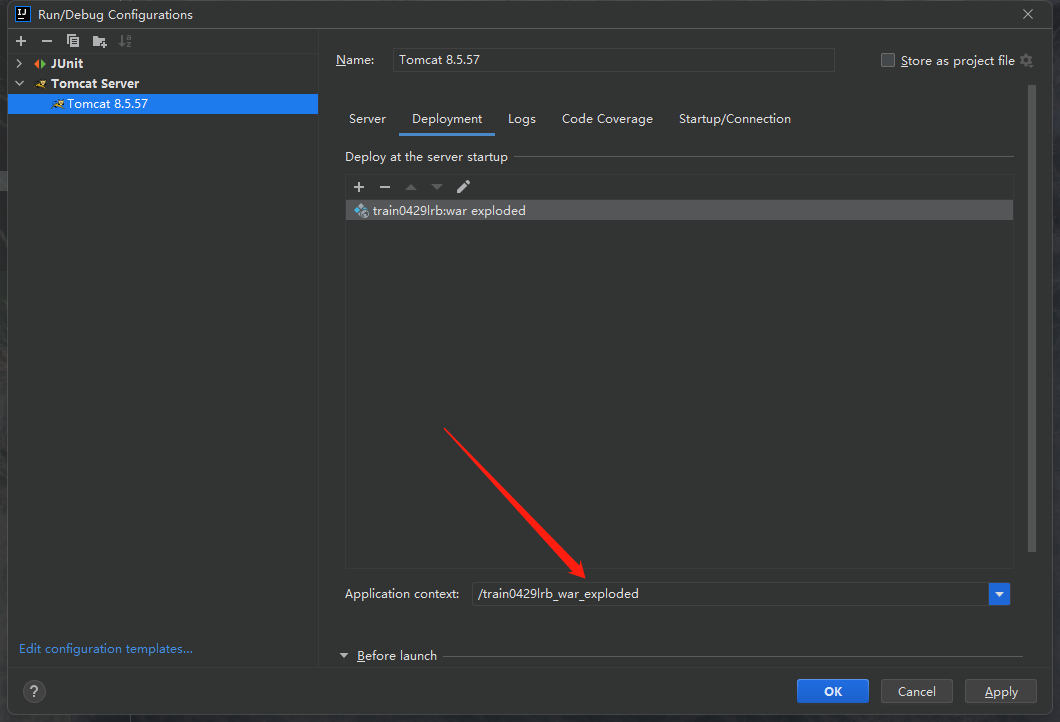
我们发现新出现的栏目中是一串字符,内容是我们的项目名称_war_exploded,我们删除掉_war_exploded部分,让这里的内容变成我们的项目名称:
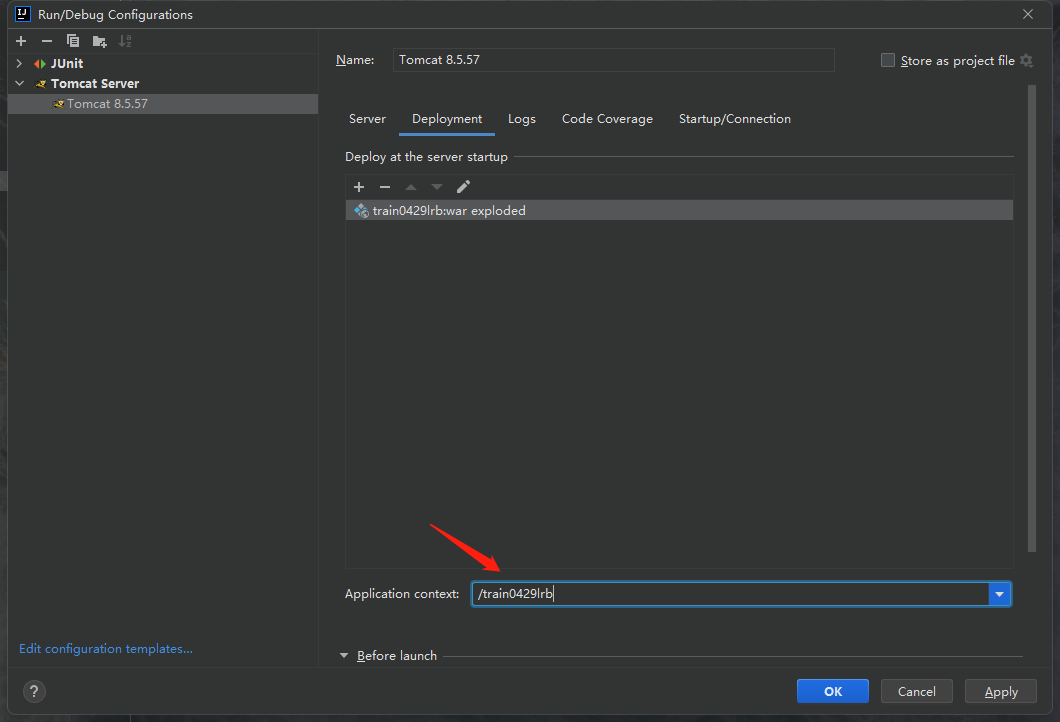
然后点击Apply->OK之后就好了。
5.测试
我们直接点击绿色箭头让Tomcat运行起来:
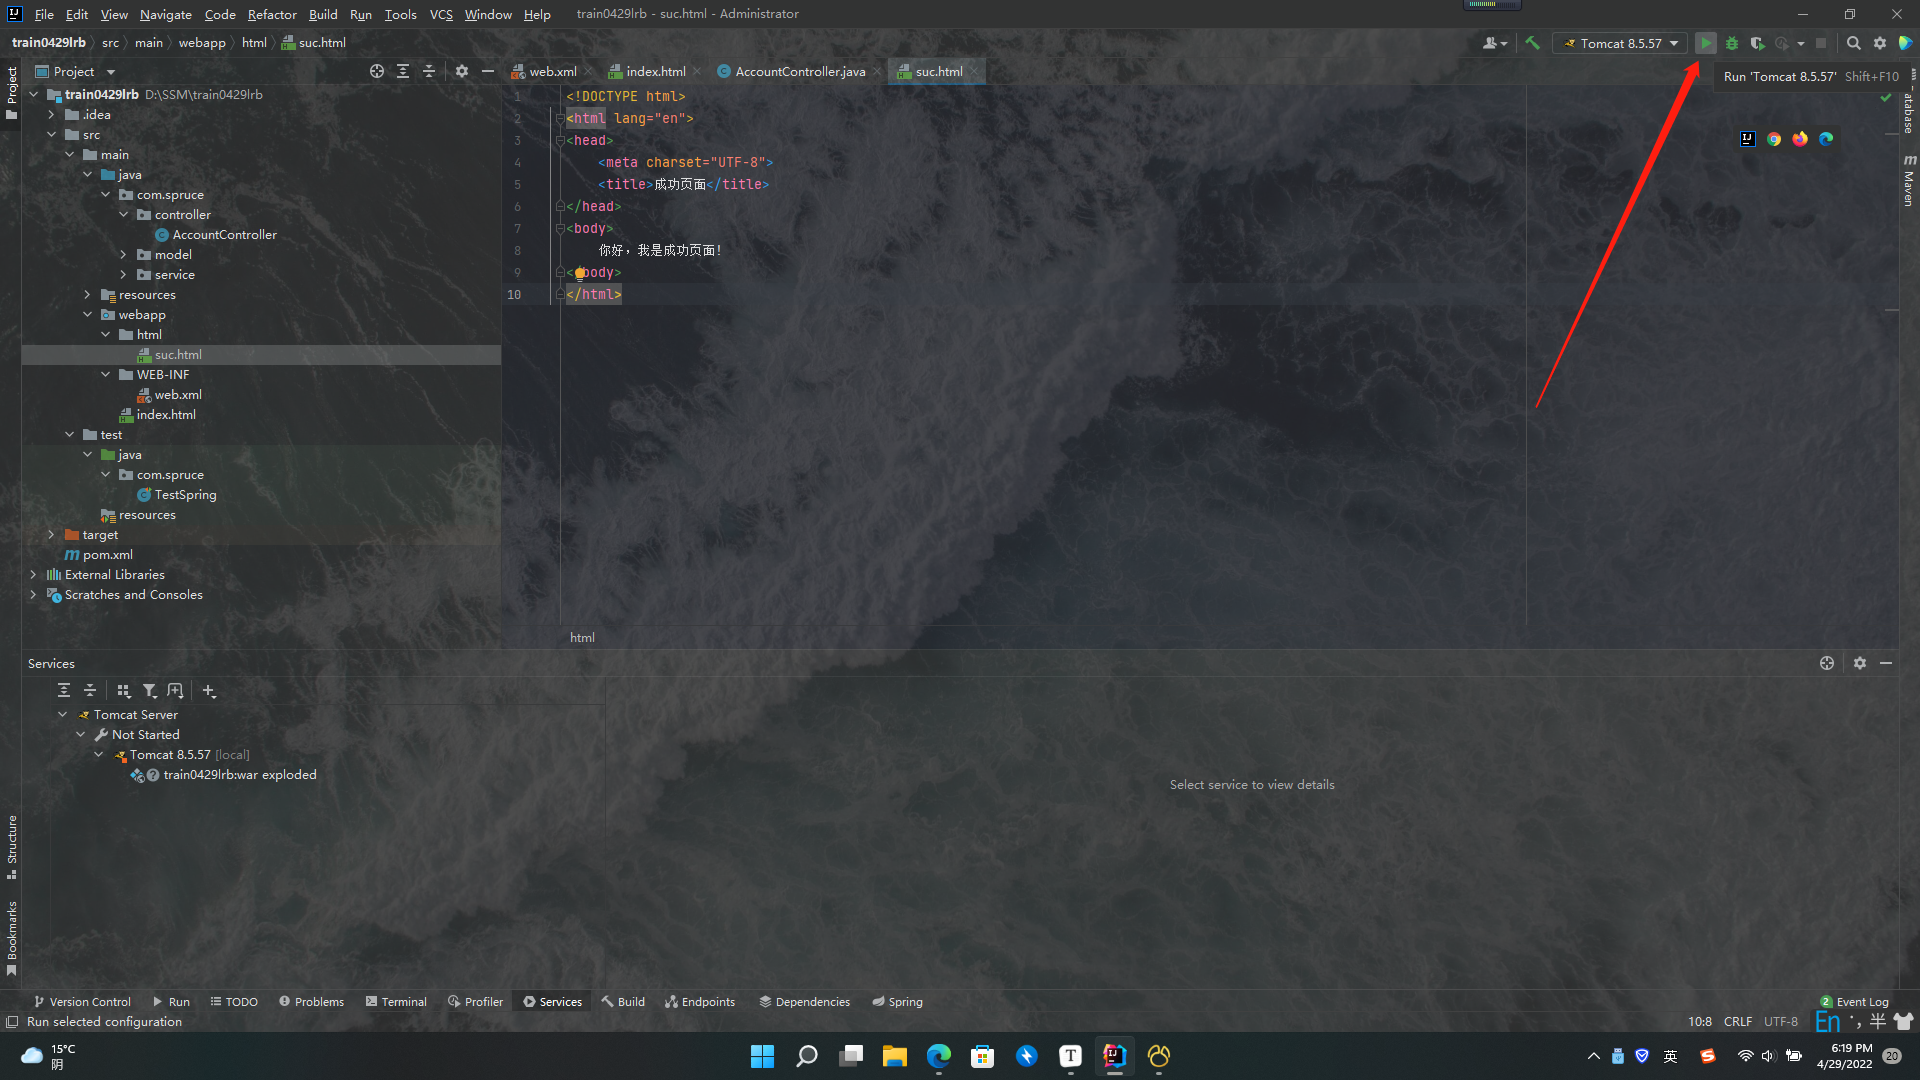
我们首先就会进入之前配置好的index.html页面,如下:

之后我们点击入门程序,进行跳转,根据上面我们书写的代码,我们知道点击这个连接会触发我们写好的servlet程序,并进行寻址,找到account/hello并执行,这个代码在controller层,这个代码会让我们跳转到html/suc.html,我们点点看:
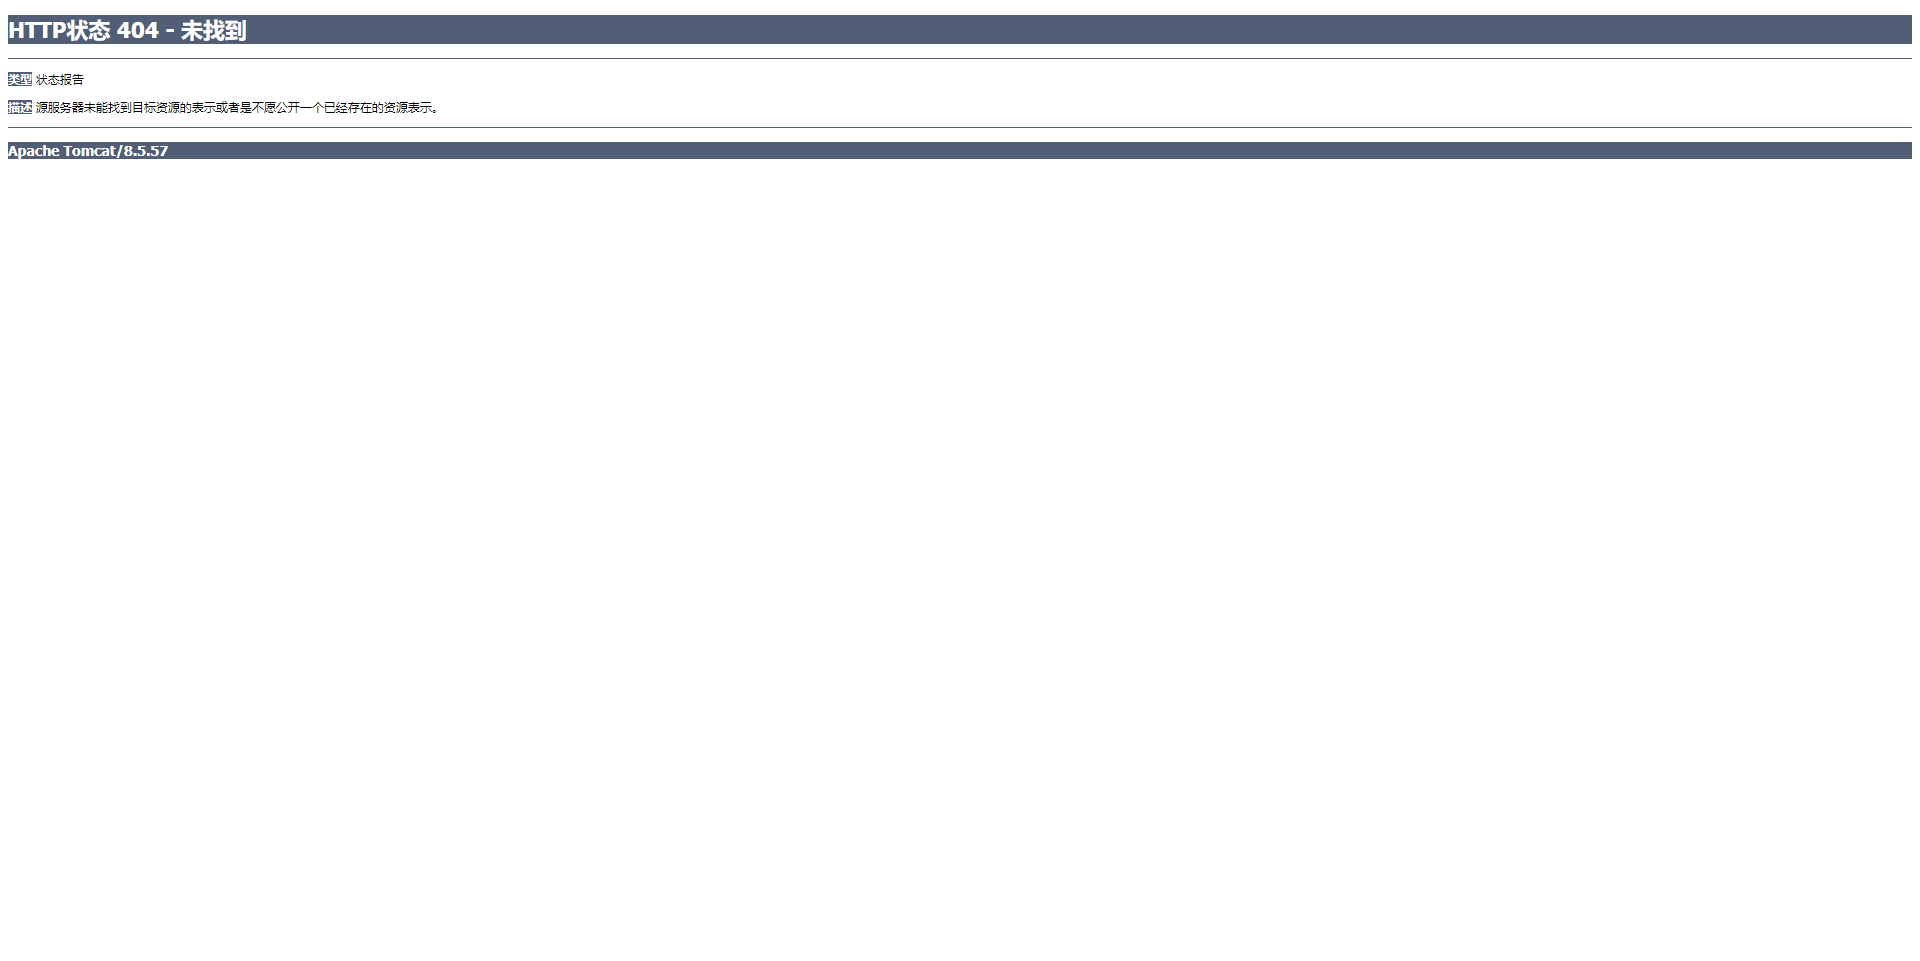
拉垮了,不行,这是为什么?404错误意思是url路径错误,还记得我们在上面的步骤中,就是在书写index.html页面的代码中做了一个提示吗,问题就出在那里,我们的请求路径没写对,现在我把那个代码拿到这里来看:
<!DOCTYPE html>
<html lang="en">
<head>
    <meta charset="UTF-8">
    <title>主页</title>
</head>
<body>
<html>
<head>
    <meta charset="utf-8">
    <title>入门程序</title>
</head>
<body>
<h3>入门</h3><a href="/SSMDemo/hello" >入门程序</a>
</body>
</html>
</body>
</html>
我们的路径是"/SSMDemo/hello",第一级目录是"SSMDemo",这是我们的项目名,我这里的代码因为是直接复制的老师给我的,这个项目名是老师的项目名所以错了。那么我们改成我们自己的“/train0429lrb/hello”就行了吗?答案还是不行,我们应该应该还记得我们在书写controller的时候还配置了一个二级路径,第一级为account,这个路径给在了类上,而hello才是给定在了方法上,这里这个跳转我们是想调用那个方法,那就应该把路径写全进行精确调用,因此路径应该是这样:“/train0429lrb/account/hello”,我们的index.html代码应该是这样:
<!DOCTYPE html>
<html lang="en">
<head>
    <meta charset="UTF-8">
    <title>主页</title>
</head>
<body>
<html>
<head>
    <meta charset="utf-8">
    <title>入门程序</title>
</head>
<body>
<h3>入门</h3><a href="/train0429lrb/account/hello" >入门程序</a>
</body>
</html>
</body>
</html>
我们重启项目再次测试:

跳转成功!尽管有乱码错误,但是根据我们最后书写的那个感叹号,我们可以依稀判断出,这句话就是我们在suc.html中书写的:你好,我是成功页面!,关于编码问题,我会在文章的最后进行研究,这里如果你想让效果更明显的话,可以先改成英文,这样就不会出现乱码。
2.8.MyBatis框架的导入以及Dao层的创建
现在我们来进行最后一个步骤的配置,这个步骤的配置可能比较繁琐,我们现在来配置Dao层和MyBatis框架。
1.创建数据库信息配置文件
我们首先创建用来填写数据库信息的配置文件,我们可以将数据库信息直接填在xml文件中,也可以新建一个properties文件,然后将数据库信息放在这里边,在xml文件中用变量的形式来填写,两种方法均可,配置文件的方式更利于后人维护时更改,因此我们使用这种更为先进的方法,我们首先创建一个MyBatisConfig目录,然后在下面创建一个SqlMapConfig.xml文件,一个jdbc.properties文件:
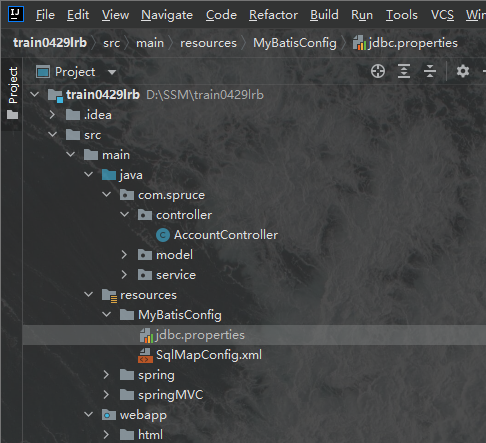
我们在jdbc.properties文件中书写下列信息:
driver=com.mysql.jdbc.Driver
url=jdbc:mysql://localhost:你的数据库服务端口名/你的数据库名称?useUnicode=true&characterEncoding=utf-8&serverTimezone=UTC&useSSL=false
username=你的数据库用户名
password=你的数据库用户密码
initialSize=0
maxActive=20
maxIdle=20
minIdle=1
maxWait=60000
然后我们在SqlMapConfig.xml中书写如下配置信息:
<?xml version="1.0" encoding="UTF-8"?>
<beans xmlns="http://www.springframework.org/schema/beans"
    xmlns:xsi="http://www.w3.org/2001/XMLSchema-instance" xmlns:p="http://www.springframework.org/schema/p"
    xmlns:context="http://www.springframework.org/schema/context"
    xmlns:mvc="http://www.springframework.org/schema/mvc"
    xsi:schemaLocation="http://www.springframework.org/schema/beans
                        http://www.springframework.org/schema/beans/spring-beans-3.1.xsd
                        http://www.springframework.org/schema/context
                        http://www.springframework.org/schema/context/spring-context-3.1.xsd
                        http://www.springframework.org/schema/mvc
                        http://www.springframework.org/schema/mvc/spring-mvc-4.0.xsd">
    <!-- 自动扫描 -->
    <context:component-scan base-package="com.spruce" /> <!--MyBatis托管的包路径-->

    <!-- 引入配置文件 -->
    <bean id="propertyConfigurer"
        class="org.springframework.beans.factory.config.PropertyPlaceholderConfigurer">
        <property name="location" value="classpath:jdbc.properties" />
    </bean>

    <bean id="dataSource" class="org.apache.commons.dbcp.BasicDataSource"
        destroy-method="close">
        <property name="driverClassName" value="${driver}" />
        <property name="url" value="${url}" />
        <property name="username" value="${username}" />
        <property name="password" value="${password}" />
        <!-- 初始化连接大小 -->
        <property name="initialSize" value="${initialSize}"></property>
        <!-- 连接池最大数量 -->
        <property name="maxActive" value="${maxActive}"></property>
        <!-- 连接池最大空闲 -->
        <property name="maxIdle" value="${maxIdle}"></property>
        <!-- 连接池最小空闲 -->
        <property name="minIdle" value="${minIdle}"></property>
        <!-- 获取连接最大等待时间 -->
        <property name="maxWait" value="${maxWait}"></property>
    </bean>

    <!-- spring和MyBatis完美整合,不需要mybatis的配置映射文件 -->
    <bean id="sqlSessionFactory" class="org.mybatis.spring.SqlSessionFactoryBean">
        <property name="dataSource" ref="dataSource" />
        <!-- 自动扫描mapping.xml文件 -->
        <property name="mapperLocations" value="classpath:mapping/*.xml"></property>  <!--你的mapper类型的xml文件路径-->
    </bean>

     <!-- DAO接口所在包名,Spring会自动查找其下的类 -->
    <bean class="org.mybatis.spring.mapper.MapperScannerConfigurer">
        <property name="basePackage" value="com.spruce.dao" />  <!--你的dao层接口路径-->
        <property name="sqlSessionFactoryBeanName" value="sqlSessionFactory"></property>
    </bean>
    <!-- (事务管理)transaction manager, use JtaTransactionManager for global tx -->
    <bean id="transactionManager"
        class="org.springframework.jdbc.datasource.DataSourceTransactionManager">
        <property name="dataSource" ref="dataSource" />
    </bean>

</beans>
这是一个比较完善的MyBatis配置文件,以后我们可以直接使用它作为模板,现在我们复制进入:
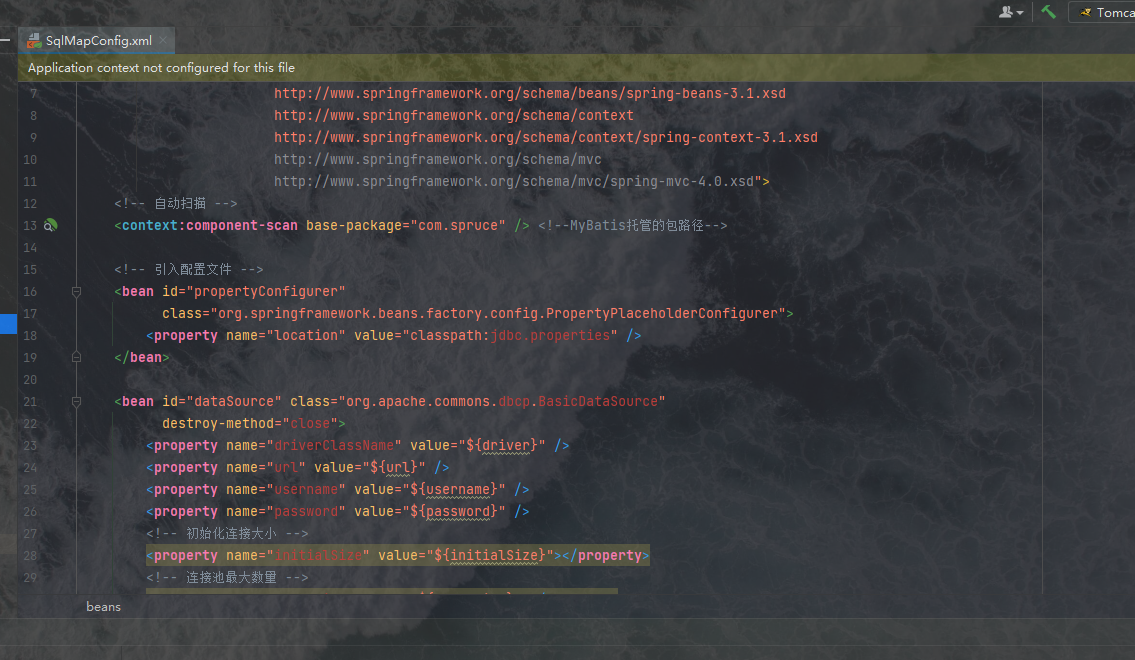
配置文件出报错是因为我们的路径有误,而下面的类找不到问题则是我们没有导入commons-dbcp.jar包,我们逐一修正这些问题,我们在pom文件的坐标依赖中加入下面的语句:
<dependency>
      <groupId>commons-dbcp</groupId>
      <artifactId>commons-dbcp</artifactId>
      <version>1.4</version>
</dependency>

之后就好了:
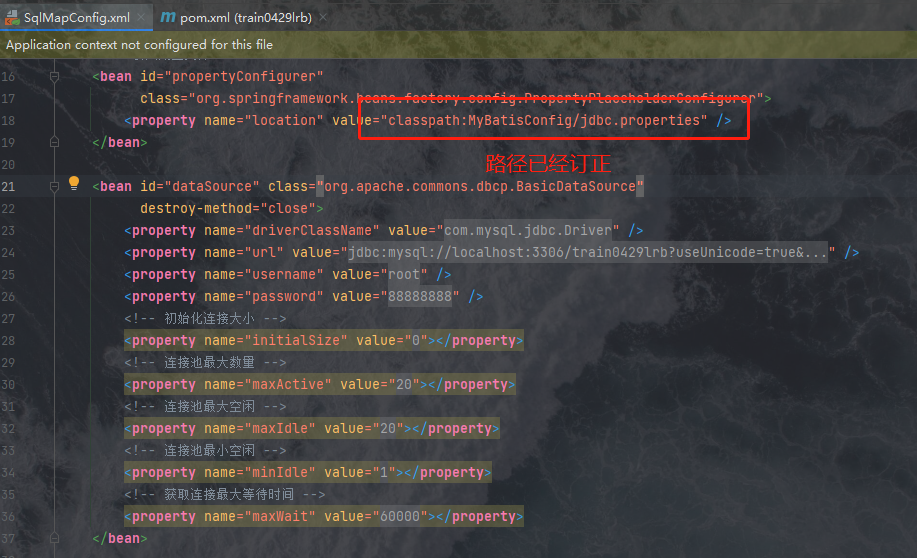
需要注意的是这个包不能导入太新的,太新的里边去掉了这个类,导致仍然报错,我们使用1.4版本就完全没问题。(这些东西已经上升到玄学的约定问题了,没有一定之规,只要不报错就能用)
最后我们还有一个检测mapper类型配置文件的位置也报错,这是因为我们还没有创建这个目录:

我们现在来创建这个目录:
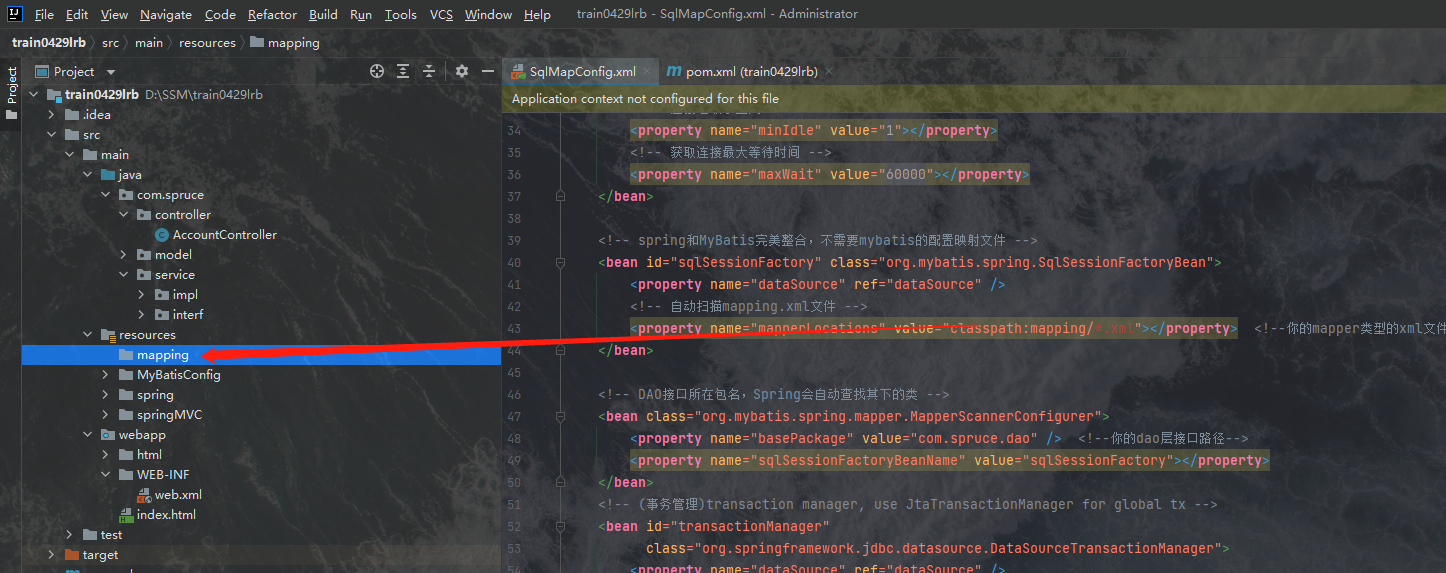
等我们往里边创建了实现数据操作的xml配置文件之后就完全不会报错了,这个属于下个步骤的内容。
2.搭建Dao层
Dao层分为两部分,一部分为Dao层接口,一部分为mapping中的实现配置文件,我们现在都没创建,我们先创建Dao层接口,我们现在com.spruce下创建一个新包:dao
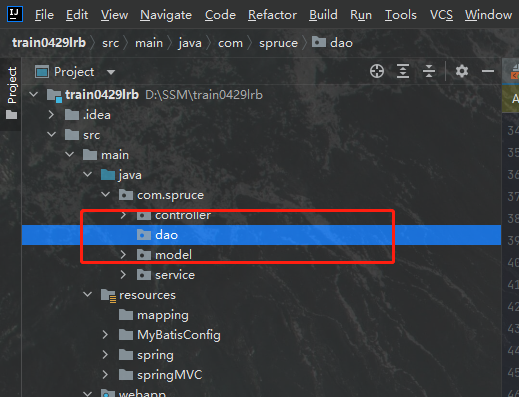
然后我们在里边书写一个针对account的dao层接口类AccountDao:
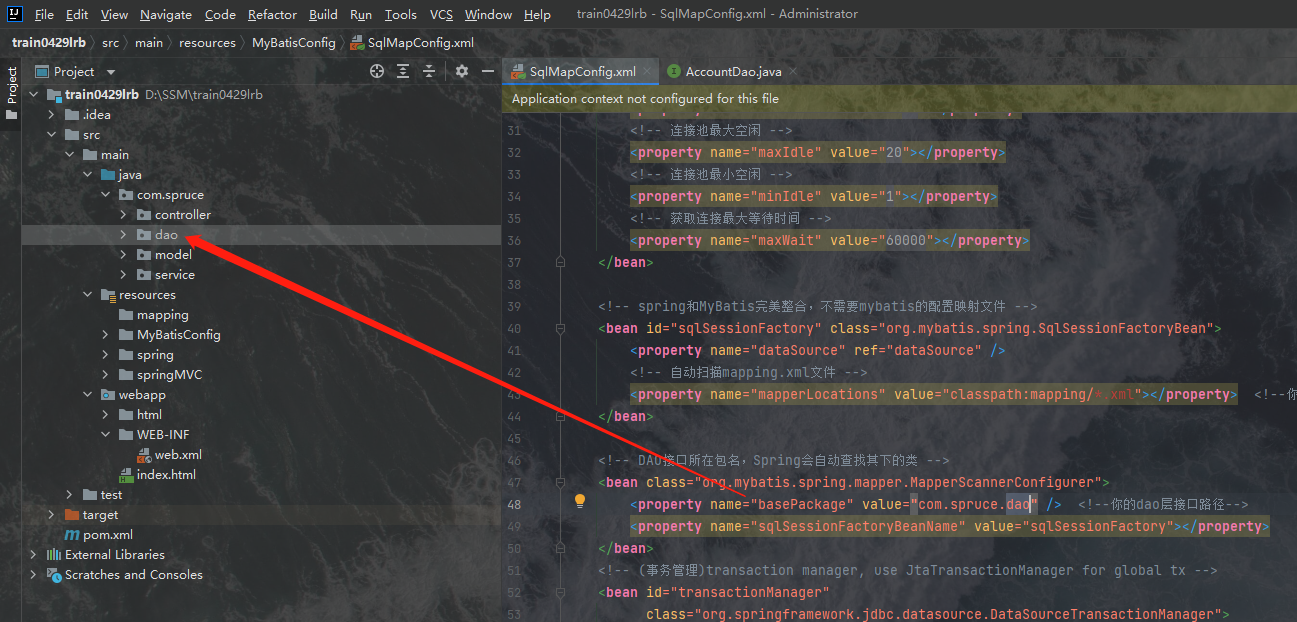
如上图所示我们创建好了Dao层的接口,需要注意的是在配置文件中,MyBatis里边也需要用到Spring对Dao层的类进行托管,这个托管的作用是使用IOC的思想生成Dao层对象时用到的。之后我们在Dao层中的接口下书写如下代码:
package com.spruce.dao;

import com.spruce.model.Account;

import java.util.List;

public interface AccountDao {
    public List<Account> findAll();
}
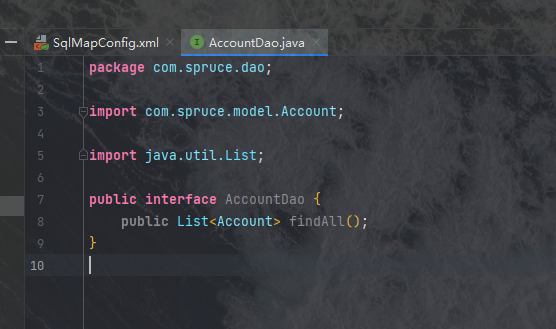
然后我们在mapping中书写一个关于Account的全览方式的实现:
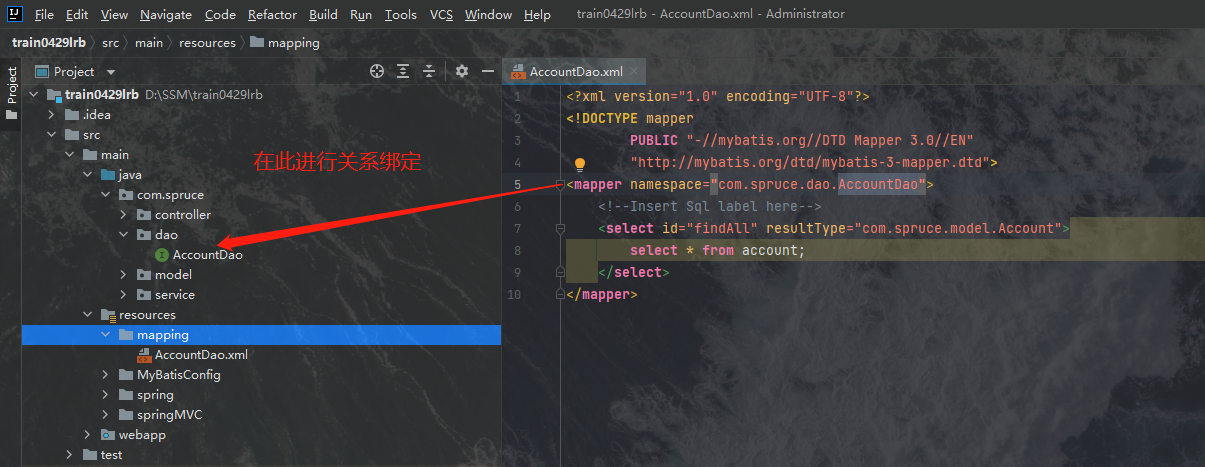
之后Dao层就创建好了,最后我们将MyBatis加入到Spring的配置文件中去,我们将将如下代码复制到web.xml文件中去:
<!-- 配置加载类路径下的applicationContext.xml配置文件 -->
<context-param>
    <param-name>contextConfigLocation</param-name>
    <param-value>classpath:applicationContext.xml</param-value>
</context-param>
<!-- 配置监听器-->
<listener>
    <listener-class>org.springframework.web.context.ContextLoaderListener</listener-class>
</listener>
需注意的是我们如果直接将这个代码复制进去的话必定报错,这是因为我们已经配置过一个监听器了,mybatis的监听器和spring的监听器重名了,因此我们首先需要给mybatis的监听器改个名字,然后直接将它复制进去即可:
<!-- 配置加载类路径下的applicationContext.xml配置文件 -->
<context-param>
    <param-name>contextConfigLocation1</param-name>
    <param-value>classpath:applicationContext.xml</param-value>
</context-param>
但是,这种方式万万不行的,初学的我天真的以为这样就行了,实际上不行,我亲自尝试的结果告诉我们,这种方法是错误的,且说出来会被嘲笑,这是因为这个监听器只能监听这个contextConfigLocation名字的文件,如果这么写的话会导致整个mybatis无法使用,在创建dao层对象是,依赖注入出现问题:
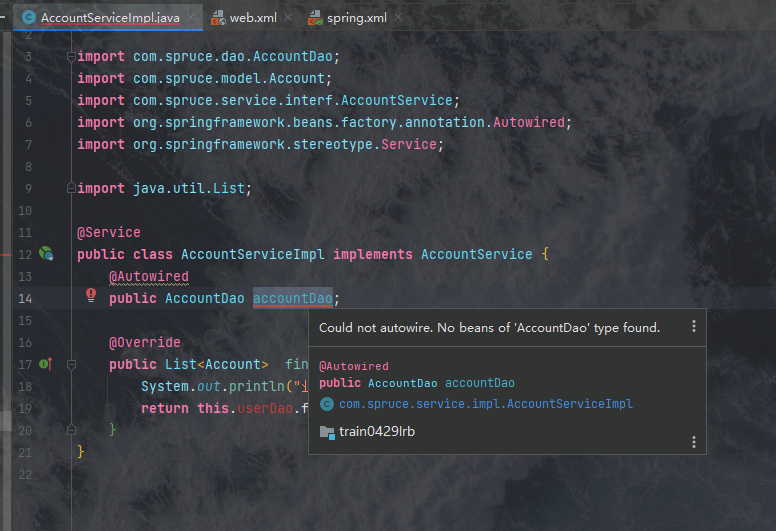
如果大家碰到这种问题那就是监听器没配置对,我们如何解决这个问题呢?我们对比之前书写的spring.xml和SqlMapConfig.xml会发现二者在开有一个标签是重复的:
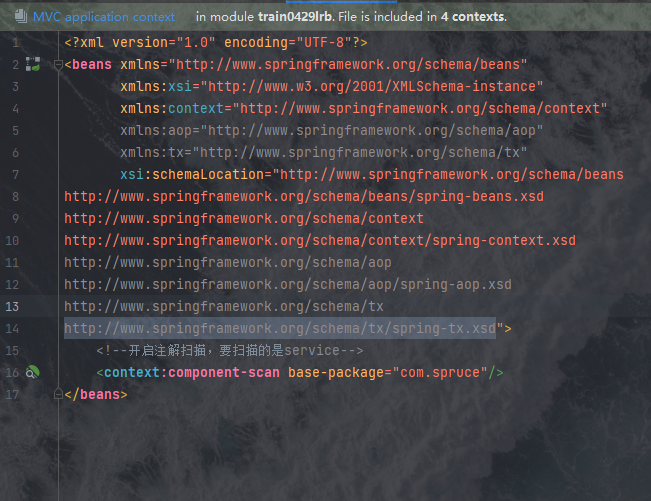
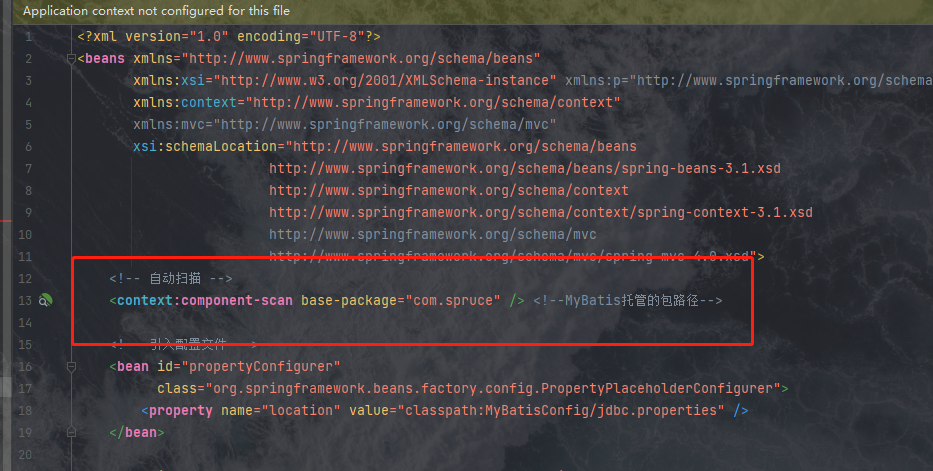
实际上,两个标签是同一个东西,就是Spring托管,因此我们完全可以将spring.xml删除掉,然后将其配置融入进mybatis的配置文件中:

然后我们惊喜的发现这里就不报错了:
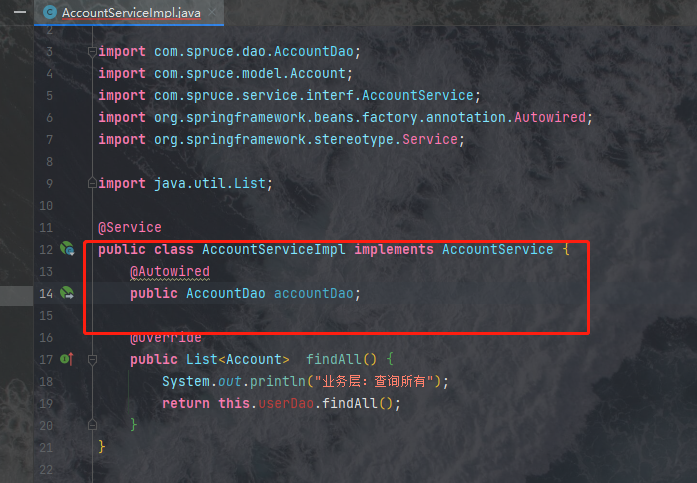
因此在书写配置文件时,由于Spring的配置文件过于简单并且和其他的配置文件都是相容的,因此我们可以将Spring的配置文件书写进MyBatis的配置文件中去或者书写进Spring MVC的配置文件中去,我个人觉得书写进Spring MVC的里边更好一点。
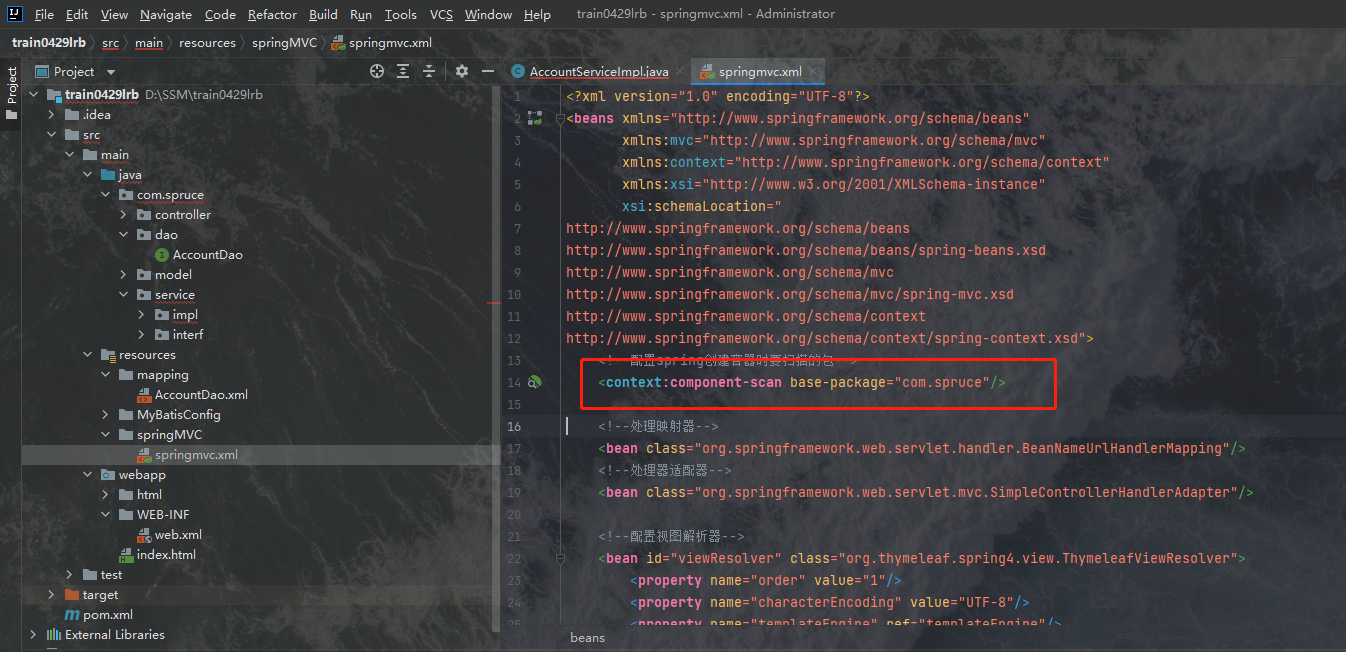
而实际上我已经这么做了,只不过是因为我刚才不懂,才会忽略这个部分。
2.9.测试
我们现在开始测试:
1.书写Service层的方法
package com.spruce.service.impl;

import com.spruce.dao.AccountDao;
import com.spruce.model.Account;
import com.spruce.service.interf.AccountService;
import org.springframework.beans.factory.annotation.Autowired;
import org.springframework.stereotype.Service;

import java.util.List;

@Service
public class AccountServiceImpl implements AccountService {
    @Autowired
    public AccountDao accountDao;

    @Override
    public List<Account>  findAll() {
        System.out.println("业务层:查询所有");
        return this.accountDao.findAll();
    }
}
2.书写controller层的方法
package com.spruce.controller;

import com.spruce.model.Account;
import com.spruce.service.interf.AccountService;
import org.springframework.beans.factory.annotation.Autowired;
import org.springframework.stereotype.Controller;
import org.springframework.ui.Model;
import org.springframework.web.bind.annotation.RequestMapping;

import java.util.List;

@Controller
@RequestMapping(path = "/account")
public class AccountController {

    @Autowired
    private AccountService accountService;

    /**
     * 处理超链接发送出来的请求
     * @param model
     * @return
     */
    @RequestMapping(path = "/hello")
    public String sayHello(Model model){
        System.out.println("入门方法执行了2...");
        List<Account> accounts = accountService.findAll();
        for (Account account: accounts) {
            System.out.println(account.toString());
        }
        // 向模型中添加属性msg与值,可以在html页面中取出并渲染
        model.addAttribute("msg","hello,SpringMVC");
        // 配置了视图解析器后,写法
        return "suc";
    }
}
根据逻辑,我们调用这个方法会使得控制台中输出我们的查询结果,我们运行尝试:
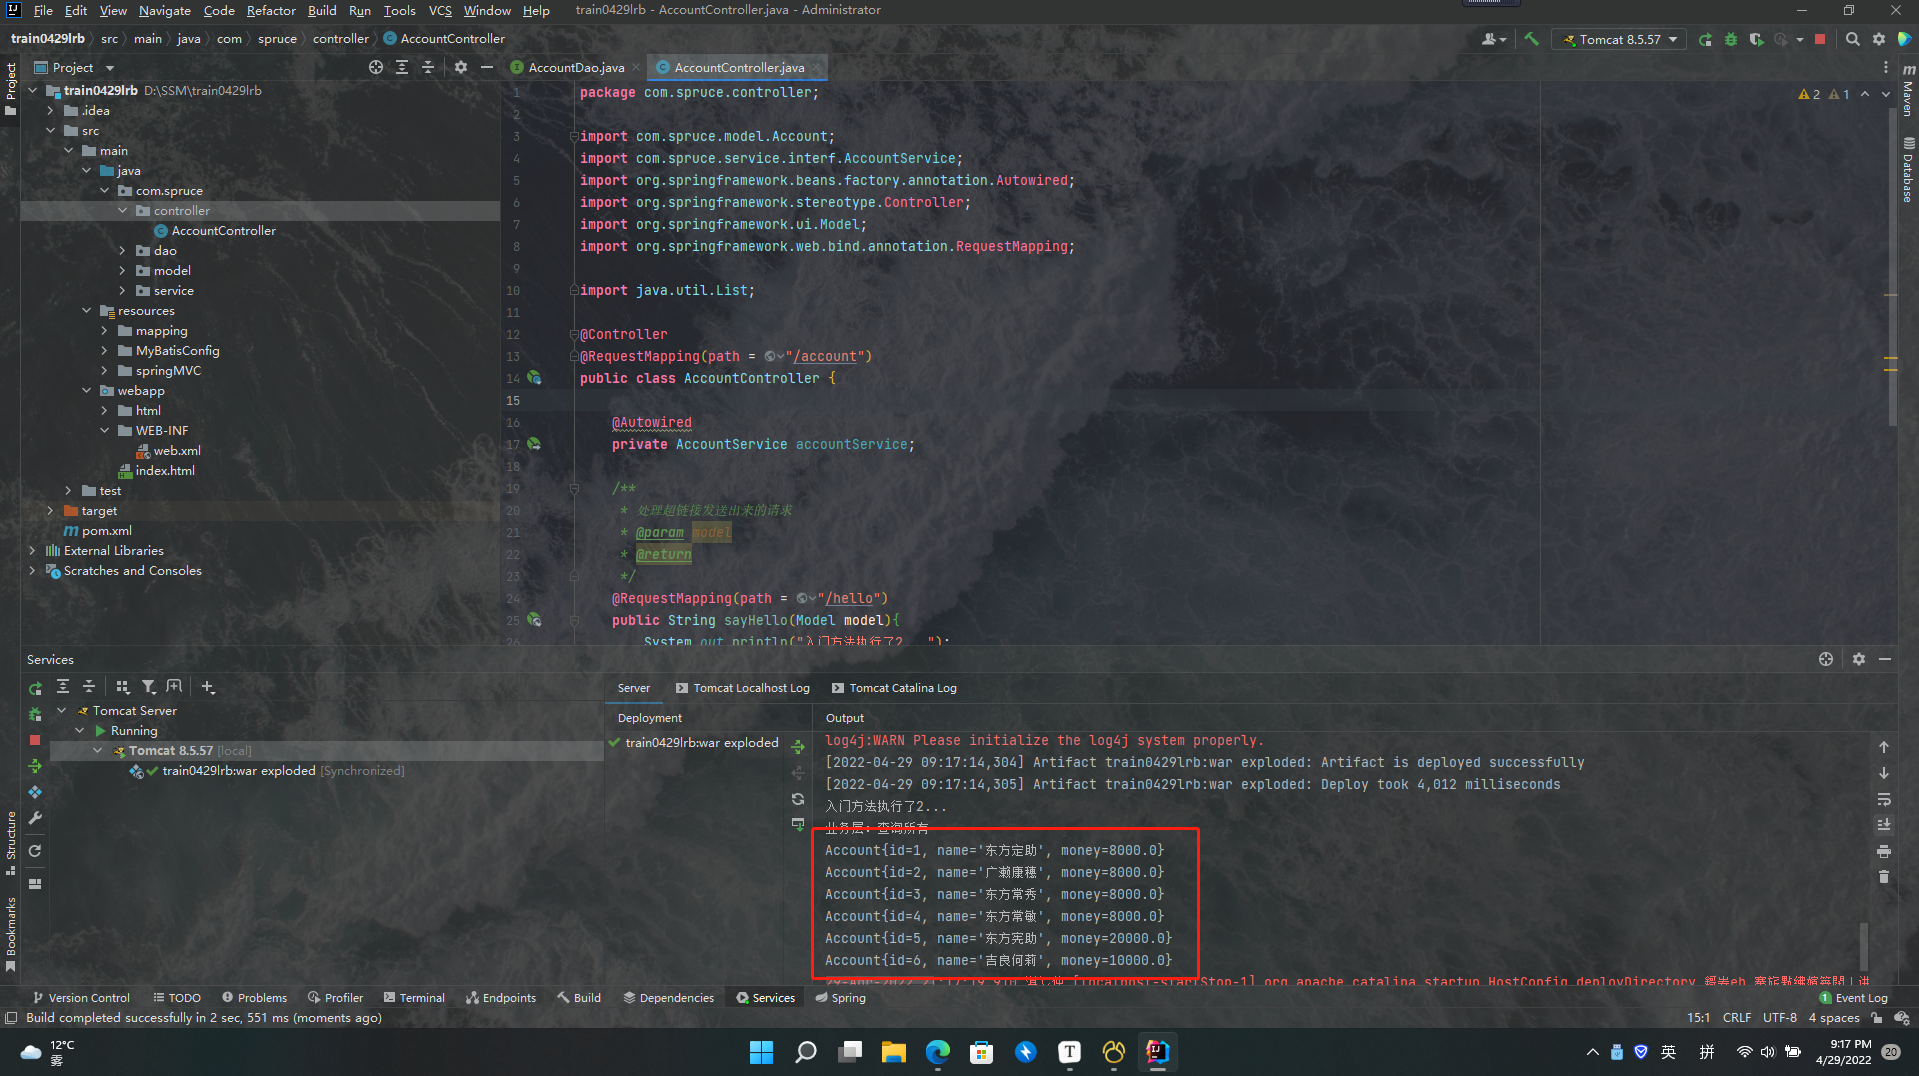
执行成功!太感动了!我们整体上在controller层和service层使用了依赖注入,这两个地方的依赖注入都是依托的spring的IOC容器,整个项目的依赖注入都没问题说明我们的SSM项目已经整合成功,赛高泥嗨铁鸭子哒!!!!!!!
在SSM项目整合成功之后我们就可以愉快的使用它进行开发了,使用SSM开发是一种非常简单的事情,我们只需创建两个接口然后写crud就行了,难一点的顶多是设置个懒加载,连接个LayUI,不过都无所谓了,都是简单的使用工具吗,而创建SSM项目却是一件让人血压飙升的事情,即使创建完成了,我也仍然是不太懂,还有更多的知识在等着我。


