机器学习中的Standardization, Regularization, Normalization
在ML中Standardization, Regularization, Normalization是需要经常用到的概念。本文介绍三者的不同。
核心区别
-
Standardization和Normalization是数据预处理技术,而Regularization是用来提高模型性能的
-
- 在Standardization中,我们减去变量的平均值,然后除以标准差
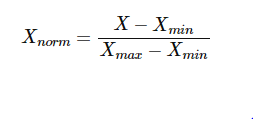
- 在Normalization中,我们减去最小值除以变量范围
- 在Reguarization中,我们通过在误差函数中添加额外的惩罚项来调整函数
-
在执行Standardization和Normalization之后,大多数数据将位于给定的范围之间,而Regularization根本不会影响数据
-
在Standardization中分布变化为正态分布,而在Regularization和Normalization中分布保持不变
-
当数据是正态分布时使用Standardization,当数据不是正态分布时使用Normalization,当数据噪声很大时使用Regularization
Standardization
在统计学中,Standardization是将不同的变量放在同一个尺度上的过程。这个过程允许您比较不同类型变量之间的分数。通常,为了标准化变量,需要计算变量的平均值和标准差。然后,对于变量的每个观测值,减去均值,除以标准差。

- Z = Standardized Value
- x = Variable Value
- μ = Variable Mean
- σ = Variable Standard Deviation
Standardization假设您的数据具有高斯分布。这并不是严格意义上的正确,但是如果你的属性分布是高斯分布,这个技巧会更有效。当您的数据具有不同的规模,并且您正在使用的算法确实对数据具有高斯分布进行假设时,适合用Standardization,例如线性回归、逻辑回归和线性判别分析。
import numpy as np
import matplotlib.pyplot as plt
import seaborn as sns
mean = 128
std = 11
data = np.random.normal(mean,std,1000)
from sklearn.preprocessing import StandardScaler
scaled_data = StandardScaler().fit_transform(data)
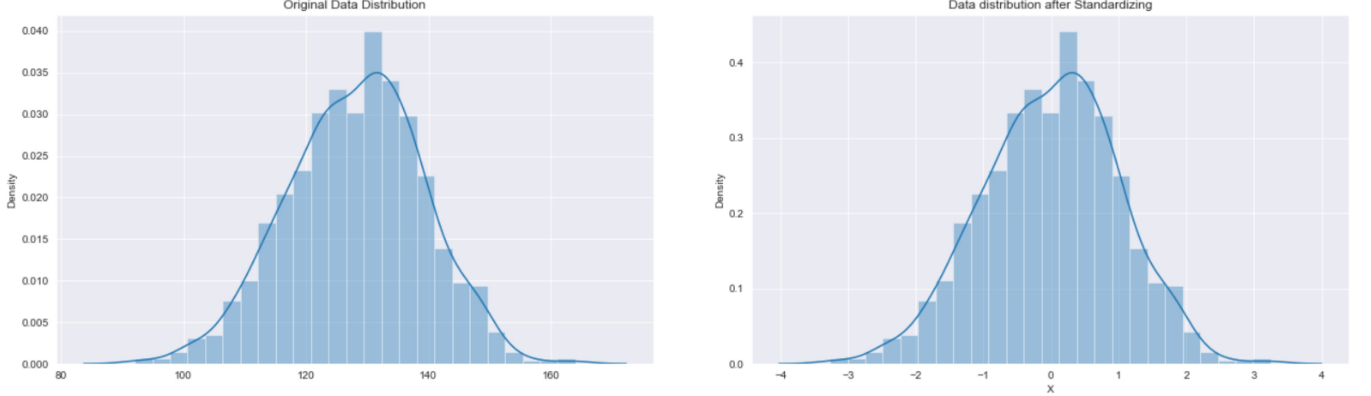
Standardization后可见数据分布情况和之前一样
Normalization
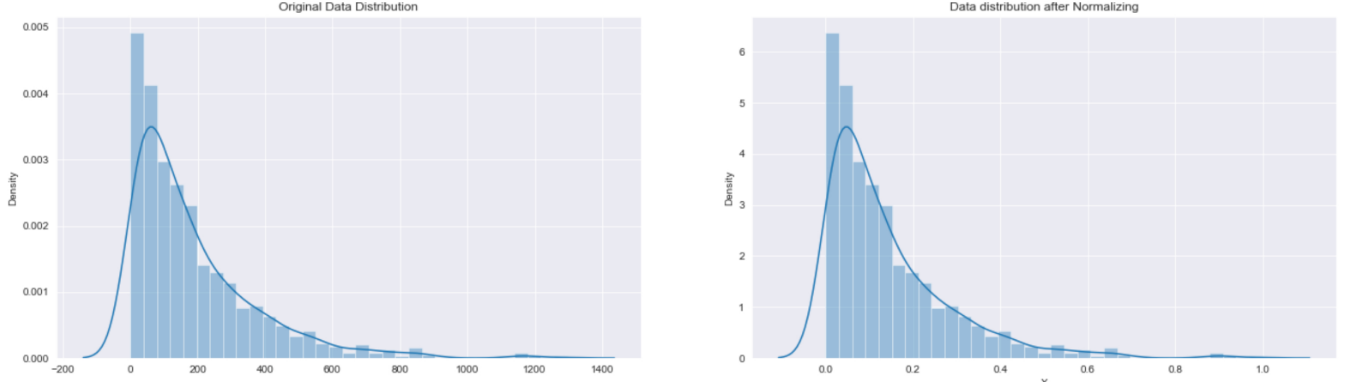
Normalization将数据归到制定的区间内,(如[0,1]或[-1,1])。Normalization相对于Standardization的优点是我们不受任何特定分布的约束。除此之外,正常化还在一定程度上抑制了异常值的影响。
当您不知道数据的分布或者知道分布不是高斯分布时,可以使用Normalization。当您的数据具有不同的规模,并且您正在使用的算法不需要对数据的分布(如KNN和ANN)进行假设时,Normalization可行。
import numpy as np
import matplotlib.pyplot as plt
import seaborn as sns
mean = 187
data = np.random.exponential(mean,1000)
from sklearn.preprocessing import MinMaxScaler
scaled_data = MinMaxScaler().fit_transform(data)
Regularization
正则化(Regularization) 是机器学习中对原始损失函数引入额外信息,以便防止过拟合和提高模型泛化性能的一类方法的统称。也就是目标函数变成了原始损失函数+额外项,常用的额外项一般有两种,英文称作ℓ1−𝑛𝑜𝑟𝑚和ℓ2−𝑛𝑜𝑟𝑚,中文称作L1正则化和L2正则化,或者L1范数和L2范数(实际是L2范数的平方)。
正则化是回归的一种形式,它约束/正则化或缩小系数估计为零。这种技术不鼓励学习更复杂或更灵活的模型,从而避免过拟合的风险。
L1和L2
L1 Regularization
L1正则化可以使得参数稀疏化,即得到的参数是一个稀疏矩阵,可以用于特征选择。
\( Loss = Loss_d + \lambda \sum_{i=1}^{n} |\theta_i| \)
稀疏性,说白了就是模型的很多参数是0。通常机器学习中特征数量很多,例如文本处理时,如果将一个词组(term)作为一个特征,那么特征数量会达到上万个(bigram)。在预测或分类时,那么多特征显然难以选择,但是如果代入这些特征得到的模型是一个稀疏模型,很多参数是0,表示只有少数特征对这个模型有贡献,绝大部分特征是没有贡献的,即使去掉对模型也没有什么影响,此时我们就可以只关注系数是非零值的特征。这相当于对模型进行了一次特征选择,只留下一些比较重要的特征,提高模型的泛化能力,降低过拟合的可能。
L1正则化适用于以下情况:
- 特征选择:当数据集中存在大量特征,而只有一小部分特征对目标变量有重要影响时,L1正则化可以通过将一些权重变为零,实现稀疏性,从而进行特征选择。它可以帮助剔除对模型没有贡献或冗余的特征。
- 稀疏性要求:当模型需要具有稀疏性时,L1正则化是一个好的选择。例如,在图像处理中,稀疏表示假设图像具有很少的非零像素,因此可以使用L1正则化来推动稀疏性。
- 解释性要求:当需要更容易解释和理解的模型时,L1正则化可以帮助生成稀疏的权重向量,这使得模型的解释更加直观和可解释。
L2 Regularization
L2正则化可以防止模型过拟合(overfitting);一定程度上,L1也可以防止过拟合。
\( Loss = Loss_d + \lambda \sum_{i=1}^{n} \theta_i^2 \)
L2正则化相对于L1正则化有以下优势:
- 光滑性:L2正则化使用了权重的平方作为惩罚项,这意味着它是可微分的。相比之下,L1正则化使用了权重的绝对值作为惩罚项,导致在权重为零的点处不可微。这使得L2正则化的优化问题更易于求解,可以使用更多的优化算法进行求解。
- 唯一解:L2正则化在优化问题中具有唯一解。由于L2正则化的惩罚项是凸的,并且L2范数是一个连续可微的凸函数,因此优化问题的解是唯一的。这意味着通过L2正则化可以得到唯一的最优权重。
- 平衡性:L2正则化倾向于平衡各个权重的大小。通过对权重的平方进行惩罚,L2正则化鼓励权重较小的值,从而减少了对某些特定权重的过度依赖。这有助于避免模型过拟合,提高泛化能力。
- 稳定性:L2正则化对异常值不敏感。由于L2正则化使用了权重的平方作为惩罚项,它对异常值的影响相对较小。这使得L2正则化具有一定的稳定性,对数据中的噪声和异常值有一定的鲁棒性。
L2正则化适用于以下情况:
- 泛化能力要求:当模型面临过拟合问题,即在训练集上表现很好但在测试集上表现较差时,L2正则化可以帮助控制模型的复杂性,提高模型的泛化能力,从而减少过拟合的风险。
- 高维数据:当数据集具有较高维度时,L2正则化可以通过对权重进行平方惩罚,减少对特定特征的过度依赖,从而提高模型的鲁棒性。
- 平衡性要求:当需要平衡各个权重的大小时,L2正则化是一个好的选择。它可以鼓励权重取较小的值,从而减少权重之间的差异,使模型在各个特征上更加平衡。
ElasticNet
ElasticNet是一种用到L1和L2范式的正则化方法,它有一个参数α可以用来设置L1和L2的Lasso项参数。公式如下所示:

代码示例
用于sklearn的逻辑回归
下面给出一个例子,在sklearn-LogisticRegression中通过penalty参数设置L2回归函数
from sklearn.datasets import load_breast_cancer
from sklearn.linear_model import LogisticRegression
from sklearn.metrics import accuracy_score

# Load the breast cancer dataset
data = load_breast_cancer()

# Split the dataset into training and testing sets
x_train, x_test, y_train, y_test = train_test_split(data.data, data.target, test_size=0.2, random_state=0)

# Standardize the features
scaler = StandardScaler()
x_train = scaler.fit_transform(x_train)
x_test = scaler.transform(x_test)

# No regularization
log_reg_no_regularization = LogisticRegression(penalty='none')
log_reg_no_regularization.fit(x_train, y_train)
y_pred = log_reg_no_regularization.predict(x_test)
accuracy_no_reg = accuracy_score(y_test, y_pred)

# Create a logistic regression model with regularization
log_reg = LogisticRegression(penalty='l2', C=1)  # L2 regularization (Ridge)
log_reg.fit(x_train, y_train)
y_pred_l2 = log_reg.predict(x_test)
accuracy_l2 = accuracy_score(y_test, y_pred_l2)
用于tensorflow神经网络
在tensorflow中,每一个dense都可以包含kernel_regularizer参数,用来设置Reg,下面给出代码示例:
import numpy as np
import matplotlib.pyplot as plt
import tensorflow as tf
from sklearn.datasets import make_moons
from sklearn.model_selection import train_test_split
from sklearn.preprocessing import StandardScaler

# Generate a moon-shaped dataset
X, y = make_moons(n_samples=10000, noise=0.1, random_state=42)

# Split the dataset into training and testing sets
X_train, X_test, y_train, y_test = train_test_split(X, y, test_size=0.2, random_state=42)

# Standardize the features
scaler = StandardScaler()
X_train = scaler.fit_transform(X_train)
X_test = scaler.transform(X_test)

# Create a function to build the neural network model
def build_model(regularizer=None):
    model = tf.keras.models.Sequential([
        tf.keras.layers.Dense(16, activation='relu', input_shape=(2,), kernel_regularizer=regularizer),
        tf.keras.layers.Dense(16, activation='relu', kernel_regularizer=regularizer),
        tf.keras.layers.Dense(1, activation='sigmoid')
    ])
    return model

# Create models with different regularization techniques
model_no_reg = build_model()
model_l1_reg = build_model(regularizer=tf.keras.regularizers.l1(0.01))
model_l2_reg = build_model(regularizer=tf.keras.regularizers.l2(0.01))

# Compile the models
model_no_reg.compile(optimizer='adam', loss='binary_crossentropy', metrics=['accuracy'])
model_l1_reg.compile(optimizer='adam', loss='binary_crossentropy', metrics=['accuracy'])
model_l2_reg.compile(optimizer='adam', loss='binary_crossentropy', metrics=['accuracy'])

# Train the models
history_no_reg = model_no_reg.fit(X_train, y_train, validation_data=(X_test, y_test), epochs=50, verbose=0)
history_l1_reg = model_l1_reg.fit(X_train, y_train, validation_data=(X_test, y_test), epochs=50, verbose=0)
history_l2_reg = model_l2_reg.fit(X_train, y_train, validation_data=(X_test, y_test), epochs=50, verbose=0)

# Evaluate the models
loss_no_reg, accuracy_no_reg = model_no_reg.evaluate(X_test, y_test, verbose=0)
loss_l1_reg, accuracy_l1_reg = model_l1_reg.evaluate(X_test, y_test, verbose=0)
loss_l2_reg, accuracy_l2_reg = model_l2_reg.evaluate(X_test, y_test, verbose=0)

# Print the evaluation results
print("No Regularization - Loss:", loss_no_reg, " Accuracy:", accuracy_no_reg)
print("L1 Regularization - Loss:", loss_l1_reg, " Accuracy:", accuracy_l1_reg)
print("L2 Regularization - Loss:", loss_l2_reg, " Accuracy:", accuracy_l2_reg)

# Plot the training history
plt.plot(history_no_reg.history['accuracy'], label='No Regularization')
plt.plot(history_l1_reg.history['accuracy'], label='L1 Regularization')
plt.plot(history_l2_reg.history['accuracy'], label='L2 Regularization')
plt.xlabel('Epochs')
plt.ylabel('Accuracy')
plt.legend()
plt.title('Training Accuracy')
plt.show()

 浙公网安备 33010602011771号