[SpinalHDL] 从建立工程到查看仿真波形
折腾一下发现还是IntelliJ更好用一些,所以接下来采用IntelliJ IDEA学习SpinalHDL
安装环境不再赘述
建立工程
建立工程官方推荐的办法是从SpinalTemplateSbt创建。
下载好之后,解压到文件夹
unzip SpinalTemplateSbt-master.zip -d test_m/
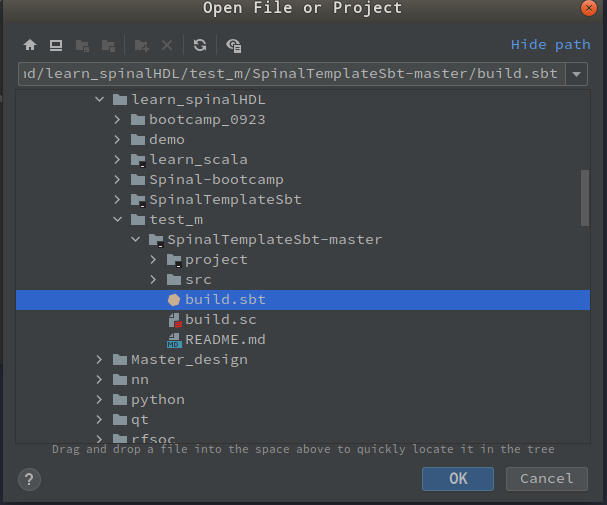
在IntelliJ IDEA中导入工程

选择build.sbt之后,点击open as project导入工程
在src/main/scala/mylib中会包含MyTopLevel和MyTopLevelSim对应这Spinal描述文件和仿真文件,可以再这个基础上更改,或者新建一组文件。
创建一个电路
我们选择在mylib中再创建一个文件,MyTopLevel和MyTopLevelSim就用过参考
创建一个电路来检测输入信号上升沿个数。
package mylib
import spinal.core._
import spinal.lib._
class RiseCounter extends Component{
  val io=new Bundle{
    val sigIn=in Bool
    val clear=in Bool
    val cnt=out UInt (32 bits)
  }
  val counter=new Area{
    val cnt=Counter(32 bits,io.sigIn.rise(False))
    when(io.clear){
      cnt.value.clearAll()
    }
    io.cnt:=cnt.value
  }
}

//Generate the RiseCounter's Verilog
object RiseCounterVerilog {
  def main(args: Array[String]) {
    SpinalVerilog(new RiseCounter)
  }
}
点击运行之后,最后在工程的根目录生成对应的Verilog代码
仿真
参考MyTopLevelSim编写RiseCounterSim
package mylib
import spinal.core._
import spinal.sim._
import spinal.core.sim._

import scala.util.Random
object RiseCounterSim {
  def main(args: Array[String]) {
    // 建立仿真 其中RiseCounter 来创建代码
    SimConfig.withWave.doSim(new RiseCounter) { dut =>
      // 创建时钟
      //Fork a process to generate the reset and the clock on the dut
      dut.clockDomain.forkStimulus(period = 10)
      // 注意 io的电平赋值用 #=
      dut.io.clear #= true
      // 等待三个时钟周期,不知道是否有更好的写法
      for(idx <- 0 to 3){
        dut.clockDomain.waitRisingEdge()
      }
      dut.io.clear #= false
      for(idx <- 0 to 99){
        //Drive the dut inputs with random values
        dut.io.sigIn #= Random.nextBoolean()
        //Wait a rising edge on the clock
        dut.clockDomain.waitRisingEdge()
      }
    }
  }
}
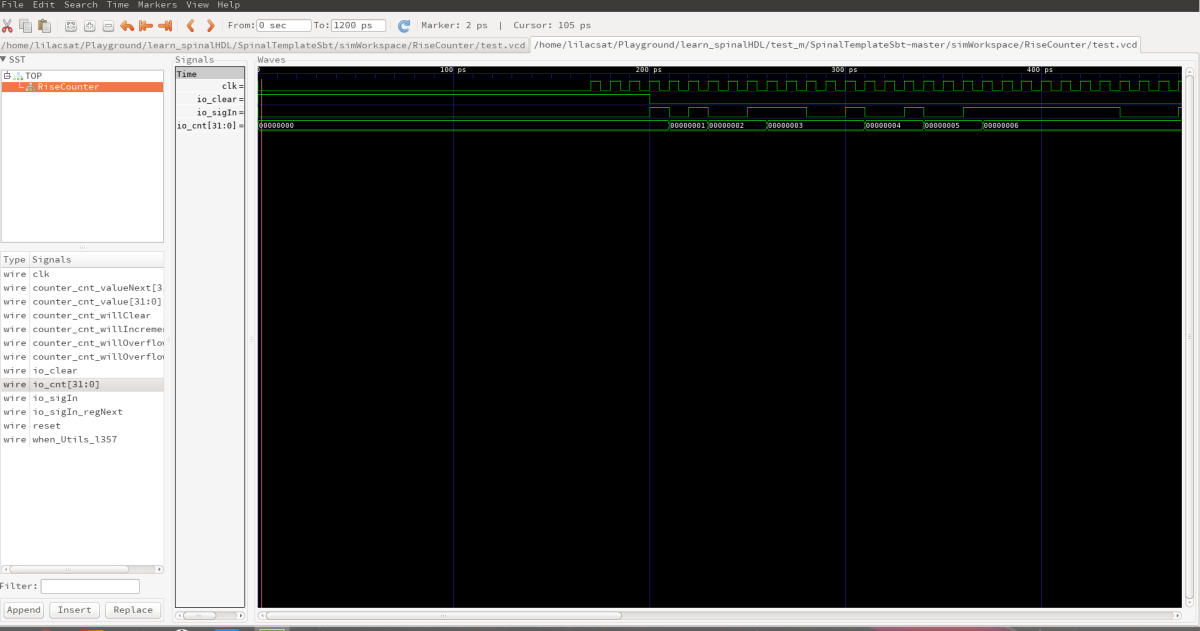
之后点击运行之后,就可以自动启动仿真,并输出波形
波形路径在simWorkspace/RiseCounter/test.vcd可以使用GTKWave打开


